- 02 -
Important Safety Instructions
Please save these instructions.
The User Manual provides important operation and maintenance instructions for PHOENIX 500
Portable Power Station. Please read the User Manual carefully before operation and save it for
future reference. Failure to observe the instructions or precautions in the User Manual can result
in electrical shock, serious injury, or death, or can damage PHOENIX, potentially rendering it
inoperable.
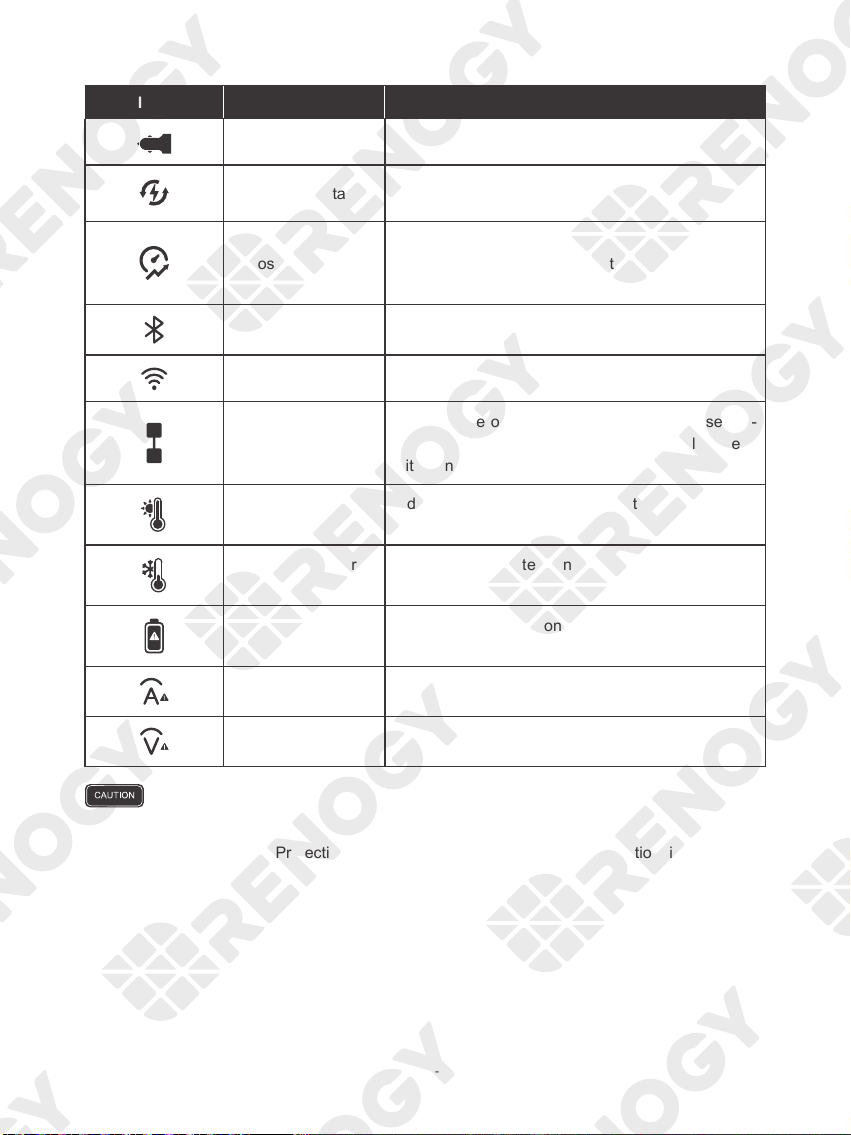
█Symbols Used
The following symbols are used throughout the User Manual to highlight important information.
Indicates a potentially dangerous condition which could result in injury or death.
Indicates a critical procedure for safe and proper installation and operation.
Indicates an important step or tip for optimal performance.
█General Safety Information
•DO NOT immerse PHOENIX in water or leave it out in the rain.
•DO NOT puncture, drop, crush, penetrate, shake, strike, or step on PHOENIX.
•DO NOT open, dismantle, repair, tamper with, or modify PHOENIX.
•DO NO insert foreign objects into the casing or outlets of PHOENIX.
• Please remove all connections and turn PHOENIX off before cleaning it.
• DO NOT expose PHOENIX to direct flame.
• Please keep PHOENIX away from flammable or combustible materials.
•Please keep PHOENIX away from heating equipment.
•DO NOT touch the exposed electrolyte or powder if PHOENIX is damaged.
•DO NOT use PHOENIX with life support equipment or other medical equipment.
•Please keep PHOENIX out of the reach of young children.
•DO NOT dispose of PHOENIX as household waste. Please recycle PHOENIX in accordance
with local, state, and federal regulations.
•Please inspect PHOENIX before each use. Stop using PHOENIX if any visible damages in-
cluding cracks, dents, and deformation or abnormalities including unusual smells and heating
are observed.