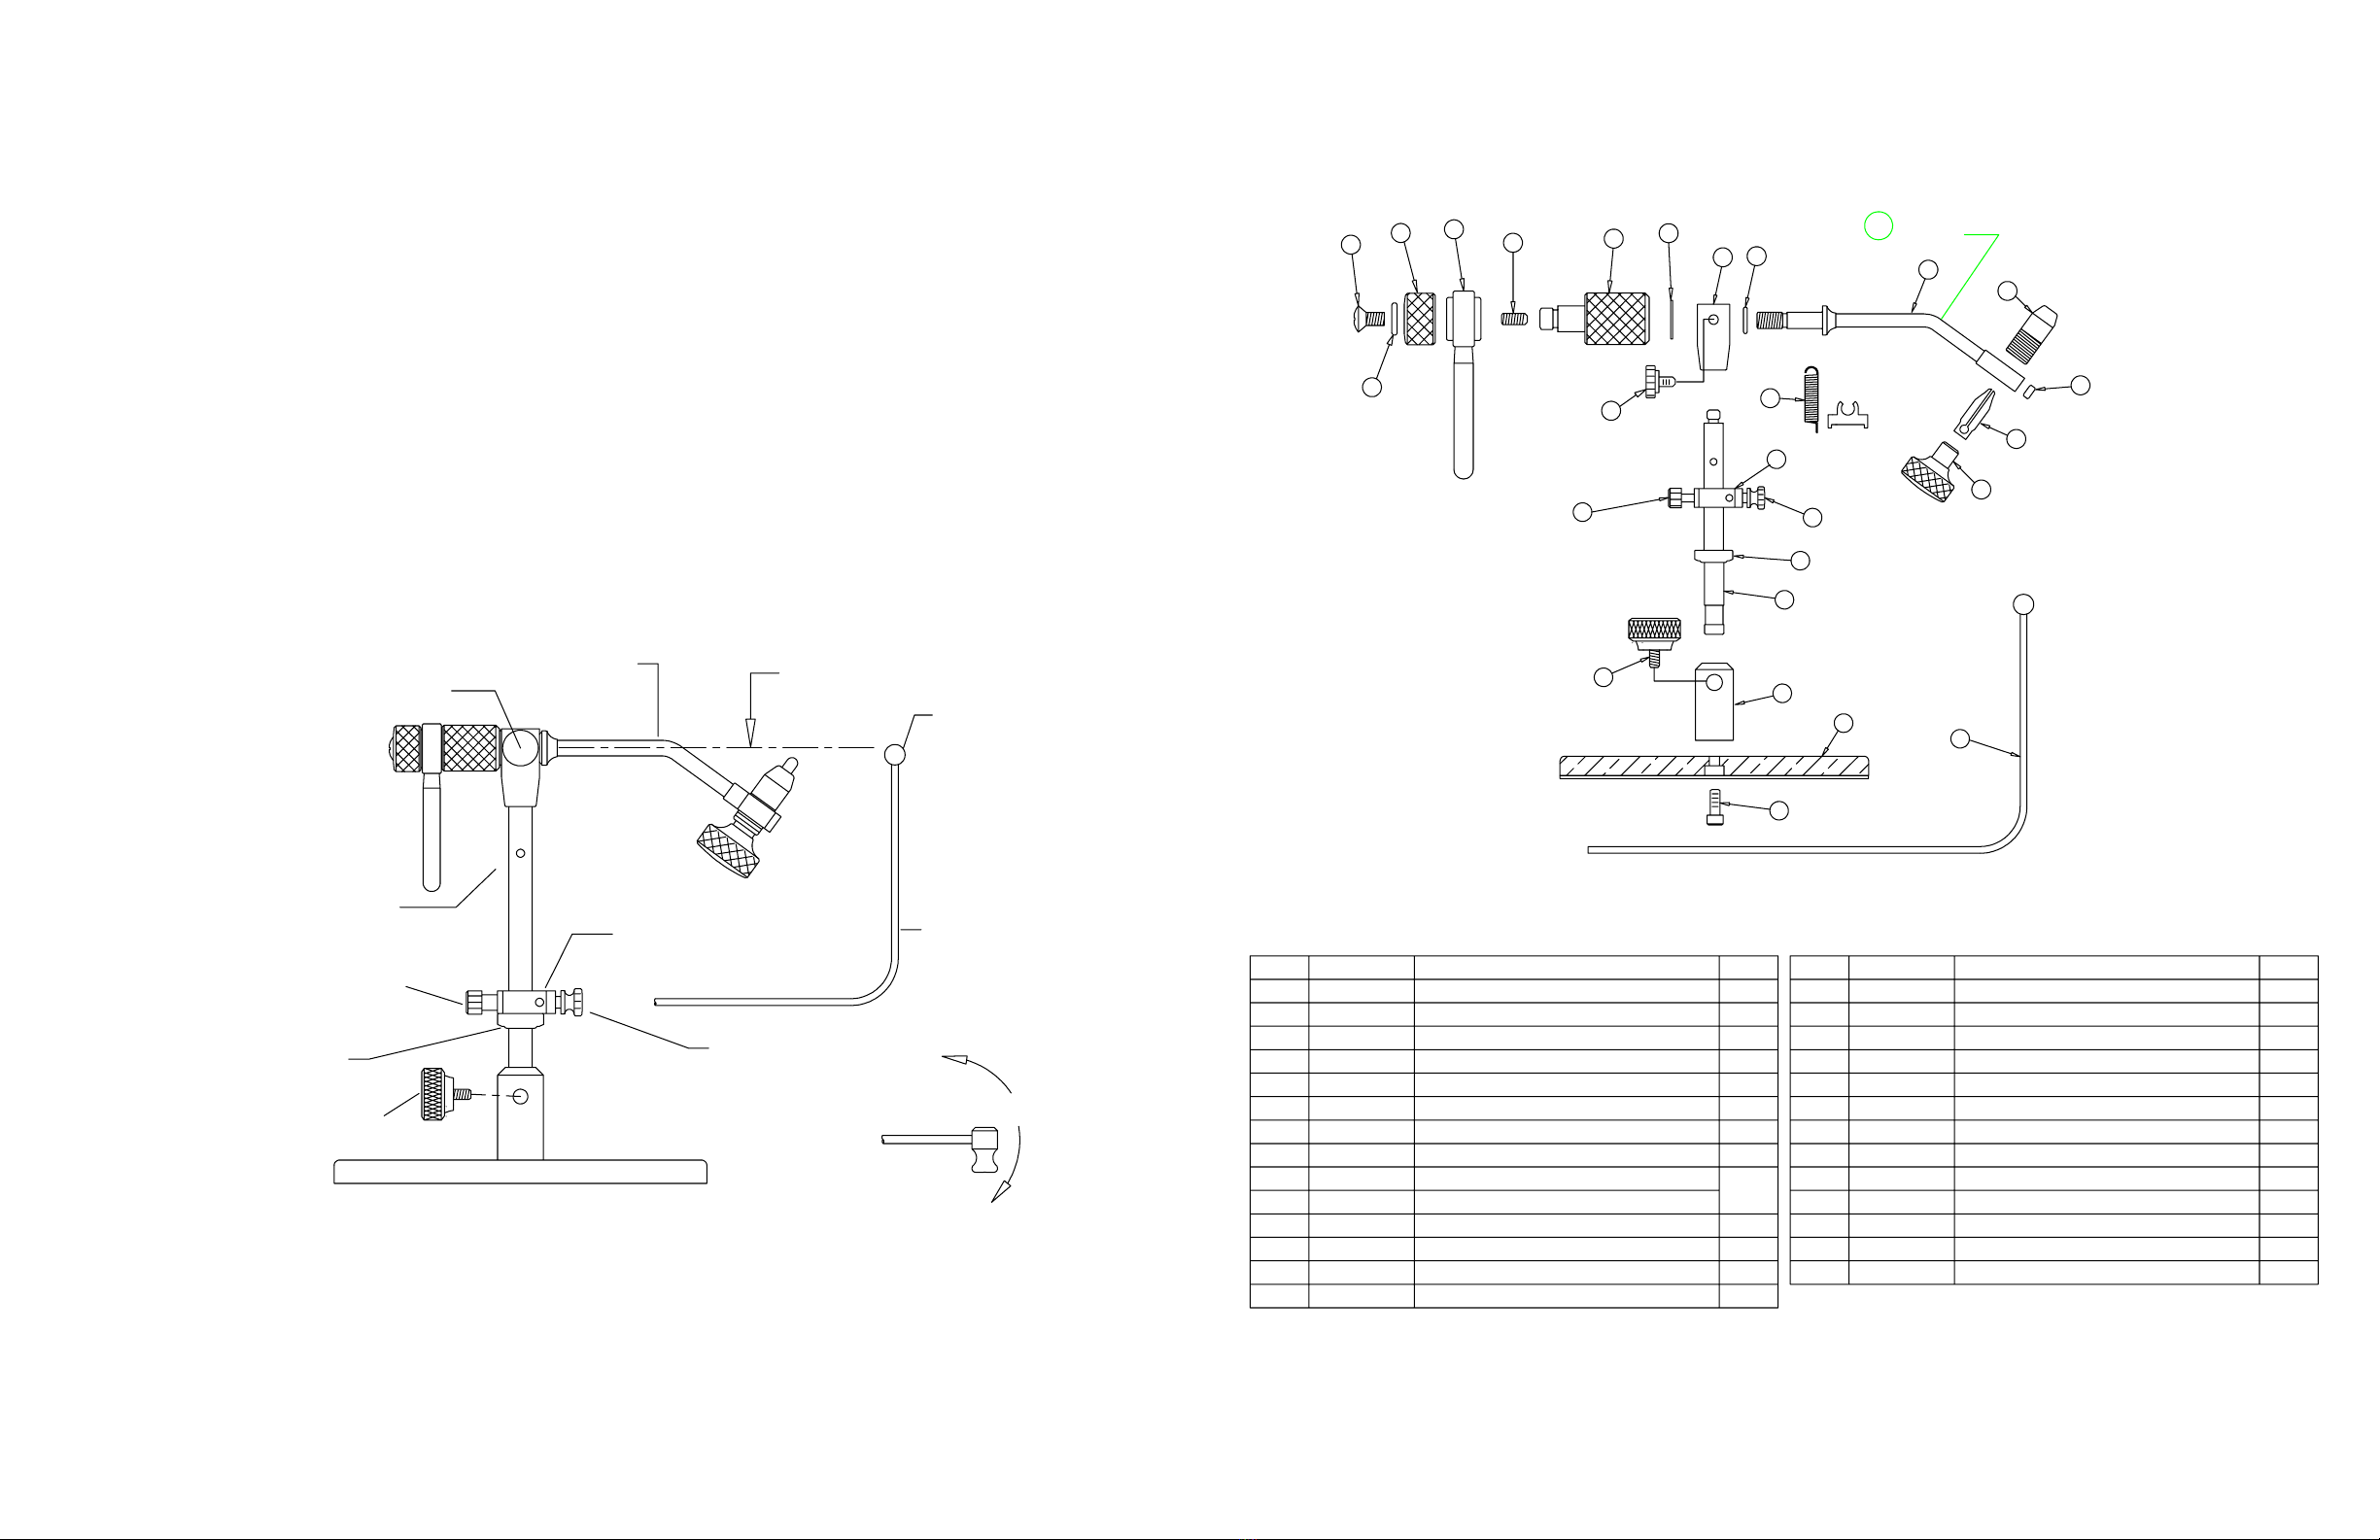
Jaw Housing Adjustment
1: Loosen the jaw housing lock screw with the 1/8 hex key provided with your vise.
2: Turn the jaw housing to the desired position. See detail 6 and detail 7.
3: Tighten the jaw housing lock screw. Be sure that the screw rests on the flat area of the
jaw housing. Do not tighten the screw against the threads of the jaw housing.
Jaw housing lock screw
Jaw housing lock screw
Hook Placement in Jaw
Detail 6
Hooks 28-16
Detail 7
Hooks 16-2
Detail
8
Detail
9
Detail 10
Correct Correct
The jaw housing can be adjusted to accomadate smaller(28-16) or larger(16-2) hooks.
Threads
Incorrect
Flat Flat
Center Line Center Line
Center Line
Actuator support knob
Detail
14
End cap
End cap
screw
Support lock screw
3/32 Hex key
End cap
Actuator support knob
Detail
15
Hold
Rotary tension screw
Rotary Tension Adjustment
Rotary Actuator Disassembly and Assembly
Detail
13
Detail
11
Assembly
End cap
screw
Disassembly
Hold knob
End Play Adjustment
While tying you should use the rotary tension screw to regulate the
amount of restriction to vise rotation. The vise is designed not to be
locked ebough to cause damage to the rotary shaft. The screw will
however generate enough restriction of rotation to allow working
on any area of the fly without vise motion. See detail 13.
End cap
Bearing ser. # left hand
End cap
screw
Rotary actuator
Detail
12
Actuator support knob
Bearing ser. # righ
t hand
Tips on True Rotary Tying
04/14
Threads
Jaw housing
Rotary shaft
Jaw housing
Rotary shaft
O-Ring O-Ring
1. Turn the end cap clockwise, as viewed from the actuator end of the vise, to loosen the end
cap screw. See detail 14.
2 Remove the end cap screw. See detail 14.
3. Hold the actuator support and the rotary shaft in one hand and loosen the support lock
screw with the 3/32" hex key supplied. See detail 15.
4. Either tighten or loosen the actuator support to the point where you like your rotary tension
for tying.
5. Again hold the actuator and rotary shaft in one hand and use the 3/32" hex key to tighten
the support lock screw.
6. Turn end cap counterclockwise about 1/8 turn and reinstall end cap screw finger tight. Be
sure not to over tighten end cap screw.
1. Slide rotary actuator onto the rotary actuator support as shown. The bearing serial #
should be facing the head for right hand tying or the end cap for left hand. See detail 12.
2. Install end cap and end cap screw.
Note: To set the vise for rotation in one direction, turn end cap until it seats against the
actuator bearing. Then back it off about 1/8 to 1/4 turn. Install end cap screw finger
tight against the end cap. This will allow free rotation of the actuator to place it out
of the way when necessary.
Your vise can also be set to rotate in both directions. To do this tighten the end cap
against the bearing and leave it like that. Do not tighten the end cap screw against the
end cap.
1. Hold the actuator support knob and turn the end cap clockwise, as viewed from the actuator
end of the vise. It should only take about 1/4 turn to free up the end cap screw. See detail 10.
Be careful not to jam the end cap by trying to remove it before removing the end cap screw.
2. Remove end cap screw, end cap, and rotary actuator. See detail 12.
1: When applying dubbing remember to use your rotary action, this allows you to always be in contact with
the area you are wrapping.
2. The secret to palmering a hackle by rotary is the half hitch. After tying in the hackle, wrap your thread to the
point at which you wish to stop the hackle. Then apply a half hitch. Hang the bobbin from the bobbin cradle.
As the hackle is palmered the thread will roll with the hook. At the end of the palmer let your hackle pliers
hang. Pick up the bobbin, swing the cradle out of the way and tie off the hackle.
3. Remember that a rotary vise makes all sides of your fly viewable by rotating the vise.
For more rotary tying techniques ask your retailer for the renzetti rotary tying tips video.
1. The most important step of rotary tying is proper positioning of the hook in the jaw.
Always p
lace the hook in the jaw so that the shank of the hook rotates on the
center line of the rotary shaft as shown in detail 8 and detail 9.
2 As hook size increases be sure to place the hook deeper in the jaws as shown in
detail 8 and detail 9.
3. Never try to hold large hooks at the extreme tip of the jaw as shown in detail 10.
This practice will cause premature failure of the clamping faces.