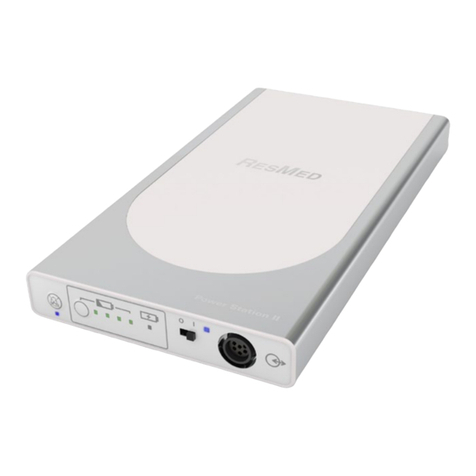
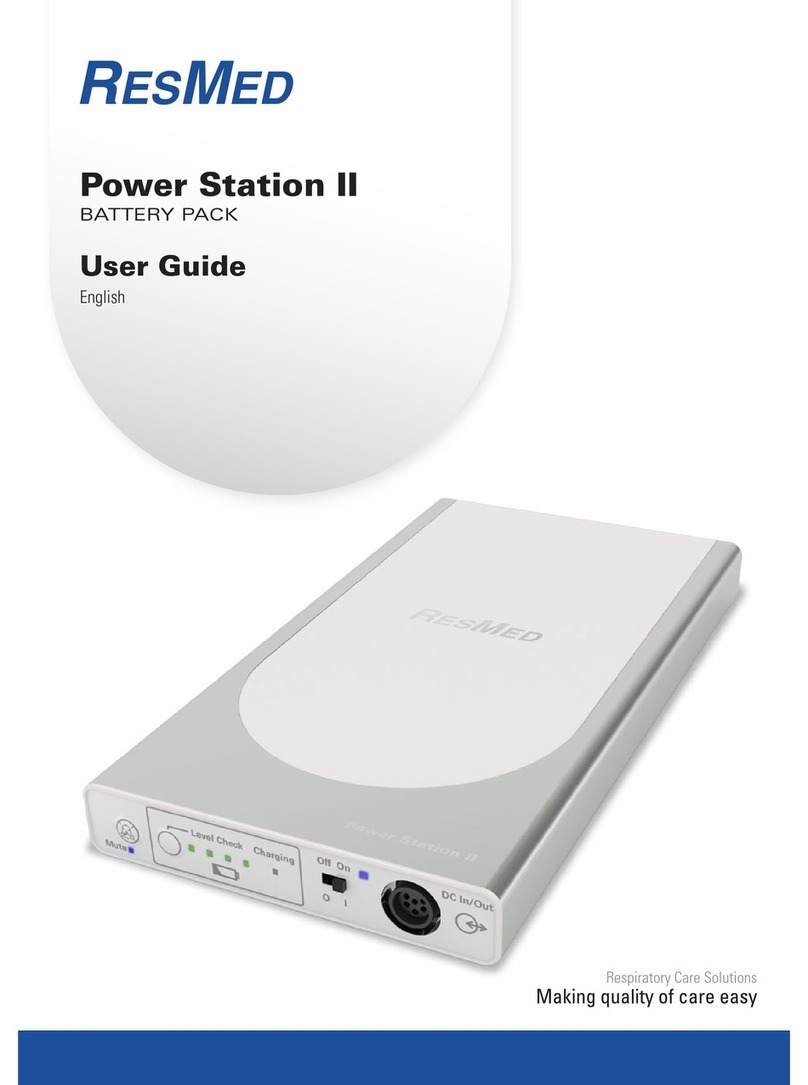
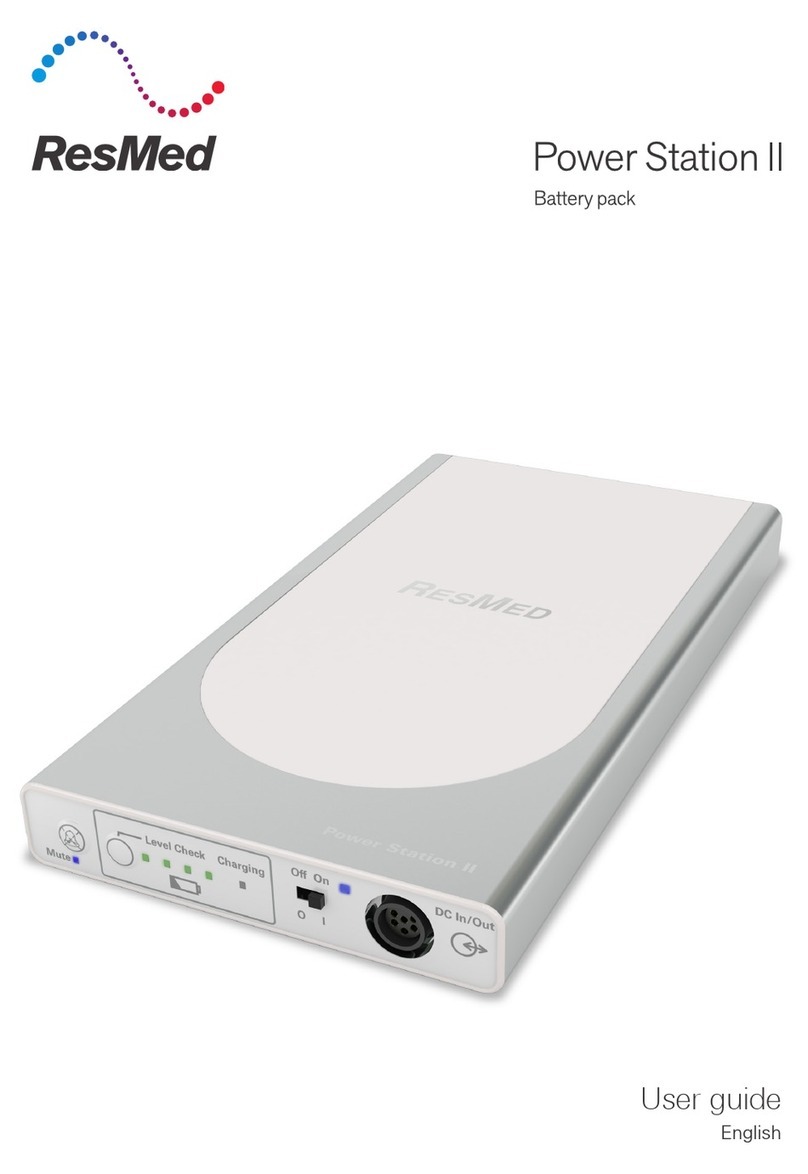
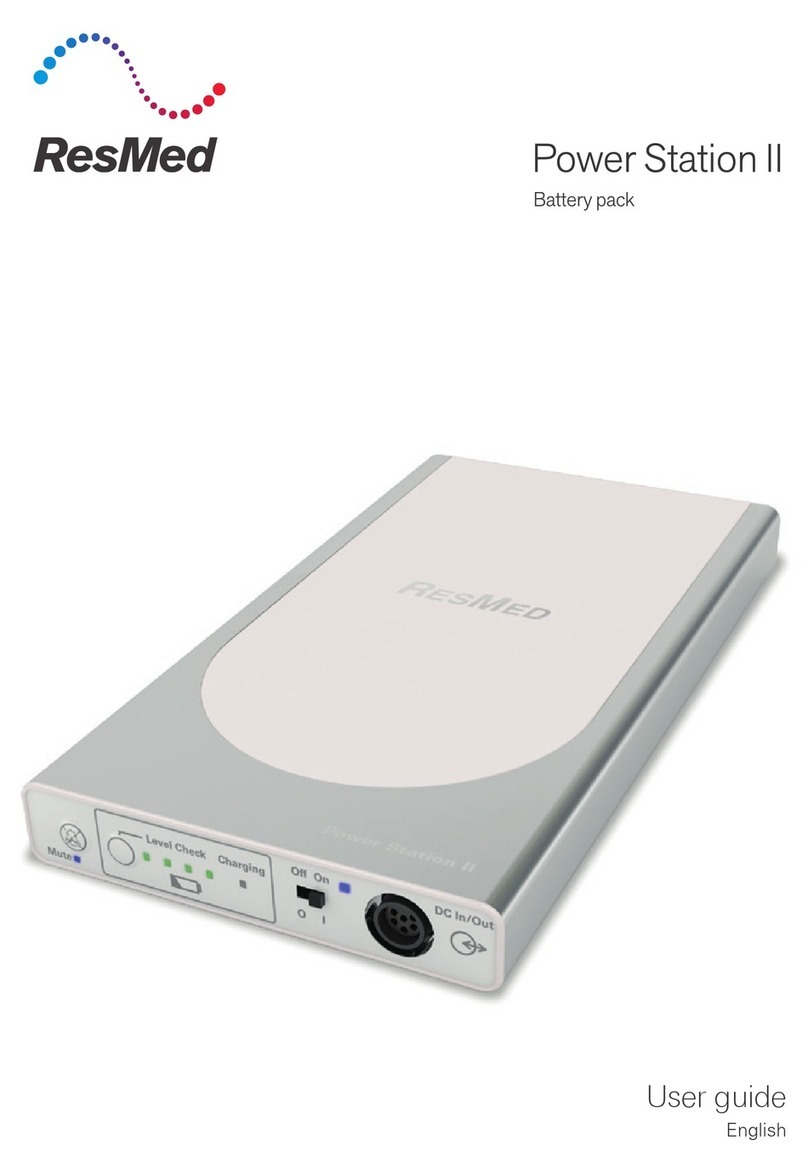
ResMed Power Station II User manual

User guide
English | Deutsch | Français | Italiano | Español | Português | Nederlands |
Svenska | Dansk | Norsk | Suomi | Ελληνικά | Polski | 简体中文 | 繁體中文
User guide

Power Station II
Battery Pack / Akkupack / Batterie / Alimentatore a batteria / Batería / Bateria / Accu / Batteripack /
Batteripakke / Batteripakke / Akku / Μπαταρια / Bateria Akumulatorowa / 电池包 / 電池包
Illustrations only, parts may differ / Nur Abbildungen,Teile können abweichen / Illustrations uniquement,
les pièces sont susceptibles d’être différentes / Illustrazione a solo titolo di esempio, i pezzi potrebbero
essere diversi / Solo ilustraciones, las piezas pueden ser diferentes / Apenas ilustrações; as peças podem
ser diferentes / Dit zijn slechts illustraties, de onderdelen kunnen afwijken / Endast illustrationer, vissa delar
kan skilja sig från bilden / Dette er kun eksempler. Delene kan afvige fra dine / Kun illustrasjoner, delene
kan variere / Kuvat ovat vain viitteellisiä; osat voivat näyttää toisenlaisilta/ Εικόνες μόνο, τα εξαρτήματα μπορεί
να διαφέρουν / Przykładowa ilustracja, elementy mogą się różnić / 图示中的部件可能和实物会有差异/ 圖示
中的部件可能和實物會有差異
a
A
24V | 26V
Mute on/off Level Check Level Charging
Mute on
On
O/I DC In/Out
123
8
4
56 7
9
12 3
8
4
567 9
B
1
2
3
C
aDC plug / Gleichstromstecker / Fiche CC / Spinotto DC / Enchufe de CC / Ficha CC / DC-stekker /
DC-kontakt / Jævnstrømsstik / Likestrømsstøpsel / Tasavirtaliitin / Βύσμα DC / Gniazdo DC / 直流电电源插头 /
直流電電源插頭
1
4
3
2
5 6 78
a

i
Power Station II
DC output voltage & DC cables
24V 26V DC Cable
Part Number
AirSense™Series 37343
AirCurve™Series 37343
Lumis™Series 37343
VPAP™III ST-A 24959
VPAP™III ST-A with QuickNav 24959
VPAP™IV, VPAP™IV ST 24960
S8™Auto 25 24960
S9™Series 24961
Stellar™ Series
24959
(24981 for Stellar™
Mobility bag)
VS III™24963
Elisée™ 150 24962
English
Notes:
• Not all devices are available in all regions.
• To recharge the ResMed Power Station II using an Air 10 power supply unit (supplied with Air 10
and Lumis devices) or the Air 10 DC converter, an Air 10 power supply unit adaptor is required (part
no. 37342).
• For information on battery run times refer to the Battery/Compatibility List on www.resmed.com.
Deutsch
Hinweise:
• Einige Geräte sind nicht in allen Ländern erhältlich.
• Um die ResMed Power Station II mit Hilfe eines Air 10 Netzgerätes (im Lieferumfang von Air 10 und
Lumis Geräten enthalten) oder eines Air 10 Gleichstromkonverters wieder aufzuladen, ist ein Air 10
Netzgerät-Adapter (Artikelnummer 37342) erforderlich.
• Informationen zu den Akkulaufzeiten finden Sie in der Kompatibilitätsliste Akku/Gerät unter
www.resmed.com.
Français
Remarques :
• Certains de ces appareils ne sont pas disponibles dans tous les pays.
• L’adaptateur du module d’alimentation Air10 (code produit 37342) est nécessaire pour recharger le
bloc d’alimentation ResMed Power Station II avec une alimentation Air10 (fournie avec les appareils
Air10 et Lumis) ou le convertisseur CC Air10.
• Pour plus d’informations sur l’autonomie des batteries, veuillez consulter la liste de compatibilité
entre les appareils et les batteries disponible sur www.resmed.com.
Italiano
Note:
• Alcuni apparecchi non sono disponibili in tutti i Paesi.
• Per ricaricare la ResMed Power Station II utilizzando l’alimentatore elettrico Air 10 (in dotazione con
gli apparecchi Air 10 e Lumis) o il convertitore DC Air 10, è necessario l’adattatore per alimentatore
elettrico Air 10 (n. di catalogo 37342).
• Per informazioni sull’autonomia delle batterie, vedere laTabella di compatibilità tra batterie e
apparecchi su www.resmed.com.

ii iii
Español
Notas:
• No pueden obtenerse todos los dispositivos en todas las regiones.
• Para recargar la ResMed Power Station II con una fuente de alimentación Air 10 (suministrada con
los dispositivos Air 10 y Lumis) o el transformador de CC Air 10, se necesita un adaptador de la
fuente de alimentación Air 10 (nº de pieza 37342).
• Para obtener información sobre la duración de las baterías, consulte la Lista de compatibilidad de
baterías/dispositivos en www.resmed.com.
Português
Notas:
• Nem todos os dispositivos estão disponíveis em todas as regiões.
• Para recarregar a ResMed Power Station II, usando uma unidade de alimentação Air 10 (fornecida
com dispositivos Air 10 e Lumis) ou o conversor CC Air 10, é necessário um adaptador da unidade
de alimentação Air 10 (peça n.º 37342).
• Para obter informações sobre a autonomia das baterias, consulte a lista de compatibilidade entre
baterias/dispositivos em www.resmed.com.
Nederlands
NB
• Niet alle apparaten zijn in alle regio’s verkrijgbaar.
• Om het ResMed Power Station II op te laden met een Air 10 voedingseenheid (die bij Air 10 en
Lumis apparaten wordt verschaft) of de Air 10 DC-omvormer, is een Air 10 voedingseenheidadapter
vereist (artikelnr. 37342).
• Raadpleeg voor informatie over bedrijfstijden van accu’s de Compatibiliteitslijst accu/apparaat op
www.resmed.com.
Svenska
Obs!
• Vissa utrustningar finns inte i alla delar av världen.
• Obs!: För att ladda ResMed Power Station II med hjälp av en Air 10-strömförsörjningsenhet (som
medföljer Air 10- och Lumis-apparater) eller Air 10 DC-omvandlaren, behövs en Air 10-adapter till
strömförsörjningsenheten (delnr. 37342).
• För information om batteritider hänvisas till Battery/Device Compatibility List på www.resmed.com.
Dansk
Bemærkninger:
• Det er ikke alle apparater, der kan fås i alle lande.
• For at oplade ResMed Power Station II med en Air 10 strømforsyningsenhed (leveres med Air
10- og Lumis-enheder) eller Air 10 jævnstrømsomformeren, kræves der en adapter til Air 10
strømforsyningsenhed (varenr. 37342).
• Der er oplysninger om batteriers driftstid under Liste over kompatible batterier og apparater på
webstedet www.resmed.com.
Norsk
Merknader:
• Noen apparater er ikke tilgjengelig i alle land.
• For å lade opp ResMed Power Station II med en Air 10 strømforsyningsenhet (leveres med Air 10 og
Lumis apparater) eller Air 10 likestrømomformer, kreves en Air 10 strømforsyningsadapter (delenr.
37342).
• Se listen over batteri-/apparatkompatibilitet på www.resmed.com for informasjon om batterilevetid.
Suomi
Huomautukset:
• Kaikkia laitteita ei ole saatavissa kaikissa maissa.
• Jos ResMed Power Station II -virtalähde halutaan ladata Air 10 -virtalähdettä käyttäen (joka
toimitetaan Air 10 - ja Lumis-laitteiden kanssa) tai Air 10 -tasavirtamuunninta käyttäen, tarvitaan Air
10 -virtalähdesovitin (tuotenro 37342).
• Tietoja akkujen käyttöajoista saat Laitteiden ja akkujen vastaavuus -taulukosta osoitteesta
www.resmed.com.
Ελληνικά
Σημειώσεις:
• Δεν είναι όλες οι συσκευές διαθέσιμες σε όλες τις γεωγραφικές περιφέρειες.
• Για την επαναφόρτιση του ResMed Power Station II με χρήση τροφοδοτικού Air 10 (παρέχεται με τις
συσκευές Air 10 και Lumis) ή μετατροπέα DC Air 10, απαιτείται ένας προσαρμογέας τροφοδοτικού Air 10 (αρ.
εξαρτήματος 37342).
• Για πληροφορίες σχετικά με τους χρόνους λειτουργίας των μπαταριών, ανατρέξτε στο Κατάλογο συμβατότητας
για μπαταρίες/συσκευές στη διεύθυνση www.resmed.com.
Polski
Uwagi:
•Nie wszystkie urządzenia są dostępne we wszystkich regionach.
•Do ładowania akumulatora ResMed Power Station II z zasilacza Air 10 (dostarczanego z urządzeniami
Air 10 i Lumis) lub przetwornicy prądu stałego Air 10 potrzebna jest przejściówka do zasilacza Air 10
(nr kat. 37342).
•Informacje dotyczące okresów eksploatacyjnych baterii można znaleźć na Liście urządzeń
kompatybilnych z baterią pod adresem: www.resmed.com.

iii
简体中文
备注:
• 不是所有装置都在各个地区有销售。
• 瑞思迈电源装置II采用Air 10供电装置(提供Air 10和Lumis装置)或 Air 10直流
电转换器充电,需要瑞思迈供电装置适配器(零件号:37342)。
• 欲了解有关电池运行时间的信息,请浏览网站www.resmed.com,查看电池/装置兼
容清单。
繁體中文
備註:
• 不是所有裝置都在各個地區有銷售。
• 瑞思邁電源裝置II採用Air 10供電裝置充電(提供Air 10和Lumis裝置)或Air 10直流
電轉換器充電,需要瑞思邁供電裝置轉接器(零件號:37342)。
• 請瀏覽網站www.resmed.com,查看電池/裝置相容清單。

English 1
Intended use
The ResMed Power Station II (RPSII) is an external lithium-ion battery that provides
power when mains power is unavailable.
Please read the entire guide before using the RPSII. Refer to the device user guides
for intended patients, uses, environment where used, and contraindications associated
with CPAP, bilevel and ventilation therapy.
RPSII at a glance
Refer to illustration A.
The RPSII system comprises the following components:
1. Battery
2. Power supply unit adapter
3. Carry bag
Available separately:
4. 90W AC power supply unit or DC converter
5. AC or DC power cord
6. DC output cable
7. Air 10 Power supply unit adaptor
Note: To recharge the RPS II using an Air 10 power supply unit (supplied with Air 10
and Lumis devices) or the Air 10 DC converter, an Air 10 power supply unit adaptor
is required (part no. 37342).
Optional accessory:
8. Battery coupler (packed with Velcro™strap)
Compatible devices and accessories
For a full list of compatible devices for RPSII, see the Battery/Device Compatibility List
on www.resmed.com on the Products page under Service & Support. For a full list
of accessories, see the Ventilation Accessories on www.resmed.com on the Products
page under Ventilation Devices. For a list of output voltages and DC cables for your
device, see the attached information leaflet, your device user guide, or the Battery/
Device Compatibility List on www.resmed.com. If you do not have internet access,
please contact your ResMed representative.
For more information on setting up your device, see your device user guide.
English

2
Control panel
Refer to illustration B.
The control panel of your battery includes the following:
1. Audible alert mute button
2. Charge level check button
3. DC on/off switch
4. DC input/output port
5. Audible alert mute indicator
6. Battery level indicators
7. Charging indicator
8. DC switch/discharging indicator
9. Voltage output selector switch (rear
panel)
Setting up
CAUTION
•Ensure the RPSII and the device are turned off before setting up.
•When the RPSII is plugged to the mains power supply, ensure all cables are
properly connected.
Charging the battery
Refer to illustration C.
1. Attach the power supply unit adapter to the DC plug and connect into the battery
DC input/output port.
2. Connect the AC or DC power cord to the power supply unit.
3. Plug the other end of the AC or DC power cord into the mains power outlet.
Notes:
• Charging takes less than 4 hours from 0% battery level to greater than 95%.
• To discontinue charging, unplug the power cord from the mains power outlet.
Providing power to the device
Refer to illustration D.
1. Select the correct output voltage for your device using the voltage output selector
from the RPSII rear panel.
2. Connect the appropriate DC output cable into the battery.
3. Connect the other end of the DC output cable into the device.
4. Set the DC on/off switch to on.
Providing backup power to the device (for systems with both AC and DC inputs)
WARNING
In this configuration, the Elisee draws power from the RPSII first until it is
fully discharged, and will not recharge. As a result, once all power has been
discharged from the battery, it will not act as an AC backup.
Refer to illustration E.
1. Select the correct output voltage for your device using the voltage output selector
from the RPSII rear panel.
2. Connect the appropriate DC output cable into the battery.
3. Connect the other end of the DC output cable into the device.
4. Connect the AC power cord to the rear of the device.

English 3
5. Plug the other end of the AC power cord into the mains power outlet.
6. Set the DC on/off switch to on.
Note: When powering the device regularly check the battery charge level.
Using two batteries
Refer to illustration F.
1. Place one battery on top of another.
If required, use the Velcro strap to hold the batteries securely.
2. Plug the battery coupler cables into each of the battery DC input/output ports. The
battery coupler cables are marked with ‘1’ (primary) and ‘2’ (reserve) labels.
3. When charging two batteries, attach the power supply unit adapter to the DC plug
and connect the adapter to the battery coupler.
When powering a device, connect the DC output cable of the device to the end
of the battery coupler. The primary battery supplies power to the device and the
reserve battery takes over when the primary battery is disconnected or discharged.
Indicators
Refer to illustration B.
The RPSII provides LEDs to indicate its current operating state.
LED indicator Status
Battery charge level1(B-6)
One amber flashing (audible
alert beeps continuously) Less than 5%
One green flashing (audible alert
beeps for 10 sec) Less than 10%
One green continuous 10% to 40% (approximate)
Two green continuous 40% to 65% (approximate)
Three green continuous 65% to 90% (approximate)
Four green continuous Greater than 90% (approximate)
Charging (B-7)
Flashing green Charging
Constant green Fully charged
DC on/off (B-8)
Flashing blue RPSII turned on but not discharging
Constant blue RPSII turned on and discharging
Audible alert mute (B-5)
Flashing blue Not discharging and mute is active
Constant blue Discharging and mute is active
1When setting the DC on/off switch, the charge level indicator may fluctuate between different levels.

4
To check the battery charge level, press the charge level check button (B-2) on the
control panel. The number of green LEDs indicates the approximate charge level.
To mute the alert, press the audible alert mute button (B-1). To permanently mute,
press and hold the audible alert mute button (B-1) for 5 seconds. To deactivate, press
the audible alert mute button (B-1) when the mute is still active.
Using humidifiers
With the exception of AirSense 10, AirCurve 10, Lumis, S9 and H5i™, when a device
integrated with a humidifier is not connected to the mains power supply, the humidifier
will only operate in passive unheated mode despite the warm-up message appearing
on the device. When the device is connected to the mains power supply, it will return
to active heated mode.
AirSense 10, AirCurve 10, Lumis, S9 and H5i devices operate normally in active heated
mode when connected to the battery or to the mains power supply.
Cleaning and maintenance
WARNING
Do not immerse the RPSII in water, and do not use liquids to clean any part of
the product.
1. Disconnect the battery from the power supply unit and the device. Remove all
cables.
2. Wipe the exterior of the battery with a clean cloth.
Storing
CAUTION
Batteries must be charged to 100% indicated by four green LEDs and switched off
before storing.You must recharge the batteries to 100% again after six months
of storage. When not in use, all Lithium-Ion batteries self-discharge over time. If
not periodically recharged (ie, every six months), the RPSII will eventually self-
discharge to the point that it can no longer be recharged. If this occurs the RPSII
is no longer usable and is unrecoverable.
Store the RPSII in a cool, dry place.
Note: A fully charged battery when left switched on, self-discharges to 0% of full
capacity within four weeks of storage. When switched off, the battery self-discharges
to 0% of full capacity within six months of storage.
Servicing
The RPSII is intended to provide safe and reliable operation when used and
maintained in accordance with the instructions provided by ResMed.There is no
servicing necessary during the lifetime of the battery.
The service life of the RPSII exceeds 500 recharge cycles. After 500 recharge cycles,
the battery will last about 60% of the time from its original condition. A full charge in
an older battery will not last as long as in a new battery. ResMed recommends that the
RPSII be tested for battery duration regularly. As with all electrical equipment, if any

English 5
irregularity becomes apparent, you should exercise caution and contact an authorised
ResMed service representative.
Traveling
Consult with your carrier if you intend to take the battery on board with your device.
Troubleshooting
If there is a problem, try the following suggestions. If the problem cannot be solved,
contact your equipment supplier or ResMed. Do not attempt to open the battery.
Problem/Possible cause Solution
Device is not running
Power connections are disrupted. Check all cables and connect them as described in
Setting up.
RPSII is discharged. Connect the device to the mains power supply and
recharge the RPSII.
RPSII is off. Set the DC on/off switch to on.
Incorrect output voltage selected. Select the correct output voltage for your device
using the output voltage selector switch from the
RPSII rear panel.
Note: For a list of output voltages and DC cables
for your device, see the attached information leaflet,
your device user guide, or the Battery/Device
Compatibility List on www.resmed.com.
RPSII sounds an audible alert continuously and an amber LED is flashing
The battery charge level is less
than 5%. Press the audible alert mute button to mute the
alert. Recharge the battery as soon as possible.
RPSII sounds an audible alert for 10 seconds and a green LED is flashing
The battery charge level is below
10%. Recharge the battery as soon as possible.
Charging stops before completion
When charging the battery inside
the RPSII carry bag, the ambient
temperature is warmer than 35°C.
Remove the battery from the RPSII carry bag or
charge the battery where the ambient temperature is
cooler than 35°C.
Battery turns off and stops powering device
When the battery is in the
RPSII carry bag, the ambient
temperature is warmer than 35°C.
Remove the battery from the RPSII carry bag or
power the device where the ambient temperature is
cooler than 35°C.
Battery charge level indicator is inaccurate
Ambient temperature is at
extreme condition (eg, –5°C,
+40°C).
Recharge the battery as soon as possible to ensure
adequate capacity.

6
Technical specifications
Battery technology Lithium ion
Capacity < 100 Wh (97 Wh)
UN classification UN3480 (lithium-ion batteries)
AC power supply Input range 100–240V, 50–60Hz, 1.0-1.5A
Nominal for aircraft use 110V, 400Hz
DC converter Input range 12V / 24V, 13A / 6.5A
Battery output voltage (24V / 26V) ± 0.5V, 90W continuous
Power supply unit output
current (rated) 3.75 A
Battery output current (rated) 3.75 A / 3.46 A
Standby current < 100 μA
Protection Overcharge, overdischarge, excess current, short circuit,
high temperature
Dimensions (L x W x H) 230 mm x 126 mm x 26 mm
Battery weight 0.9 kg
System weight 2.3 kg
Minimum life cycle ≥ 500 cycles at 23°C to 60% capacity
Operating conditions
Charging
Discharging 5°C to 40°C; 5–85% maximum humidity
-5°C to 40°C; 5–85% maximum humidity
Transport/storage conditions -20°C to +45°C; 5–85% maximum humidity
Operating/storage air pressure 600 hPa to 1100 hPa
Aircraft use Product meets the Federal Aviation Administration (FAA)
requirements (RTCA/D0-160, section 21, category M) for
all phases of air travel.
Recharge time < 4 hrs at full level
Electromagnetic compatibility Product complies with all applicable electromagnetic
compatibility requirements (EMC) according to IEC60601-
1-2, for residential, commercial, and light industry
environments. Information regarding the electromagnetic
emissions and immunity of these ResMed devices can
be found on www.resmed.com/downloads/devices.
IEC 60601-1 classification Class II (double insulation) and/or Internally Powered
Equipment, IP21 (IP20 while charging), Continuous
Operation (from mains), Limited Operation (from
battery), Equipment not suitable for use in the presence
of a flammable anaesthetic mixture with air or with
oxygen or nitrous oxide.
Battery run time > 8 hrs at average device settings1
For more information, see the Battery/Device
Compatibility List on www.resmed.com.
1Using 15 cm H2O (IPAP), 5 cm H2O (EPAP), and 15 BPM (Respiratory Rate). Not applicable to devices
when using heated humidification and heated tubing.

English 7
Note: The manufacturer reserves the right to change these specifications without
notice.
Symbols
The following symbols may appear on the device or packaging:
Attention, consult accompanying documents; Read instructions before use;
Drip proof; No protection;
0
No protection; Class II equipment;
European RoHS; Batch Code; Serial number; Catalogue number;
8
Humidity limitation; Temperature limitation (storage and transport);
Charging; Battery charge level; Audible alert mute;
DC input/output;
O I
DC on/off; Do not use if package is damaged;
Manufacturer; Keep dry; European Authorised Representative;
Importer; Medical device.
See symbols glossary at www.resmed.com/symbols.
Environmental Information.
Disposal of the battery and the power supply unit should be carried out in accordance with
applicable national laws and regulations. WEEE 2012/19/EU is a European Directive that
requires the proper disposal of electrical and electronic equipment. The battery and power
supply unit should be disposed of separately, not as unsorted municipal waste.To dispose
of your battery and power supply unit, you should use appropriate collection, reuse and
recycling systems available in your region. The use of these collection, reuse and recycling
systems is designed to reduce pressure on natural resources and prevent hazardous
substances from damaging the environment. European Directive 2006/66/EC requires the
proper disposal of spent batteries and accumulators. The battery may only be returned to
collection points fully discharged. If charged or partially discharged, care should be taken to
prevent short circuiting. Batteries containing more than 0.0005% of mercury by mass, more
than 0.002% of cadmium by mass or more than 0.004% of lead by mass are marked below
the crossed-bin symbol with the chemical symbols (Hg, Cd, Pb) of the metals for which the
limit is exceeded.
If you need information on these disposal systems, please contact your local waste
administration. The crossed-bin symbol invites you to use these disposal systems. If you
require information on collection and disposal of your ResMed device please contact your
ResMed office, local distributor or go to www.resmed.com/environment.

8
General warnings and cautions
WARNINGS
•Lithium ion batteries have built-in safety protection circuits, but can still be
dangerous if they are not used correctly. Damaged batteries can become
inoperative or catch fire.
•Due to risk of fire or electric shock:
- do not place the RPSII near open fire or heaters.
- do not expose the RPSII to direct sunlight or heat (for example behind a
car window).
- do not expose the RPSII to water, rain or high moisture levels.
- do not short-circuit the RPSII.
- do not use a damaged RPSII.
- do not open the RPSII, AC charger or the DC converter.
•Make sure to revert to AC power when the remaining capacity of RPSII and/or
device internal battery is low.
•Make sure to periodically recharge the battery due to effects of self-
discharging.
•As the battery ages, the available capacity decreases. When the remaining
battery capacity is getting low, do not rely on the RPSII as the primary supply.
•Ensure the internal battery of any connected device is kept charged up to
provide backup power in the event of loss of power from RPSII.
•Only use a supplied ResMed 90W AC power supply unit or DC converter for
charging the RPSII.
•Explosion hazard—do not use in the vicinity of flammable anaesthetics.
•The RPSII system is not intended for use by persons (including children)
with reduced physical, sensory or mental capabilities, or lack of experience
and knowledge, unless they have been given supervision or instruction
concerning use of the RPSII system by a person responsible for their safety.
•Children should be supervised to ensure that they do not play with the RPSII
system.
•Care should be taken to keep the power supply unit adapter dry.The RPSII
system, while connected to a device and discharging, is rated to IP21 (Drip
proof) according to IEC60529. When charging, the RPSII system is rated to
IP20 (No protection) due to the power supply unit adapter which is rated to
IP20.The AC power supply, RPSII battery and DC converter are rated to IP21.
CAUTIONS
•Avoid hard, physical impact on the battery.
•Before using for the first time, ensure that the RPSII and its components are
in good condition and operational. If there are any defects, the system should
not be used.
•The RPSII is to be used only in accordance with the intended use stated in
this guide. Damage to equipment or injury can result from modifications to
the equipment or operation.
•Always fully charge the RPSII before use, or before relying as a backup power.

English 9
•Monitor the charge level of the RPSII. When the charge level is low, ensure
that continuity of power can be maintained.
•When in use, always plug the cable from the RPSII into the device. Keep the
RPSII power switch turned on to ensure it can provide backup power.
•When transporting, turn off the RPSII, unplug all cables, and pack in the carry
bag.
•Medical electrical equipment requires special precautions regarding EMC and
needs to be installed and operated according to the information provided in
this user guide. Portable and mobile communications equipment can affect
medical electrical equipment. If EMC interference is observed, for example
static on radios, move the RPSII away from other equipment.
Notes:
• The above are general warnings and cautions. Specific warnings, cautions, and
notes appear with the relevant instructions in the guide.
• For any serious incidents that occur in relation to this product, these should be
reported to ResMed and the competent authority in your country.
Limited warranty
ResMed Pty Ltd (hereafter ’ResMed’) warrants that your ResMed product shall be free
from defects in material and workmanship from the date of purchase for the period
specified below.
Product Warranty period
• Mask systems (including mask frame, cushion, headgear and
tubing)—excluding single-use devices
• Accessories—excluding single-use devices
• Flex-type finger pulse sensors
• Humidifier water tubs
90 days
• Batteries for use in ResMed internal and external battery systems 6 months
• Clip-type finger pulse sensors
• CPAP and bilevel device data modules
• Oximeters and CPAP and bilevel device oximeter adapters
• Humidifiers and humidifier cleanable water tubs
• Titration control devices
1 year
• CPAP, bilevel and ventilation devices (including external power
supply units)
• Battery accessories
• Portable diagnostic/screening devices
2 years
This warranty is only available to the initial consumer. It is not transferable.
If the product fails under conditions of normal use, ResMed will repair or replace, at its
option, the defective product or any of its components.
This limited warranty does not cover: a) any damage caused as a result of improper
use, abuse, modification or alteration of the product; b) repairs carried out by any

10
service organisation that has not been expressly authorised by ResMed to perform
such repairs; c) any damage or contamination due to cigarette, pipe, cigar or other
smoke; and d) any damage caused by water being spilled on or into an electronic
device.
Warranty is void on product sold, or resold, outside the region of original purchase.
Warranty claims on defective product must be made by the initial consumer at the
point of purchase.
This warranty replaces all other expressed or implied warranties, including any implied
warranty of merchantability or fitness for a particular purpose. Some regions or states
do not allow limitations on how long an implied warranty lasts, so the above limitation
may not apply to you.
ResMed shall not be responsible for any incidental or consequential damages claimed
to have resulted from the sale, installation or use of any ResMed product. Some
regions or states do not allow the exclusion or limitation of incidental or consequential
damages, so the above limitation may not apply to you.
This warranty gives you specific legal rights, and you may also have other rights which
vary from region to region. For further information on your warranty rights, contact
your local ResMed dealer or ResMed office.

Deutsch 1
Verwendungszweck
Die ResMed Power Station II (RPSII) ist ein externer Lithium-Ionen-Akku. Er sorgt für
die Stromversorgung, wenn kein Netzstrom verfügbar ist.
Lesen Sie bitte vor dem Gebrauch des RPSII die gesamte Gebrauchsanweisung.
Informationen zu Patientengruppen, Anwendungsgebieten, Anwendungsumgebungen
und Kontraindikationen im Zusammenhang mit CPAP-, Bilevel- und Beatmungstherapie
entnehmen Sie bitte den jeweiligen Gebrauchsanweisungen.
Die RPSII im Überblick
Siehe Abbildung A.
Die RPSII setzt sich aus folgenden Komponenten zusammen:
1. Akku
2. Netzgerät-Adapter
3. Tragetasche
Separat erhältlich:
4. 90W AC-Netzgerät oder Gleichstromkonverter.
5. Wechselstrom- oder Gleichstromkabel
6. DC-Ausgangskabel
7. Air 10 Netzgerät-Adapter
Hinweis: Um die RPS II mit einem Air 10 Netzgerät (im Lieferumfang von Air 10
und Lumis Geräten enthalten) oder eines Air 10 Gleichstromkonverters wieder
aufzuladen, ist ein Air 10 Netzgerät-Adapter (Artikelnummer 37342) erforderlich.
Optionales Zubehör:
8. Akkukoppler (mit Velcro™-Verschlüssen)
Kompatible Geräte und Zubehör
Eine vollständige Liste der mit der RPSII kompatiblen Geräte finden Sie in der
Kompatibilitätsliste Akku/Gerät unter www.resmed.com auf der Seite Produkte
unter Service & Unterstützung. Eine vollständige Auflistung des Zubehörs finden
Sie unter www.resmed.com auf der Seite Produkte unter Beatmungszubehör.
Eine Liste der Ausgangsspannungen und DC-Kabel Ihres Gerätes finden Sie im
beigefügten Informationsblatt, in der Gebrauchsanweisung für Ihr Gerät bzw. in
der Kompatibilitätsliste Akku/Gerät unter www.resmed.com. Wenn Sie keinen
Internetanschluss haben, wenden Sie sich bitte an Ihren ResMed-Vertreter.
Weitere Informationen zu Aufbau und Einrichtung Ihrer Geräte finden Sie in den
jeweiligen Gebrauchsanweisungen.
Deutsch

2 Deutsch 3
Bedienoberfläche
Siehe Abbildung B.
Auf der Bedienoberfläche Ihres Akkus finden Sie:
1. Alarmstummtaste
2. Ladestatustaste
3. Schalter DC Ein/Aus
4. Gleichstromeingang/-ausgang
5. Anzeige Alarmstummschaltung
6. Akkustatusanzeige
7. Ladeanzeige
8. Anzeige Gleichstrom-Schalter/Entladung
9. Auswahlschalter Ausgangsspannung
(Rückseite)
Aufbau
VORSICHT
• Stellen Sie vor dem Aufbau sicher, dass sowohl die RPSII als auch das Gerät
ausgeschaltet sind.
• Vergewissern Sie sich, dass alle Kabel ordnungsgemäß verbunden sind, wenn
die RPS an die Netzversorgung angeschlossen ist.
Laden des Akkus
Siehe Abbildung C.
1. Schließen Sie den Gleichstromstecker des Netzgerätadapters an den
Gleichstromeingang/-ausgang der RPSII an.
2. Schließen Sie das Netz- oder Gleichstromkabel an das Netzgerät an.
3. Stecken Sie das andere Ende des Netz- oder Gleichstromkabels in die Steckdose.
Hinweise:
• Das Laden von 0% auf über 95% Akkustatus dauert weniger als 4 Stunden.
• Um das Laden zu unterbrechen, ziehen Sie das Stromkabel aus der Steckdose.
Stromversorgung des Gerätes
Siehe Abbildung D.
1. Wählen Sie über den Auswahlschalter an der Rückseite der RPSII die richtige
Ausgangsspannung für Ihr Gerät.
2. Schließen Sie das entsprechende Gleichstromausgangskabel an den Akku an.
3. Schließen Sie das andere Ende des Gleichstromausgangskabels an das Gerät an.
4. Schalten Sie den Schalter DC Ein/Aus auf Ein.
Ersatzstromversorgung des Gerätes (für Systeme mit Eingängen für
Wechselstrom und Gleichstrom)
WARNUNG
In dieser Konfiguration wird das Elisée zuerst mit Strom von der RPSII versorgt,
bis diese vollständig entladen ist und sich nicht wieder auflädt. Wenn die
Batterie vollständig entladen ist, kann sie daher nicht mehr als Wechselstrom-
Ersatzversorgung verwendet werden.
Siehe Abbildung E.
1. Wählen Sie über den Auswahlschalter an der Rückseite der RPSII die richtige
Ausgangsspannung für Ihr Gerät.

Deutsch 3
2. Schließen Sie das entsprechende Gleichstromausgangskabel an den Akku an.
3. Schließen Sie das andere Ende des Gleichstromausgangskabels an das Gerät an.
4. Schließen Sie das Netzstromkabel an der Rückseite des Gerätes an.
5. Stecken Sie das andere Ende des Wechselstromkabels in die Steckdose.
6. Schalten Sie den Schalter DC Ein/Aus auf Ein.
Hinweis: Überprüfen Sie beim Einschalten des Gerätes regelmäßig den Ladestatus
des Akkus.
Verwendung von zwei Akkus
Siehe Abbildung F.
1. Legen Sie die Akkus übereinander.
Nutzen Sie bei Bedarf den Velcro-Verschluss, um die Akkus zu sichern.
2. Schließen Sie die Akkukopplerkabel an den jeweiligen Gleichstromeingängen/
-ausgängen des Akkus an. Die Akkukopplerkabel sind mit Etiketten versehen, die
Haupt-Akku (1 primary) und Backup-Akku (2 reserve) ausweisen.
3. Wenn Sie zwei Akkus aufladen, schließen Sie den Netzgerät-Adapter an den
Gleichstromstecker und dann an den Akkukoppler an.
Schließen Sie beim Einschalten eines Gerätes das Gleichstromausgangskabel des
Gerätes an das Ende des Akkukopplers an. Der Haupt-Akku versorgt das Gerät mit
Strom und der Backup-Akku kommt zum Einsatz, wenn der Haupt-Akku getrennt
wird oder entladen ist.
Anzeigen
Siehe Abbildung B.
Anhand der LEDs an der RPSII lässt sich der jeweilige Betriebsstatus ablesen.
LED-Anzeige Status
Ladestatus des Akkus1(B-6)
Eine gelbe Leuchte blinkt
(kontinuierliches akustisches Signal) Weniger als 5%
Eine grüne Leuchte blinkt
(akustisches Signal für 10 s) Weniger als 10%
Eine grüne Leuchte kontinuierlich (ca.) 10% bis 40%
Zwei grüne Leuchten kontinuierlich (ca.) 40% bis 65%
Drei grüne Leuchten kontinuierlich (ca.) 65% bis 90%
Vier grüne Leuchten kontinuierlich Über (ca.) 90%
Lädt (B-7)
Grün blinkend Lädt
Grün kontinuierlich Vollständig geladen

4 Deutsch 5
LED-Anzeige Status
DC Ein/Aus (B-8)
Blau blinkend RPSII ist eingeschaltet, wird jedoch nicht
entladen
Blau kontinuierlich RPSII ist eingeschaltet und wird entladen
Alarmstummschaltung (B-5)
Blau blinkend RPSII wird nicht entladen und
Stummschaltung ist aktiviert
Blau kontinuierlich RPSII wird entladen und Stummschaltung
ist aktiviert
1Beim Einstellen des DC Ein/Aus-Schalters kann die Ladezustandsanzeige zwischen verschiedenen
Werten hin- und herschwanken.
Drücken Sie auf die Ladestatustaste (B-2) auf der Bedienoberfläche, um den Ladestaus
des Akkus zu überprüfen. Die Anzahl der grünen LEDs zeigt den ungefähren
Ladestatus an.
Drücken Sie die Alarmstummtaste, um den Alarm stummzuschalten (B-1). Halten
Sie die Alarmstummtaste (B-1) 5Sekunden lang gedückt, um den Alarm dauerhaft
stummzuschalten. Zum Aufheben der Alarmstummschaltung (B-1) drücken Sie die
Alarmstummtaste erneut.
Verwendung von Atemluftbefeuchtern
Wenn ein mit einem Atemluftbefeuchter integriertes Gerät nicht an die
Netzversorgung angeschlossen ist, funktioniert der Atemluftbefeuchter nur im
passiven (unbeheizten) Modus, obwohl eine Aufwärmmeldung auf dem Gerät
erscheint. Eine Ausnahme sind folgende Atemluftbefeuchter: AirSense 10, AirCurve
10, Lumis, S9 und H5i™. Sobald die Versorgung wieder über Netzstrom erfolgt, kehrt
der Atemluftbefeuchter in den aktiven (beheizbaren) Modus zurück.
Die Geräte AirSense 10, AirCurve 10, Lumis, S9 und H5i funktionieren normalerweise
sowohl bei Netzbetrieb als auch bei Akkubetrieb im aktiven (beheizbaren) Modus.
Reinigung und Instandhaltung
WARNUNG
Tauchen Sie die RPSII nicht in Wasser und verwenden Sie zum Reinigen der Teile
des Produktes keine Flüssigkeiten.
1. Trennen Sie den Akku vom Netzgerät und vom Atemtherapiegerät. Entfernen Sie
alle Kabel.
2. Wischen Sie das Gehäuse des Akkus mit einem sauberen Tuch ab.

Deutsch 5
Aufbewahrung
VORSICHT
Vor der Aufbewahrung müssen Akkus auf 100% geladen (vier grüne LEDs
leuchten auf) und dann ausgeschaltet werden. Nach sechsmonatiger
Aufbewahrung müssen die Akkus wieder auf 100% geladen werden. Lithium-
Ionen-Akkus entleeren sich selbst, wenn sie nicht verwendet werden. Wenn sie
nicht regelmäßig (d. h. alle sechs Monate) aufgeladen wird, entleert sich die
RPS II am Ende von alleine so weit, dass er nicht mehr aufgeladen werden kann.
In diesem Fall ist die RPS II unbrauchbar.
Bewahren Sie die RPS II an einem kühlen und trockenen Ort auf.
Hinweis: Ein vollständig geladener Akku entlädt sich innerhalb einer Lagerzeit von vier
Wochen auf 0% seiner vollen Kapazität, wenn er nicht ausgeschaltet wird. Nach dem
Ausschalten entlädt sich der Akku innerhalb von sechs Monaten Lagerung von alleine
auf 0% der vollen Kapazität.
Wartung
Wenn die RPSII entsprechend den von ResMed mitgelieferten Anweisungen
eingesetzt und gewartet wird, sollte ein sicherer und zuverlässiger Betrieb
gewährleistet sein. Während der Lebensdauer des Akkus ist keine Wartung
notwendig.
Die Lebensdauer der RPS II beträgt über 500 Ladezyklen. Nach 500 Ladezyklen beträgt
die Kapazität des Akkus nur noch 60% der Originalkapazität. Ein voll aufgeladener
älterer Akku hat eine geringere Kapazität als ein voll aufgeladener neuer Akku. ResMed
empfiehlt, die RPS II regelmäßig auf Batteriedauer zu testen. Gehen Sie mit dem Gerät
wie mit allen elektrischen Geräten im Falle einer Störung äußerst vorsichtig um und
lassen Sie es von einem autorisierten ResMed Service-Center untersuchen.
Reisen
Bitte konsultieren Sie Ihre Fluggesellschaft, wenn Sie den Akku mit Ihrem Gerät an
Bord nehmen möchten.
Fehlersuche
Folgende Hinweise können Ihnen beim Beheben von Problemen helfen. Kann das
Problem nicht beseitigt werden, wenden Sie sich bitte an Ihren ResMed-Fachhändler
oder direkt an ResMed. Versuchen Sie nicht, den Akku zu öffnen.
Problem/Mögliche Ursache Lösung
Das Gerät schaltet sich nicht ein.
Die Spannungsversorgung ist
unterbrochen. Überprüfen Sie alle Kabel und schließen Sie sie den
Anweisungen im Abschnitt „Aufbau“ entsprechend an.
Die RPSII ist entladen. Schließen Sie das Gerät an die Netzversorgung an
und laden Sie die RPSII auf.
Die RPSII ist ausgeschaltet. Schalten Sie den Schalter DC Ein/Aus auf Ein.
Other manuals for Power Station II
6
Table of contents
Languages:
Other ResMed Batteries Pack manuals