Resolution RE116-U User manual

USE THIS MANUAL IF USING THE SPECIAL TRANSMITTER TO SEND
SIGNAL TO SIREN
RE116-U Universal Wireless Siren Instructions Page 1 of 4 29-Oct-14
24-Hour Tech Support Line: (715)808-0164
www.ResolutionProducts.com
#2
#1
#2
#1
Battery
RE150 Special Transmitter
SIREN +
SIREN -
4.7K
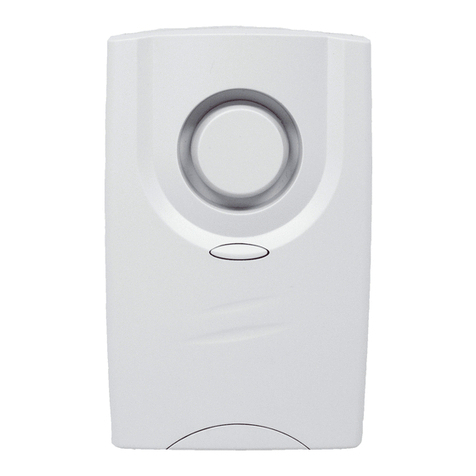
RE116-U Wireless Siren, Universal
using RE150 Spe ial Transmitter
Features
• Remote Wireless Siren
• Works with any panel with siren terminals
• Special transmitter at panel sends siren signals
• Siren cadence synchronized to panel
• Automatically follows panel beep volume
• Wall-powered with backup power on CR123A battery
• Can use multiple Sirens on one panel
• Cover tamper
• Unparalleled wireless range
• Low Battery indication
• 3x4x1.25 inches
• Siren can also respond to a GE Key Fob (instead of a Panel)
How it wor s:
Key Instructions
TYPICAL HARDWIRE CONNECTIONS
Refer to Siren Hardware Connections for specific panel connections and settings.
Connect Special Transmitter to Control Panel Siren:
•
Remove Special Transmitter battery during install.
•
MOUNT SPECIAL TRANSMITTER OUTSIDE
ANY METAL CANS!
1. Panel siren output
terminals signal alarm or
status beeps
2. Transmitter tells
wireless siren to make
noise, following siren
terminals pattern
3. Wireless siren
makes same noise
pattern as panel
4. Wireless siren sends
supervisories, low battery and
tamper statuses
( E systems only)
Special
Transmitter
More than one
siren can be
used
USE THIS MANUAL IF USING THE SPECIAL TRANSMITTER TO SEND
SIGNAL TO SIREN
RE116-U Universal Wireless Siren Instructions Page 2 of 4 29-Oct-14
24-Hour Tech Support Line: (715)808-0164
www.ResolutionProducts.com
ENROLLMENT
Open the Siren battery door giving access to the programming switches.
Power the Special Transmitter with its battery.
Power the Siren with its battery.
Enrolling Special Transmitter into Siren – to send panel siren signals to Siren
1. Put Siren Function in ENROLL Mode.
2. Press and release the Special Transmitter tamper switch.
The Siren will beep 4 times indicating enrollment.
3. IMPORTANT: Put cover on Special Transmitter.
4. Put Siren Function Switches in RUN Mode.
Select low volume or HIGH VOLUME status beeps
DO THESE STEPS ONLY IF PANEL IS A GE SYSTEM.
Enrolling Siren in Panel – to monitor both Special Transmitter and Siren
(Siren only talks GE wireless):
• If you want to have Siren monitor the Special Transmitter
In Step 2 above instead of using the Special Transmitter’s tamper switch to
enroll pull and replace Special Transmitter battery. Siren will beep 8 times.
IMPORTANT: You must NOT enroll Special Transmitter in panel.
Panel will go CRAZY with alarms.
5.After step 4 above enroll Siren into GE panel:
With Panel in enroll mode…Cycle tamper switch on Siren. Enroll in Group 10.
Put cover on Siren.
Plug Siren in wall.
System is ready to operate.
MULTIPLE SIRENS:
You can enroll multiple sirens in one system. Just enroll the same single original
Special Transmitter in the 2
nd
Siren. Simply repeat Steps 1-4 with the 2
nd
Siren.
TO DRIVE SIREN FROM KEY FOB (instead of driving Siren from Panel)
Repeat Steps 1-4 but use Key Fob Lock + Unlock instead of Special Transmitter.
TO CHECK SPECIAL TRANSMITTER SIREN LINK:
Tamper or install the battery in the Special Transmitter Siren will beep twice.
HIGH VOLUME STATUS BEE
PS
low volume status beeps
ENROLL
RUN
ENROLL
RUN
1
2
1 2
1
2
1 2
HIGH VOLUME STATUS BEEPS
low volume status beeps

USE THIS MANUAL IF USING THE SPECIAL TRANSMITTER TO SEND
SIGNAL TO SIREN
RE116-U Universal Wireless Siren Instructions Page 3 of 4 29-Oct-14
24-Hour Tech Support Line: (715)808-0164
www.ResolutionProducts.com
Operation
• Alarm
Siren follows panel alarm pattern.
Some panels (Lynx 2GIG) cannot drive siren without AC power.
• GE panels only:
• Supervision
Siren sends supervisory signals to panel IF:
Siren has AC power.
AND if Special Transmitter is enrolled in Siren…
Siren has heard signal from Special Transmitter in previous 60
minutes.
• Tamper
When cover is opened on Siren or on Special Transmitter if enrolled.
• Key Fob Response [if you instead enroll a GE-Compatible Key Fob into Siren]
Lock Low-level beeps for 5 seconds
Lock & Unlock High-level beeps for 5 seconds
Star Low-level beeps for 4 minutes
Star & Light High-level beeps for 4 minutes
Unlock Silence
Tamper Switch
Function
Switches
Red LED
• Enroll Mode:
Short ON flashes when
waiting to enroll Short
OFF after Special
Transmitter is enrolled
Green LED
• ON if AC Present.
• Flickers when
hearing wireless signals
from its enrolled
Transmitter.
Battery “+”
Battery isolator tab.
Remove.
Special Transmitter
Battery “+”
-
Terminal #1
+ Terminal #2
Wireless Siren
USE THIS MANUAL IF USING THE SPECIAL TRANSMITTER TO SEND
SIGNAL TO SIREN
RE116-U Universal Wireless Siren Instructions Page 4 of 4 29-Oct-14
24-Hour Tech Support Line: (715)808-0164
www.ResolutionProducts.com
Siren Specifications
Device Behavior: Siren Supervision in GE panels acts like a
Door/Window Battery & Tamper
Supervisory Time 64-68 minutes
Alarm Patterns: Follows panel Siren ON/OFF Directly
Shortest ON pulse: 250 ms
Shortest OFF Pulse: 250 ms
Alarm Sound Intensity 85dB minimum at 1m
Receiver: Dual antenna diversity
Transmitter> Dual antenna Dirersity
Electrical Connection: US 2-prong Electrical outlet blades
Mounting hardware: Secure with outlet plate mounting screw
Terminal wire capacity: 16 Gauge
Backup Battery Life: 48 hours cumulative non-rechargeable
Back-up Battery: CR123A 1550 mAH
Temperature Range: 0F to 120F
Housing dimensions: 3x4x1.25 inches
Specifications subject to change without notice.
Notices
“GE”, “Honeywell”, and “DSC” are trademarks owned by General Electric Company, Honeywell International Inc., and Tyco
Safety roducts Canada LTD, respectively.
Resolution roducts, Inc. products will function with one of either GE, DSC or Honeywell systems. However, no Resolution
product is produced by, endorsed by, nor is officially associated with GE, Honeywell or DSC. Resolution recommends verifying
proper enrollment and operation, per control panel installation instructions, at installation.
Warranty
Resolution Products, Inc. will replace products that are defective in their first five (5) years.
FCC Notice
This device complies with art 15 of the FCC rules. Operation is subject to the following two conditions:
This device may not cause harmful interference.
This device must accept any interference that may be received, including interference that may cause
undesired operation.
Changes or modifications not expressly approved by the Resolution roducts, Inc. could void the user's authority to
operate this equipment.
FCC ID: U5X-RE116 (Siren)
FCC ID: U5X-RE150 (Special Transmitter)
IC Notice
This device complies with Industry Canada license-exempt RSS standard(s). Operation is
subject to the following two conditions:
(1)This device may not cause interference, and
(2)This device must accept any interference, including interference that may
cause undesired operation of the device.
Le présent appareil est conforme aux CNR d'Industrie Canada applicables aux appareils
radio exempts de licence. L'exploitation est autorisée aux deux conditions suivantes :
(1)l'appareil ne doit pas produire de brouillage, et
(2)l'utilisateur de l'appareil doit accepter tout brouillage radioélectrique subi,
même si le brouillage est susceptible d'en compromettre le fonctionnement.
IC: 8310A-RE116 (Siren)
IC: 8310A-RE150 (Special Transmitter)
Other Resolution Security System manuals
Popular Security System manuals by other brands

ITI
ITI SX-V owner's manual
Digital Monitoring Products
Digital Monitoring Products XR40 Security Command Executive Series user guide

ADEMCO
ADEMCO VISTA-20PS user guide
TARGET TECHNOLOGY
TARGET TECHNOLOGY DUAL-4000-ANZ instruction manual
Logitech
Logitech Alert 700e Guide System Support Guide
Copper Connections
Copper Connections CCL BAS-GS manual
