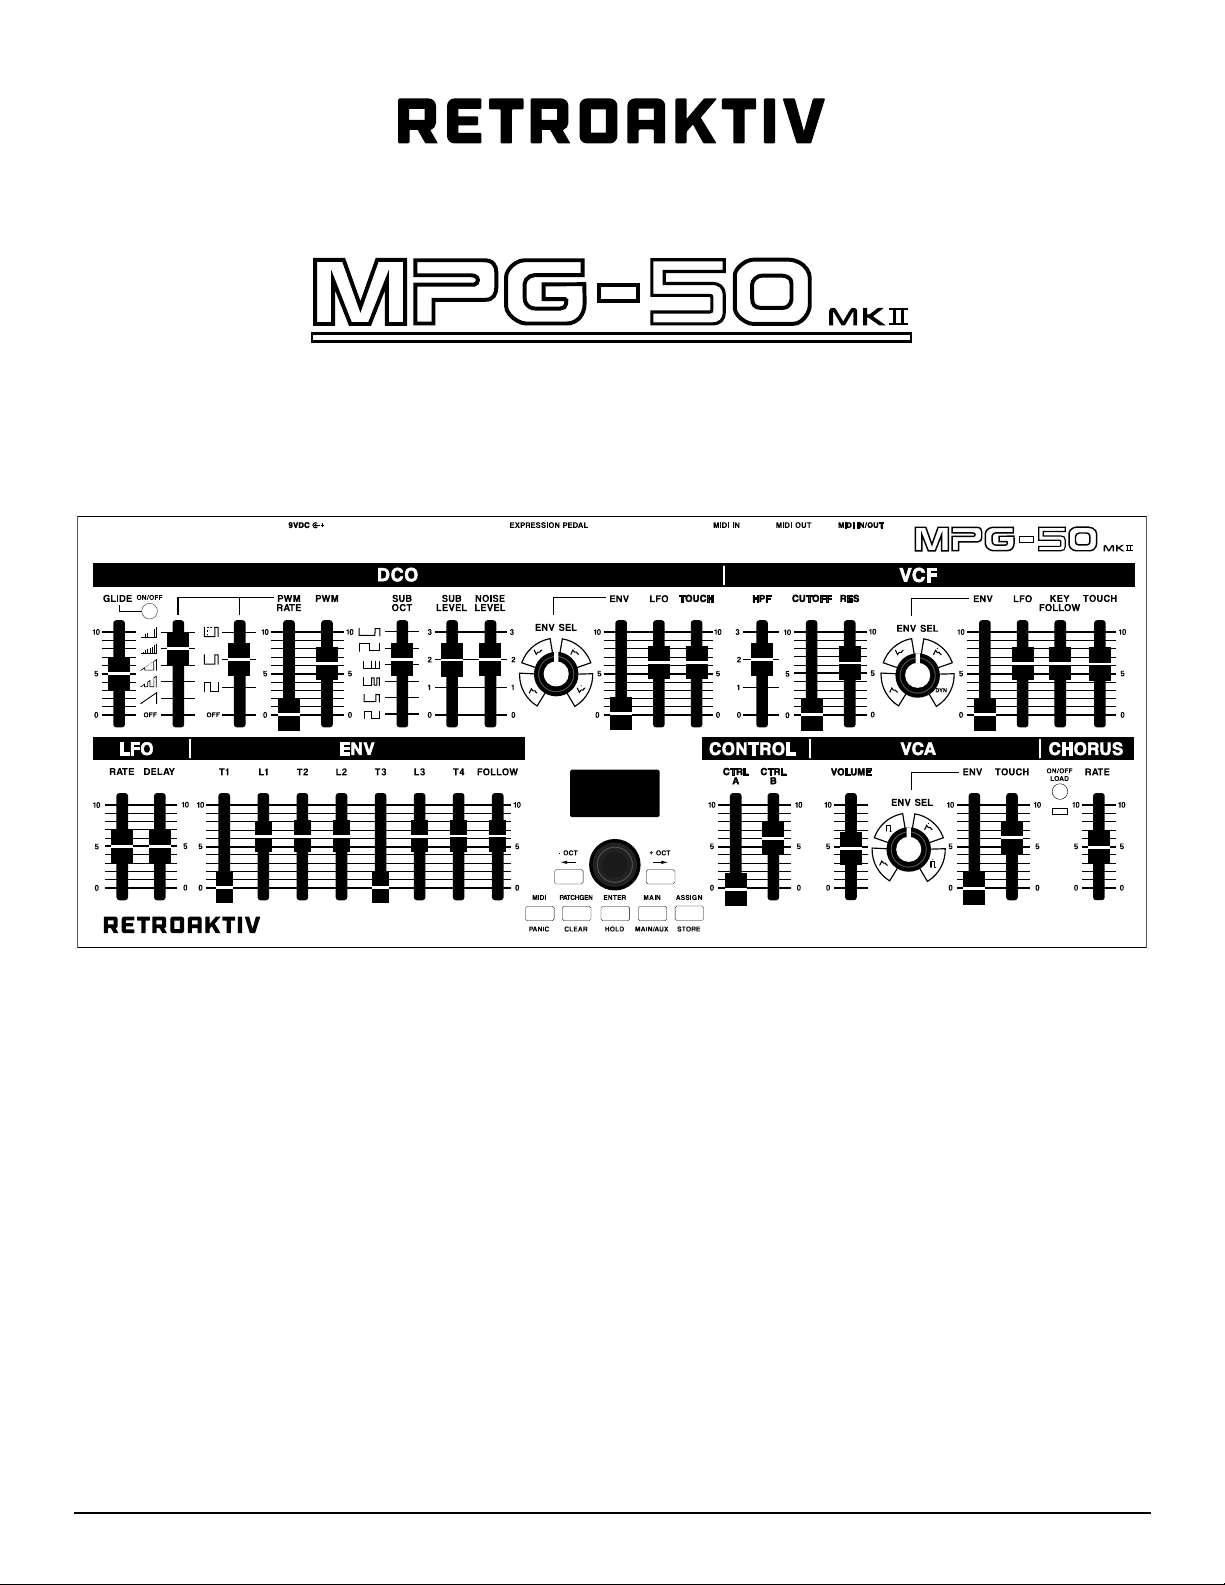
RETROAKTIV MPG-50 USER MANUAL
2
FEATURESFEATURES
Independent control of any combina-
tion of 2 Alpha Juno or MKS-50 syn-
thesizers.
Control 2 units independently, or as a
single 12-voice polyphonic synthesiz-
er, using Multi-Unit Poly Mode.
On-board 32k of memory for storing
patches, MIDI matrices (ASSIGN), and
setups on the controller. MKI units
can be expanded to 128K of object
storage. MKII units ship with 32K on-
board, expandable to 160K.
Flexible MIDI matrix allows multiple
parameters to be controlled inde-
pendently in real-time, using af-
teouch, mod wheel or any CC, an
expression pedal, or the two ASSIGN
sliders on the MPG-50 front panel.
Chord mode for playing any combina-
tion of notes using a single key. (This
is different than AJ CHORD mode)
Store any PATCH with the push of
a buon. MPG-50 eliminates the
“shared-tones” system of saving
sounds on the MKS-50. Each MPG-50
PATCH is stored as one object.
Intelligent patch generator creates new
tones and patches at the push of a buon.
Choose from Basses, pads, bells, strings
and more.
CC to sysex translation allows for DAWs
and sequencers to record and playback
parameter changes on MPG-50 in
realtime. Each of the 2 layers on the con-
troller can be controlled independently by
CCs.
Each ASSIGN, PATCH, and SETUP can be
changed using program and bank change
messages. Independent control of all
layers.
MPG-50 allows users to store and name
custom CC maps, allowing users to create
their own custom control maps for other
gear using the MPG-50 panel.
Receive or transmit banks, individual
patches, or a full memory backup of all
stored user objects. Sysex utility allows
users to quickly load, store, and back up all
of their favorite soundbanks.
MIDI bootloader allows users to use sysex
files to update their MPG-50 allowing for
more new features to be added in the
future.