manuals.online logo
Brands
  1. Home
  2. •
  3. Brands
  4. •
  5. retrotouch
  6. •
  7. Switch
  8. •
  9. retrotouch FUSED SPUR User manual

retrotouch FUSED SPUR User manual

INSTALLATION WARNINGS:
BEFORE COMMENCING
INSTALLATION ISOLATE YOUR
MAINS ELECTRIC SUPPLY
Read the instructions care fully before starting the
installation process and keep them for future reference.
This product must be installed by a qualified electrician.
This product should be installed in accordance with the
relevant sections of the building regulations code, and the
current edition of the IEE Wiring Regulations (BS
7671:Requirements for electrical installations) and
appropriate statutory regulations.
Do not exceed the Maximum Power Rating:
INSTALLATION
Remove the glass panel
Using a flat screwdriver. Insert the screw driver in the
location notch on the bottom of the cover and twist to
unclip the cover.
Wiring
Wire as shown in the diagram. Push wires firmly into
terminals and tighten terminal screws so that wires are held
securely. No bare wires should protrude from the terminals.
Ensure correct wires are connect to the correct terminals, if
incorrectly wired, this could damage the product.
RATING 13A VOLTAGE 250V~
BS 1363/4 CE CERTIFIED
PATENT PENDING
Fix screws:
Use the screws supplied to attach the unit to backbox
using a flat head screwdriver
Reattach the glass panel:
Align the glass panel at the top edge (A) of the fused spur
and firmly push at the base (B) to click in to place.
Changing the fuse
With the switch in the OFF position the button removal
slot will be visable at the base of the button. Insert a
screwdriver in the notch then twist and lift to unclip the
button to access the fuse. Use a flat head screwdriver to
open the fuse holder.
Optional Flex outlet
Punch out the highlighted plastic sections on the base and
the button cover. Insert the load cable first before wiring and
tighten across outer sheath of cable using the cable clamp on
the back of the fused spur.
FUSED SPUR
INSTRUCTION MANUAL
Wire identification - Twin & Earth Cable
As from 1st April 2004 new colour codes for hard wire installations was introduced.
EARTH = Green/Yellow Sleeving
NEUTRAL = Black (pre Apr 04) / Blue (After Apr 04)
LIVE = Red (Pre Apr 04 / Brown (After Apr 04)
SUPPLY LOAD
INSTALLATION
Remove the glass panel
Using a flat screwdriver. Insert the screw driver in the
location notch on the bottom of the cover and twist to
unclip the cover.
Wiring
Wire as shown in the diagram. Push wires firmly into
terminals and tighten terminal screws so that wires are held
securely. No bare wires should protrude from the terminals.
Ensure correct wires are connect to the correct terminals, if
incorrectly wired, this could damage the product.
GUARANTEE
10 year Guarantee (from date of purchase). Please keep
proof of purchase.
If any of our products become faulty within this 1 year
period, please contact us. Please send product/s by recorded
post, as proof of dispatch as we cannot be held liable for
products lost in the post. If the product is found to be faulty,
a replacement shall be sent within 7 working days from date
received. In all cases, an identical replacement shall be sent,
however, if the product has been discontinued a suitable
alternative shall be sent with the same or similar
specification.
Fix screws:
Use the screws supplied to attach the unit to backbox
using a flat head screwdriver
Reattach the glass panel:
Align the glass panel at the top edge (A) of the fused spur
and firmly push at the base (B) to click in to place.
Changing the fuse
With the switch in the OFF position the button removal
slot will be visable at the base of the button. Insert a
screwdriver in the notch then twist and lift to unclip the
button to access the fuse. Use a flat head screwdriver to
open the fuse holder.
Optional Flex outlet
Punch out the highlighted plastic sections on the base and
the button cover. Insert the load cable first before wiring and
tighten across outer sheath of cable using the cable clamp on
the back of the fused spur.
TEL: 01293 279 426
SALES@RETROTOUCH.CO.UK
WWW.RETROTOUCH.CO.UK
INSERT AND TWIST
BASE OF BUTTON TO
REVEL HIDDEN FUSE

Other retrotouch Switch manuals

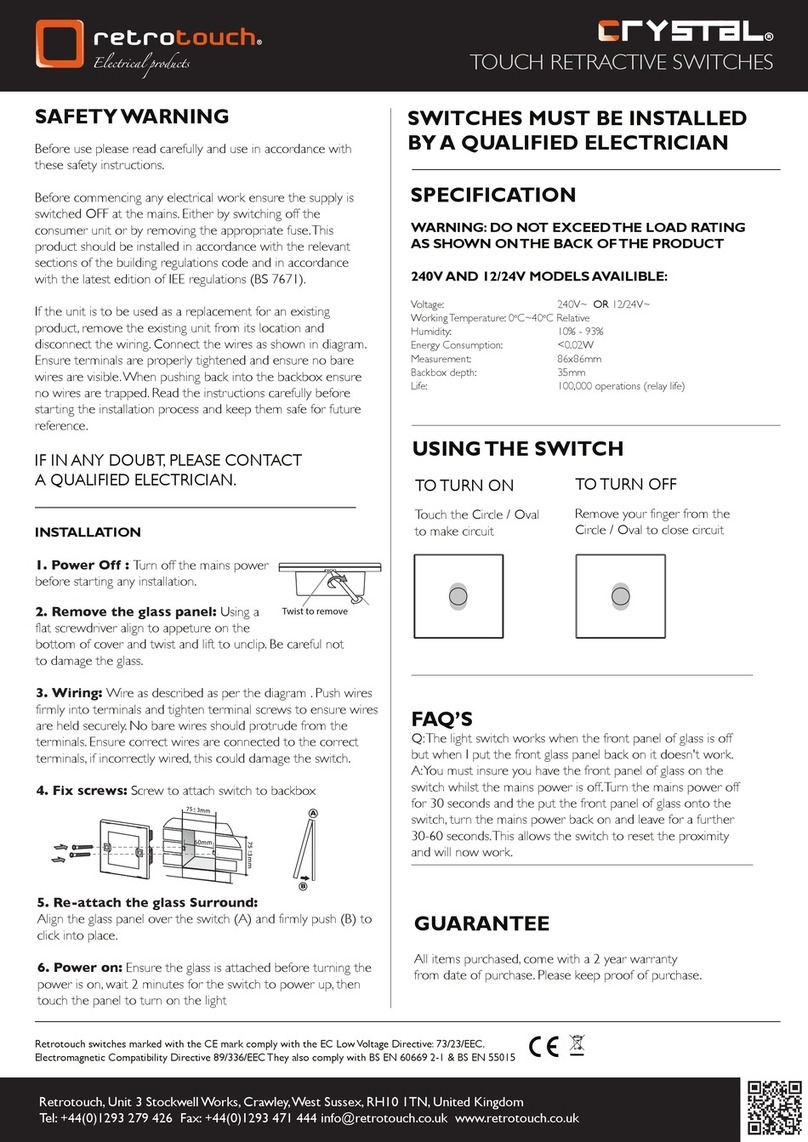
retrotouch Crystal 240V User manual

retrotouch

retrotouch Crystal 240V User manual

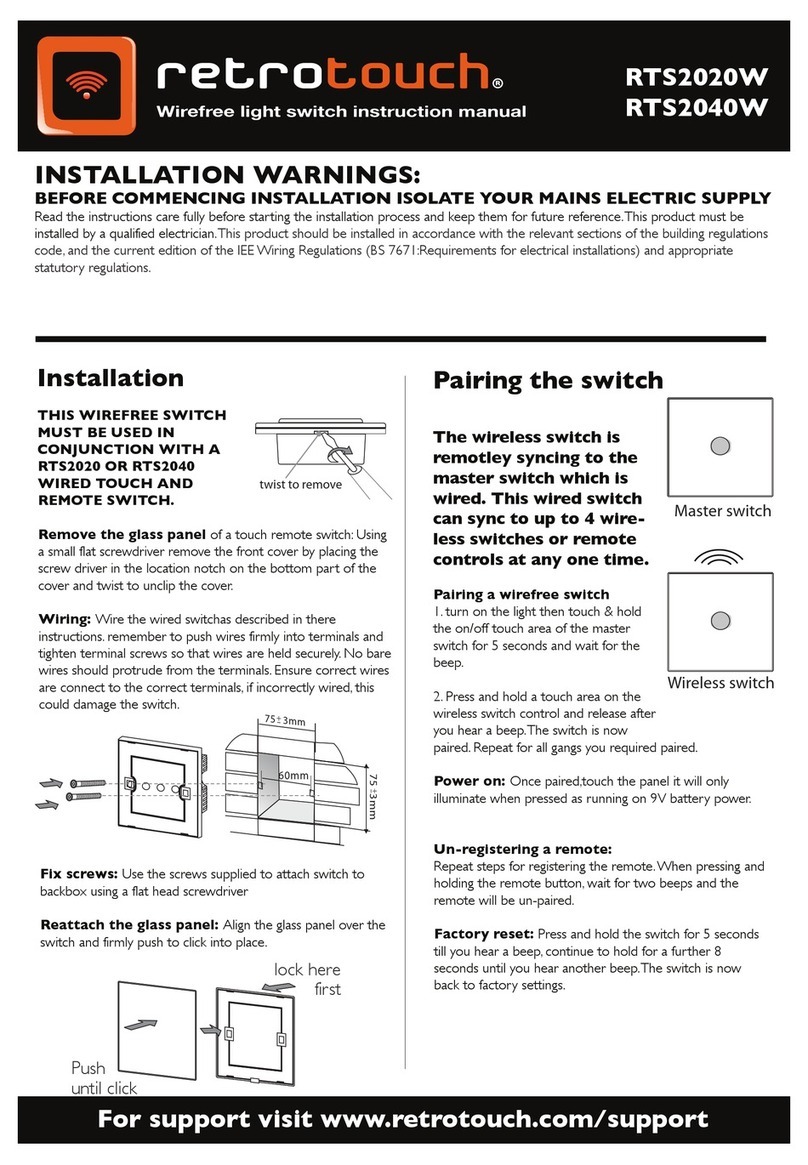
retrotouch RTS2020W User manual

retrotouch

retrotouch RTS2020W User manual

Popular Switch manuals by other brands

D-Link DGS-1005D - Switch user guide

D-Link

D-Link DGS-1005D - Switch user guide

ANTAIRA LNX-1604G-SFP Series user manual

ANTAIRA

ANTAIRA LNX-1604G-SFP Series user manual

HPE FlexNetwork 10500 SERIES Command reference

HPE

HPE FlexNetwork 10500 SERIES Command reference

Neol ePowerSwitch 8M+R2 user guide

Neol

Neol ePowerSwitch 8M+R2 user guide

Link electronics ASW-822 Specification sheet

Link electronics

Link electronics ASW-822 Specification sheet

NETGEAR GS108PP installation guide

NETGEAR

NETGEAR GS108PP installation guide

ZooZ ZEN34 user manual

ZooZ

ZooZ ZEN34 user manual

Daxten SCOUTUTP - brochure

Daxten

Daxten SCOUTUTP - brochure

Minicom Minicom Smart 116 IP user guide

Minicom

Minicom Minicom Smart 116 IP user guide

HP 6127XLG Blade Series Command reference

HP

HP 6127XLG Blade Series Command reference

NETGEAR FS108 - ProSafe 10/100 Desktop Switch Product data

NETGEAR

NETGEAR FS108 - ProSafe 10/100 Desktop Switch Product data

Cisco Nexus 9372PX Configuration guide

Cisco

Cisco Nexus 9372PX Configuration guide

Allied Telesis AT-GS950/10PS user guide

Allied Telesis

Allied Telesis AT-GS950/10PS user guide

hager EMN005 User instructions

hager

hager EMN005 User instructions

Manhattan MondoHub II instructions

Manhattan

Manhattan MondoHub II instructions

Belkin OmniView ENTERPRISE Quad-Bus Series Quick installation guide

Belkin

Belkin OmniView ENTERPRISE Quad-Bus Series Quick installation guide

Samson 3738-50 Configuration manual

Samson

Samson 3738-50 Configuration manual

Linksys SRW2008MP Product data

Linksys

Linksys SRW2008MP Product data

manuals.online logo
manuals.online logoBrands
  • About & Mission
  • Contact us
  • Privacy Policy
  • Terms and Conditions

Copyright 2025 Manuals.Online. All Rights Reserved.