Air Quality CO2 Monitor
DT-326
1. Description
The Carbon Dioxide (CO2) Monitor is designed for air quality control and health
control by measuring Carbon Dioxide (CO2) level in areas where it needs to be
monitored, such as factories, schools, offices, transportation lines and so on.The
measured CO2value in ppm (parts-per-million) will be displayed on the LCD with
three acoustic alarm sounds when then CO2level is exceeding the define level.
2. Feature
• NDIR (non-dispersive infrared) CO2sensor
• Checks for Carbon Dioxide (CO2) concentrations
• Indoor Air Quality displayed in ppm with Good (0 to 800ppm), Normal (800
to1500ppm), Poor (>1500ppm) indication
• Easy to read, large dual display
• Simultaneously displays (CO2) concentrations,Air Temperature and Humidity
• Adjustable carbon dioxide refresh frequency.
• Adjustable carbon dioxide alarm function in the range of 0-5000 ppm.
• Air quality indicator function.
• low battery indication.
3. Specifications
Range Accuracy Resolution
CO20 to 5000ppm ±75 ppm ±5% of reading 1 ppm
Temperature -10 to 50oC ±1oC 0.1oC/oF
Humidity 0 to 100 %RH
±3.5 %RH (20%RH-80%RH)
±5%RH (0%RH-20%RH/
80%RH-100%RH)
0.1 %RH
Power supply 1.5V AA Battery * 2
Charging Micro USB DC 5V 1A
Working temperature -10 to 50oC
Storage temperature -10 to 60oC
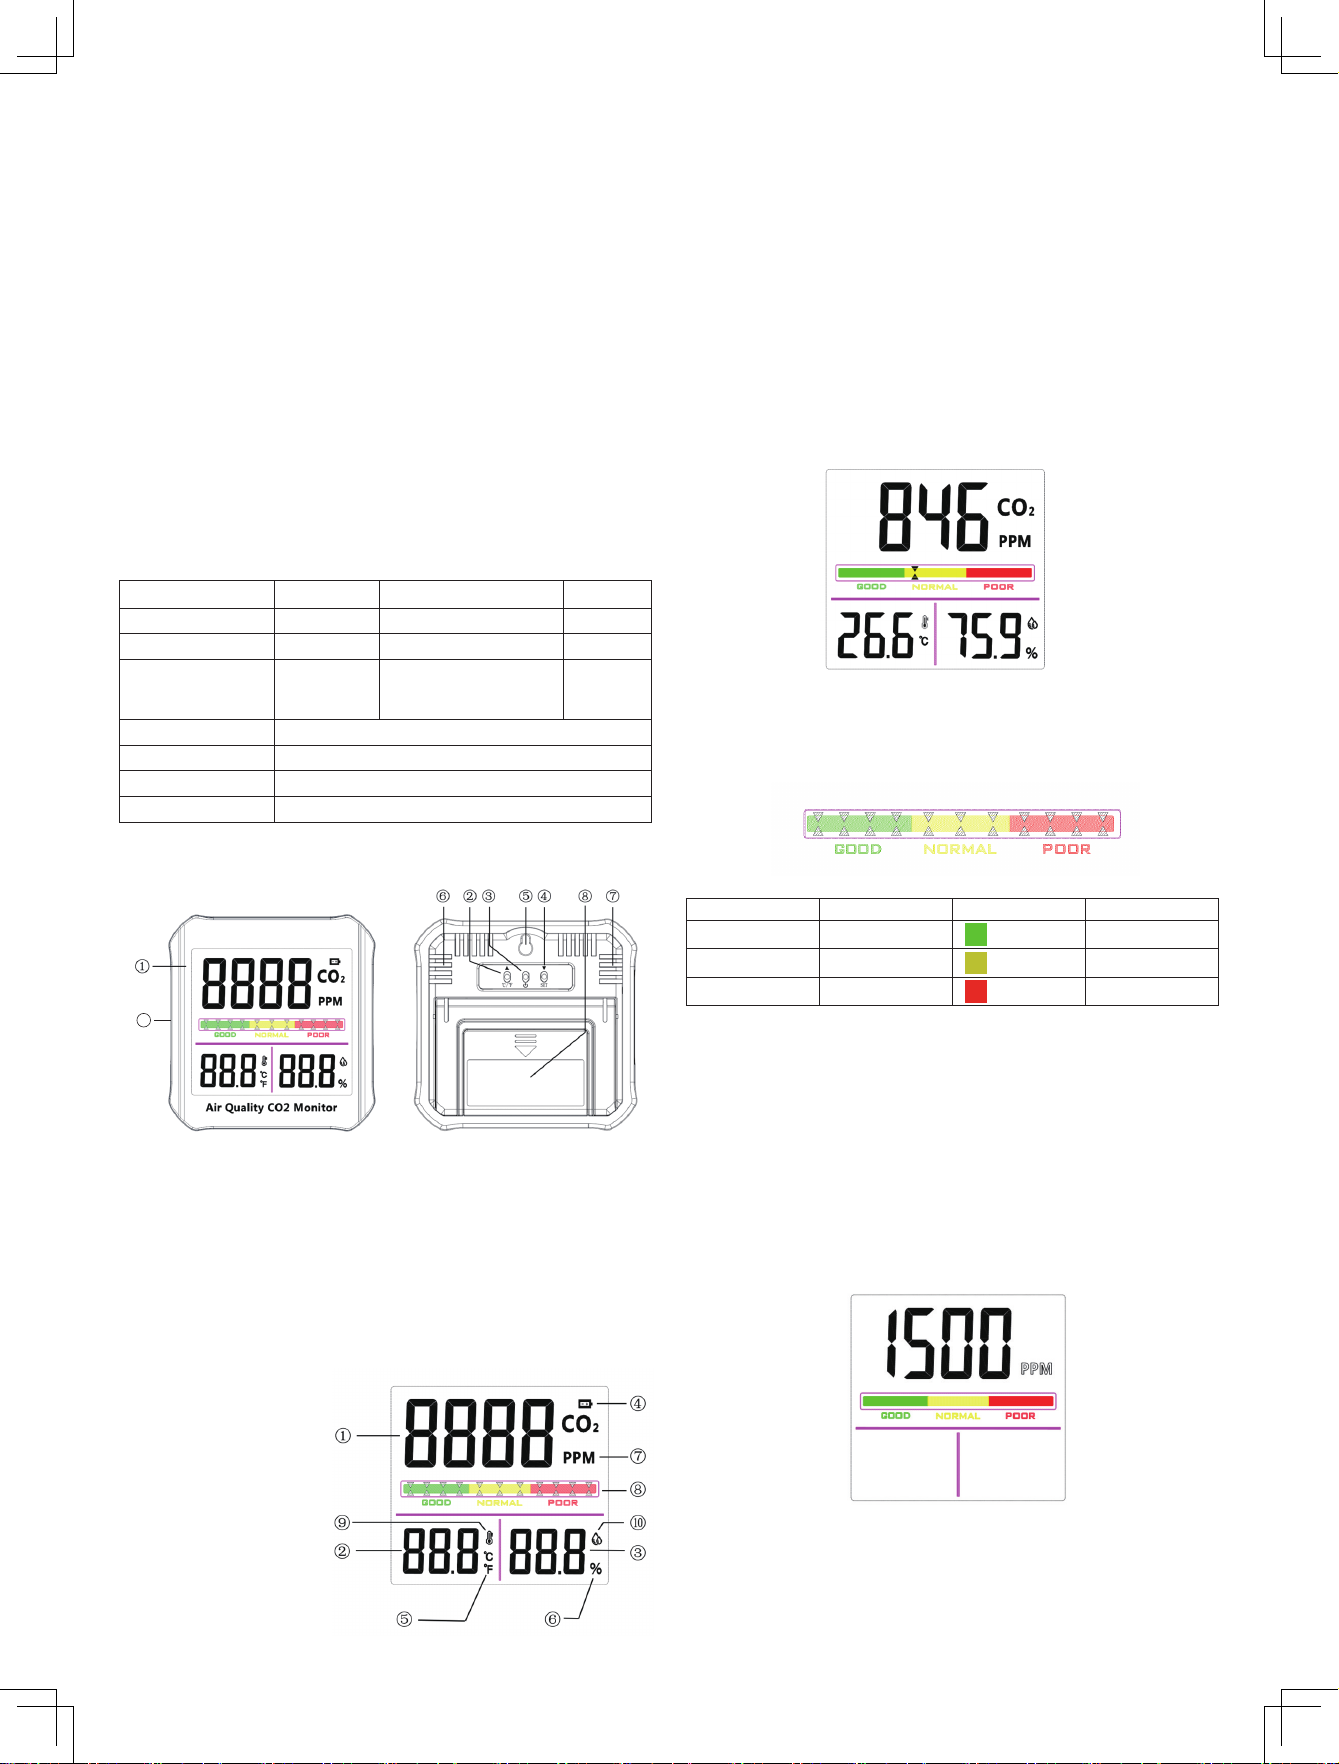
4.Names and function of parts LCD display
1. LCD
2. °C/°F Switch Function Button (UP Button)
3. Power Button
4. SET Button(UP Button)
5. Instrument Hang Buckle Point
6. CO2sensor
7. Temperature and humidity sensor
8. Battery Cover
9. Power supply Micro USB DC 5V 1A
5. LCD Introduction (Below is the Picture of LCD)
1. CO2display value
2. Temperature display value
3. Humidity display value
4. Battery power icon
5. Temperature unit : Celsius
and Fahrenheit
6. Humidity unit : %RH
7. CO2unit : PPM
8. Color screen printing and air
quality indication
9. Temperature icon
10.Humidity icon
6. Operation Instructions
Key function
In the measurement mode:
Press the °C/°F switch function button briefly will switch between Celsius and
Fahrenheit;
Press the SET button briefly to enter the setting mode;
Long press the power button to shut down;
In the setting mode:
Press the °C/°F switch function button briefly to increase the corresponding
(flashing) value;
Press the SET button briefly to decrease the corresponding (flashing) value;
Press the power button briefly to switch between alarm value setting and CO2
refresh frequency setting;
Long press the SET button to save the set value and exit the setup mode;
Long press the power button to shut down.
·Start measuring
Install 2 x AA 1.5V batteries; Power supply Micro USB DC 5V 1A.
Press the power button to start the instrument;
After starting up,CO2updates the data according to the set frequency;
The temperature and humidity update the real-time data once every second;
Air environment indication function:
Range(PPM) Grid Color Grade
<800 1 GOOD
800~1500 2 NORMAL
>1500 3 POOR
The analog bar in the middle of the liquid crystal will indicate the current
environmental quality according to the CO2concentration.
Setting mode
Alarm value setting mode
After entering the setting mode, the alarm value setting mode will be entered
firstly;
Alarm value setting: PPM is displayed, CO2value flashes, and alarm value unit is
ppm. When press the “ ▲” or “ ▼” button , the alarm value will be increase by
10ppm or decrease by 10ppm.the default value is 1500;
Alarm value setting mode diagram is as follows:
CO2sampling frequency setting mode
In the alarm value mode,press the power button briefly to enter CO2sampling
frequency setting mode.
9


