manuals.online logo
Brands
  1. Home
  2. •
  3. Brands
  4. •
  5. Reznor
  6. •
  7. Gas Heater
  8. •
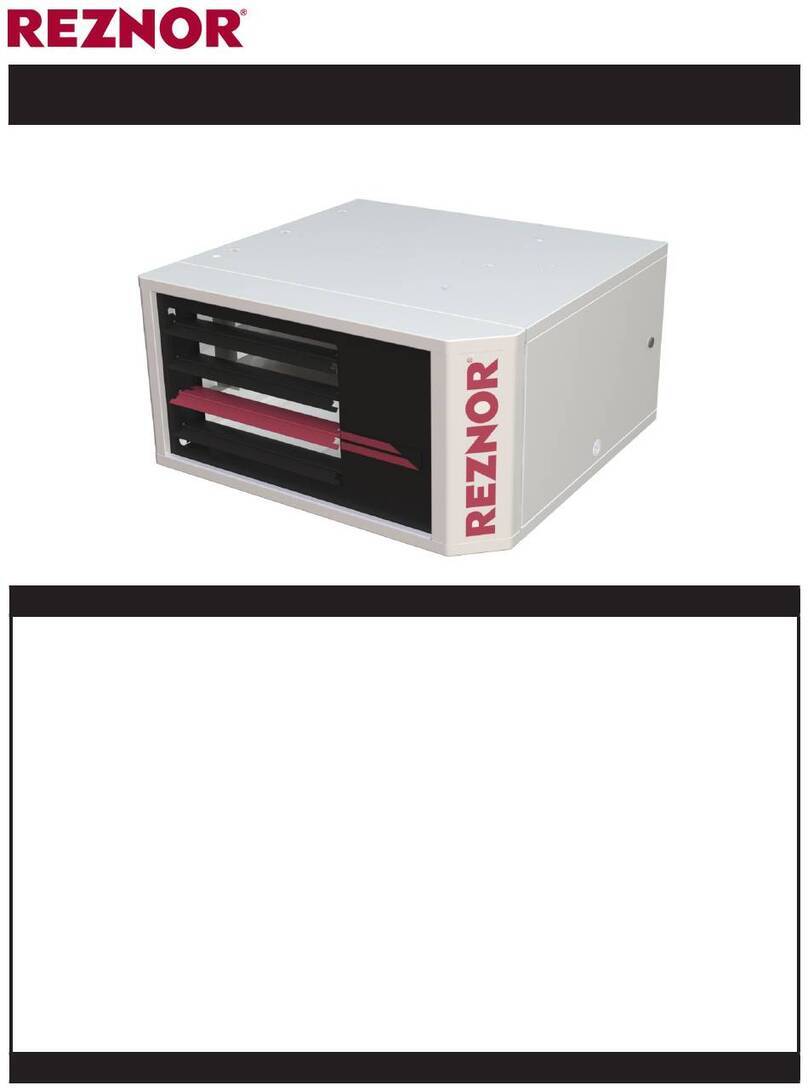
  9. Reznor VPS Series User manual

Reznor VPS Series User manual


PROPANE CONVERSION INSTRUCTIONS
(INCLUDING HIGH ALTITUDE ADJUSTMENT)
Applies to: Gas-Fired, Tubular Radiant,
Low-Intensity Infrared Heater
Models VPS, VPT, VCS, VCT
Part no. 270686Form CP-VC/VP-GC (Version B) 
2

VPS MODEL NUMBERS
60 80 100 125 150 170 200
Conversion Kit Required 270619 270620 270621 270622 270623 270627 270628
Step Operation
1Burner Orifice
Replacement SECTION 1
2Fit Turbulators SECTION 2 
3Fit Flame Plate SECTION 3
4Replace Gas
Orifice SECTION 4a SECTION 4b 
5Install Baffle Plate SECTION 5 NOT REQUIRED
6Refit Burner Head SECTION 6
7Convert Gas
Valve SECTION 7a
8Replace Air
Pressure Switch NOT REQUIRED SECT 8a
9Replace Fan
Orifice SECTION 9a SECT 9b
10 Replace Data
Badge SECTION 10
11 Re-commissioning SECTION 11/12
NOT REQUIRED
VPS Conversion Step By Step
Please note: The LPG gas pressure must be reset according to the values in Section 12.
3

VPT, VCS, VCT MODEL NUMBERS
60 80 100 125 150 170 200
Conversion Kit Required
VCS 270619 270620 270621 270622 270623 270627 270628
Conversion Kit Required
VPT/VCT 270619 270620 270621 270622 270623 270626 270628
Step Operation
1Burner Orifice
Replacement SECTION 1
2Fit Turbulators SECTION 2 NOT REQUIRED
3Fit Flame Plate SECTION 3
4Replace Gas
Orifice SECTION 4a SECTION 4c 
5Install Baffle Plate SECTION 5 NOT REQUIRED
6Refit Burner Head SECTION 6
7Convert Gas
Valve SECTION 7b
8Replace Air
Pressure Switch NOT REQUIRED SECT 8b
9Replace Fan
Orifice SECT
9c NOT
REQ *SECT 9d 
10 Replace Data
Badge SECTION 10
11 Re-commissioning SECTION 11/12
SECTION 9c 
*VCS 170 = SECTION 9c, VPT 170, VCT 170 SECT 9d
VPT, VCS, VCT Conversion Step By Step
Please note: The LPG gas pressure must be reset according to the values in Section 12.
4





B
Q L
M
H

R

P

S
VPS Model
Part Code Description
B Gas Valve
H Gas orifice
L Pressure Switch
M Gaskets
P Burner Orifice Plate
Q Flame Plate Location (plate not shown)
R Fan Orifice Plate
S Baffle Plate Location (plate not shown)
5






B
Q
L
M
H

R

P 
S
VPT, VCS/T Models
Part Code Description
B Gas Valve
H Gas orifice
L Pressure Switch
M Gaskets
P Burner Orifice Plate
Q Flame Plate Location (plate not shown)
R Fan Orifice Plate
S Baffle Plate Location (plate not shown)
Not on VCS models
6

Section 1
Burner Orifice Plate Replacement (all models).
Step 1: Remove the four retaining screws securing
the burner casting using a no. 2 crosshead
screwdriver.
Step 3: The burner head assembly can now be
disconnected by separating the connectors of the
ignition and flame probe lead assemblies and
removing the ground lead and pressure switch silicon
tube.
Step 2: Remove the supporting casting and gasket.
Step 4: The burner orifice plate can then be released
by removing the 3 fixing screws from the burner tube
using a No.2 crosshead screwdriver.
Step 5: Using a flathead screwdriver remove the
retaining washer securing the impulse stud (arrowed).
Remove the stud. Remove the cable grommet from
the old orifice plate and attach to the replacement
plate.
Step 6: Fit new propane burner orifice plate to burner
tube ensuring the impulse stud is facing the correct
direction. The cable grommet is fitted to the lower of
the 3 holes at the bottom of the plate (arrowed). Two
new gaskets are provided and should be used when
reconnecting to the burner housing. Dispose of the old
gaskets.
See Section 13 for correct burner orifice plate
identification.
Section 2
Turbulator Information.
These heaters have a different arrangement of
turbulators and tube inserts when operating on LPG.
This section will guide you through the process of
changing these components where necessary.
7

Flame Plate Identification
Figure 1: Tube Insert
Length 5൐(1524mm)
Part No. 270489 (201688)
Figure 2: Turbulator
Length 4൐3" (1277mm)
Part No. 270495 (202422)
Step 1: Prior to conversion a number of the natural
gas heaters use a tube insert Part No. 270489
(201688) See Figure 1.
This is not required when operating on LPG, please
check inside the firing leg. If fitted, remove and
discard.
Step 2: If your heater is a 20’ long model, fit the
turbulator Part No. 270495 (202422). See Figure 2.
(Note: This turbulator is already fitted to the 20’ VPT/
VCT heaters)
Section 3
Flame Plate Attachment (all models).
Step 1: Remove the 3 screws holding the burner head
in place with a no. 2 crosshead screwdriver.
Step 2: Discard the spacer bracket arrowed below.
Step 4: Attach flame plate to the burner tube using
the 3 screws removed in step 1. Ensure the flame
plate is mounted ON TOP of the original burner
head.
Step 3: Align the 5 holes in the flame plate (arrowed)
with the 5 holes on the outer edge of the burner
head as shown.
269957
269958
269959
269960
8

Section 4a
Gas Orifice Replacement (60kBTU to 150kBTU
models only).
Step 1: Remove the burner casting as detailed in
section 1.
Step 2: Using a 12mm wrench remove the gas
orifice from the jet carrier by rotating
counter-clockwise.
Step 3: Replace the gas orifice with the propane
alternative ensuring an approved gas sealant is used
on the thread. DO NOT OVERTIGHTEN.
See Section 13 for gas orifice identification.
Section 4b
Gas Orifice Replacement (VPS 170kBTU to
200kBTU models only).
Step 1: Remove the burner casting as detailed in
section 1.
Step 2: Remove the two securing screws from the
base of the manifold, noting the ground terminal
connection.
Step 3: Remove the four screws holding the rear
burner plate in position (arrowed). Remove the rear
plate.
.Step 4: The manifold/gas orifice can now be
detached from the gas valve. The two screws
retaining the gas valve can then be removed.
Step 5: Replace the manifold/gas orifice with the
propane alternative ensuring an approved gas
sealant is used on the thread. DO NOT
OVERTIGHTEN.
See Section 13 for gas orifice identification.
9

Section 5
Baffle Plate Installation (60kBTU to 100kBTU
models only).
Step 1: Locate the baffle plate in the LP conversion
kit.
Step 2: Carefully insert the baffle plate at an angle
through the combustion chamber opening, making
sure that the holes are positioned towards the holes
at the front of the burner box.
For VC burners there will already be 2 screws
located in these holes. Remove these screws before
proceeding.
Section 4c
Gas Orifice Replacement (VPT/VCS[T] 170kBTU
to 200kBTU models only).
Step 1: Remove the burner casting as detailed in
section 1.
Step 2: Remove the two securing screws from the
base of the orifice manifold, noting ground terminal
connection.
Step 3: Remove the four screws securing the base
plate and remove.
Step 4: Remove the gas valve wiring connections,
noting their positions.
Step 5: Remove the four screws (arrowed) securing
the gas valve inlet plate to the burner housing and
remove plate. Remove gas valve rearwards.
Step 6: The jet manifold/gas orifice can now be
detached from the gas valve.
Step 7: Replace the jet manifold/gas orifice with the
propane alternative ensuring an approved gas
sealant is used on the thread.
DO NOT OVERTIGHTEN.
Step 3: Align the holes and screw the baffle plate to
the burner box using the self tapping screws supplied.
10

Section 6
Refitting Burner Head (all models).
Step 1: Reconnect the ignition and flame probe leads,
the ground lead and pressure switch silicon tube. Take
care to pass the leads and silicone tube through the
gasket. New gaskets are provided. The old gaskets
should be disposed of accordingly.
Step 2: Locate the burner head assembly over the
gas orifice ensuring the leads do not get pinched
between the orifice plate and burner housing.
Step 3: Refit the gasket and casting over the burner
head tube and fix with the original screws.
Section 7a
Gas Valve LP Conversion (VPS).
Step 1: To gain access to the gas valve loosen screw
in burner lid and open the right hand burner access
door.
Step 2: Remove the gas valve regulator cover screw
(brass).
Step 3: Remove the adjustment screw (white)
beneath cover screw.
Step 4: Remove natural gas regulator spring
(color-coded silver/plain) from regulator sleeve.
Step 5: Insert the LP regulator spring (provided in the
conversion kit and color-coded white) into the
regulator sleeve.
Step 6: Replace the regulator adjustment screw and
adjust approximately 8 turns clockwise from the
beginning of the thread.
Step 7: Adjust gas pressure as detailed in Section
11a or 11b.
Step 8: Replace regulator cover screw.
Step 9: Attach warning label to outside of burner
housing where it can be readily seen.
Step 10: Fit small round LP label to the top of the
converted gas valve cover screw.
11

Step 2: Remove the gas valve regulator cover
screw(s) (brass).
Step 3: Remove the adjustment screw(s) (white)
beneath cover screw/screws.
Step 4: Remove the natural gas regulator spring(s)
(color-coded silver/plain) from regulator sleeve(s).
Section 7b
Gas Valve LP Conversion (VPT, VCS/T).
VPT / VCT burners have a two-stage gas valve.
VCS burners have a single stage gas valve.
Step 1: To gain access to the gas valve, remove the 4
screws securing the bottom access panel with a no. 2
crosshead screwdriver. Remove panel.
Step 5: Insert the LP regulator spring(s) (provided in
the conversion kit and color-coded white) into the
regulator sleeve(s).
Step 6: Replace the regulator adjustment screw(s)
and adjust approximately 8 turns clockwise from the
beginning of the thread.
Step 7: Adjust gas pressure as detailed in Section
11a or 11b.
Step 8: Replace regulator cover screw.
Step 9: Attach warning label to outside of burner
housing where it can be readily seen.
Step 10: Fit small round LP label to the top of the
converted gas valve cover screw.
12

Step 4: Fit the new air pressure switch (with red
label), ensuring the cables and terminal cap are
installed correctly and the silicon tubes are connected
as shown below.
Section 8a
Air Pressure Switch Replacement (200kBTU VPS).
Step 1: To gain access to the pressure switch loosen
screw in burner lid and open left hand access door.
The pressure switch has a brown label.
Step 2: Disconnect the silicone tubes, cables and
terminal cap from the pressure switch.
Step 3: Remove the two screws arrowed below.
Step 5: Close access door and tighten screw in
burner lid.
Section 8b
Air Pressure Switch Replacement (200kBTU VPT,
VCS/VCT).
Step 1: The pressure switch can be accessed by
removing the top panel at the rear of the burner. This
is secured by 4 screws.
Step 2: Disconnect the silicone tubes, cables and
terminal cap from the pressure switch.
13

Step 3: Remove the two electrical chassis retaining
screws (arrowed).
Step 4: The air pressure switch can now be removed
by unscrewing from the back plate.
It may be necessary to partially disconnect the chassis
wiring to access the pressure switch mounting screws
at the rear.
Step 5: Fit the new air pressure switch (with a red
label) ensuring the cables and terminal cap are
installed correctly and the silicon tubes are connected
as shown below.
Step 6: Close access door and replace the fixing
screws.
Section 9a
Fan Orifice Plate Replacement (3 screws VPS).
Step 1: Remove the 3 off 8mm nuts (arrowed) securing
the fan orifice plate with an 8mm wrench. Slide orifice
plate off the 3 protruding studs.
Section 9b
Fan Orifice Plate Replacement (4 screws VPS).
Step 1: Using a No.2 crosshead screwdriver remove
the four screws (arrowed) securing the fan orifice plate.
Remove plate.
Step 2: Fit the replacement fan orifice plate. Re-attach
the 3 x 8mm nuts (arrowed) turning clockwise, using
the wrench to secure to the combustion fan.
Take care not to cross thread the fasteners.
See Section 13 Table 1 for correct fan orifice
plate identification.
For high altitude conversion see Section 12 for
correct high altitude fan orifice plate identification.
Step 2: Fit the replacement fan orifice plate and
secure with the same four screws.
See Section 13 Table 2 for correct fan orifice
plate identification.
Take care not to cross thread the screws.
14

Section 9c
Fan Orifice Plate Replacement (3 screws VPT, VCS/
VCT).
Step 1: Remove the top cover of the burner using a no.2
crosshead screwdriver to expose the combustion fan.
Step 2: Remove the four screws (arrowed), three of
which can not be seen in the photograph. Lift out the
fan assembly to access the fan.
Step 3: Follow the procedure in Section 8a to change
the fan orifice plate.
See Section 13 Table 3 for correct fan orifice
plate identification.
Step 4: Refit the fan and cover.
Section 9d
Fan Orifice Plate Replacement (4 screws VPT, VCS/
VCT).
Step 1: Remove fan following procedure in Section 8c.
Step 2: Follow procedure in Section 8b to change the
fan orifice plate.
See Section 13 Table 4 for correct fan orifice
plate identification.
Step 3: Refit the fan and cover.
Section 10
Data Badge Replacement (all models).
Ensure the single stage LP conversion label is
used on VPS/VCS burners and the two-stage LP
conversion label is used when converting VPT/VCT
burners.
Step 1: Locate the LP conversion data label.
Step 2: Indicate the altitude setting of the appliance by
placing an ‘X’ in the appropriate box highlighted below.
Step 3: Affix new label over the technical data section
of the natural gas data label as shown below.
15

Section 11
Re-commissioning (all models).
Check installation has been
carried out to these instructions.
NO
YES
Replace burner on tube
and secure.
Reconnect gas hose. Open manual valve.
Check soundness.
Check thermostat is set to
maximum and is calling for heat.
Switch on electrical supply. The red
neon should now be illuminated. If
restarting heater a delay of 15sec
should be allowed.
The heater should now
run through its start up
sequence and ignite.
Turn off power and check
that all components are
securely fastened.
Has the
burner lit?
Check operation on flame failure.
Check gas pressure.
Set gas pressure.
(refer to Section 12a or 12b)
Close control housing.
Leave these instructions
with a responsible person. Check operation of
air pressure switch.
Open control housing and check that
all components are securely fastened.
A successful ignition is indicated
by the amber light illuminating
and remaining illuminated.
Once gas outlet pressure has been set, replace gas valve regulator cover screw(s) and attach
round LP label/labels to the top of the regulator cover screw(s).
16

Section 12a
Orifice Pressure Adjustment (VPS/VCS).
* De-rated from 169kBTU to 150kBTU.
** De-rated from 200kBTU to 169kBTU, not suitable for high altitude.
LP Gas 0- 2000 ft (0-610m)
Size 60 80 100 125 150 170 200**
“WC 6.0 5.2 8.2 6.6 7.0 5.7 5.7
USA LP Gas 0- 2000 ft (0-610m)
Size 60 80 100 125 150 170 200**
“WC 6.0 5.2 8.2 6.6 7.0 5.7 5.7
CANADA
LP Gas 2001– 4000 ft (611-1220m)
Size 60 80 100 125 150 170* 200
“WC 5.8 5.0 8.0 6.4 6.8 6.8 N/A
USA LP Gas 2001– 4500 ft (611-1371m)
Size 60 80 100 125 150 170* 200
“WC 5.8 5.0 8.0 6.4 6.8 6.8 N/A
CANADA
LP Gas 4001– 6000 ft (1220-1829m)
Size 60 80 100 125 150 170* 200
“WC 5.7 4.9 7.9 6.3 6.7 6.7 N/A
USA
LP Gas 6001– 10000 ft (1830-3048m)
Size 60 80 100 125 150 170* 200
“WC 5.6 4.8 7.7 6.1 6.3 6.3 N/A
USA
17

Section 12b
Orifice Pressure Adjustment (VPT/VCT).
*** Not suitable for high altitude.
** De-rated from 200kBTU to 169kBTU, not suitable for high altitude.
LP Gas 0- 2000 ft (0-610m)
Size 60 80 100 125 150 170*** 200**
“WC Hi 6.1 5.2 8.2 7.6 7.2 6.8 6.8
USA
“WC Lo 3.5 3.0 3.7 4.4 3.3 3.9 3.9
USA LP Gas 2001– 4000 ft (611-1220m)
Size 60 80 100 125 150 170 200
“WC Hi 6.0 5.0 8.0 7.4 7.0 N/A
“WC Lo 3.4 2.9 3.5 4.2 3.1 N/A
CANADA LP Gas 0– 2000 ft (0-610m)
Size 60 80 100 125 150 170*** 200**
“WC Hi 6.1 5.2 8.2 7.6 7.2 6.8
“WC Lo 3.5 3.0 3.7 4.4 3.3 3.9 3.9
6.8
USA LP Gas 4001– 6000 ft (1220-1829m)
Size 60 80 100 125 150 170 200
“WC Hi 5.9 4.9 7.9 7.3 6.9 N/A
“WC Lo 3.3 2.8 3.4 4.1 3.0 N/A
USA LP Gas 6001– 10000 ft (1830-3048m)
Size 60 80 100 125 150 170 200
“WC Hi 5.7 4.8 7.7 7.1 6.5
“WC Lo 3.1 2.6 3.2 3.9 2.8 N/A
N/A
CANADA LP Gas 2001– 4500 ft (611-1371m)
Size 60 80 100 125 150 170 200
“WC Hi 6.0 5.0 8.0 7.4 7.0 N/A
“WC Lo 3.4 2.9 3.5 4.2 3.1 N/A
18

Section 13
Propane Conversion Kit Parts List/Technical Data
REZNOR KIT PART NUMBER 270619
Part No. Quantity Description
270686 1 Propane Conversion Manual VC / VP
270412 1 Grommet 12.5 x 9.5mm
270459 1 M6 retaining washer
270653 2 Propane Data Conversion Label for VP1P18 / VC1P18
270654 2 Propane Data Conversion Label for VP2P18 / VC2P18
270374 1 Gas Valve Propane Conversion Kit
269948 1 Burner orifice plate
270366 2 3.0mm EPDM Sponge Gasket to suit Burner Casting (with adhesive)
269957 1 Flame Plate Type 1
270398 1 Std. multi hole gas orifice 1.1mm
270328 1 Baffle Plate For Vision Burners
270414 2 No. 8 x 1/2" Stainless Steel Pozi Pan Self Tapper
269925 1 Blown fan orifice plate to suit 2576T, 10 x 10mm sq.
269924 1 Blown fan orifice plate to suit 2576T, 9 x 10mm sq.
269928 1 Blown fan orifice plate to suit 2576T, 12 x 10mm sq.
REZNOR KIT PART NUMBER 270620
Part No. Quantity Description
270686 1 Propane Conversion Manual VC / VP
270412 1 Grommet 12.5 x 9.5mm
270459 1 M6 retaining washer
270655 2 Propane Data Conversion Label for VP1P25 / VC1P25
270656 2 Propane Data Conversion Label for VP2P25 / VC2P25
270374 1 Gas Valve Propane Conversion Kit
269949 1 Burner orifice plate
270366 2 3.0mm EPDM Sponge Gasket to suit Burner Casting (with adhesive)
269958 1 Flame Plate Type 2
270399 1 Std. multi hole gas orifice 1.3mm
270328 1 Baffle Plate For Vision Burners
270414 2 No. 8 x 1/2" Stainless Steel Pozi Pan Self Tapper
269925 1 Blown fan orifice plate to suit 2576T, 10 x 10mm sq.
269928 1 Blown fan orifice plate to suit 2576T, 12 x 10mm sq.
19

REZNOR KIT PART NUMBER 270622
Part No. Quantity Description
270686 1 Propane Conversion Manual VC / VP
270412 1 Grommet 12.5 x 9.5mm
270459 1 M6 retaining washer
270659 2 Propane Data Conversion Label for VP1P38 / VC1P38
270660 2 Propane Data Conversion Label for VP2P38 / VC2P38
270374 1 Gas Valve Propane Conversion Kit
269951 1 Burner orifice plate
270366 2 3.0mm EPDM Sponge Gasket to suit Burner Casting (with adhesive)
269959 1 Flame Plate Type 3
270400 1 Std. multi hole gas orifice 1.5mm
269931 1 Blown fan orifice plate to suit 2576T, 18 x 10mm sq.
269932 1 Blown fan orifice plate to suit 2576T, 21 x 10mm sq.
REZNOR KIT PART NUMBER 270621
Part No. Quantity Description
270686 1 Propane Conversion Manual VC / VP
270412 1 Grommet 12.5 x 9.5mm
270459 1 M6 retaining washer
270657 2 Propane Data Conversion Label for VP1P30 / VC1P30
270658 2 Propane Data Conversion Label for VP2P30 / VC2P30
270374 1 Gas Valve Propane Conversion Kit
269950 1 Burner orifice plate
270366 2 3.0mm EPDM Sponge Gasket to suit Burner Casting (with adhesive)
269958 1 Flame Plate Type 2
270399 1 Std. multi hole gas orifice 1.3mm
270328 1 Baffle Plate For Vision Burners
270414 2 No. 8 x 1/2" Stainless Steel Pozi Pan Self Tapper
269928 1 Blown fan orifice plate to suit 2576T, 12 x 10mm sq.
269930 1 Blown fan orifice plate to suit 2576T, 15 x 10mm sq.
Propane Conversion Kit Parts List.
20

REZNOR KIT PART NUMBER 270623
Part No. Quantity Description
270686 1 Propane Conversion Manual VC / VP
270412 1 Grommet 12.5 x 9.5mm
270459 1 M6 retaining washer
270661 2 Propane Data Conversion Label for VP1P45 / VC1P45
270662 2 Propane Data Conversion Label for VP2P45 / VC2P45
270374 1 Gas Valve Propane Conversion Kit
269952 1 Burner orifice plate
270366 2 3.0mm EPDM Sponge Gasket to suit Burner Casting (with adhesive)
269959 1 Flame Plate Type 3
270401 1 Std. multi hole gas orifice 1.7mm
269933 1 Blown fan orifice plate to suit 2576T, 26 x 10mm sq.
269934 1 Blown fan orifice plate to suit 2576T, 37 x 10mm sq.
REZNOR KIT PART NUMBER 270626
Part No. Quantity Description
270686 1 Propane Conversion Manual VC / VP
270412 1 Grommet 12.5 x 9.5mm
270459 1 M6 retaining washer
270664 2 Propane Data Conversion Label for VP2P50 / VC2P50
270374 1 Gas Valve Propane Conversion Kit
269953 1 Burner orifice plate
270366 2 3.0mm EPDM Sponge Gasket to suit Burner Casting (with adhesive)
269960 1 Flame Plate Type 4
270403 1 Std. multi hole gas orifice 1.9mm
269936 1 Blown fan orifice plate to suit 2560-1, 14 x 10mm sq.
270375 1 1/2" NPT Standard Jet Carrier
Propane Conversion Kit Parts List.

This manual suits for next models

31

Other Reznor Gas Heater manuals

Reznor LCSC-3E 30 Guide

Reznor

Reznor LCSC-3E 30 Guide

Reznor CK11 User manual

Reznor

Reznor CK11 User manual

Reznor CD2 User manual

Reznor

Reznor CD2 User manual

Reznor UBXC Installation and operating instructions

Reznor

Reznor UBXC Installation and operating instructions

Reznor SC Series Instruction Manual

Reznor

Reznor SC Series Instruction Manual

Reznor GA1 User manual

Reznor

Reznor GA1 User manual

Reznor UBX User manual

Reznor

Reznor UBX User manual

Reznor DE1 User manual

Reznor

Reznor DE1 User manual

Reznor OPTIONS CD57 User manual

Reznor

Reznor OPTIONS CD57 User manual

Reznor UDSA 008-2 User guide

Reznor

Reznor UDSA 008-2 User guide

Reznor UEZ Installation and operating instructions

Reznor

Reznor UEZ Installation and operating instructions

Reznor RHC DJL 4000 Series Guide

Reznor

Reznor RHC DJL 4000 Series Guide

Reznor Flamrad User guide

Reznor

Reznor Flamrad User guide
Popular Gas Heater manuals by other brands

Comfortflame CCL3924NRA owner's manual

Comfortflame

Comfortflame CCL3924NRA owner's manual

Jocel JAG014160 instruction manual

Jocel

Jocel JAG014160 instruction manual

Trane GXAA Installation, operation and maintenance

Trane

Trane GXAA Installation, operation and maintenance

Truma Trumatic E 2400 E operating instructions

Truma

Truma Trumatic E 2400 E operating instructions

Desa LCB20PT Safety information and installation manual

Desa

Desa LCB20PT Safety information and installation manual

HearthStone TUCSON owner's manual

HearthStone

HearthStone TUCSON owner's manual

FMI EMF18NR Owner's operation manual and installation guide

FMI

FMI EMF18NR Owner's operation manual and installation guide

Intertek F18B411 manual

Intertek

Intertek F18B411 manual

Robur OTRG005 instruction sheet

Robur

Robur OTRG005 instruction sheet

Quadra-Fire FG21SP-LP owner's manual

Quadra-Fire

Quadra-Fire FG21SP-LP owner's manual

Vermont Castings Intrepid INDVRBDSB Installation & operating manual

Vermont Castings

Vermont Castings Intrepid INDVRBDSB Installation & operating manual

Kingsman MQZCV48N installation instructions

Kingsman

Kingsman MQZCV48N installation instructions

SHM IVFMV24LP OWNER'S OPERATION AND INSTALLATION MANUAL

SHM

SHM IVFMV24LP OWNER'S OPERATION AND INSTALLATION MANUAL

Superior STANDARD SERIES and Installation and operating instructions
Superior

Superior STANDARD SERIES and Installation and operating instructions

pyromaster UVHB26 Installation and homeowners operating instructions

pyromaster

pyromaster UVHB26 Installation and homeowners operating instructions

Brivis BX3 Series Installer manual

Brivis

Brivis BX3 Series Installer manual

Steffes 2102 Owner's and installer's manual

Steffes

Steffes 2102 Owner's and installer's manual

Dyna-Glo IR12DTL-2 manual

Dyna-Glo

Dyna-Glo IR12DTL-2 manual

manuals.online logo
manuals.online logoBrands
  • About & Mission
  • Contact us
  • Privacy Policy
  • Terms and Conditions

Copyright 2025 Manuals.Online. All Rights Reserved.