RHINO Miami Series User manual

UserGuide
Miami Series - Pallet Cooler
07/2022
Please keep these instructions for future reference.
Thank you for choosing this Rhino appliance. It is essential that you read
this booklet carefully and keep in a safe place for future reference. The booklet
contains mandatory safety information as well as details of essential maintenance
routines.
WARNING!Refrigeration repairs, electrical repairs or
alterations must only be carried out by suitably qualified
and competent persons.

Model List
Miami 600 L
Miami 600 R
Miami 600 L MS
Miami 600 R MS
Miami 900
Miami 900 MS
Miami 1070
Miami 1070 MS
Miami 1430 A
Miami 1430 C
Miami 1430 A MS
Miami 1430 C MS
Miami 1430 AD
Miami 1430 CD
Miami 1430 AD MS
Miami 1430 CD MS
Miami 1620 A
Miami 1620 C
Miami 1620 A MS
Miami 1620 C MS

1. Before you start.............................................................................................................................................. 2
1.1. Environmental conditions............................................................................................................... 2
2. Intended use of the cabinet......................................................................................................................... 2
2.1. Safety Warnings................................................................................................................................. 2
2.2. Unpacking and Plugging in..............................................................................................................4
2.3. Installation and positioning............................................................................................................ 8
2.3.1. ......................................................................................................................... 8
2.3.2. Location Advice........................................................................................................................10
2.3.3. Installation of the shelves......................................................................................................10
2.4. Cleaning before firstuse.................................................................................................................10
2.5.Turn on the power............................................................................................................................10
3. Operation of the appliance......................................................................................................................... 11
3.1. Lighting...............................................................................................................................................11
3.2. Temperature control....................................................................................................................... 11
3.4. Defrosting.......................................................................................................................................... 13
3.5. Loading the cabinet........................................................................................................................ 13
4. Maintenance...................................................................................................................................................14
4.1. Cleaning and sanitisation.............................................................................................................. 14
4.2. Cleaning the condenser ................................................................................................................14
5. Servicing and spare parts..........................................................................................................................15
6. Disposal of Equipment at End-of-Life.....................................................................................................15
Ventilation space
Version 07/20221
CONTENTS
3.3. Eco Mode (only applicable to Miami fitted with a motion sensor)
......................................12
2.2.1. ...........................................................................................4
2.2.2. Special Instructions for larger Miami models......................................................................5
General guidelines for all models

1. Before you start
Thank you for your selection of this Rhino appliance. It uses the latest energy saving
components and high quality materials to ensure optimum operational efficiency.
Please read this User Guide carefully. It explains how to position, install, use and maintain the
appliance in the authorised manner. Please store this User Guide in a safe place and ensure
that it is available for reference by other users. All those responsible for the appliance must be
aware of how to operate it safely.
The cabinet must be installed, started up and operated in compliance with local hygiene laws,
safety regulations and the instructions set out in this User Guide.
If the cabinet has sustained damage in transit or, if a defect is apparent upon start-up, please
switch off the appliance, disconnect from the mains power supply and report the fault to the
dealer from whom it was purchased.
1.1. Environmental conditions
The appliance has been designed to be operated in ISO Climate Class 3 / CC1 conditions.
These are defined as:
●Maximumambient temperature 25℃
●Relative Humidity 60%
2. Intended use of the cabinet
The Miami series of cabinets is designed for the bulk display of cold beverages in a
commercial setting. It should not be used for purposes other than these. The cabinet
automatically maintains the temperature of the stored products and comes pre-set from the
factory.
2.1. Safety Warnings
Please observe the following safety precautions and instructions at all times.
Rhino accepts no liability if the instructions and warnings in this manual have been
disregarded:
•
The appliance is for indoor use only.
•
Do not use this appliance other than for its intended use as a commercial beveragecooler.
•
Always observe the load lines on the coolers and never overfill.
•
Always disconnect the mains power supply before removing any cover, performing
maintenance work, cleaning or making any repairs.
•
Ensure that children do not play with the appliance. Neither cleaning nor user maintenance
shall be performed by children.
•
Do not cover the front, rear or top cover ventilation slots. To do so causes risk of fireand
WARNING!Electrical work must only be
performed by suitably qualified and competent
persons in accordance with all local regulations.
Version 07/20222

will also cause a malfunction of the refrigeration system. Please observe the installation
instructions in this user guide.
Version 07/2022 3
•
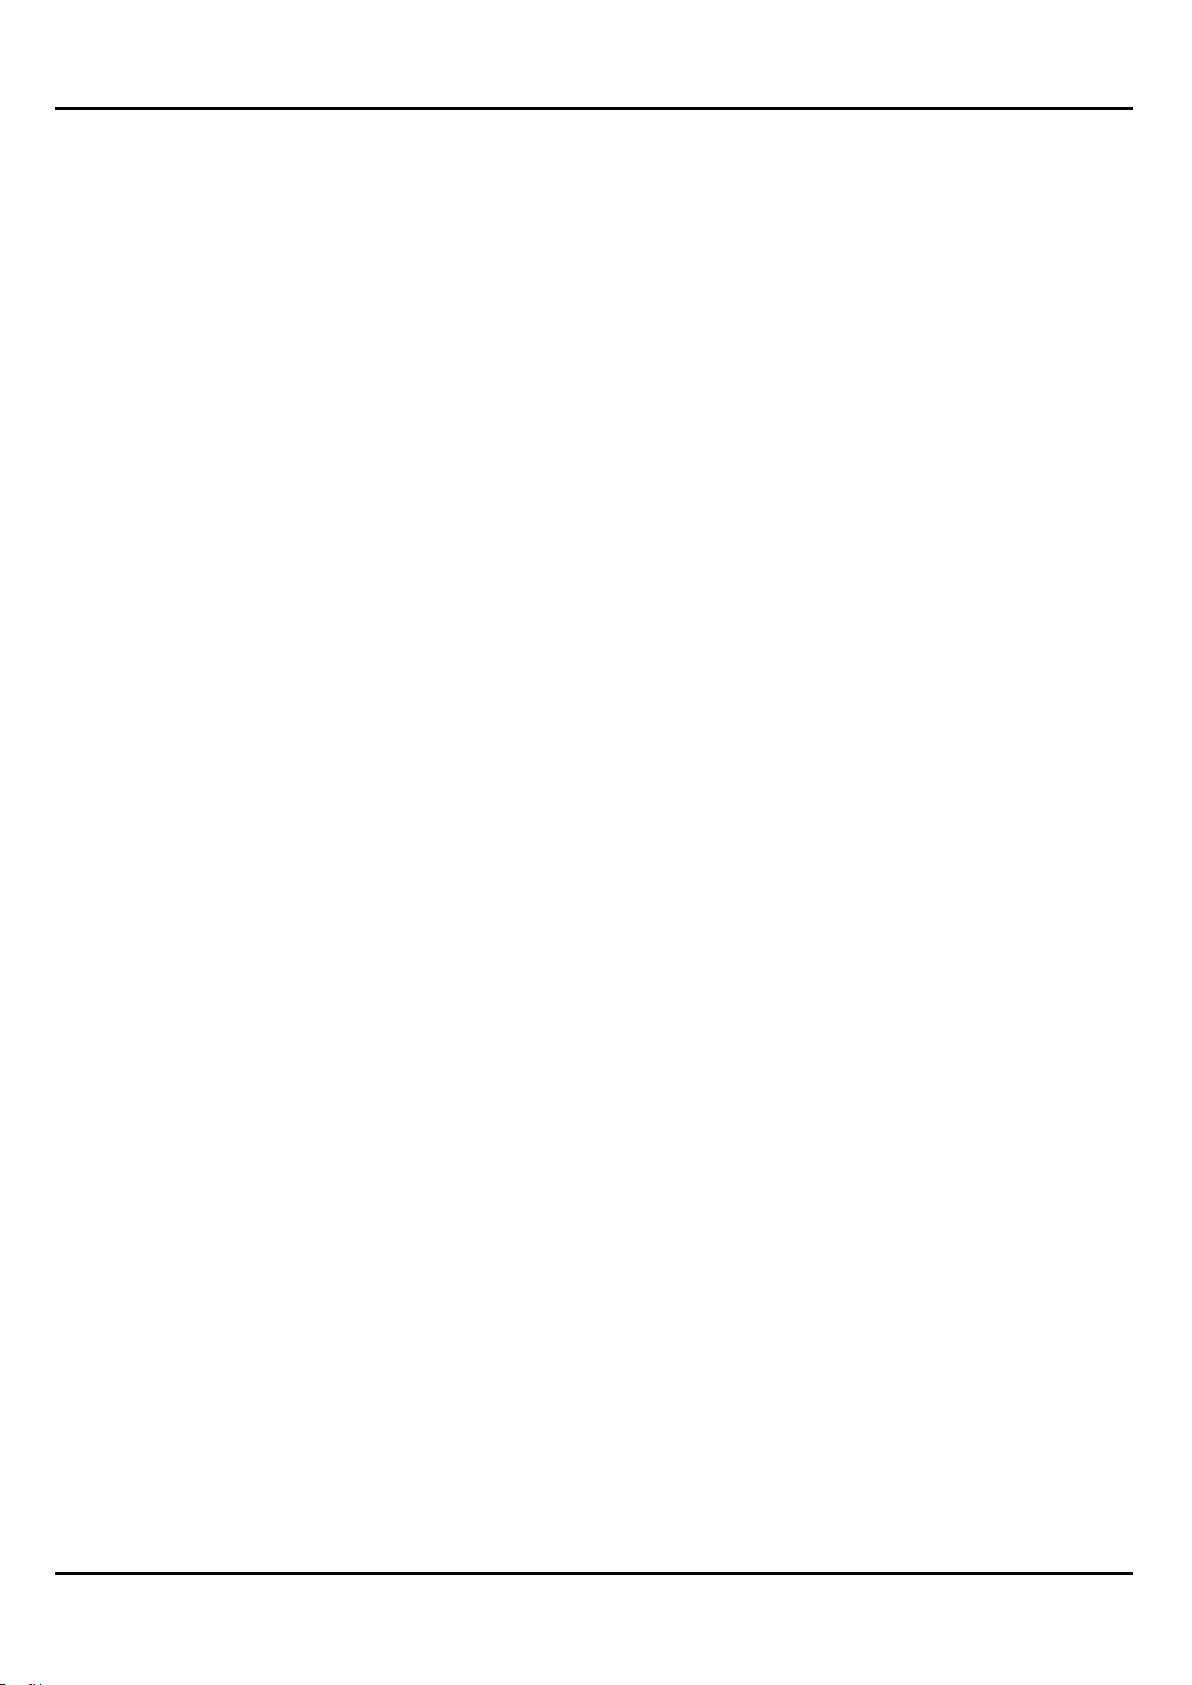
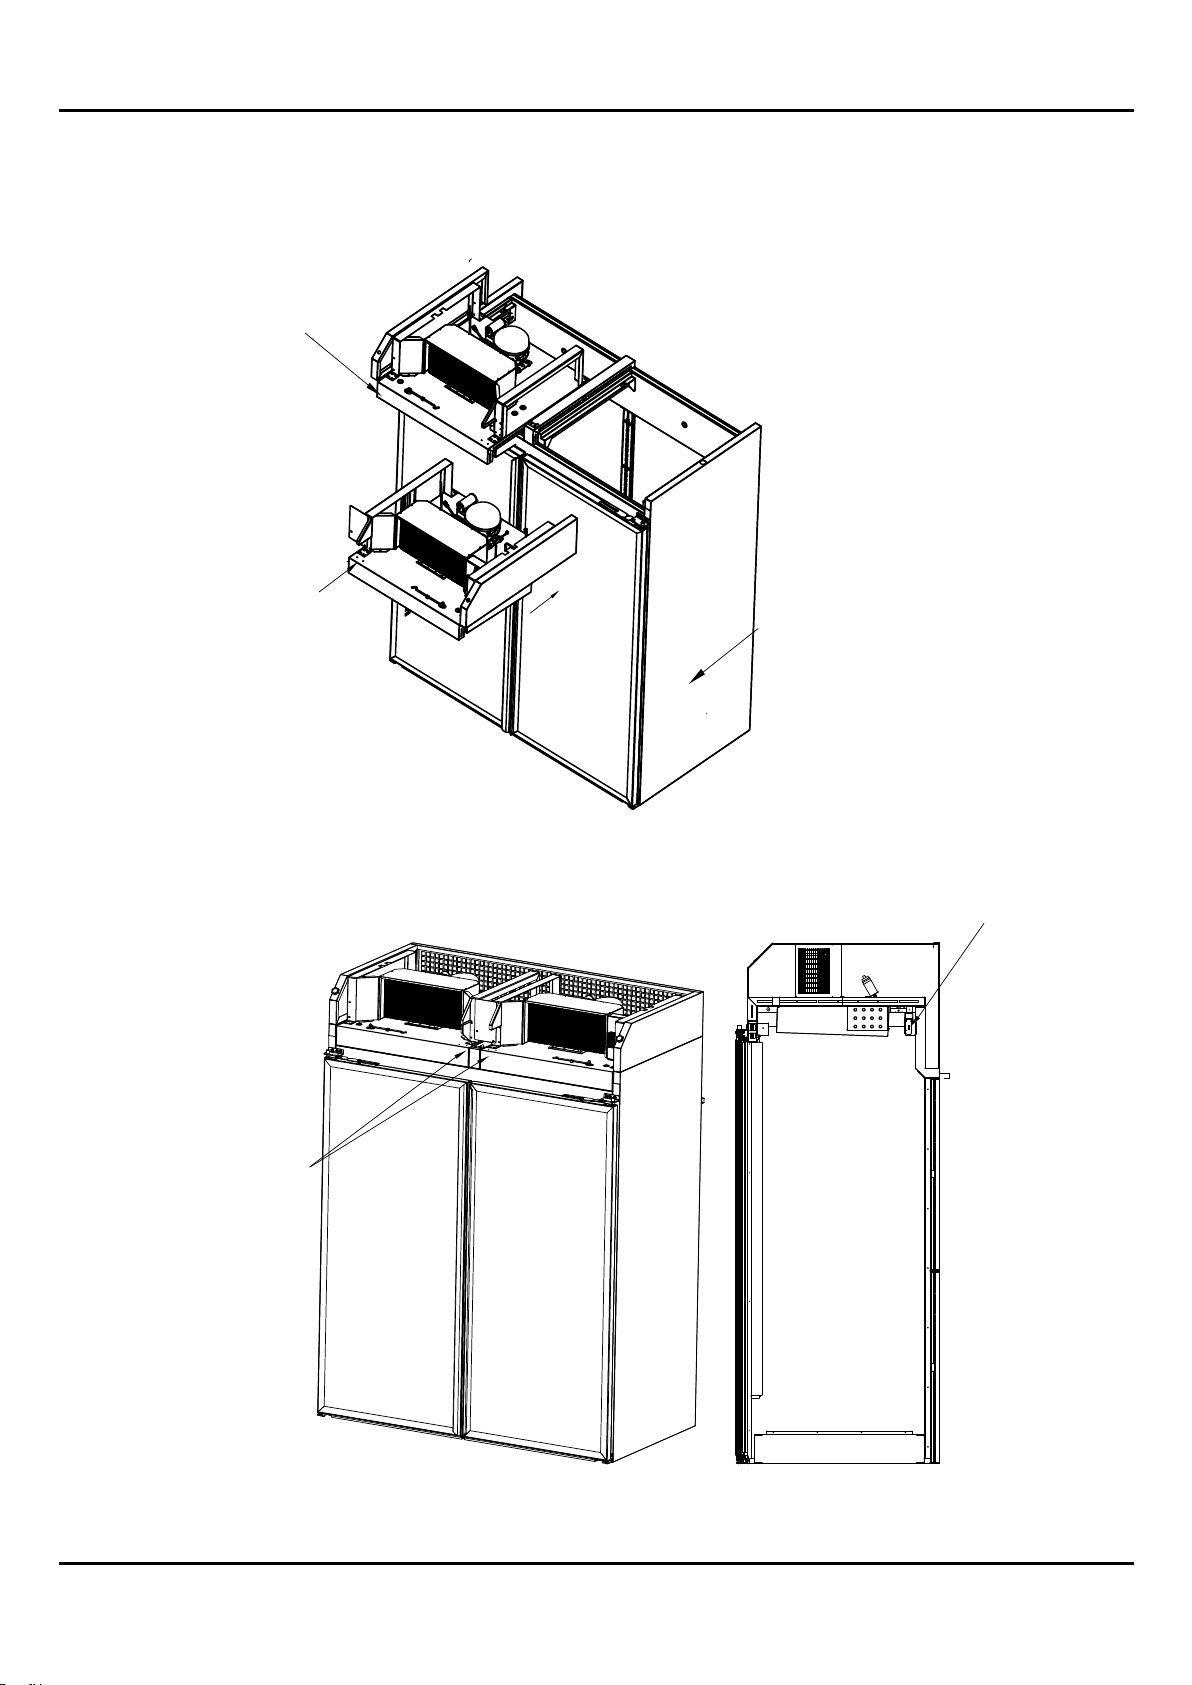
Do not probe any openings in the cabinet and be careful not to touch any moving parts such
as the fans. Do not touch hot surfaces such as the compressor or rear pipework or cold
surfaces such as the evaporator plate (these items are safely behind covers).
•
Any electrical work on the cabinet shall only be carried out by suitably qualified, competent
and skilled persons in possession of current certificates and licenses sufficient for the practice of
their trade.
•
Do not overload the power supply. Always ensure that the power supply is sufficient for the
electrical requirements that are specified on the rating label. The rating plate is located on the
inside of the cabinet on the left hand sidewall. If in doubt, please consult a qualified electrician.
Important: never use adaptors or multi-block extension leads to connect the appliance to
the mains power.
•
If the mains power supply cord is damaged, it must be replaced by Rhino, its service agent or
a suitably qualified, competent and skilled electrician in order to avoid a hazard.
•
Do not store explosive or flammable substances, liquids or packages (such as aerosol cans
with a flammable propellant) inside this appliance.
•
Do not use any electrical appliances inside the refrigerated compartment of this appliance.
•
Do not use any mechanical devices or other means to accelerate the defrosting process.
Defrosting is performed automatically by the electronic controller and needs no user
intervention.
•
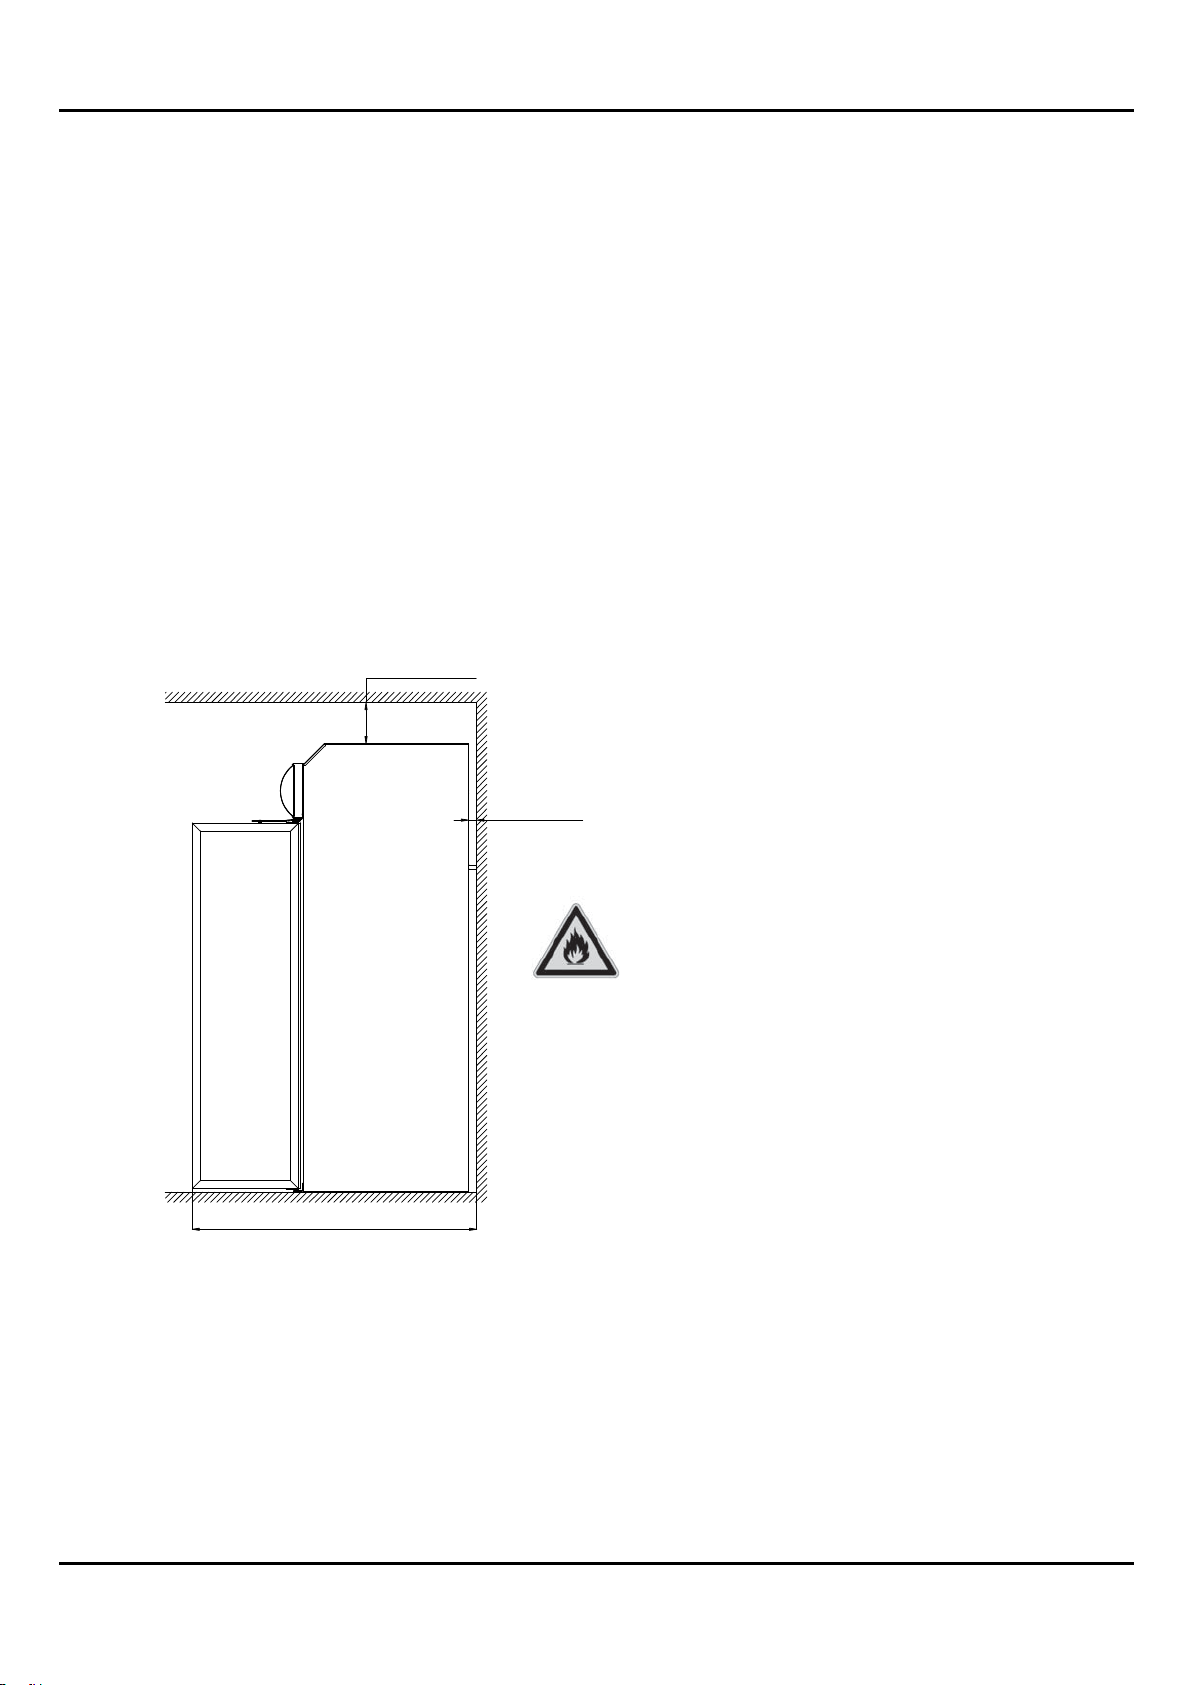
Do not damage the refrigeration circuit. If you do so by accident, then open a window or door
immediately so as to ventilate the area. The refrigerant is flammable.
•
This appliance contains flammable refrigerant within its sealed system and also within the
insulation foam. As such it is mandatory that the cabinet is serviced and, at end-of-life recycled
by, a professional organisation with appropriate skilled persons who have the necessary
qualifications, certifications, licenses and expertise to do so. If in doubt please contact Rhino.
•
The appliance uses LED lighting. The lighting strips and transformer should only be replaced
using genuine Rhino spare parts of the same technical specification. The items must only be
installed by a qualified electrician.
•
During all operations please be careful not to jolt, bump, jaror thump the cabinet. Handle it
gently and with care. The refrigeration pipework is delicate and may be damaged by rough
handling.
•
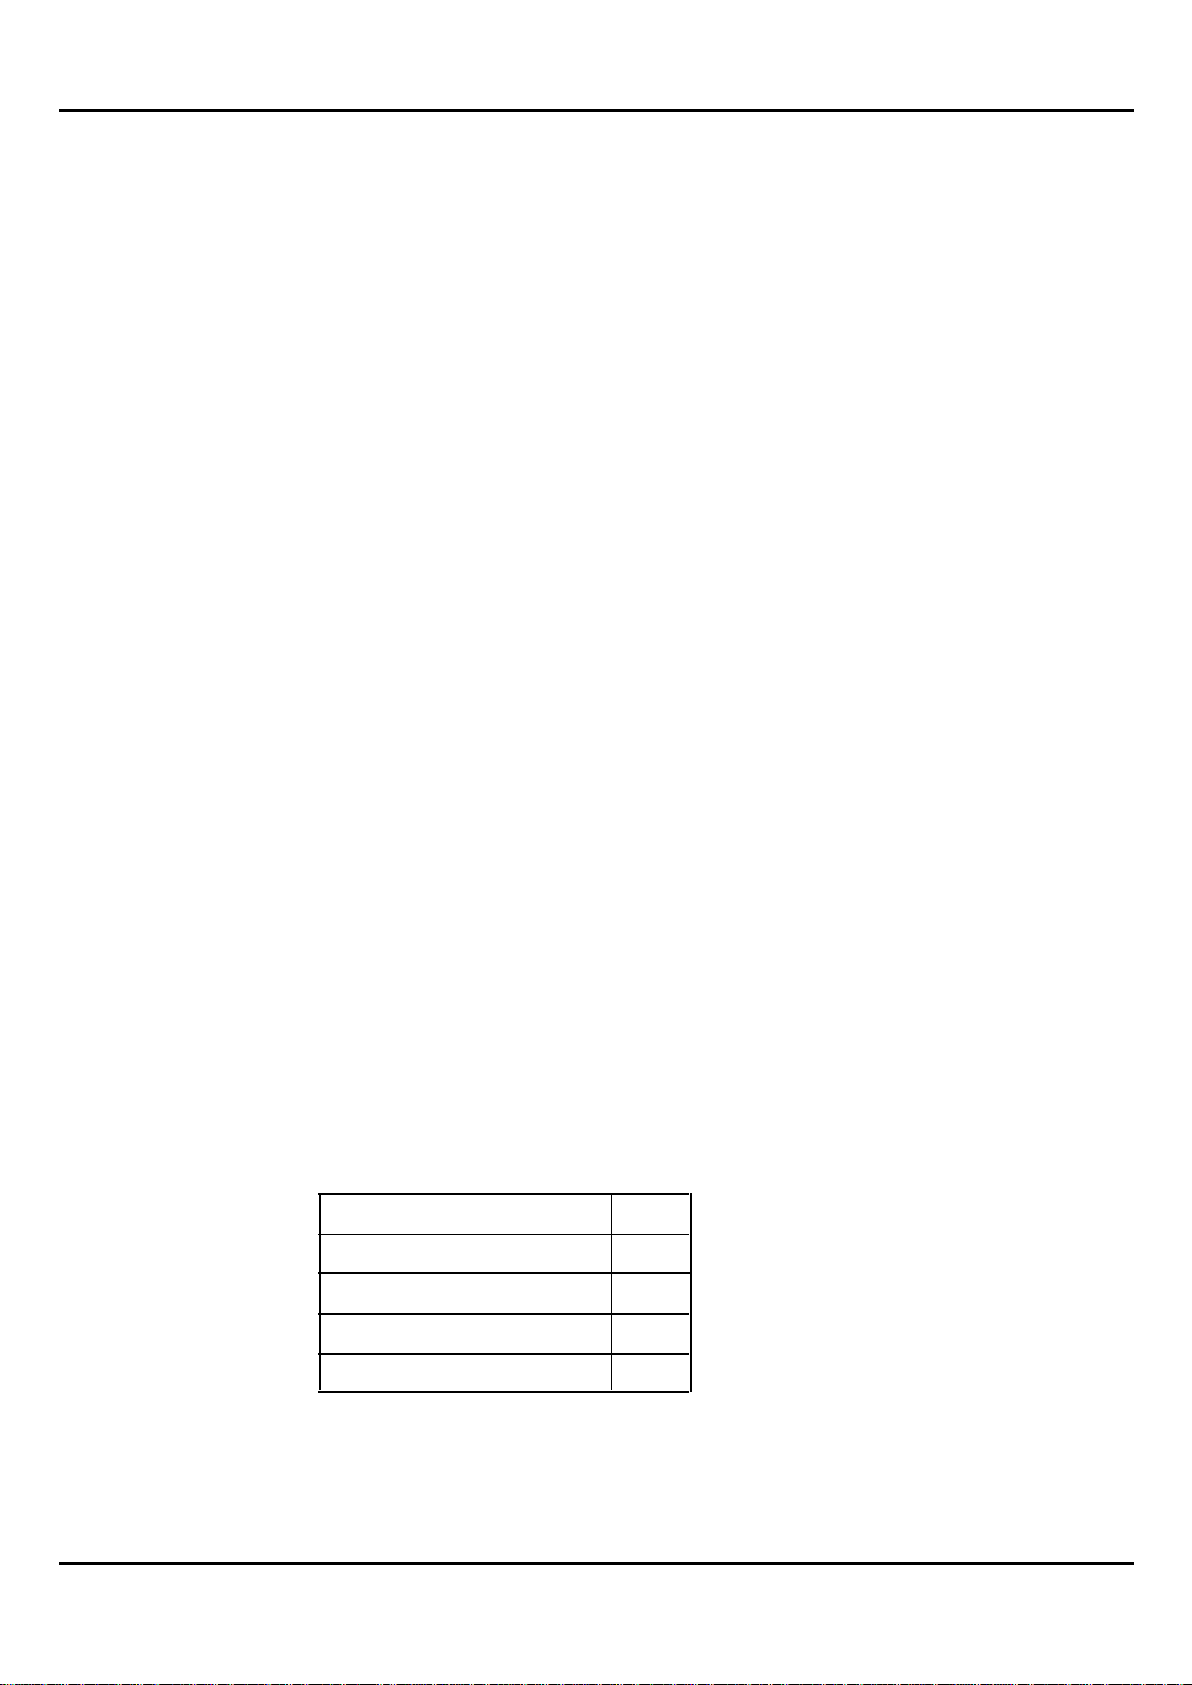
Do not exceed the maximum individual shelf loading weight of 120 kg/m2 shown in
Table 1 below:
Table 1: Maximum Shelf Loading Weights
Do not use more than 4levels of shelves per Miami.
Do not climb on, or swing from the shelves.
Only use genuine Rhino shelves and brackets.
Miami 900 /MS
34kg
Miami 1070 /MS 67kg
Miami 1430 A/C/AD/CD/MS 44kg
Miami 1620 A/C/MS 52kg
Miami 600 L/R/MS
55kg

•
Never move or tilt the appliance whilst it is connected to the power supply.
•
The appliance must always be earthed.
•
The appliance must only be charged with R290 refrigerant from an authorised supplier in
possession of the correct licenses. The use of any other type of refrigerant is dangerous and
is not permitted under any circumstances.
•
Electrical equipment should not be placed under the unit, nor where the refrigerant could
gather in the event of a leak.
•
In some countries, a Gas Work Authorisation may be required if the system is to be opened
or charged.
•
The appliance shall not be used without the compressor compartment cover in place and
securely fastened.
•
Do not climb on the cabinet or step inside it.
•
This appliance can be used by children aged from 8 years and above and persons with reduced
physical, sensory or mental capabilities or lack of experience and knowledge if they have been given
supervision or instruction concerning use of the appliance in a safe way and understand the hazards
involved.
2.2. Unpacking and Plugging in
2.2.1 General guidelines for all models
•
Please read and observe all the warnings and procedures listed in 2.1. These contain
critical safety advice.
•
During all operations, please be careful not to bump, thump, jolt or jar the appliance.
Handle it gently and with care. The refrigeration pipework is delicate and will be damaged by
rough handling.
•
The appliance is heavy and therefore please carry out a risk assessment prior to
commencing this operation.
•
Please cut the packing straps,taking the necessary precautions to avoid hurting yourself or
others. Remove all packaging and ensure that it is recycled in accordance with all local laws
and regulations. Safety Note: Please pay attention to the plastics used in the packaging and
ensure that they are kept away from children and animals.
•
Please take care not to pinch or damage the power cord.
•
Please examine the power cord for splits, cuts or damage prior to connection to the mains
power supply.
•
Do not place the appliance next to a source of static electricity or where it could be
vulnerable to lightning strike.
•
The room must be well ventilated and free from sources of ignition. It must not be located
in a position where refrigerant could gather in the event of a leak. If it is below ground level,
then extra precautions may be necessary and an expert should be consulted.
•
Set the cabinet in its place in full accordance with the instructions in 2.3below.
•
Plug-in the appliance to the powersupply.
Version 07/2022 4

Version 07/2022 5
2.2.2 Special Instructions for Miami models1430 A, 1430 A MS, 1620 A, 1620 A MS
Safety Precautions:
Do not connect to the power supply until all of the steps below have been safely completed.
Heavy! Units weigh 31kgs each. Please ensure appropriate lifting safety precautions have
been taken.
Risk of toppling: Please ensure that cabinet base is fully stabilised to ensure that no toppling
risk is present.
Safe work area: Please ensure that the work area is safely cordoned off to avoid injury in the
case of an accident during installation.
Unpacking the refrigeration units:
Prise open the wooden crates being mindful that the contents inside are delicate.Be sure to
immediately bend flat any nails or pins that become exposed during the opening process.
Remove from site as soon as possible.
If the refrigeration units are found to have been delivered upside down, please abort the
installation and return the units to the warehouse.
Step 1: Take out the unit from the package
Left side unit
does not have
sensors.
Right side unit
comes complete
with sensors.

Version 07/2022 6
Step 2: Install the refrigeration units into the cabinet
Left side unit
Right side unit Cabinet
Step 3: Fasten into position
Close the latches
Close the latches
inside the cabinet

Version 07/2022 7
Step 4: Install the canopy and unit top grill
Firmly tighten the two fastening
bolts using the finger grip.
Step 5: Make the electrical connections
Connect the LED light
power cable in the centre.
If a movement sensor is fitted,
please ensure that it is aligned
with the aperture on the flexible
canopy cover.
Join the coloured connectors,
of which there are five.
Red, blue, grey, white and yellow.
Join the connector
Raise the canopy upwards and secure
in the open position using the stays
provided at left and right hand side.

Version 07/2022 8
Step 6: Power-Up and Test
Check the power cable for integrity in case it has become split or damaged. If it is damaged,
abort the process and call for a qualified person to change it.
Plug the unit into mains power supply ensuring that the supply is in full accordance with the
rating plate values shown on the cabinet.
Check that the units have come down to temperature and are cycling.
min 200mm
min 40mm
max 1670mm
2.3. Installation and Positioning
Please locate the cabinet on a smooth and level floor, respecting the maximum ambient
conditions 25℃, 60% relative humidity.
2.3.1. Ventilation Space
The minimum ventilation space at rear and
top is shown in Figure 1. It is essential that the minimum
spaces are respected to ensure the safe operation of the
appliance. Failure to do so will cause a fire risk, cause a
refrigeration failure and invalidate the guarantee.
Figure 1

Version 07/2022 9
Figure 3
Never place objects or point-of-sale materials /
advertisements on top of the appliance.
min 20mm min 20mm
Figure 2
The plan view (looking from the top) in figure 2 shows the space that must be left
at each side of the cabinet.

Version 07/2022 10
2.4. Cleaning before first use
Please clean and sanitise the interior and exterior surfaces of the appliance using a
disposable paper towel. Please clean the glass inside and out using a commercially
available glass cleaner. Always follow and respect the instructions given by the
manufacturer of the fluids used. Do not use cream cleansers because they may damage
the paint finish. Do not use steam, power washers, jetting water, or any form of water
inundation.
NOTE Make sure that all cleaning fluids are classed as non-toxic.
Dry the surfaces carefully prior to connection to the power supply.
2.5. Turn on the power
Turn on the power to the cabinet and observe the temperature beginning to fall.
2.3.2. Location Advice
•
Do not position the cabinet next to a source of heat such as a ceiling heating duct, ceiling
mounted spot light, radiator or other heat emitting device.
•
Do not position the cabinet in direct sunlight.
•
Do not position in a cellar location or near any naked flames or sources of spark.
2.3.3. Installation of the shelves
Figure 4
Please fit the shelf brackets ensuring they are level
and securely located on the support structure.

Version 07/2022 11
3.2. Temperature control
The temperature of the cabinet is pre-set at the factory and normally needs no user
intervention. In normal use, the interior air temperature is displayed. Please note that this
will fluctuate with door openings and also when defrosting routines occur. However if it is
desired to alter the temperature, please see the control buttons in Figure 6. To access the
Set Point, make a short press on the UP Arrow button. The current target Set Point will be
displayed. To raise the Set Point, please repeatedly press the Up Arrow button until the
desired set point is reached. Release the button and the display will revert to the current
interior air temperature. To lower the Set Point, press the Down arrow button.
1 Press: temperature set point
Sub function:“up”
1 Press: temperature set point
Sub function:“down”
Figure 6
3. Operation of the Appliance
The appliance is designed to operate automatically with no user intervention.
Temperature control and defrosting are part of the automatic routines of the appliance.
3.1. Lighting
Figure 5
light switch
The interior lights may be switched on and off by means
of the light button on the controller. See Figure 5 to locate
the position of the controller and the lighting button.
To activate the light switch, press and hold the light button.
The appliance uses low voltage LED lights to save energy
and add safety. If replacement is required always use
genuine Rhino spare parts. An electrician or suitably
qualified refrigeration engineer should be used to fit the
new components.

Version 07/2022 12
The purpose of the Eco mode is to save energy by allowing the interior temperature to
rise by 4 degrees Centigrade when it detects that the location is closed for business
(no movement).
To enable this to happen, Eco versions of the Miami series have a motion detection
sensor mounted in the centre of the advertising canopy, above the doors. Figure 7
shows the maximum field of vision of the sensor. Any movement detected within this
zone will automatically trigger the electronic controller to place the system into Normal
Business Mode. Stationary objects such as nearby shelves, even if placed within the
field of vision, will not affect the sensor readings. When the cabinet is placed in ECO
mode, the display shown in Figure 6 will change to ECO. If the user desires to manually
switch mode from Normal mode to Eco mode, then they may simply press and hold the
ECO button for approximately 5 seconds until the display changes either to ECO or
NOR. The standard version of the Miami series does not have this functionality.
3.3. Eco Mode (only applicable to Miami fitted with a Motion Sensor)
2700mm 385mm
80°
Figure 7

Version 07/2022 13
•The doors may be opened widely to activate the “stay-open” function. Load the cabinet always
being sure to respect the loading weight limits of the shelves and the load lines marked on the
rear and side walls. Position the products carefully.
•Do not fill the cabinet above the load limits marked in thecabinet.
•Exceeding theload limit will disrupt the designed airflow pattern and cause the
temperature of products to rise.
•Do not drop or throw products into the cabinet.
•Take not to damage the cabinet interior.
3.4. Defrosting
Defrosting is performed automatically without user intervention. During the programmed
defrost cycle, the displayed temperature value is locked at the last reading prior to entering
the defrosting period. The actual interior air temperature will rise temporarily until the
defrosting cycle has completed. This is a normal and necessary function of the cooling
system. When the defrost cycle has concluded, the displayed value will revert to the actual
air temperature and the cooling system will resume working to bring the temperature down
to the Set Point temperature.
3.5. Loading the cabinet
Figure 8

Version 07/2022 14
4.1. Cleaning andsanitisation
Please regularly clean and sanitise the interior and exterior surfaces of the appliance
using a disposable paper towel paying special attention to the door handles and delicate
rubber seals. Please clean the glass inside and out using a commercially available glass
cleaner. Always follow and respect the instructions given by the manufacturer of the fluids
used. Do not use cream cleansers because they may damage the paint finish. Do not use
steam, power washers, jetting water, or any form of water inundation. If necessary
vacuum out the interior to remove any debris such as paper packaging or other foreign
objects. Do not probe any openings or covers.
NOTE: The cabinet must not be cleaned while the fans are running. Todisable the
fans, disconnect the cabinet from the electricitysupply.
WARNING Wear protective gloves and work cautiously to avoid cut injuries.
4.2. Cleaning the condenser
This appliance uses a low maintenance condenser (see figures 9 and 10) that is less prone
to blockage than previous types. However it must still be cleaned periodically, the frequency
of which will be determined by the amount of dust in the environment. Regular examination
is recommended. A partially or fully blocked condenser causes the cooling efficiency to be
affected, increases electricity consumption and in the worst case can lead to a complete
malfunction of the cooling system. For the warranty to be valid, the condenser/s must be
clean. The user may call Rhino for support (a cost will be incurred) or the following
procedure can be adopted:
Step 1: Please take care to observe any working at height safety restrictions that apply.
A full workplace safety risk assessment is required before beginning this operation.
Step 2: Disconnect the appliance from the mains power supply.
Step 3: Using a screwdriver, remove the screws that fasten the top cover to the body of the
cabinet and carefully lift away the cover.
Step 4: The condenser is highlighted in the photograph and it should be clean, free from
dust, debris and any obstructions.
Caution! Many of the exposed surfaces may be hot and a risk of burns to the skin
is present. Allow the appliance to cool off prior to commencing work.Also, the
exposed surfaces may have sharp edges and a risk of a cut to the skin is present.
Take appropriate precautions.
4. Maintenance
It is essential to maintain and care for your Rhino appliance.

Version 07/2022 15
Figure 9 Figure 10
Step 6: Using the nozzle of a vacuum, please remove all the dust and debris from the compressor
compartment.
Step 7: Refit the cover and re-fasten all of the screws to secure it in position.
Step 8: Re-connect to the mains power.
5. Service and Spare parts
In the event of a malfunction, please disconnect from the mains power supply and contact the
dealer from whom you purchased the appliance. Please have the model number and serial
number to hand. The appliance must only be repaired by an appropriately qualified and skilled
professional in possession of all the required licences required for work on a refrigerating
appliance with R290 hydrocarbon refrigerant.
If spare parts are required, please always insist upon genuine Rhino parts.
6. Disposal of Equipment at End-of-Life
At the end of its service life, the appliance must be recycled by a professional organisation in
accordance with all local laws and regulations. The appliance contains flammable refrigerant
within its sealed system and also within the insulation foam. If in doubt, please contact
Rhino or your Local Authority.
WARNING
R290 and Cyclopentane are highly flammable
Step 5: Take a soft brush and sweep the condensers clean. The condenser is a very delicate
component and it is easily damaged. Only use a soft brush. Do not use a stiff brush
or a wire brush. If the condenser is contaminated with grease, a fire hazard is present
and a professional must be called to do the cleaning. Do not use water or steam.

Contact
Staycold Export Ltd.
Hawarden Business Park
Hawarden
Deeside
Flintshire
United Kingdom
CH5 3US
www.staycold.co.uk
Tel: +44 1244 321320
Email: [email protected]
This manual suits for next models
20
Table of contents
Other RHINO Accessories manuals