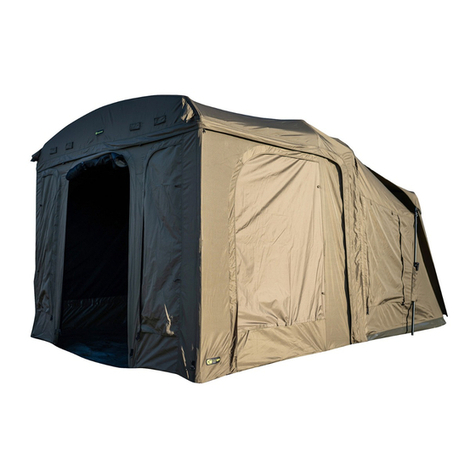
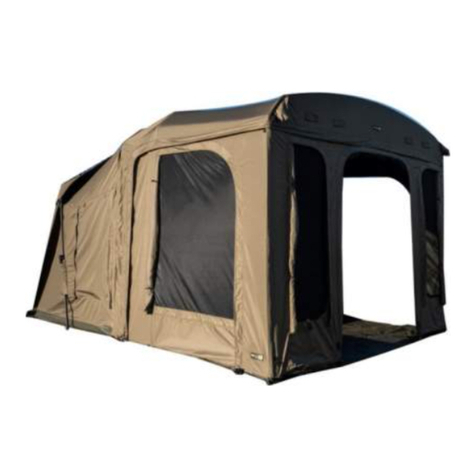
RidgeMonkey Escape XF1 Compact User manual

XF1 Compact / Standard instructions
Instructions de montage bivvies XF1 Compact/Standard
XF1 Assembly:
Montage du bivvy XF1 :
1: Remove the Escape XF1 from the carry bag and with the door facing upwards, lay the it in the required
position and peg the two rear corners into place. arefully open the outer arms.
1 – sortez le bivvy Escape XF1 de son sac de transport avec la porte vers le haut, installez-le à
l’emplacement souhaité et enfoncez les sardines des coins arrières gauche et droit. Ouvrez doucement les
bras extérieurs.
2: Standing in front of the doorway and holding the front crossbar, pull the Escape XF1 upwards and
towards you to raise the bivvy into position. Stand inside the bivvy and lock the two internal X-Frame
bosses into place by sliding them upwards along the internal side bars until firmly seated in the location
point.
2 – Positionnez-vous devant l’entrée, et tout en tenant la barre transversale avant, tirez l’armature X-
Frame du bivvy Escape XF1 vers le haut pour déployer le bivvy. De l’intérieur du bivvy, verrouillez les deux
systèmes de fermeture latéraux en position en les faisant coulisser vers le haut le long des barres, jusqu’à
ce qu’ils s’enclenchent à leur emplacement.
3: lip the two short non-adjustable tension bars into their corresponding position to extend the front
peak. lip the long curved non-adjustable tension bar across the two shorter bars to ensure no rainwater
can pool in the peak area.
3 – lipsez les deux petites barres de tension fixes dans leurs emplacements pour déplier l’avant de la
casquette. lipsez la barre de tension incurvée fixe plus longue en position sur les deux barres plus courtes,
pour assurer une étanchéité parfaite de la casquette.
4: Peg the perimeter of the bivvy to the ground and zip on the flysheet if required (see fitting instructions
below).
4 – fixez les sardines autour du bivvy en incluant la surtoile si vous souhaitez installer celle-ci. (voir
instructions ci-dessous)
5: Unfold the groundsheet inside the Escape XF1 and affix to the skirt using the velcro fixing points. Note
that the small RidgeMonkey logo indicates the front of the groundsheet and should be placed in the door
area.
5 – Dépliez le tapis de sol à l’intérieur de l’Escape XF1 et fixez la jupe sur le pourtour à l’aide des points
d’attache à velcro. Le petit logo RidgeMonkey indique l’avant du tapis de sol et doit se trouver du côté de
la porte.
6: lip the four adjustable tension bars between the rear bars of the inner X-Frame. These only require
light pressure to operate effectively, DO NOT over-extend.
6 – lipsez les 4 barres de tension réglables entre les barres arrières de l’armature interne X-Frame, à l’aide
d’une pression légère. Ne forcez pas.
XF1 Disassembly:
Démontage du bivvy XF1 :
1: Remove flysheet, all perimeter pegs except the two rear corners and groundsheet. Remove all tension
bars.
1 – Enlevez la surtoile, toutes les sardines sauf celles des coins arrières gauche et droit, enlevez toutes les
barres de tension.

2: Firmly depress the two X-Frame locking bosses downward along the side bars to unseat them and
release tension from the canopy. Holding the front crossbar of the Escape XF1, carefully lower the bivvy to
the floor ensuring all material is folded neatly between the crossbars.
2 – Appuyez fermement sur les deux systèmes de verrouillage latéraux en les faisant coulisser vers le bas
pour détendre l’armature interne X-frame. Tout en tenant la barre frontale latérale, repliez doucement
l’armature du bivvy vers le sol en vous assurant que la toile se replie bien entre les barres latérales en X.
3: With the Escape XF1 now completely on the floor and starting with arm #1, carefully fold the outer arms
inwards until they meet the crossbars. Unpeg the two rear corners.
3 - Le bivvy Escape XF1 étant maintenant complètement au sol, et en commençant par le bras no1, repliez
doucement les bras extérieurs vers l’intérieur jusqu’à ce qu’ils touchent les barres en X. Enlevez les
sardines des deux coins arrières.
4: Ensuring all material is folded neatly, your Escape XF1 can now be placed inside the carry bag until your
next session*
4 – Lorsque vous vous êtes assuré que la toile est correctement repliée, vous pouvez remettre le bivvy
Escape XF1 dans son sac de transport jusqu’à votre prochaine session. *
*Note: see storage information
* Note : voir les instructions de stockage.
Flys eet:
Surtoile :
1: Zip the flysheet to the corresponding zip on the rear of the Escape XF1, assemble the elasticated curved
flysheet support bar and attach it to the inside of the flysheet using the velcro tabs sewn into the flysheet
material.
1 – Enfilez la surtoile sur la fermeture à glissière correspondante à l’arrière du bivvy Escape XF1, assemblez
la barre de maintien incurvée de la surtoile et fixez-la à l’intérieur à l’aide des attaches velcro prévues à cet
effet.
2: Screw the supplied storm poles onto each end of the curved flysheet bar, locate the upright storm poles
in the velcro retaining flaps of the Escape XF1 and attach the flysheet hooks to the retaining rings on the
upright storm poles.
2 – Vissez les mâts tempête fournis à chaque extrémité de la barre de maintien de la surtoile, fixez-les
verticalement dans les straps de maintien en velcro du bivvy Escape XF1, et fixez les crochets de la surtoile
sur les anneaux de fixation des mâts.
3: Adjust the height of the storm poles and peg the flysheet to the ground at the rear of the Escape XF1,
ensuring a generous gap between flysheet and bivvy for optimum protection.
3 – Réglez la hauteur des mâts tempête et fixez la surtoile au sol à l’aide des sardines à l’arrière du bivvy
Escape XF1, en gardant un espace suffisant entre la surtoile et le bivvy pour une protection maximale.
4: Removal is a reverse of fitting.
4 – le démontage se fait en sens inverse du montage.
Storage and aftercare:
Rangement et entretien :
Proper storage is one of the most vitally important aspects of caring for your new Escape XF1 Bivvy and
every effort should be taken to ensure the bivvy is packed away dry. If you need to pack away the bivvy
when it is wet, it is of paramount importance that it is unpacked and dried completely within 24 hours

before being repacked dry. If stored when damp or wet mildew and rust will be able to form, both of which
can severely damage the product and its accessories.
Un rangement et un stockage appropriés sont les deux éléments essentiels de l’entretien de votre bivvy
Escape XF1. Il est impératif de toujours le replier et le ranger sec. Si vous deviez le replier et le ranger
humide, il est très important de le déplier et de le sécher entièrement sous 24 heures, avant de le replier et
le ranger à nouveau une fois bien sec. Si vous le stockez encore humide, des moisissures et de la rouille
peuvent se développer, ce qui peut endommager le produit et certains de ses accessoires.
Always store in a cool, dark, dry place away from sources of heat or moisture. If storing for extended
periods, we recommend unzipping the carry bag to allow fresh dry air to circulate.
Stockez toujours le bivvy Escape XF1 dand un endroit sombre, sec et ventilé, loin des sources de chaleur ou
d’humidité. Si vous le rangez pour de longues périodes, nous vous recommandons de laisser le sac de
transport ouvert, pour permettre à l’air de circuler.
Regularly cleaning and reproofing your Escape XF1 bivvy will maintain its ability to repel water. Use only
clean, fresh water and a soft brush or cloth to clean your Escape XF1 bivvy. Do not use detergents or
chemicals of any sort and never machine wash or tumble dry your bivvy.
Nettoyer régulièrement votre bivvy Escape XF1 le maintiendra imperméable et en bon état. Utilisez
uniquement de l’eau propre et fraiche, un chiffon doux ou une brosse souple non abrasive pour nettoyer
votre bivvy. N’utilisez jamais de détergents ou de lessives, ne le passez pas en machine ni au sèche-linge.
Warning:
Attention :
NEVER use any fuel-burning products inside or within close proximity of your Escape XF1 bivvy. Doing so
can result in the accumulation of dangerous concentrations of carbon monoxide which can be fatal.
N’utilisez jamais d’appareils à combustible dans ou près de votre bivvy Escape XF1. ela peut provoquer
des concentrations de monoxyde de carbone très dangereuses voire fatales.
While the Escape XF1 is built using PAI-84 flame resistant fabric, it is not fireproof and will burn if left in
continuous contact with an open flame or other heat source. Failure to keep flame and heat sources away
from the Escape XF1 can lead to fire which may result in serious injury or death.
Votre bivvy Escape XF1 est fabriqué à partir d’une toile répondant à la norme de résistance aux flammes
PAI-84, cela ne veut pas dire qu’il ne peut pas brûler s’il reste en contact prolongé avec des flammes ou
une source de chaleur. Une exposition aux flammes ou la chaleur peut provoquer un incendie provoquant
des blessures graves, voire même la mort.
Always peg down your Escape XF1 properly to reduce the risk of loss or injury. Enough pegs and guy ropes
are supplied to safely secure your Escape XF1 in most situations, however it may be necessary to purchase
additional pegs and ropes for use in extreme conditions. Tightly tensioning your Escape XF1 with the
included guy ropes further increases its strength and stability and we recommend that you do so whenever
possible.
Fixez toujours votre bivvy au sol à l’aide des sardines fournies pour éviter les risques de dégâts ou de
blessures. Les sardines et de cordes de haubannage sont fournies en nombre suffisant pour arrimer votre
bivvy en toute sécurité dans la plupart des situations, cependant il peut être nécessaire d’acheter des
sardines et des cordes supplémentaires pour le sécuriser complètement dans des conditions extrêmes.
Nous vous recommandons de vérifier la bonne tension des cordes de haubannage, cela contribue à sa
stabilité et à sa résistance.
Always maintain adequate ventilation inside your Escape XF1 at all times to help reduce the build-up of
condensation, moisture and odour. Use of the groundsheet and flysheet will also help to maintain
temperature and prevent the build-up of condensation inside the Escape XF1.
Veillez à toujours garder votre bivvy bien aéré et ventilé, pour éviter les mauvaises odeurs, la formation de
condensation et l’apparition de moisissures. L’utilisation du tapis de sol et de la surtoile aident au maintien
d’une température ambiante agréable et réduisent le risque de formation de condensation.

Warranty:
Garantie :
RidgeMonkey provides customers with a comprehensive warranty of two years from the date of purchase.
Please keep your receipt in a safe place as it may be needed in the event of a claim. Your warranty covers
repair or replacement at our discretion in the event of a manufacturing fault. over excludes damage
arising from (but not limited to) misuse, neglect, improper storage, improper cleaning, Acts of God and
cover is valid when your product is being used for recreational purposes only. No consequential loss may
be claimed. This warranty is provided in addition to your statutory consumer rights in the country of
purchase.
La garantie RidgeMonkey est valable 2 ans à compter de la date d’achat. onservez votre justificatif
d’achat, il vous sera demandé en cas de demande de prise en charge. Votre garantie couvre le
remplacement ou la réparation de votre bivvy, selon le défaut constaté (en usage loisirs seulement). Elle ne
couvre pas les dégâts causés par (liste non exhaustive) : une mauvaise utilisation, la négligence, un
stockage innaproprié, un mauvais nettoyage, la force majeure.
Contact Us:
Nous contacter :
For any enquiries or comments concerning our products, please use the contact form on
www.ridgemonkey.co.uk or call our dedicated ustomer Services team on +44 151 486 7070, and we will
respond to you as soon as possible.
Pour toute demande ou commentaire sur nos produits, merci d’utiliser le formulaire de contact sur
www.ridgemonkey.co.uk, ou appelez notre Service lients au + 44 151 486 7070, nous vous répondrons
dès que possible.
Statement:
Informations légales :
In the first instance, we’re only able to provide after-sales service for purchases made directly from
RidgeMonkey. If you purchased your product through an authorised retailer, please contact them
for any warranty issues and they will manage the claim on your behalf. Your statutory rights are
unaffected.
Merci de contacter votre détaillant pour toute demande d’application de la garantie, il sera votre
intermédiaire pendant la durée de la prise en charge, jusqu’à la réparation ou l’échange du produit.
Please note that unauthorised trade reselling of RidgeMonkey products is prohibited. If you are an
established high street retailer and wish to apply for a RidgeMonkey trade account, please contact
Head Office on +44 151 486 7070
La revente de produits RidgeMonkey sans autorisation est interdite. Si vous êtes détaillant, et que
vous voulez commander nos produits, envoyez-nous un mail à l’adresse suivante :
All brand names and trademarks used in this instruction manual are property of their respective
owners and in no way endorse (or imply endorsement) of any product described in this instruction
manual.
Les noms et les marques apparaissant dans ce document appartiennent à leurs auteurs respectifs et
ne viennent pas cautionner les produits décrits dans ces instructions.
This instruction manual and all literature contained within remains copyright of RidgeMonkey®. Any
unauthorised copying, lending or reproduction without prior written permission is strictly
prohibited.
es instructions et leur contenu appartiennent à RidgeMonkey. Toute copie, prêt ou reproduction
sans autorisation préalable sont strictement interdits.
This manual suits for next models
1
Table of contents
Other RidgeMonkey Tent manuals