Rieber navioven User manual

Issue: 2011-07-21
navioven
•
••
•For baking, frying, and regenerating specially portioned dishes as well as for hot holding.
•
••
•For the systems catering industry
Translation of the Original user guide

Contents
2 Rieber GmbH & Co. KG
Rieber Professional.
Our solutions guarantee high quality, safety and, above all,
excellent energy efficiency and cost effectiveness.
Contents
1
Revision index ................................................................................................................................................. 4
2
Important information ..................................................................................................................................... 4
2.1
Use of this guide ................................................................................................................................................4
2.2
Representation conventions in the text ..............................................................................................................4
2.3
Structure of safety instructions........................................................................................................................... 5
3
Description of appliance................................................................................................................................. 6
3.1
Identification....................................................................................................................................................... 6
3.2
Technical Details................................................................................................................................................6
4
Purpose ............................................................................................................................................................ 7
5
General safety instructions ............................................................................................................................ 8
5.1
General behaviour .............................................................................................................................................8
5.2
On use of electrical appliances .......................................................................................................................... 8
5.3
Operator's duties................................................................................................................................................9
5.4
Personnel qualification..................................................................................................................................... 10
5.5
Provide protective equipment for personnel ..................................................................................................... 10
5.6
Appliance-specific safety instructions............................................................................................................... 10
5.7
Information about regulations to be followed.................................................................................................... 12
5.8
Instructions on behaviour in an emergency...................................................................................................... 12
6
Before first use .............................................................................................................................................. 12
6.1
Transport ......................................................................................................................................................... 12
6.2
Commissioning ................................................................................................................................................ 13
7
Use.................................................................................................................................................................. 14
7.1
Safety instructions on use ................................................................................................................................ 14
7.2
The control panel of the navioven ....................................................................................................................15
8
Use.................................................................................................................................................................. 16
8.1
General ............................................................................................................................................................ 16
8.2
Select programme............................................................................................................................................ 17
8.3
Starting the cooking operation.......................................................................................................................... 17
8.4
Changing settings during operation.................................................................................................................. 18
8.5
Stopping the cooking operation........................................................................................................................ 18
8.6
Setting the date and time .................................................................................................................................18
8.7
Turning the navioven off...................................................................................................................................19
8.8
Use of navioven function buttons ..................................................................................................................... 19
8.9
The navioven programmes .............................................................................................................................. 21
9
Cleaning, maintenance and care.................................................................................................................. 28
9.1
Safety information relating to cleaning, maintenance and care ........................................................................ 28
9.2
Descale the appliance as required ................................................................................................................... 29
9.3
Cleaning........................................................................................................................................................... 30

Contents
Rieber GmbH & Co. KG 3
9.4
Cleaning the seal .............................................................................................................................................33
9.5
Clean ventilation grille at least every 4 weeks ..................................................................................................34
9.6
Disinfect the appliance as required ..................................................................................................................34
9.7
Keep ready for next use in dry condition ..........................................................................................................34
10
Fault - What now? ......................................................................................................................................... 35
11
Warranty and liability.................................................................................................................................... 36
12
EC Declaration of Conformity ...................................................................................................................... 39
13
Address of manufacturer.............................................................................................................................. 40

Revision index
4 Rieber GmbH & Co. KG
1 Revision index
Revision Change
2011-03-31 First issue
2011-05-06 Controller revised
2011-07-05 Addition: Setting the date and time, Images of the control unit
2011-09-19 8.9.5 Note added on two variants of saving a menu
2 Important information
2.1 Use of this guide
This guide contains important information about how you can use the appliance safely and correctly.
IMPORTANT
Protect yourself against potential hazards and prevent damage to your appliance.
►
It is essential that you read the user guide before using the product for the first time.
►
Keep this guide in a safe place and pass it onto the next owner should you wish to
part with the product.
If there are any deficits from your point of view, please do not hesitate to let us know. With your help,
we will try to get even better.
2.2 Representation conventions in the text
. . . Highlighting . . . , text to be highlighted
Listings are represented in this way.
Instructions on certain actions are represented in this way.
See ‘. . . ’ , cross-references are represented in this way.
Notes
NOTE
indicates potential damage to property without any personal injury.
Failure to follow these instructions may cause damage to property.
User tip
►
Useful information or tip
Important information
Rieber GmbH & Co. KG 5
2.3 Structure of safety instructions
The signal words DANGER - WARNING - CAUTION classify the degree of risk of bodily injury in an actual
situation. You can avoid injury by complying with the behavioural rules provided.
The warning triangle symbol indicates a "General Danger".
DANGER!
indicates imminent danger.
Failure to follow these warning instructions will result in serious bodily
injury or even death.
WARNING!
indicates a potentially hazardous situation.
Failure to follow these warning instructions may cause serious bodily
injury or even death.
CAUTION!
indicates a potentially harmful situation.
Failure to follow these warnings may cause minor bodily injury.

Description of appliance
6 Rieber GmbH & Co. KG
3 Description of appliance
This section provides useful information about the installation and operation of this appliance.
3.1 Identification
In the following, the parts which are important for understanding the subsequent sections are identified.
1 Door lock
2 Carrying handles
3 Water tank
4 Control panel
5 Window in door
6 Core temperature sensor
7 Support feet
3.2 Technical Details
Rated voltage / mains frequency 1N AC 230 V 50/60 Hz
Heating output 2.4 kW
Environmental conditions 0°C to +80°C
Protection class IP55 according to DIN EN 60529
(dust-proof, protected against access with wire, protected against
spray water (nozzle) from any angle)
If installed outdoors, a roof / protection against moisture
penetration is required.
Weight approx. 45 kg
Dimensions (W x D x H) 730 x 450 x 560 mm
Temperature range +20°C to +230°C
4
7
5
6
2
1
3

Purpose
Rieber GmbH & Co. KG 7
Water tank 1 litre
Support rails 7 pairs for max. 5 x 1/1 GN 65 mm deep
For detailed information on dimensions, order number, accessories,
circuit diagrams, spare and wearing parts:
See catalogue, brochure
If you have any questions, please contact your local Rieber Service.
4 Purpose
This chapter describes the intended use and contains warnings against misuse, for your safety.
Generally, the following are intended uses for the product:
•
••
•For systems catering trade, catering, hotels, and school catering.
•
••
•Use as mobile tabletop unit.
•
••
•Use as built-in kitchen appliance for installation in ‘aircleansystem’ from Rieber.
Installation may only be carried out by Rieber or an authorized partner.
Installation by the operator shall only be permissible in exceptional situations and on
the operator's own responsibility.
•
••
•For baking, cooking, core temperature cooking, braising and regenerating of
specially portioned dishes as well as for hot holding.
•
••
•The person, e.g. the chef, configures the navioven parameters.
•
••
•Wear personal safety gear such as protective gloves which will prevent you from
burning your arms or hands on the hot parts, such as the heating, hot parts, objects
and meals.
•
••
•For use by adults only.
•
••
•For use by instructed persons only.
Prevent any potential misuse in advance:
•
••
•Never operate the appliance unsupervised. To prevent persons from burning
themselves on hot surfaces, use of the product in public, e.g. for self-service, should
only be allowed under constant supervision.
•
••
•Not intended for private use at home.
•
••
•Do not lean against or sit on the appliance.
•
••
•Keep any combustible or explosive fluids away from heatable appliances. Otherwise
a fire or explosion may arise.
•
••
•Do not use to heat up a room.

General safety instructions
8 Rieber GmbH & Co. KG
5 General safety instructions
This section covers residual risks and hazards associated with the intended use of the appliance. We have
provided a list of all generally valid safety instructions which must be followed.
In the following section, safety information relating to a particular operation or situation is placed before the
appropriate operation step or description of the situation.
5.1 General behaviour
This appliance meets the current state of the art and complies with all acknowledged technical safety-
related regulations. Nevertheless hazards may still arise.
Only use this appliance when it is in fault-free condition and according to the instructions in this
user guide.
During all phases of the appliance's life please ensure that the appliance is safely integrated into
its environment.
Do not make any conversions or modifications to the appliance.
5.2 On use of electrical appliances
Safety instructions according to EN 60745-1:
Work area
•
••
•
Keep your work area clean and tidy. A messy or unlit work area can cause accidents.
•
••
•
Keep children and other persons at a distance when using the product.
Electrical safety
•
••
•
The plug on the unit must fit in the socket. Do not modify the plug in any way. Never use
an adapter in combination with earthed appliances. Using an unmodified plug and a
suitable socket will reduce the risk of an electric shock.
•
••
•
Avoid bodily contact with earthed surfaces such as pipes, heating units, cookers and
refrigerators. The risk of an electric shock is greater when your body is earthed.
•
••
•
Keep the appliance away from rain or damp. Allowing water to get into an electric
appliance will increase the risk of electric shock.
•
••
•
Do not misuse the cable by using it to remove the plug from the socket. Always remove
whilst holding onto the plug. Keep the cable away from heat, oil, sharp edges or the
moving parts of other appliances. Using damaged or tangled cables increases the risk of
electric shock.
•
••
•
When working with an appliance outdoors, only use extension cables which are permitted
for outdoor use. Using an extension cable suitable for outdoor use reduces the risk of
electric shock.
•
••
•
Potential risk of fire due to heat build-up. Unwind the cable from the spool to prevent any
heat build-up or cable fire. The coupling must have splash protection, must be made of
rubber or be rubber-coated. The cable cross-section must be at least 1.5 mm
2
.
Safety guidelines for persons
•
••
•
Be attentive and pay attention to what you are doing, act rationally when working with an
electrical appliance. Do not use the appliance when tired or under the influence of drugs,
alcohol or medication.
Just one moment of inattention whilst using the appliance can result in serious injury.
•
••
•
Make sure the appliance cannot be switched on unintentionally. Double check that the
main switch is in the "OFF" position before inserting the plug in the socket. Connecting
the appliance to the power supply while it is switched on can cause an accident.

General safety instructions
Rieber GmbH & Co. KG 9
Careful handling and use of electrical appliances
•
••
•
Never use an electrical appliance with a faulty switch. An electrical appliance which can
no longer be switched on or off is dangerous and must be repaired.
•
••
•
Keep unused electrical appliances in places where children are not able to reach them.
Do not allow the appliance to be used by persons who are not familiar with it or persons
who are not familiar with this user guide. Electrical appliances are dangerous when in the
hands of inexperienced persons.
•
••
•
Handle the appliance carefully. Make sure all moving parts of the appliance work
perfectly and are not jammed, also check whether any parts are broken or damaged to
the extent that operation of the appliance is impaired. Have any damaged parts repaired
before using the appliance. Many accidents are caused by poorly-maintained electrical
appliances.
•
••
•
Use electrical appliances, accessories etc. in accordance with these guidelines and in a
manner that is specified for this particular appliance type. When using the appliance,
please take into account the working conditions and the work being carried out. Using
electrical appliances for other uses than that intended can lead to hazardous situations.
Service
•
••
•
Only have the device repaired by qualified and authorised staff. Only use original spare
parts. In this way you can ensure that the appliance remains safe.
5.3 Operator's duties
Operator
The operator is the person who operates the appliance for commercial or economic purposes either
himself/herself or lets others use it and bears the legal appliance responsibility for protection of the
user, staff or any third parties during operation.
Operator's duties
The appliance is used in commercial applications. For this reason, the operator of the appliance must
meet all legal duties relating to work safety.
In addition to the safety instructions in this guide, the safety, accident prevention and environmental
protection regulation applying to the application of the appliance must be complied with.
In particular, the following shall apply:
•
••
•The operator must be familiar with the applicable work safety regulations and
identify, by carrying out a risk analysis, any additional hazards which are due to the
place where the appliance is used. These hazards must be addressed in the form of
operating instructions governing the operation of the appliance.
•
••
•During the whole service lift of the appliance, the operator must verify if the
operator's operating instructions reflect the current versions of the applicable
regulations. If necessary, the operator must update the operating instructions
accordingly.
•
••
•The operator must define and assign the responsibilities for installation, operation,
repair, maintenance and cleaning clearly.
•
••
•The operator must make sure that all personnel working with the appliance have
read and understood this guide. In addition, the operator must train the personnel
and inform them of the hazards involved at regular intervals.
•
••
•The operator must provide the personnel with the necessary protective equipment
and make sure that they wear it.

General safety instructions
10 Rieber GmbH & Co. KG
In addition, the operator must ensure that the appliance is always in a perfect technical condition. For
this reason, the following shall apply:
•
••
•The operator must ensure that the maintenance intervals defined in this guide are
obeyed.
•
••
•The operator must have all safety equipment be checked regularly for completeness
and proper function.
•
••
•The operator must ensure that the required media connections are available.
•
••
•The operator must ensure that all safety-relevant measures required on site are
taken.
5.4 Personnel qualification
Safe operation requires certain technical skills and personal qualification of each person.
•
••
•The responsibility for organization lies with the ‘Designated Representative’
(operator).
According to EN 50110-1, the Designated Representative is a 'person assigned the
direct responsibility for the performance of the work. If necessary, this responsibility
can be assigned partly to other persons. [...] The designated representative must
instruct all persons involved in the work on all hazards which may not be obvious for
them’.
•
••
•The work may only be performed by ‘instructed persons’ who have been trained
accordingly. Training, instructions must be repeated, proper understanding must be
verified (ideally by way of an appropriate test).
•
••
•Only ‘Qualified Staff’ is allowed to carry out repair work.
IEC 60204-1 defines qualified personnel as "persons who, on account of their
training and relevant experience are in the position to recognise risks and avoid
potentially dangerous situations."
•
••
•Electrical work may only be carried out by trained and experienced electricians.
Electro-technically instructed persons may only work under the supervision of a
qualified electrician.
5.5 Provide protective equipment for personnel
Ensure that the personnel wears the personal protective equipment appropriate to the relevant
situation.
Wear sturdy shoes to avoid injury.
Wear safety gloves to avoid burns at hands and arms.
5.6 Appliance-specific safety instructions
This chapter describes general, appliance-specific safety instructions. In the following section, additional safety
information relating to a particular operation or situation is placed before the appropriate operation step or
description of the situation.
5.6.1 Safety and monitoring devices
•
••
•The appliance features a safety cut-out. The appliance switches itself off
automatically in the event of a fault to the control system.
•
••
•To increase your safety we recommend you install a earth leakage circuit breaker
with a tripping current of 30 mA upstream to the appliance.

General safety instructions
Rieber GmbH & Co. KG 11
5.6.2 Hazards during transport
WARNING!
Danger by lifting of heavy loads. Personal damage possible when transporting the
appliance without aids. The appliance has a weight of approx. 45 kg.
►
Judge realistically if you are physically fit for transporting the appliance. The
appliance should only be transported by 2 persons.
►
Use the handles when transporting the appliance.
5.6.3 Dangers due to hot surfaces, burns
Before first use
12 Rieber GmbH & Co. KG
WARNING!
One can burn one's hands and arms on the hot surfaces around the heating and its
environment.
►
Stay calm and prudent.
►
Where possible wear protective gloves.
►
Keep unauthorised persons away from the appliance.
►
Never operate the appliance unsupervised.
►
Keep combustible materials away from the product.
5.7 Information about regulations to be followed
Alongside this user guide there are a range of health and safety and other regulations that are relevant
for the operation of this cooking station; these include HACCP food hygiene regulations for example.
5.8 Instructions on behaviour in an emergency
In an emergency, always turn the main switch off.
First aid in the case of burns and scalding or electric shock:
Inform yourself on this before commissioning the appliance.
Store the emergency equipment, including the relevant instructions, at a readily accessible place
near the place of use.
User tip
►
Inform yourself in detail taking the company-internal instructions as a reference.
►
We recommend that half-yearly emergency training sessions should be carried out.
6 Before first use
This chapter describes the measures to be taken before use.
6.1 Transport
6.1.1 Check/handle any transport damage
Immediately after delivery, visually check the appliance for any transport damage.
Document any potential transport damage on the consignment note in the presence of the haulage
contractor, and have the damage confirmed by the haulage contractor (with signature).
Decide if you wish to keep the appliance and claim the defect using the consignment note, or if
you wish to reject the appliance.
▌By following this procedure you will contribute to proper claim settlement.

Before first use
Rieber GmbH & Co. KG 13
6.1.2 Unpacking
Open the transport packaging at the positions provided for this purpose. Do not tear or cut.
Remove any packaging remnants.
6.1.3 Scope of supply
Inspect the scope of supply.
6.1.4 Dispose of packaging material
Dispose of packaging material in an environmentally compatible way.
6.2 Commissioning
Preconditions
•
••
•Installation may only be carried out by Rieber or an authorized partner. Installation
by the operator shall only be permissible in exceptional situations and on the
operator's own responsibility.
•
••
•The appliance has no defects or visible damage.
•
••
•The appliance has room temperature and is dry.
•
••
•Handle pointed core temperature sensor with care.
NOTE
Protective foils or heat-sensitive objects at/in the appliance might damage the appliance
during heating.
►
Ensure that there are no protective foils in the inside and on the outside of the
appliance.
•
••
•navioven is built into a Rieber ‘aircleansystem’ station by Rieber or an authorized
partner or installed as a mobile table-top unit.
NOTE
Improper installation can damage or even destroy the appliance. If the ventilation openings
on the rear of the appliance are obstructed or if the opening adjustment for escaping
overpressure steam is changed, the appliance may overheat.
►
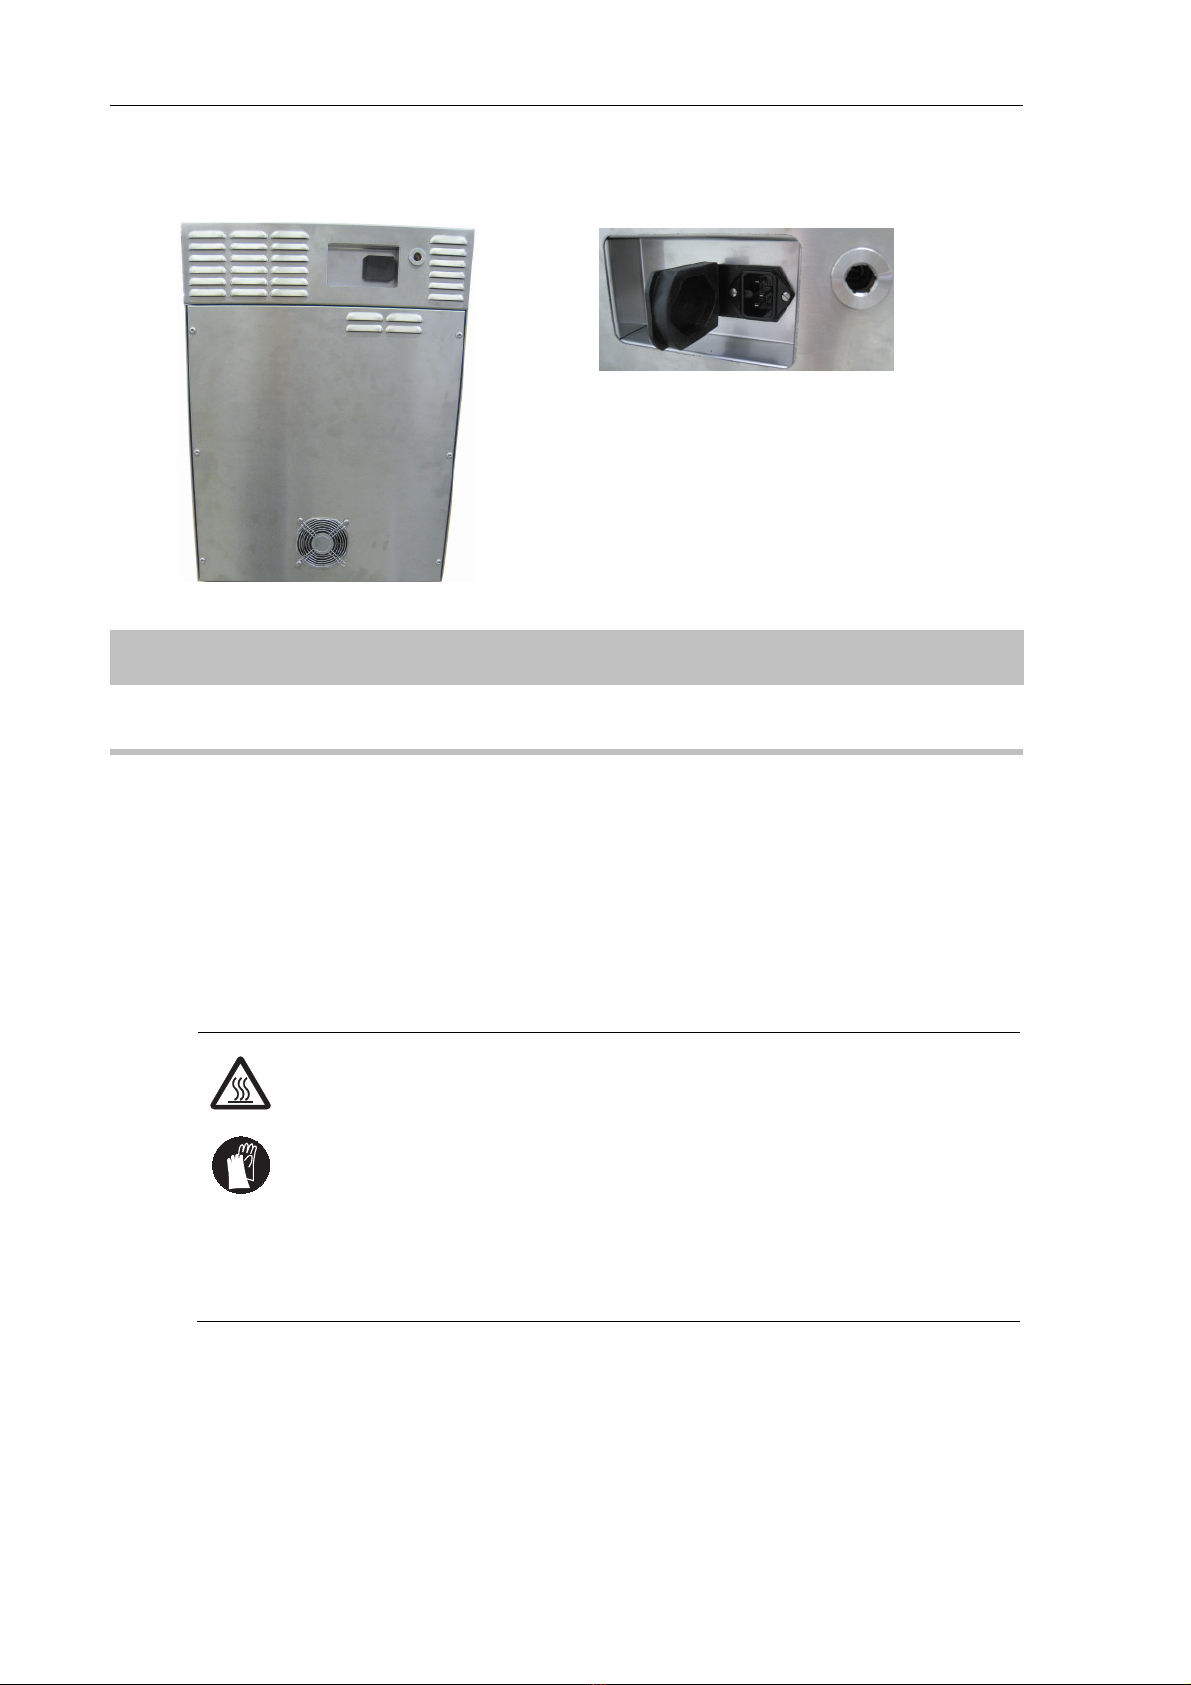
Keep the minimum distance for proper air circulation at the rear wall, ≥10 cm.
►
Assess the installation conditions realistically (heat/steam impact).
Comply with regulations of local building authorities
Refer to the local authorities for information.
Clean the navioven
See chapter ‘ Cleaning, maintenance and care’, on page 28
Use
14 Rieber GmbH & Co. KG
Connect the navioven
•
••
•Connect the navioven to power supply.
7 Use
7.1 Safety instructions on use
Keep to the basic rules for operating the product
Before each use, check the appliance for any visible damage.
Only use the appliance for the specified goods.
Keep the appliance in a clean and hygienically spotless condition.
Ensure that water is in the water tank when using the moistening function. Refill water regularly.
Dangers due to hot surfaces, burns
WARNING!
One can burn one's hands and arms on the hot surfaces around the heating and its
environment, e.g. casing and door.
►
Stay calm and prudent.
►
Where possible wear protective gloves.
►
Keep unauthorised persons away from the appliance.
►
Never operate the appliance unsupervised.
►
Keep combustible materials away from the product.
Use
Rieber GmbH & Co. KG 15
7.2 The control panel of the navioven
7.2.1 Main menu
4 Control dial,
extended when the appliance is off
6 POWER ON
11 STOP
12 START
Programmes
1 Simmering
2 Core temperature
3 Fan
5 Menu
Function buttons
7 Moistening
8 Time
9 Core temperature
10 Chamber temperature
Programme 1: Simmering
Options for setting chamber temperature, time and steam.
Programme 2: Core temperature
Options for setting core temperature, chamber temperature and steam.
Programme 3: Fans (passive cooling)
Passive cooling with cooling pellets + circulating air
Programme 6: Menu
For selecting stored programmes.
3
1
2
6
12
11
10
9
8
7
4
5

Use
16 Rieber GmbH & Co. KG
Display
Examples of
displays
Meaning
•navioven is in standby mode.
•LED POWER ON (6) is flashing.
•Display is black
•Programme XX running.
•In the bottom menu bar, the function buttons for the relevant
setting options are flashing.
•The actual temperature is displayed.
•F1 in the display indicates: a fault is present.
See ‘Fault – What now?’, Page 35
•Acoustic signal: 10 seconds before automatic execution of an
action, an acoustic signal will sound, e.g. 10 seconds before
cooking time has elapsed.
8 Use
8.1 General
Switching on the appliance
For simmering with moistening, fill in water first,
max. up to 1 cm below the upper edge.
Ensure that water is in the water tank when using the moistening function. Refill water regularly.
▌There will be no fault message if there is no water in the tank.
Plug in the connecting plug.
▌Standby indicator will light up.

Use
Rieber GmbH & Co. KG 17
8.2 Select programme
Turn the control dial (4) to select the programme.
▌The current chamber temperature is shown in the display.
▌In the bottom menu bar, the function buttons for the relevant setting
options are flashing.
8.3 Starting the cooking operation
Fill the food to be cooked in a GN container.
Press the START button (12).
▌The chosen programme will be executed.
▌The current chamber temperature is shown in the display.
▌The relevant LED at the control dial will light up.
Checking values
Press the relevant function button.
▌The relevant target value, e.g. the remaining runtime, will be displayed.
Release the function button.
▌The relevant actual value will be displayed
▌After approx. 10 seconds the display will revert to the current chamber
temperature.
After cooking time has elapsed
▌Once the cooking time has elapsed, there will be an acoustic signal.
▌The programme is continued.
▌The current chamber temperature is shown in the display.

Use
18 Rieber GmbH & Co. KG
8.4 Changing settings during operation
▌The chosen programme will be executed.
▌The current chamber temperature is shown in the display.
Press the relevant function button and set the required value using the
control dial (6).
▌The controller applies the set value for the current cooking operation.
8.5 Stopping the cooking operation
Press Stop (11) button and keep it pressed for approx. 5 seconds: back to
programme selection.
▌The programme currently running will be stopped.
Press Stop button again and keep it pressed for approx. 5 seconds:
▌Standby mode is activated.
▌LED POWER ON (6) lights up.
Stopping programme with real time function
See ‘Unlocking the controller in real-time mode’, Page 27
8.6 Setting the date and time
In standby mode, press Time button (8) and keep it pressed for approx. 5 seconds.
Using the control dial (4), move the flashing bar to the required position.
Press the control dial.
▌The value to be changed will be flashing on the display.
Use the control dial to set the required value.
Press the control dial again.
▌The new value will be saved.
To exit setup mode, press the Stop BUTTON (11).
▌The appliance is in standby mode.

Use
Rieber GmbH & Co. KG 19
8.7 Turning the navioven off
Press Stop (11) button and keep it pressed for approx. 5 seconds: back to
programme selection.
▌The programme currently running will be stopped.
Press Stop button again and keep it pressed for approx. 5 seconds:
▌Standby mode is activated.
▌The current chamber temperature is shown in the display.
Turn the control dial (4) to POWER ON position.
▌The display will be turned off.
Unplug the mains connector if necessary.
Stopping programme with real time function
See ‘Unlocking the controller in real-time mode’, Page 27
8.8 Use of navioven function buttons
Turn the control dial (4) until the display for the required programme lights up.
Press the control dial to open the required programme.
▌The LEDs on the function buttons will be flashing.
Depending on the selected programme, you can now set the chamber temperature,
core temperature, time and moistening function using the function buttons.
▌The LEDs on the function buttons will be flashing.
Chamber temperature function button
Checking the actual chamber temperature
▌The actual temperature is displayed, if no other function key was
pressed.
Checking the target chamber temperature
Press the chamber temperature function (10) button.
▌The target temperature is displayed.
▌After approx. 10 seconds the display will revert to the current chamber
temperature.
Setting the target chamber temperature
Press the chamber temperature function button and keep it pressed.
Turn the control dial (4) to set the target chamber temperature.
Release the chamber temperature function button.

Use
20 Rieber GmbH & Co. KG
▌The adjusted value is applied automatically.
▌The current chamber temperature is displayed.
Core temperature function button
Checking the target core temperature
Press the core temperature function (9) button.
▌The target temperature is displayed.
▌After approx. 10 seconds the display will revert to the current core
temperature.
Checking the actual core temperature
Press and release the core temperature function button.
▌The current core temperature is displayed.
Setting the target core temperature:
Press the core temperature function button and keep it pressed. Turn the control
dial to set the target core temperature.
Release the core temperature function button.
▌The adjusted value is applied automatically.
▌The current chamber temperature is shown again in the display.
Time function button
Checking the target time
Press the time function (8) button.
▌The target time is displayed.
▌After approx. 10 seconds the display will revert to the current chamber
temperature.
Checking the remaining runtime
Press and release the time function button.
▌The remaining runtime is displayed.
▌After approx. 10 seconds the display will revert to the current chamber
temperature.
Setting the target time
Press the time function button and keep it pressed. Turn the dial to set the target
time.
Select "--" for continuous operation.
Release the time function button.
▌The adjusted value is applied automatically.
▌The current chamber temperature is shown again in the display.
Moistening function button
Moistening levels
The air moistening function prevents the food from drying and improves heat transfer.
Four air moistening levels are available:
•0: neutral position, no moistening
Other manuals for navioven
1
Table of contents
Other Rieber Oven manuals

Popular Oven manuals by other brands

IKEA
IKEA KULINARISK 203.008.75 manual

LG
LG LWS3081ST - 30in Single Electric Wall Oven Specification sheet
Electrolux
Electrolux E30EW75GSS - 30" Single Electric Wall Oven Installation

Eleyus
Eleyus Victoria operating manual

Bella
Bella 18 Qt. Roaster Oven instruction manual

Hanseatic
Hanseatic N5M90E2-E11G400 user manual


