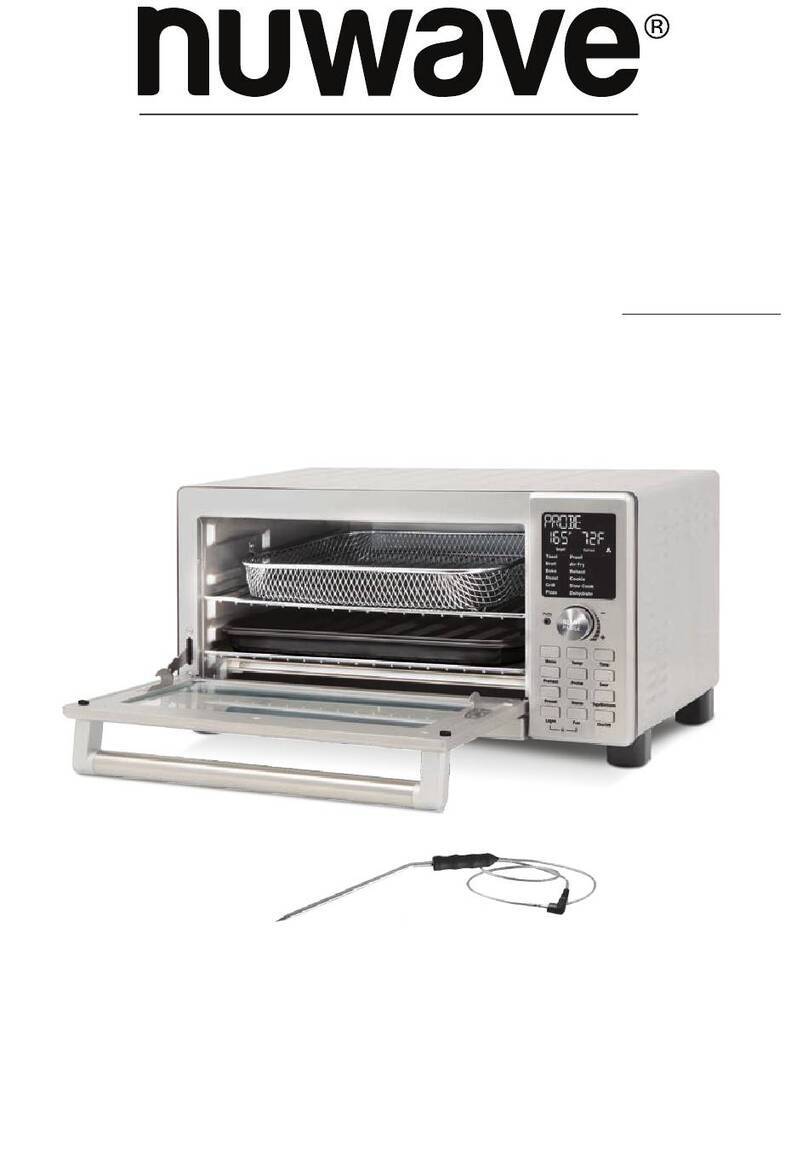
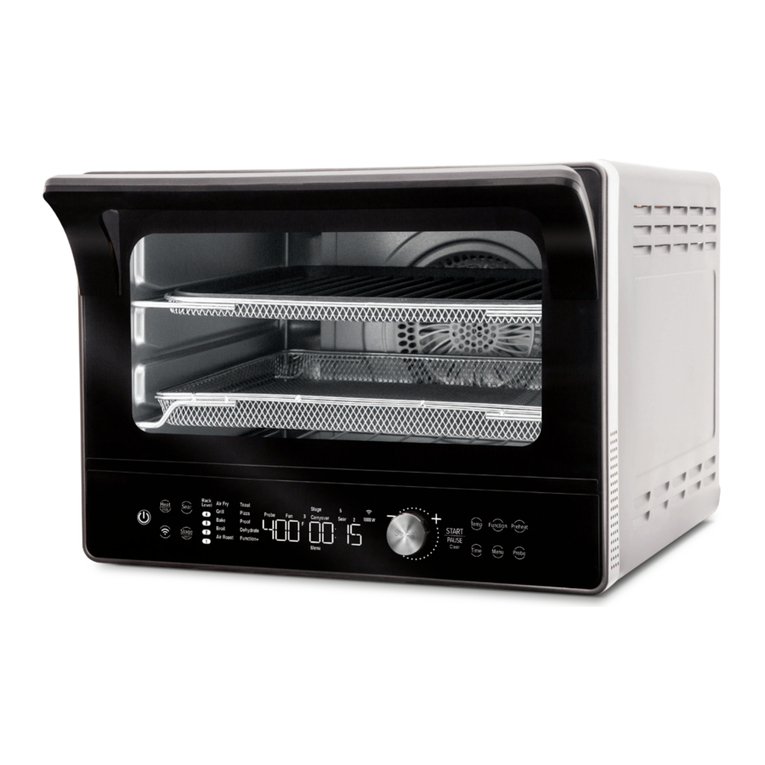
NuWave Bravo 20831 User manual

OWNER’S MANUAL
Toaster Oven & Air Fryer
nuwavenow.com

2
2
REGISTER
NOW!
As a special thank-you for registering your NuWave
Bravo, you’ll automatically receive an additional 3
months added to your limited manufacturer’s warranty!*
All you have to do is follow these simple steps.
Using your smartphone or
smart device, scan the QR code
located on the unit label on the
back of the Bravo.
You will be directed to NuWave’s
product registration page with
your Bravo’s unique serial
number automatically entered in
the appropriate eld.
NOTE: If you do not have a
web-enabled smart device,
simply visit nuwavenow.com/
QR and manually enter in your
Bravo’s serial number.
Fill out the remaining information
and complete the optional survey.
Once you submit your
information, you will receive
a conrmation email containing
your extended warranty details.
1
2
3
4
*Register your product within 1 year of date of purchase for a free
3-month extension of your limited warranty.

Open your mobile app store
(App Store, Google Play).
Search for "QR code readers."
Simply download the QR code reader to your phone,
open it, scan the code and you are ready to go.
NOTE: You may need to open your downloaded QR
code reader each time you want to scan a QR code.
nuwavenow.com
3
nuwavenow.com
3
3 for an additional
months
warranty!
1
2
3
DOWNLOAD THE QR CODE
APP TO YOUR MOBILE DEVICE
QR code readers

table of contents
4
TABLE OF CONTENTS
4
OWNER’S MANUAL
Guides...............................................................................5-6
Important Safeguards .......................................................6-9
Parts & Accessories............................................................. 9
Assembly Guide................................................................. 10
Quickstart........................................................................... 12
Instructions....................................................................13-18
Cleaning & Maintenance................................................18-19
Troubleshoot Guide........................................................20-21
Limited Warranty ............................................................22-24
Spanish............................................................................25-49
Replaceable Parts...........................................................50-51
nuwavenow.com

nuwavenow.com
5
ENGLISH
nuwavenow.com
5
nuwavenow.com 5
12 Preprogrammed Menus
Note: Preset temperatures and times may need minor adjustments
to best suit your desired results.
Air Fry
• Default Temp: 360°F
• Default Time: 15 minutes
• Heat Source: Top/Bottom
(100/100 percent)
• Rack Position: 2
Grill
• Default Temp: 425°F
• Default Time: 15 minutes
• Heat Source: Top/Bottom
(0/100 percent)
• Rack Position: 1
Bagel
• Default Temp: 450°F
• Default Time: 6 minutes
• Heat Source: Top/Bottom
(100/100 percent)
• Rack Position: 2
Pizza
• Default Temp: 450°F
• Default Time: 15 minutes
• Heat Source: Top/Bottom
(100/100 percent)
• Rack Position: 1
NOTE: Times & Temps will vary
on the size of the pizza.
Bake
• Default Temp: 350°F
• Default Time: 25 minutes
• Heat Source: Top/Bottom
(100/100 percent)
• Rack Position: 1, 2, and 3
Reheat
• Default Temp: 350°F
• Default Time: 10 minutes
• Heat Source: Top/Bottom
(100/100 percent)
• Rack Position: 1, 2, and 3
Broil
• Default Temp: 450°F
• Default Time: 10 minutes
• Heat Source: Top/Bottom
(100/0 percent)
• Rack Position: 3
Roast
• Default Temp: 375°F
• Default Time: 30 minutes
• Heat Source: Top/Bottom
(100/100 percent)
• Rack Position: 1 and 2
Dehydrate
• Default Temp: 100°F
• Default Time: 2 hours
• Heat Source: Top/Bottom
(100/100 percent)
• Rack Position: 1, 2, 3, and 4
(may need rack rotation)
Toast
• Default Temp: 450°F
• Default Time: 6 minutes
• Heat Source: Top/Bottom
(100/100 percent)
• Rack Position: 2
Frozen
• Default Temp: 325°F
• Default Time: 20 minutes
• Heat Source: Top/Bottom
(100/100 percent)
• Rack Position: 1, 2, and 3
• (May need to rotate rack)
Waffle
• Default Temp: 450°F
• Default Time: 5 minutes
• Heat Source: Top/Bottom
(100/100 percent)
• Rack Position: 3
GUIDES
Refer to Oven Rack and Pan Positions chart under Instructions

guides
6
GUIDES
Notes:
• NEVER allow any food to touch the heating elements directly.
• Default temperatures, times, and rack positions are a guide.
Adjustments may need to be made to reach desired result.
• Fan speed is High (level 3) unless speed is adjusted.
Meat Thermometer Temperature Guide
Beef Temp
Rare 125℉
Medium-Rare 135℉
Medium 145℉
Medium-Well 150℉
Well 160℉
Minimum Cook Temperatures
Poultry 165℉
Pork 145℉
Seafood 145℉
WARNING: When using
the Bravo, basic safety
precautions should always be
followed:
1. Do not touch hot surfaces.
Use handle and wear
oven gloves.
2. Do not use the Bravo
together with other electric
appliances with high power
to avoid electrical overload.
3. To protect against risk of
electrical shock, do not
immerse the cord, plug,
or any part of the Bravo in
water or any other liquids,
or touch plug when hands
are wet.
4. Do not operate the Bravo
with a damaged cord
or plug, if the appliance
malfunctions, is dropped,
or damaged in any manner.
Contact Customer Service
at 1-877-689-2838 or email
help@nuwavenow.com for
information on examination,
repair, or adjustment.
5. Close supervision is
necessary when any
appliance is used near
children. The Bravo is
not intended for use by
children, persons with
reduced physical, sensory, or
mental capabilities, or those
with lack of expertise or
knowledge of this Bravo.
6. Do not let the cord hang over
the edge of table or counter.
7. Do not let cord contact hot
surfaces, including a stovetop.
8. Place the Bravo on a
surface that is horizontal,
even, and stable.
9. DO NOT USE OUTDOORS.
FOR INDOOR USE ONLY.

nuwavenow.com 7
ENGLISH
nuwavenow.com 7
IMPORTANT SAFEGUARDS
HOUSEHOLD USE ONLY • READ ALL INSTRUCTIONS BEFORE USE
10. Do not place on or near a
hot gas or electric burner or
on a heated oven or on a
stovetop.
11. Do not place the Bravo close
to flammable materials,
heating units, or wet
environments.
12. A fire may occur if the
toaster oven is covered
or touching flammable
materials including curtains,
draperies, walls, etc., when
in operation.
13. Do not place objects on top
of the Bravo.
14. Do not place airtight
containers in the Bravo.
15. Do not place plastic or
rubber containers in
the Bravo. Avoid using
containers made of any
other material other than
ceramic, glass, or metal in
the Bravo.
16. Always wear protective,
insulated oven gloves when
inserting or removing items
from the Bravo.
17. Do not place any cookware
or dishes in the Bravo that
are not oven safe.
18. Do not store any materials
other than the manufacturer’s
recommended accessories in
the Bravo when not in use.
19. Do not clean with metal
pads. Pieces can break off
the pad and touch electrical
parts, involving a risk of
electric shock.
20. Do not place paper,
cardboard, plastic, or any
other flammable materials
on top of or inside the Bravo.
21. Use aluminum foil to wrap
foods that produce oil or
juice when operating and
put on the Baking Rack, to
prevent fire.
22. Make sure foil does not
touch heating elements, to
prevent fire.
23. Do not cover Crumb Tray
or any part of the oven
with foil. This will cause
overheating of the oven and
may cause fire.
24. Do not alter or modify any
part of the Bravo or use
attachments or accessories
not recommended by the
manufacturer.
25. When the appliance is
operating, press ON/OFF to
turn the Bravo off.
26. It is normal for some smoke
to escape the Bravo when
heating for the first time.
27. If excess smoke is escaping
from the air vent during
operation, unplug the Bravo
immediately and contact
Customer Service at 1-877-
689-2838 or email help@
nuwavenow.com.
28. Extreme caution must be
used when moving an
appliance containing hot oil
or other hot liquids.
29. Use extreme caution when
removing or disposing of
hot grease.
30. Do not overfill the Bravo
such that contents are
touching heating elements or
blocking the fan.
important safeguards
8
IMPORTANT SAFEGUARDS
HOUSEHOLD USE ONLY • READ ALL INSTRUCTIONS BEFORE USE
8
WARNING
In case of other
problems, unplug the
Bravo and contact
Customer Service:
1-877-689-2838 or email
help@nuwavenow.com.
SEE CLEANING
& MAINTENANCE
BEFORE USE
31. Oversized foods or metal
utensils must not be inserted
in the Bravo as they may
create a fire or a risk of
electric shock.
32. During use, steam may
be released from the air
outlet vents. Keep hands
and face away from the air
outlet openings. Be careful
of hot steam escaping when
opening the Bravo.
33. Avoid placing face and eyes
near the glass door during
use.
34. Never touch the insides
of the Bravo while it is
operating.
35. Never leave the Bravo
unattended during use.
36. Never put the Bravo against
the wall or other appliances.
There should be at least 5
inches of free space behind,
to the sides of, and on top of
the Bravo.
37. To disconnect, first turn OFF
then remove plug from wall
outlet.
38. Do not disassemble the
Bravo.
39. Unplug the Bravo from the
outlet when not in use or
before cleaning.
40. Allow the Bravo to cool
before putting on, taking off
parts, or before cleaning.
41. Do not use appliance for
other than its intended use.
42. Keep manual handy for
future reference.
Electrical Information
A short power-supply cord
is provided to reduce the
risk resulting from becoming
entangled in or tripping
over a longer cord. Longer
detachable power-supply
cords or extension cords are
available and may be used if
care is exercised in their use.
If a longer detachable power-
supply cord or extension cord
is used:
1. The marked electrical rating
of the extension cord should
be at least as great as
the electrical rating of the
appliance.
2. The longer cord should be
arranged so that it will not
drape over the countertop
or tabletop where it could
be pulled on or tripped
over unintentionally. The
Bravo should be operated
on a separate electrical
outlet from other operating
appliances due to wattage
limitations. The appliance
has a polarized plug (one
blade is wider than the

nuwavenow.com
9
ENGLISH
nuwavenow.com
9
other). To reduce the risk of
electric shock, this plug is
intended to fit into a polarized
outlet only one way. If the
plug does not fit fully into the
outlet, reverse the plug. If
it still does not fit, contact a
qualified electrician. Do not
attempt to modify the plug in
any way.
3. If the appliance is of the
grounded type, the cord set
or extension cord should be
a grounding-type 3-wire cord.
SAVE THESE
INSTRUCTIONS
Read and understand the
entire manual before using this
appliance.
Note: The Bravo is intended
for household use only. It is
not intended to be used in
environments such as staff
kitchens/cafeterias, shops,
offices, farms, or other work
environments, nor is it intended
to be used by clients in hotels,
motels, bed and breakfasts, and
nonresidential environments.
NOTICE: FAILURE TO FOLLOW
ANY OF THE IMPORTANT
SAFEGUARDS, ADDITIONAL
SAFEGUARDS, OR THE
INSTRUCTIONS FOR SAFE
USE IS A MISUSE OF THE
BRAVO THAT CAN VOID THE
WARRANTY AND CREATE THE
RISK OF SERIOUS INJURY.
DO NOT USE THE BRAVO FOR
ANYTHING OTHER THAN ITS
INTENDED USE.
ADDITIONAL
SAFEGUARDS
1. Amount of ingredients placed
in the Bravo should comply
with directions listed under
“Instructions.”
2. Do not move the Bravo while
in operation.
3. Only after the Bravo has
completely cooled down
should you attempt to move
or handle it.
4. DO NOT attempt to use the
Bravo to deep-fry any food as
this is NOT its intended use
and may create a fire hazard.
5. Do not cover the intake air
vents or exhaust vents while
the Bravo is operating.
6. Always put the ingredients to
be cooked on the appropriate
baking sheet (do not overfill)
and do not allow food to come
into direct contact with the
heating components.
7. Make sure the Bravo
is always clean prior to
cooking.
8. Always unplug power cord by
pulling on plug, NOT the cord.
9. Children should be
supervised to ensure that
they do not play with the
Bravo.
10. The Bravo is not intended to
be operated by means of an
external timer or separate
remote-control system.

parts & accessories
10
PARTS & ACCESSORIES
10
WARNING
Never use the Bravo with loose, damaged, or
missing parts.
1
2
3
4
5
Base
Part #: 26831
Heavy-Duty Cooking
Rack
Part #: 26833
Steel
Baking Rack
Part #: 26834
Baking Pan
Part #: 26835
Air Fry Basket
Part #: 26806
Crumb Tray
Part #: 26832
1
2
5
6
To order replaceable parts head over to the Replaceable Parts section
and then NuWaveNow.com.
3
4
6

nuwavenow.com
11
ENGLISH
nuwavenow.com
11
Parts
Baking Rack
Cooking Rack
Baking Pan Slot 1
Slot 2
Air Fry Basket
1. Place the Bravo on a level, even, and stable
heat-resistant surface.
2. Slide the Cooking Rack into either Slot 1 or 2 of the Bravo.
3. Place Baking Pan on Cooking Rack.
4. Place Crumb Tray into position by sliding it into slot at bottom of
oven. To remove, pull out.
5. Plug the Bravo into a standard wall socket. The power plug is
located in the rear of the Bravo.
Note:
Do not cover or block the intake air vents located in the back and
sides of the Bravo, as doing so can prevent proper ventilation.
ASSEMBLY GUIDE

ON/OFF
Turns the Bravo®ON and OFF. This
also stops any cooking function.
While cooking press ON/OFF to
cancel the cooking function and
turns the Bravo off.
START/PAUSE
Press START/PAUSE to start and
pause cooking at any time. Press
START/PAUSE for 1 second (until
you hear a beep) to mute and unmute
the Bravo.
MENU
Choose between the 12 cooking
Menu options. Each menu selection
has a set temperature and time.
Press MENU or turn START/PAUSE
to choose your desired Menu.
TEMP and TIME
Allows you to adjust temperature and
time before and during the
cooking process.
TOP/BTM
Adjust the temperatures of the top
and bottom heating elements.
Default is set to 100/100.
WARM
Keeps your food warm after cooking and quickly warms your favorite
leftovers. Press WARM for 1 second (until you hear a beep) to use
warm independently. Default is 140ºF for 1 hour.
FAN
Adjust between 3 fan speeds.
quickstart
1212
QUICKSTART
Bravo 3 Convection Oven
Control Panel_shunde
2018.10.27.
/
/
Note: Refer to INSTRUCTIONS for detailed explanation for each
button and feature.

nuwavenow.com 13
ENGLISH
nuwavenow.com 13
Getting Started
1. Press ON/OFF once to turn
your Bravo on.
2. Press START/PAUSE to
begin cooking at 350°F for
15 minutes, which are the
default settings.
• 00:15 will be displayed
and a countdown will
begin.
• To adjust cooking
temperature, turn the
START/PAUSE Dial
clockwise to increase,
or counterclockwise to
decrease temperature in
5°F increments. Quickly
turn the Dial to adjust in
larger increments.
• Both the cooking
temperature and time
can be adjusted during
cooking by pressing
TEMP or TIME then
turning the START/
PAUSE Dial to adjust
each.
/
3 5 0 F
INSTRUCTIONS
3. Press START/PAUSE once
during cooking to pause.
4. Press START/PAUSE a
second time to resume
cooking.
• Remaining cooking time
will be displayed and the
countdown will continue.
Note: Press START/PAUSE for
1 second (until you hear a beep)
to mute and unmute the Bravo
beeps.
TEMP
1. Press TEMP any time you
want to see or adjust the
cooking temperature.
2. The temperature can
be adjusted up or down
by turning the START/
PAUSE dial clockwise or
counterclockwise.
3. Press START/PAUSE to
begin cooking at the
set temperature.
4. Temperature can be adjusted
during cooking by pressing
TEMP and turning the START/
PAUSE dial to adjust. The
Bravo will continue cooking at
the new temperature setting.
TIME
1. Press TIME anytime you
want to see or adjust the
cooking time. Time range as
follows.

instructions
14
INSTRUCTIONS
14
• 50F~275F: 00:00-99:99
(0-min. to 99-hrs., 99-
min.)
• 280F~400F: 00:00-24:00
(0-min. to 24-hrs.)
• 405F~450F: 00:00-01:00
(0-min. to 1-hr.)
2. The time can be
adjusted up or down
by turning the START/
PAUSE dial clockwise or
counterclockwise.
3. Press START/PAUSE to
begin cooking at the new
time.
4. Time can be adjusted during
cooking by pressing TIME
and turning the START/
PAUSE dial to adjust. The
Bravo will continue cooking
at the new time setting.
FAN
1. Press the FAN button to
adjust the fan speed.
2. Press FAN once and the
display will show FAN 3.
3. Press FAN a second time
and the display will show
FAN 2.
4. Press it a third time and the
display will show FAN 1.
5. To turn the fan off, press FAN
four times. The display will
show FAN 0.
F A 3
WARM
1. Press WARM to keep your
food warm after cooking until
you’re ready to serve. The
default for Warm is 140ºF for
1 hour.
2. Turn the START/PAUSE
dial to adjust the warming
temperature up to 200ºF.
3. Press TIME. The display will
show 01:00 and WARM.
4. Turn the START/PAUSE dial
to adjust the warming time.
• 50ºF~200ºF: 00:00 – 03:00
5. Press START/PAUSE to start
cooking. The Bravo will go
through a regular cooking
cycle then will go into Warm
at the set temperature and
time.
Using Warm as an
Independent Function
1. Press and hold WARM for
1 second (until you hear a
beep). The Bravo will begin
the warming function at the
default settings.
2. Use the START/PAUSE dial
to adjust the warming time.
• 50˚F ~ 200˚F: 00:00 –
03:00
3. To adjust the warming
temperature, press TEMP
0 1 :00

nuwavenow.com
15
ENGLISH
nuwavenow.com
15
and use the START/PAUSE
dial to adjust the warming
temperature up to 200ºF.
4. When the warming time runs
out, the display will show
End and the Bravo will beep
3 times.
Notes:
• Warm temperature can be
adjusted up to 200ºF.
• Warm can be used with
the Menu options as well:
Choose the menu option and
press WARM. Adjust warm
temperature and time.
• To cancel the Warm function
at any time press WARM.
WARM will no longer be lit in
the display.
MENU
There are 12 menu options for
you to choose from.
1. Press MENU. Turn the START/
PAUSE dial or continue to
press MENU to scroll through
the menu options.
1
2. Once your desired menu
option is chosen, press
START/PAUSE to begin
cooking. The colon (:) will
flash, indicating the Bravo
is now cooking. The display
will show the default cooking
time for that menu option.
To adjust the cooking time,
simply turn the START/
PAUSE dial to the new
cooking time.
3. To change the cooking
temperature, press TEMP.
The display will show the
default cooking temperature
for that menu option.
Turn the START/PAUSE
dial to adjust the cooking
temperature.
4. To pause cooking, press
START/PAUSE. The colon (:)
will no longer flash indicating
the Bravo is now paused.
5. To unpause and go back
to cooking, press START/
PAUSE again.
6. Once the Bravo finishes
cooking, the display will
show End and the Bravo will
beep three times.
TOP/BTM
Default – Top 100%, Bottom
100%. This refers to the amount
of heat coming from the top and
bottom heating elements.
1 0 0

instructions
16
INSTRUCTIONS
16
1. Press ON/OFF.
2. Press TOP/BTM, 100 and
TOP will be displayed.
Adjust the amount of heat
coming from the top heating
element by turning START/
PAUSE. Adjustable in 10%
increments.
3. Press TOP/BTM again, 100
and BTM will be displayed.
Adjust the amount of heat
coming from the bottom
heating element by turning
START/PAUSE. Adjustable in
10% increments.
4. After top and bottom heat
percentages have been
chosen, press START/
PAUSE to begin cooking.
Helpful Hints
1. To add more time during current cooking cycle, turn START/PAUSE
Dial clockwise. Monitor food to ensure it does not overcook.
2. Some moisture may appear on the door during certain
cooking cycles.
3. When air-frying, food can be lightly coated with oil beforehand
to boost crispiness and browning.

nuwavenow.com
17
ENGLISH
nuwavenow.com
17
Parts
Baking Rack
Cooking Rack
Baking Pan
Air Fry Basket
Slot 1
Slot 2
Oven Rack and Pan Positions
Position 1: For chicken or other large items (with Baking Pan)
as shown.
Position 2:
Position 3:
Position 4: Dehydrating only
OVEN RACK AND PAN POSITIONS

instructions
18
INSTRUCTIONS
18
Recipes
Note: Temperatures and times are to be used as guidelines. Minor
adjustments may be needed to best suit your desired results.
Measurement Chart
Teaspoon = t Fahrenheit = °F Minute = min
Tablespoon = T Celsius = °C Second = sec
Cup = c Fluid Ounces = oz Inch = in.
Ounce = oz Liter = L Dozen = doz
Pound = lb(s) Milliliter = ml Hour = hr
Quart = qt Package = pkg. Gram = g
Pint = pt Gallon = gal Kilogram = kg
Before First Use:
Wash all removable parts in warm, soapy water or in the dishwasher,
top rack only.
1. Remove all the packaging materials.
2. Remove the glue and labels on the appliance.
3. Clean the Cooking Rack, Baking Pan, Air Fry Basket and Crumb
Tray thoroughly with hot water, a nonabrasive sponge, and
mild dish detergent, or in the
dishwasher, top rack only.
4. Wipe the inside and outside of the
Bravo with a damp dishcloth or wet
cloth and dry thoroughly.
CAUTION: Do not immerse the Bravo
in water.
Clean After Each Use:
1. Allow the Bravo to cool completely
before cleaning.
2. Always unplug the Bravo from the electrical outlet. NEVER clean
the Bravo while it is plugged in.
3. Never use harsh abrasive or corrosive product cleaners, as they
may damage the finish or oven surface. Wipe the exterior with a
clean, damp cloth and dry thoroughly.
CLEANING & MAINTENANCE

nuwavenow.com
19
ENGLISH
nuwavenow.com
19
4. Apply the cleaning agent directly to a cloth towel, not directly to
the Bravo, before cleaning.
5. To clean interior, use a damp cloth, mild liquid soap solution, and
a clean cloth towel.
6. Never use steel wool pads, etc., on interior or exterior
of oven.
7. When the glass window is completely cool, spray glass cleaner
on a clean cloth towel. Clean both inside and outside of window
with cloth. Use a damp cloth to rinse the window then dry
completely with a clean dry towel.
8. To remove crumbs, slide out the Crumb Tray and discard crumbs.
Wipe clean and replace. Crumb Tray should be emptied and
cleaned after each use.
9. To remove baked-on grease, soak Baking Pan, Baking Rack, and
Crumb Tray in hot, soapy water. Never operate the oven without the
Crumb Tray in place.
Storage
• Unplug the Bravo and let the Bravo cool down completely.
• Make sure that all parts are cleaned and dry.
• Never wrap the cord around the Bravo.

troubleshooting guide
20
TROUBLESHOOTING GUIDE
20
The Bravo is engineered with an automatic shut-off feature to prevent
overheating during use. If the Bravo shuts off to cool itself down, an
odor may be detected. Unplug the Bravo and wait for it to completely
cool down. To prevent the Bravo from overheating, do not cook foods at
higher temperatures or longer times than recommended.
The Bravo does not work.
1. The Bravo is not plugged in. User did not press ON/OFF.
2. Insert the plug into an appropriate grounded power socket.
Press ON/OFF. If still not working, contact Customer Service at
1-877-689-2838 or email help@nuwavenow.com.
The door to the Bravo will not close completely.
1. Food item is too large. Oven racks or accessories are not
properly set in place.
2. Use smaller amounts of food to cook. Make sure all racks and
pans are slid into place and pushed all the way to the back of
the Bravo.
The food is cooked unevenly.
1. Check cooking progress throughout. Turn or rotate as needed
to ensure even cooking.
Bake vs. Roast vs. Broil
1. Use Bake when cooking items that rise (e.g., cakes and
cookies). Use Roast for dense foods that are browned
throughout the cooking process. Use Broil to quickly brown or
crisp a food item.
The Crumb Tray will not slide back into position.
1. The Crumb Tray is not placed into the slot correctly. Something
is blocking the Tray from sliding into position.
2. Remove the Crumb Tray and clean away any food items that
may have accumulated in the back of the Bravo.
White smoke is coming out of the product.
1. You are cooking greasy foods. The Baking Pan contains greasy
residue from previous uses. When preparing greasy ingredients
in the Bravo, large amounts of oil can smoke. The oil will
produce white smoke. This will not affect the final cooking effect.
White smoke is caused by grease heating up on the Cooking
Rack, Baking Pan, Baking Rack, or Crumb Tray.
2. Clean Cooking Rack, Baking Pan, Baking Rack, and Crumb
Tray regularly between use.
Table of contents
Languages:
Other NuWave Oven manuals

NuWave
NuWave 20008 User manual

NuWave
NuWave Bravo XL User manual

NuWave
NuWave Pro Plus User manual

NuWave
NuWave PRO SMART 20902 User manual

NuWave
NuWave Bravo XL User manual

NuWave
NuWave BRAVO XL PRO User manual

NuWave
NuWave 20902 User manual

NuWave
NuWave BRAVO XL PRO User manual

NuWave
NuWave 20902 User manual

NuWave
NuWave PRO-SMART 38051 User manual