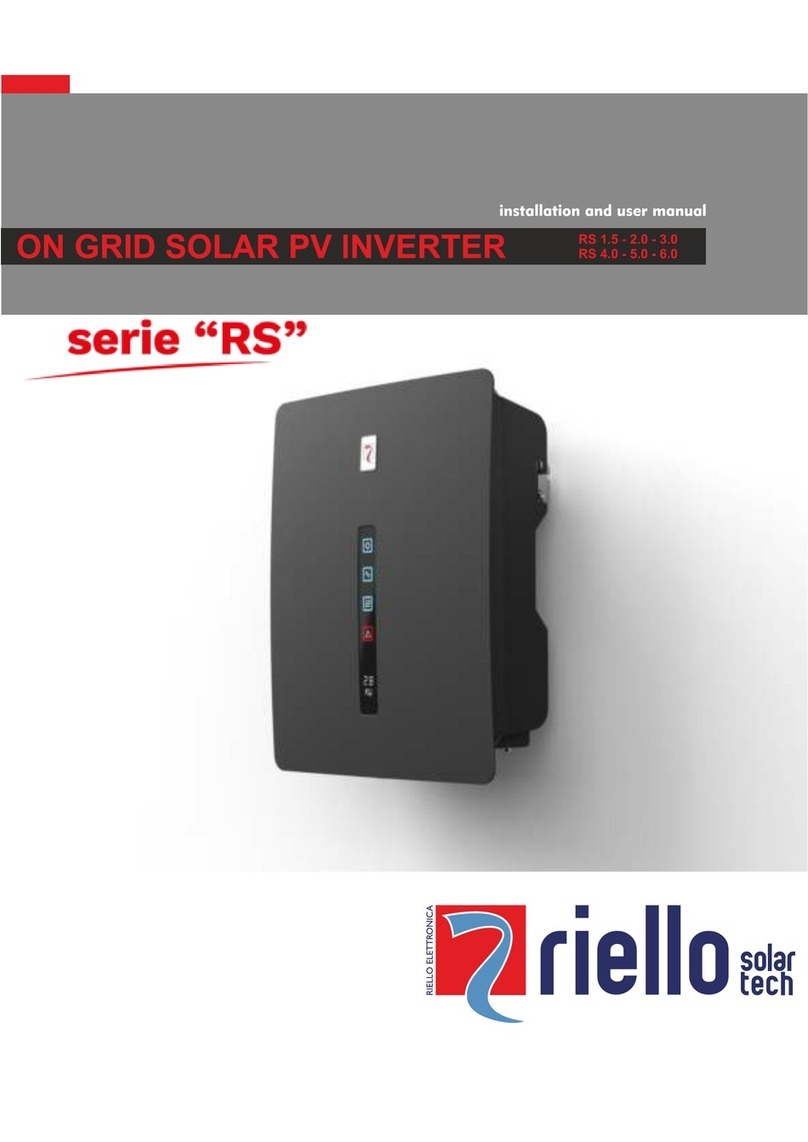
Riello RS Series User manual


- 1 -
INTRODUCTION
Thank you so much for choosing RS 6.0 T - 10.0 T - 15.0 T, the latest generation of grid-tied PV string inverters (hereinafter referred
to as the “inverter”) designed and developed by Riello Solartech.
Our company is specialised in the development and production of photovoltaic inverters. The solar inverters in this series are high-
quality products, carefully designed and constructed with the aim of ensuring high performance.
This equipment can be used by any person, provided they READ THIS MANUAL CAREFULLY AND THOROUGHLY.
This user manual introduces the inverter in terms of its installation, electrical connections, operation, commissioning, maintenance
and troubleshooting.
For information regarding use and to obtain maximum performance from your equipment, this manual should be stored
carefully near the inverter and CONSULTED BEFORE OPERATION.
NOTE: some images contained in this document are for information purposes only and may not faithfully reproduce the parts of the
product represented.
Application Model
Grid-tied PV string inverter
•RS 6.0 T / 10.0 T / 15.0 T PV three-phase inverter with double MPPT input
Intended Recipients
This user manual is intended for photovoltaic (PV) inverter operating personnel and qualified electrical technicians.
Note:
this user manual is subject to change without prior notice. The latest version of the user manual and additional information on the
product are available on http://www.riello-solartech.com, and/or by consulting your dealer.
Symbol Conventions
The safety symbols used in this manual, which highlight potential safety risks and important safety information, are listed below:
Symbol
Description
DANGER
Indicates an imminently hazardous situation which, if not correctly followed, will result in serious injury or
death.
WARNING
Indicates apotentially hazardous situation which, if not correctly followed, could result in serious injury or
death.
CAUTION
Indicates apotentially hazardous situation which, if not correctly followed, could result in moderate or minor
injury.
NOTICE
Indicates apotentially hazardous situation which, if not correctly followed, could result in equipment failure
or property damage.
NOTE
Calls attention to important information, best practices and tips:
supplements the safety instructions to optimise your use of the PV inverter and reduce wastage of
resources.
Refer
Refer to documentation (Remind operators to refer to the documentation shipped with the inverter).

- 2 -
SAFETY PRECAUTIONS
Before using the product, please read these safety precautions in the User Manual carefully.
Personnel Safety
•The PV inverter must be installed, electrically connected, operated and maintained by a specially trained technician.
•The qualified technician must be familiar with the safety regulations concerning the electrical system, the working process
of the PV power generation system and the standards of the local power grid.
•The technician must read through this User Manual carefully and master it before any operation.
PV Inverter Protection
NOTICE
Upon receiving the PV inverter, please check whether it was damaged during transport. If it was, please contact
your dealer immediately
•Do not tamper with any warning signs on the inverter’s enclosure, because these signs contain important information on
safe operation.
•Do not remove or damage the nameplate on the inverter’s enclosure, because it contains important product information.
Installation Safety
NOTICE
Please read the User Manual carefully before installing the PV inverter; warranty or liability will be voided if
damage is caused by installation faults.
•Ensure that there are no electrical connections around the PV inverter ports prior to installation.
•Adequate ventilation must be provided in the inverter’s installation location. Mount the inverter in the vertical direction and
ensure that no object is placed on the heat sink, as this may affect the cooling efficiency (for details, refer to the Installation
chapter).
Electrical Connections
DANGER
Before installing the inverter, check all electrical ports to ensure that there are no damages or short-circuits.
Otherwise, personal injury and/or fire will occur.
•Input terminals of the PV inverter apply only to input terminals of the PV string; do not connect any other DC source to the
input terminals.
•Before connecting PV modules, ensure that their voltage is within the safe range; when exposed to any sunlight, PV modules
can generate high voltage.
•All electrical connections must meet the electrical standards of the relevant country or region.
•Cables used for electrical connections must be properly secured, well-insulated and made to the appropriate specification.
Operation and Commissioning
DANGER
While the inverter operates, high voltage can lead to an electrical shock hazard and even cause personal injury.
Therefore, operate the PV inverter strictly according to the safety precautions in this User Manual.
•Unless permission has been obtained from the power company of the country/region, the grid-tied PV inverter cannot start
generating power.
•Follow the procedures for commissioning described in the User Manual when commissioning the PV inverter.
•When the PV inverter is operating, do not touch the surface of any other parts except for the DC switch; its constituent parts
will be extremely hot and can cause burns.
Maintenance
DANGER
Power OFF all electrical terminals before performing inverter maintenance; strictly comply with the safety
precautions stated in this document when operating the inverter.
•For personal safety, maintenance personnel must wear appropriate personal protective equipment (such as insulation gloves
and protective shoes) for inverter maintenance operations.
•Place temporary warning signs or erect fences to prevent unauthorised access to the maintenance site.
•Strictly follow the maintenance procedures specified in the User Manual.
•Check the relevant safety and performance of the inverter; rectify any faults which may compromise the safe operation of
the inverter before restarting it.
Additional Information
NOTICE
To avoid any other unforeseeable risk, contact Riello immediately if any safety issue emerges during operation.
.

- 3 -
PROTECTING THE ENVIRONMENT
Our company has devoted extensive resources to the analysis of environmental aspects in the development of our products. All our
products pursue the objectives set out in the environmental management system policy, developed by our company in accordance
with current legislation.
This product does not contain hazardous materials such as CFCs, HCFCs or asbestos.
Product packaging is made from RECYCLED MATERIALS. The disposal of individual components must be performed in accordance
with current legislation in the country where the product is used. Refer to the following table for material identification:
DESCRIPTION
MATERIAL
Packaging box
Corrugated cardboard (PAP)
Protective bag
High-density polyethylene (HDPE)
Foam
Low-density polyethylene (LDPE)
LIMITED GUARANTEE
The equipment you have purchased has been constructed according to the most modern techniques and was rigorously tested before
leaving the factory.
During the guarantee period, the manufacturer shall repair or replace parts that prove defective, provided that such defects have not
been caused by incompetence or negligence of the buyer, fortuitous events or force majeure (lightning, fire, flood, etc.), incorrect or
inadequate installation other than as stated in the manual, unsuitable transport or delivery, opening of the unit by unqualified personnel
or breaking of the closure seal, modification, testing or unauthorised repair, use or application beyond the limits defined by the manual,
or application beyond those defined by safety standards (VDE, UL, etc.).
It is the responsibility of the person applying for technical assistance from Customer Service to provide detailed information about the
detected failure or malfunction.
The repair and/or replacement of parts or the device shall be implemented at the discretion of the supplier.
Any repair under guarantee will be performed by the manufacturer or an authorised service centre. Equipment must arrive at the risk
and expense of the customer in its original packaging so as not to cause further damage.
If repairs must be performed directly at the customer’s premises, the customer shall be charged for expenses and hours of travel,
while the costs for labour and parts shall be borne by the manufacturer. This guarantee does not in any case cover the replacement
of equipment or compensation for any direct or indirect costs or claims for damage caused by device malfunction.
© No part of this manual may be reproduced without prior permission from the manufacturer.
For the purpose of improvement, the manufacturer reserves the right to change the product described at any time and without notice.

- 4 -
CONTENTS
PRESENTATION _________________________________________________________________________ 5
Product presentation _________________________________________________________________________ 5
INSTALLATION _________________________________________________________________________ 9
Preliminary checks ___________________________________________________________________________ 9
Electrical installation _________________________________________________________________________ 17
USE _________________________________________________________________________________ 26
System Operation ___________________________________________________________________________ 26
User Interface ______________________________________________________________________________ 28
Maintenance _______________________________________________________________________________ 31
Troubleshooting ____________________________________________________________________________ 32
Storage____________________________________________________________________________________ 34
Disposing of the product______________________________________________________________________ 34
APPENDIX ____________________________________________________________________________ 35
Technical Specifications ______________________________________________________________________ 35

- 5 -
PRESENTATION
PRODUCT PRESENTATION
This chapter introduces the inverter and describes its functional model, network application, appearance, dimensions and working
process, etc.
Functional Model
Function
This series consists of a three-phase grid-tied PV string inverter (transformerless) which converts the DC power generated by PV
strings into AC power and feeds the power into the power grid.
WARNING
The inverter is transformerless. Add an isolation transformer before grounding the positive/negative terminal
of the PV modules (such as a thin-film module) for operation.
WARNING
Do not connect PV modules in parallel to several PV inverters for operation.
Model Description
The number in the model name indicates the power class of the inverter, for example, model RS 6.0 T is a 6kW inverter.
Network Application
Grid-tied PV Power Systems
The series include grid-tied PV power systems for industrial/commercial rooftops, light complementary power generation systems,
and large ground-based power stations. Typically, a grid-tied PV power system consists of PV modules, grid-tied inverters, AC
distribution units and a low-voltage power grid, as shown in the figure below:
PV string
Inverter
AC Distribution Unit
Low-voltage power grid
These series inverters support TN-S, TN-C, TN-C-S, and TT power grids as shown in the figure below:
RS 6.0 T
Power class 6 kW

- 6 -
Outline and Dimensions
Front view
Side view
Bottom view
Connections Area
(1) DC isolation breaker
(2) PV string connectors
(3) Wi-Fi antenna connector
(4) Communications interface 1 (COM1)
(5) Communications interface 2 (COM2)
(6) AC output connection
(7) Vent valve
(8) External protection ground connector

- 7 -
Indicator Panel View LED and LCD Area
(1) PV indicator
(2) Grid indicator
(3) COM indicator
(4) Warning indicator
(5) LCD

- 8 -
Working Process
Basic principle description
RS 6.0 T / 10.0 T receive inputs from 2 strings of PV panels. RS 15.0 T receive inputs from 3 strings of PV panels, with the 2nd and
3rd routes terminals merging into one independent MPPT. Then, the inputs are grouped into two independent MPPT routes inside
the inverter to track the maximum power point of the PV panels. The MPPT power is then converted into DC bus and the DC power
is converted to AC power through an inverter circuit. Lastly, the AC power is fed into the power grid. Surge protection and EMI filer
are supported on both the DC and AC sides to reduce electromagnetic interference.
Circuit Diagrams
The diagram below shows the circuit blocks of the RS 6.0 T / 10.0 T PV inverters:
The diagram below shows the circuit blocks of the RS 15.0 T PV inverters:
Operating Modes
The following three operating modes of the inverter are described below: stand-by, operating, and shutdown.
The table below shows the conditions for the inverter to switch between operating modes.
Mode
Description
Stand-by
The PV inverter enters the stand-by mode when:
•The input voltage of the PV string can enable the auxiliary power supply to run but cannot meet the inverter
operation requirements.
•The input voltage of the PV string can meet the inverter start-up requirements but cannot meet its minimum
power requirements.
Operating
When the PV inverter is grid-tied and generates electricity, it tracks the maximum power point to maximise the PV
string output. It converts DC power from PV strings into AC power and feeds the power into the power grid.
The PV inverter will enter the shutdown mode if a fault is detected or a shutdown command is given.
Shutdown
The PV inverter switches from stand-by or operating mode to shutdown mode if a fault is detected or a shutdown
command is given.
The inverter switches from shutdown mode to stand-by mode if a start-up command is given or when it detects that
a fault has been rectified.

- 9 -
INSTALLATION
PRELIMINARY CHECKS
DANGER
Do not install the inverter on flammable building materials or in an area where flammable or explosive
materials are stored.
CAUTION
Do not install the inverter in a place where personnel are likely to come into contact with its enclosure and
heat sinks, to avoid electrical shock or burns.
Checking the packaging contents
•Upon receiving the inverter, check that the packaging materials are intact.
•After unpacking, check that the deliverables are complete, intact and consistent with your order list.
•Examine the PV inverter and its fittings for any damage such as scraps and cracks.
ITEM
DESCRIPTION
A
PV Inverter
B
Rear panel
C
Manuals
D
AC waterproof cover
E
COM2 waterproof cover
F
Signal terminals (4pin+6pin)
G
DC terminal connector group
H
Insulated end sleeve terminals
I
Screws
J
Expansion plugs kit (reserved for tightening the rear panel)
K
Wi-Fi antenna
L
Removal tool for DC connectors
NOTICE
If any of the damage mentioned above is found, contact the dealer immediately.

- 10 -
Moving the inverter
After checking the outer packaging, move the PV inverter to the designated installation position horizontally. Grip the handles on both
sides of the inverter, as shown in the figure below.
CAUTION
The inverter is relatively heavy! To prevent device damage and personal injury, arrange two people to move the
inverter and handle with care.
CAUTION
Do not place the PV inverter with its wiring terminals in contact with the floor, because the power ports and signal
ports at the bottom of the device are not designed to bear the weight of the inverter.
When placing the inverter on the floor horizontally, place foam or paper under it to protect its enclosure.
Identifying the PV Inverter
Nameplate
After removing the PV inverter from its packaging box, identify it by reading its nameplate affixed to the side of the inverter. The
nameplate contains important product information: model, communication/technical specifications and compliance symbols.
Risk of electric shock
The device contains high voltages, both alternating and direct current, and high leakage currents may be generated
during operation. To avoid the risk of electric shock during maintenance or installation, make sure that all DC and AC
connection terminals are disconnected. First connect the grounding wire to ground and disconnect it last during
maintenance. Check for the proper phases and neutral connection. If the unit is used without following the
specifications of the manufacturer, the protection provided by the equipment may be impaired.
Disconnect the inverter from the grid and from the photovoltaic generator before cleaning the photovoltaic modules:
an unexpected capacitive current from the surface of the modules may surprise operators, causing them to fall off
the roof.
Handling the photovoltaic inverter
The photovoltaic inverter must only be handled by qualified service personnel. When the photovoltaic generator is
exposed to sufficiently intense light, it generates DC voltage, and when connected to the device, it charges the bulk
capacitor. After having disconnected the photovoltaic inverter from the grid and the photovoltaic generator, an electric
charge may remain in the bulk capacitor. Please wait at least 10 minutes after disconnecting the device from the grid
before handling it.
Exclusively for the grid
The PV inverter is designed for the sole purpose of converting energy from PV modules and injecting it into the grid.
This inverter is not designed to be powered by sources of primary energy other than PV modules or to be connected
to different loads other than the public grid.
Hot surfaces
Although it has been designed in accordance with international safety standards, the photovoltaic inverter may
become hot during operation.
10 mi ns

- 11 -
Disposal
If the inverter service life has expired, dispose of the device in accordance with local rules for disposal of electrical
equipment waste. Do not dispose of PV inverter with household waste.
TÜV Certification
The PV inverter is compliant with the TÜV requirements.
Installation Requirements
These apply to wall-mounted installation, as described below in detail.
Determining the Installation Position
Basic Requirements
•The inverter is protected to IP65 and can be installed indoors or outdoors.
•The installation method and position must be appropriate for the weight and dimensions of the inverter.
•Do not install the inverter in a place where personnel are likely to come into contact with its enclosure and heat sinks,
because these parts are extremely hot during operation.
•Do not install the inverter in an area where flammable or explosive materials are stored.
Installation Environment Requirements
•The ambient temperature must be below 50°C, which ensures the inverter’s optimal operation and extends its service life.
•The inverter must be installed in a well-ventilated environment to ensure good heat dissipation.
•The inverter must not be directly exposed to sunlight, rain and snow to avoid shortening its service life. It is recommended
that the inverter be installed in a sheltered place. If no shelter is available, build an awning, as shown in the figure below.
(UoM: mm)
Carrier Requirements
•The carrier where the inverter is installed must be fireproof. Do not install the inverter on flammable building materials.
•The wall must be solid enough to bear the weight of the inverter.
•Do not install the inverter on a wall made of gypsum boards or similar materials.

- 12 -
Installation Space Requirements
•It is recommended that the inverter be installed at eye level to facilitate operation and maintenance.
•Reserve enough clearance around the inverter to ensure sufficient space for installation and heat dissipation, as shown in
the figure below.
Front view
Side view
(UoM: mm)
When installing multiple inverters, install them along the same line if sufficient space is available, or in a triangle pattern or stacked if
there is insufficient space. The installation modes ensure sufficient space for installation and heat dissipation (see following figures
for more details).
Installation along the same line (UoM: mm)

- 13 -
NOTICE
The clearance between multiple inverters must be increased to ensure proper heat dissipation when they are
installed in a hot area.
Installation in triangle pattern (UoM: mm)
Installation in stacked mode (UoM: mm)

- 14 -
Installation Mode Requirements
Install the inverter upright or with a maximum backward tilt angle of 15 degrees to facilitate heat dissipation.
Below are some correct/wrong installation modes.
The correct installation mode
Upright
Backward tilt
The wrong installation mode
Upside-down
Horizontal
NOTICE
Incorrect installation will lead to failure of the inverter operation.
Installing the Rear Panel
Before installing the inverter, secure the provided rear panel to a wall.
Step 1 Remove the rear panel from the packaging box.
Step 2 Determine the positions for drilling holes using the rear panel.
(UoM: mm)

- 15 -
Step 3 Level the hole positions using a level and mark the hole positions using a marker.
(UoM: mm)
Step 4 Drill holes using a hammer drill and install expansion bolts, as shown in the figure below.
DANGER
Before drilling the hole in the wall, ensure that no electrical wiring and/or water piping inside the wall will be
damaged.
•Drill a hole in a marked position to a depth of 60-65 mm using a hammer drill with a Ф10 mm bit.
•Partially tighten an expansion bolt, insert it vertically into the hole and knock it completely into the hole using a rubber mallet.
Drill the holes
Install the expansion plugs
Step 5 Align the rear panel with the holes, insert the expansion bolts into the holes through the real panel and tighten them to a torque
of 3 Nm using a torque wrench.

- 16 -
Installing the Inverter
Follow the procedures described below:
Step 1 The installer must hold the handle at both sides of the inverter and then lift the inverter and place it standing.
Step 2 Mount the inverter on the rear panel and keep the two parts aligned with each another.
Step 3 Tighten the M6 hexagon screw at the right side of the inverter to a torque of 3 Nm.
Mount on the rear panel
Tighten the screw at the right side

- 17 -
ELECTRICAL INSTALLATION
Preliminary operations
•It is advisable to install a circuit breaker on the AC side (see “Recommended circuit breaker” in the technical specifications
table).
•Turn the DC switch to off.
•Open the AC switch downstream of the inverter.
DANGER
Before performing any electrical connections, ensure that both the DC and AC switches are OFF.
Otherwise, fatal injury can occur due to the high voltage generated by the AC and DC cables.
CAUTION
Grounding of the PV strings must obey the following prerequisites:
If an isolation transformer must be installed on the AC side of each inverter, ensure that the neutral wire of the isolation
transformer is disconnected from the PGND cable.
One isolation transformer must be connected to one PV inverter: do not install a single isolation transformer for multiple inverters;
otherwise, circulating current generated by the inverters will lead to operation failure.
Connecting Protection Ground (PGND) Cables
Preparation
The ground cable and OT terminals have to be prepared.
Ground cable: outdoor copper-core cables with 6mm2cross-sectional area or more are recommended.
OT terminal: OT terminal for M4 screw, 6mm2cable.
NOTE
Proper grounding for the inverter helps to counter the impact of surge voltage and improve EMI performance.
Connect the PGND cable before connecting the AC and DC power cables and the communication cables.
NOTE
It is recommended that the ground cable be connected to a nearby ground position. For a system with multiple
inverters connected in parallel, connect the ground points of all inverters to ensure equipotential connections.
Wiring Procedures
Step 1 Remove an appropriate length of the insulation layer from the PGND cable using a wire stripper; this length must be longer
than that of the OT terminal’s crimping end by 2 mm–3 mm.
Step 2 Insert the exposed core wires into the crimping areas of the OT terminal and crimp them using hydraulic pliers.

- 18 -
Step 3 Remove the ground screws from the ground point.
Step 4 Secure the PGND cable (done with steps 1 and 2) using the ground screw and tighten the screw to a torque of 1.2 Nm using
a socket wrench.
Connecting the AC Output Cables
Preparation
The AC power cable and AC terminals have to be prepared.
AC power cable: outdoor multi-strand copper-core cables are recommended. The following table describes the specifications.
Inverter model
Cable type
Cross-sectional area (mm2)
Cable outer diameter (mm)
Range
Recommended value
Range
RS 6.0 T
Multi-core outdoor
cable
4–6
4
11–18
RS 10.0 T
RS 15.0 T
Multi-core outdoor
cable
6
The AC power cable connected to the AC terminals must have a maximum length as reported in the following table:
Cross-section Area
Model
RS 6.0 T
RS 10.0 T
RS 15.0 T
4mm2
53m
30m
20m
6mm2
80m
47m
30m
If a leak-protective switch is needed, please install a model B switch with at least 300mA current leakage.
Neutral wire sharing is forbidden for multi leak-protective switches in system, otherwise tripping operation will occur.
WARNING
An independent three-phase circuit breaker must be installed on the AC side of each inverter to ensure that
the inverter can be safely disconnected from the power grid. Do not install one circuit breaker for multiple
inverters.
WARNING
Do not connect loads between the AC output terminals of the inverter and circuit breaker.
Other manuals for RS Series
2
This manual suits for next models
3
Table of contents
Other Riello Inverter manuals

Riello
Riello RS 3.6 HYBRID User manual

Riello
Riello HELIOTERM Design Inverter 11B User guide

Riello
Riello Design white Series User guide

Riello
Riello RS Series User manual

Riello
Riello RPS 25/2 EVO User guide

Riello
Riello RSS MRS Manual

Riello
Riello AARIA ONE INVERTER 25 Operating instructions

Riello
Riello SC ACS 25 User manual

Riello
Riello AARIA ONE User manual

Riello
Riello CS 25 R Plus Pack of 3 User manual