RigExpert Stick 230 User manual

RigExpert Stick 230.
Users Manual
Stick 230 is an antenna and cable vector analyzer. The analyzer allows you to
measure various parameters of antennas, cables, lines, filters and many others in
the frequency range from 100 kHz to 230 MHz.
The Stick 230 analyzer has a compact size and lightweight, which is great for using
the analyzer both in the home and in the field.
The main parameters of the Stick 230 analyzer:
Operating frequency: 100 kHz –230 MHz
Size: 185 * 40 * 33 mm (7,3 in x 1,6 in x 1,3 in)
Weight: 185 grams (6.5 Oz) (unpacked, with battery installed)
Type of antenna connector: SO-239
Number of Enter Keys: 6
Display: monochrome e-paper, 200 * 200 pixels.
Type of battery used: Li-ion 18650 (included)
PC Connector Type: USB 2.0 Type-C
Charging Port Type: USB Type-C
Bluetooth Availability: Yes, Bluetooth ver. 4.2 BLE Single-mode, Class B
Battery Charge Time: 3 hours.
RF Power: -10 dBm (at 50 Ohm load)
Minimum frequency step: 1 kHz
Operating temperature: 0…40 °C (32…104 °F)
Turning on the analyzer.
The Stick 230analyzer can be turned on in several ways:
–by pressing the key.
–when connecting the analyzer to a PC via a USB cable (the analyzer will turn on automatically).
–by long-pressing one of the keys :
Important! At the same time, the analyzer will turn on and activate the measurement mode to which the pressed key
corresponds.
You can turn off the analyzer from any mode by long pressing the key.
Main menu.
After turning on the analyzer, using the key a screen with the main menu of the analyzer is available for
the user.
In addition to service information, at the top of the screen (battery charge, the indication of connection to a
PC, charger, Bluetooth connection), the screen displays 4 main measuring functions of the analyzer:

Singe Multé
HAM Free
The Singe and Multé functions display the measurement result as numbers, while the HAM and Free functions
display the measurement results as numbers and charts.
When you press in the Main Menu, 5 information screens will be available.
The first four screen will briefly talk about the main measuring functions of the analyzer (Single, Multé, HAM,
Free). By pressing the key, you can switch to the corresponding measurement mode.
On the fifth screen, when you press the key, you will enter the Settings menu.
The Single mode.
Single is a measurement of all parameters. The mode is started by pressing the key.
After pressing the key, the measurement will start automatically. This is indicated by a flashing antenna icon
located at the top of the screen. You can stop the measurement by pressing once. You can resume the
measurement by pressing once.
In Single mode, the analyzer has 5 screens with information.
The first screen displays:
working frequency
SWR value
return loss value
The second screen displays:
working frequency
|Z| value

value of active (R) and reactive (X) resistance (taking into account the sign) for the series mode
The third screen displays:
working frequency
|Z| value
inductance (L) and capacitance (C) value for series mode
Important! Sometimes inductance or capacitance values are displayed with a minus sign. It would seem to be contrary to
the laws of physics. But no, in Rig Expert analyzers, the minus sign next to the value indicates how much inductance or
capacitance you need to add to the circuit in order to compensate for the reactive component of the impedance.
On the fourth screen are displayed:
working frequency
magnitude
value of active (R) and reactive (X) resistance (taking into account the sign) for parallel mode
The fifth screen displays:
working frequency
phase value
inductance (L) and capacitance (C) value for parallel mode
Screens switch among themselves by pressing keys.
There are two ways to change the value of the operating frequency:
keystrokes and A single press changes the frequency value minimally. If you press and hold the
keys, the frequency will change continuously with an accelerated step.
pressing and holding the key for 2 seconds. After that, an information window will appear on the analyzer
screen. Press key again. A window will appear on the analyzer screen with the setting of the operating
frequency. The keys select the cursor position to change units, tens, hundreds, thousands of
kilohertz, and the keys change the value.
A single press of the key saves the change and returns to Single mode.
A single press of the key returns to Single mode without saving changes.
The help menu is accessible by pressing and holding the key and then selecting the Help mode with
the keys.
Multé mode.
Multé is a new mode, in which you can quickly assess how well your antenna works on different HAM bands.
The result is displayed as stars. The smaller the SWR of the antenna in the range, the more stars.
Table of the dependence of the number of stars on the SWR:
5–SWR from 1.0 to 1.1
4 –SWR from 1.1 to 1.15
3 –SWR from 1.15 to 1.3
2 –SWR from 1.3 to 1.7
1 –SWR from 1.7 to 3.0
The SWR over 3 analyzer in Multé mode ignores.
If, after scanning, the analyzer did not find a single resonance, then this means that either your antenna has a
minimum SWR of more than 3, or the antenna or coaxial cable is damaged.

Restarting this mode is possible by pressing any key except key.
After successful measurement in Multé mode, the following information will be displayed on the analyzer
screen:
band
number of stars (out of 5)
minimum value of SWR and the frequency at which this value was found
If there are more than one results detected by the analyzer, then the screens are switched using
the keys.
When you press the keys on one of the results screens, the analyzer switches to HAM mode on
the same band.
A long press of the key will bring up the Help menu.
HAM mode.
This mode allows you to measure and display the SWR antenna chart on the analyzer screen on one of the
fixed HAM radio bands such as:
2.2 km, 630 m, 160 m, 80 m, 60 m, 40 m, 30 m, 20 m, 17 m, 15 m, 12 m, 11 m, 10 m, 6 m, 2 m.
Enabling this mode is possible either from the main menu by pressing the key or when the analyzer is
off by a long press of the same key. The measurement will be performed automatically in the range that was
used in the previous measurement.
To repeat the measurement, press once. To measure in a cycle, press the key two times at short
intervals. A long press of the key will bring up the Help window.
You can change the measuring range using the keys.

In HAM mode, the SWR icon and the range over which the measurement is carried out are displayed at the
top of the screen.
In the center of the screen, a chart of the SWR values for the range is displayed.
The value of the minimum SWR found and the frequency at which this value was found are displayed at the
bottom of the screen.
Important! To the left and right of the graph are two vertical stripes. They indicate going out of range. Sometimes the
resonance of the antenna may be out of range, but very close to the beginning or end. In such cases, the analyzer will
determine the resonance beyond the limits of the ranges.
When you press the or keys the analyzer switches to Free mode with the center frequency of
measurement corresponding to the center frequency of the selected range:
You can exit the mode in the main menu by briefly pressing the key.
Free mode.
This is a classic SWR measurement mode with plotting in a user-defined frequency band.
This mode is useful for survey measurement of the antenna in a wide frequency range or for measuring
the SWR in a very narrow predetermined area.
In Free mode, the following is displayed on the analyzer screen:

at the top of the screen: the value of the center frequency of the measurement and the width of the
measurement band.
in the middle of the screen: SWR chart
at the bottom of the screen: the SWR value under the marker (solid vertical line) and the minimum of the SWR
found (dashed vertical line).
There are two ways to set the center of the measurement frequency:
keys. Pressing the key once will change the frequency discretely to a certain value. Pressing
and holding the key will cause an accelerated continuous change in frequency.
long press After press, a window will be available with a choice of setting the center frequency, exit or
calling Help. Press briefly and enter the frequency setting menu.
The keys select the cursor position to change units, tens, hundreds, thousands of kilohertz, and
the keys change the value.
Setting the measurement bandwidth by pressing the keys.
The minimum bandwidth is 10 kHz.
A quick double press of the key will cause a measurement in a loop. To stop click key.
To exit the mode, briefly press key.
Settings menu.
In order to get to the settings menu, in the Main menu, press and hold the key.

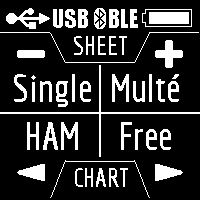
After that, the information window will be available:
Pressing the key will take the analyzer to the Settings menu. Pressing the key will return the analyzer
to the Main menu.
Change of settings screens is carried out with keys and change of parameters
with keys.
There are currently 7 basic settings available in the Stick 230 analyzer:
1. Turn on/off Bluetooth (enabled by default). If you do not use the Bluetooth connection of the analyzer with the
smartphone, turn off this function. This will save battery power.
2. Enable screen inversion (disabled by default).
3. Analyzer automatic shutdown time (battery saving mode). Available values: never, 5 minutes, 10 minutes,
30 minutes, 60 minutes, 90 minutes. Default: 5 minutes.
4. Choosing ITU region. The default is 1 region. The choice of region affects the boundaries of predefined ranges.
The width of most ranges in each region is different.
5. Band search. This setting affects the speed worked of the Multé function. There are two
meanings: Normal and Deep. In Normal mode, the Multe function is fast, but there is a chance of missing the
narrow resonance of the antenna or inaccurate determination of resonance frequency. In Deep mode, the
measurement speed increases, but the possibility of mistake is minimized.
6. System Z0. Choosing a system impedance value. Available values: 12.5 Ohm, 25 Ohm, 28 Ohm, 37 Ohm, 50
Ohm, 75 Ohm, 100 Ohm, 150 Ohm, 200 Ohm, 300 Ohm, 450 Ohm, 600 Ohm. Default: 50 Ohm. This setting is
needed in cases where, for example, when measuring, a broadband transformer with a transformation ratio of 1: 9
is used. In this case, the impedance at the transformer output will be 450 Ohms and for the correct readings of the
analyzer, it is necessary to set the system impedance equal to 450 Ohms.
7. Factory Reset. Reset all analyzer settings to factory defaults. To reset, press and hold the key.
Settings are saved automatically when they are changed.
To exit the Settings menu, press the or keys.
AntScope2 and AntScope for Android
Stick 230 analyzer can work with AntScope2 and AntScope for Android.
AntScope2 works with personal computers and laptops running operating systems Microsoft Windows, macOS,
Linux Ubuntu.
The latest versions of the software for various operating systems can be downloaded
here: https://rigexpert.com/files/software/Antscope/
Important! The Stick 230 analyzer does not work with the first version of AntScope.
To work with AntScope2 the analyzer does not require the installation of any drivers. Just connect the analyzer
to the PC via the USB cable and run the AntScope2 program (the program must be downloaded and installed
first). The program should automatically recognize the analyzer and prepare for work.
At the same time, the following information will be displayed in the upper part of the program window:

If the analyzer model does not appear, then this means that the program could not recognize the analyzer.
Try reconnecting the analyzer, closing and reopening the program, used a different USB cable.
Important! Using a Bluetooth connection, Stick 230 analyzer operation with AntScope2 is currently not possible. This is
due to limited support for the Bluetooth Low Energy protocol used in the analyzer in Windows operating systems.
The Stick 230 analyzer, together with AntScope for Android, works with smartphones and tablets running Android
version 6 and higher.
You can download AntScope for Android directly on Google
Play: https://play.google.com/store/apps/details?id=com.rigexpert.antscope&hl=en
When you connect the analyzer to a smartphone with AntScope for Android, you will see the following
information:
The window displays the following information:
analyzer model
serial number
MAC address
Bluetooth version
If the analyzer is successfully connected to the program, the BLE icon will appear at the top of the analyzer
screen next to the Bluetooth icon:

If the program could not detect the analyzer, check whether Bluetooth is enabled in the analyzer (1 mode in
the Settings menu) and whether Bluetooth is enabled on your smartphone/tablet.
Charging the analyzer.
The Stick 230 analyzer is powered by a 18650 Li-ion battery. The analyzer comes with a 2800 mAh battery.
The analyzer can be charged from a PC. According to the specification, when connecting the analyzer to the
USB 2.0 connector, the maximum charge current is 0.5 A. When connecting the analyzer to the USB 3.0
standard connector, the maximum charge current is 0.9 A.
The analyzer for charging can be connected to any charger (for phones/tablets) with an output voltage of 5
volts and a current of at least 0.5 A.
The maximum charge current of the analyzer is 1 A.
The time for a full charge of a battery with a capacity of 2800 mAh (from 0 to 100%) is about 3 hours (when
using a charger).
During charging, the bottom of the analyzer near the USB connector may become slightly warm. This is not a
malfunction.
During charging in the off state, the lightning icon is displayed on the analyzer screen.
During charging, when the analyzer is on, the CHG icon will be displayed at the top of the screen. If the
charge occurs with a current of 1 A, then, in this case, the FAST icon is additionally displayed. For example, a
screenshot of the screen of the analyzer charged from the charger:

The analyzer battery can also be charged separately. For this, it is necessary to remove it from the analyzer
by unscrewing the two screws of the battery cover and place it in an external charger.
The Stick 230 analyzer is protected against battery polarity reversal. An incorrectly installed battery will not
cause damage to the analyzer, and when the charger is connected, the analyzer will display an error
message on the screen.
Important! Do not use other types of batteries! Do not use chargers with a voltage of more than 5 volts! This may
damage the analyzer.
Table of contents