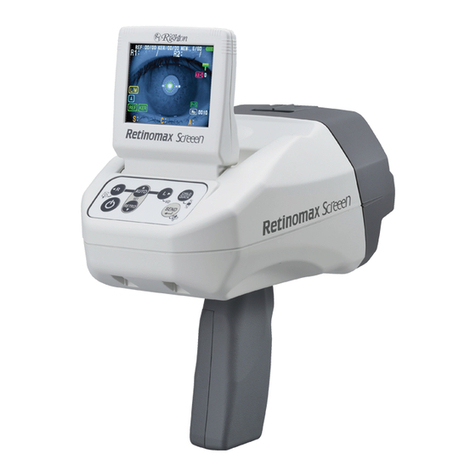
Right On Retinomax K-plus 2 User manual

Hand-Held
Auto
Refract
Keratometer
Retinomax
K-plus
2
Instructions
12024-6Е
макь.20060/2)

Thank
you
for
purchasing
this
Righton
product.
This
instruction
manual
is
writleo
for
users
of
the
Righton
“Auto
Refract-Keratometer
Retinomar
K-plus
2"
To
ensure
correct
usage
read
this
manuat
carefully
before
operating
the
instrament
+
Fis
prohibited
to
alter
this
manual
in
part
or
whole
without
expressed
permission,
+
The
contents
of
this
manual
are
subject
to
change
without
any
notice
Although
every
effort
has
been
made
to
ensure
the
uccuracy
of
this
manual,
if
you
note
any
points
that
are
unelcar
or
incorrect.
contaci
vour
nearest
Righion
representative,
+
Nate
that
despite
the
above.
Rjghton
docs
not
bear any
responsibility
for
any
claim
over
loss
due
Lo
the
use
of
this
instrument
Caution
Symbol
in
This
Manual
Though
Righton
products
ure
designed
to
provide
you
utmost
safely
daring
use,
incorrect
usage
or
disregard
of
the
instructions
can
cause
personal
injury
oc
property
damage.
For
your
safety.
read
the
instruction
yamiat
carefully
aad
Moroughiy
before
usage,
Do
not
discard
this
manual
but
keep
it
near
the
product
for
dass
yelerence
Inside
ibis
insuuction
manual,
safety
instructions
are
indicated
with
the
symbol
shown
below,
Be
sure
to
follow
the
insovevons
marked
wath
dis
symbol
for
your
safely.
Symbol
Meaning
>
Disregarding
instructions
marked
with
this
symbol
may
lead
to
injury
or
property
g\
CAUTION
yardı
are
er
PET
o
damage.
Meaning
of
Symbol
on
the
Instrument's
Cover
and
Nameplate
——————,
AC
power
OFF
cut
off
from
power
supply)
Fuse
1
ON
teonnected
to
power
supply)
Caution:
Please
refer
to
instruction
manual.
Input
and
Output
Type
B
equipment
ーーーーーー
Symbol
for
separate
collection
in
European
countries
—
Products
bearing
this
symbo)
must
be
collected
separately.
Phe
following
rule
is
applicable
anly
10
users
in
European
countries
*
This
product
is
desienafed
a
an
item
to
be
collected
separate
ly
alan
appropriate
spot
Do
nar
dispose
al
ibas
household
waste
Fer
further
information,
contact
the
retailer
or
the
local
authorities
respansie
for
waste
management

Please
Read
This
First
for
Your
Safety.
に
e
sa
f\caution
È
intended
Use
Only
use
the
Auto
Refraci-keratometer
Retinomar
K-plus
2
for
measuring
the
refractive
power
of
the
eye
and
curvalure
of
the
cornca.
Do
not use
Uns
instrument
far
any
other
purpose,
İN
CAUTLON
の
Do
Not
Disassemble
9
Disassembling
this
instrument
may
lead
to
electric
shock and/or
malfunchion
of
the
instrument.
Never
disassemble
this
jaspument.
CAUTION
3
During
Measurement
Operations
Do
not
strike
the
patient's
face
with
the
measuring
unit
when
moving
it
laterally
or
toward
the
patient,
Be
particularly
careful
when
using
the
forehead
rest.
CAUTION
4
During
Installation
and
Transportation
«Do
nol
place
the
instrument
in
an
unstable
Jocation
such
as
on
a
wobbly
table
or
ited
surface
as
this
ay
cause
the
instrament
to
drop
or
fall
over.
resulting
in
possible
injury.
Hold
the
instrument
by
its
grip,
Do
not
hold
it
by
the
viewfinder
or
forehead
rest,
Place
the
sradion
and
the
printer
in
a
location
with
good
ventilation,
De
not
obstruct
he
ventilation
holes
of
the
station
or
printer
by
placing
a
thick
layer
of
cloth
or
paper
undemeath
as
this
may
lead
to
hear
buildup
inside
during
charging,
resulling
in
possible
fire
ar
damage
to
equipment.
Recommended
operational
conditions
are
an
air
pressure
of
800
10
1060
hPa,
a
temperature
of
approximately
10°C
to
35°C,
and
a
relative
humidity
of
30
to
70%.
Although
the
instrument
is
dust-proof,
do
not
use
it
ina
room
where
there
is
a
Job
of
dust
or
dirt,
The
best
place
fer
installation
is
a
dimly
Hi
room.
Po
not
face
the
patient
side
of
the
instrument
toward
a
bright
window
or
source
of
Jight.
Although
this
instrument
conforms
to
EMO
standards
(1EC60601-1-2:2001
}.
ir
does
emiti
weak
clectromagnetie
signal.
E
use
of
this
instrument
atfects other
equipment
such
as
televisions
or
radios,
separate
it
fram
the
affected
devices
of
change
the
direction
dl
faces.
Since
this
Instrument
fs
nol
water-proof
in
construction,
never
take
it
into
decatons
where
liquids
such
as
rain
or
beverages
May
pet
inside.
H
condensation
(dew)
forms,
do
net
use
the
instrument
uatit
the
condensation
disappears

ganas
OE
RS
ως
σεν
caution
В
Other
Notes
on
Handling
Always
use
a
specified
power
cord
that
is
rated
for
the
voltage
used
in
your
area
and
that
has
been
approved
under
local
safety
standards.
Using
the
wrong
power
cord
could
result
in
damage
or
fire.
For
100
V0
V
area
:
UL
listed.
detachable
cord
set.
3
conductor grounding
type
SVT.
No.
18
AWG
rated
al
125
VW,
7
A
minimum
For
220
V
arca:
A-pale
power
supply
cord
set.
which
must
be
approved
according
to
ELVEN
standards.
Do
not
scratch,
break
or
alter
the
power
card
or
overly
bend.
pull,
twist
or
bundle
it,
Also.
placing
heavy
objects
on
the
power
cord
or
subjecting
it
to
heat
may
cause
it
to
break.
resulting
in
fire
oF
electric
shock.
Ifthe
power
cord
becomes
damaged,
be
sure
to
replace
it
with
a
new
card.
H
there
is
any
dust
on
the
power
plug
blades
or
the
surface
they
connect
to,
pull
out
the
power
plug
and
remove
the
dust.
‘The
dust
or
grime
can
make
the
power
plug
and
AC
power
outlet
ta
be
out
of
contact
and
may
result
in
fire.
Never
short-circuit
the
contact
points
used
for
recharging
the
instrument
or
the
printer
s
contact
points
for
connecting
the
station,
Doing
so
may
blow
the
fuses
of
the
instrument
and
the
printer.
Do
not
touch
the
contact
points
of
connectors
or
battery
charye
contacts
or
alow
metal
to
comaci
them.
H
contact
points
become
diny.
turn
oft
the
pawer
and
wipe
clean
with
a
soft.
dry
cloth.
This
is
a
precision
optical
instrament
containing
many
electronic
components.
Be
sure
to
handle
it
carefully
and
do
not
subject
it
to
strong
physical
shock.
Do
not
drop
pr
strike
the
instrument.
Always
use
the
supplied
strap
when
handling
the
instrument
Do
not
swing
the
instrument
by
its
strap.
GN,
CAUTION
@
Maintenance
and
Storage
ο
The
specified
transportation
and
storage
environment
is
a
temperature
of
10°C
to
43°C
and
relative
humidity
of
20
to
8
When
replacing
a
fuse.
be
sure
to
turn
off
the
power
switch
and
pull
out the
power
cord.
Be
sure
to
use
only
a
fuse
of
the
specified
rating.
Electric
shock
or
fire
may
oceur
if
a
fuse
other than
of
the
specified
rating
is
used.
Specified
tuse:
For
AC
100
V/120
V
area:
Time-lag
fuse
125
V
2
A.
6
3.2
x
20
mm
NIPPON
SEISEN
Type
“FBT2”.
For
AC
230
V
arca:
Time-lag
fuse
250
VI
A
6
5.2
x
20
mm
LITTELFUSE
Type
“218001”
Measurement
resulls
arg
adversely
atfected
if
che
measuring
window
glass
surface
hecomes
soiled
with
grease
from
the
patients
nose.
fiagerprinis
or
dust
Be
sure
to
always
keep
the
measurement
window
visa
clean
When
cleaning
the
meastremem
window
tlass,
lake care
not
to
scratch
of
break
it.
©
P61)

CAUTION
6
Maintenance
and
Storage
*
When
finished
using
the
instrument,
torn
off
the
power
switch
of
the
station
and
cover
it
with
its
plastic
cover.
+
The
internal
battery
The
instrument
includes
a
primary
lithium
battery
as
the
power
source
for
the
clack
function
and
all
seting
Junctions
stored
in
memory.
If
the
battery
goes
oul,
the
tine
and
date
pointed
on
the
measurement
printout
will
be
wrong.
Also.
settings
will
not
be
stored
in
memory
and
default
settings
will
be
restored
every
Gime
Ihe
power
is
turned
off,
Contact
your
nearest
Rigzhfon
representative
when
replacing
batteries.
Disposal
Phe
Nickel-metal
bydride
battery
and
the
Lithium
battery
are
used
for
die
instrument,
When
you
abandon
those
batteries,
check
the
rale
or
the
local
government
and
fallow
the
directions.
CAUTION
Ÿ
Battery
Pack
+
Use
the
specified
mekel-hydrogen
battery
pack,
DERACELE
made
“DRIO
or
GP
Batteries
International
Lid-made
“VDIST".
Righion
does
not
guarantee
operations
il
any
other
Iype
of
battery
pack
is
used.
Read
the
instruction
manual
provided
with
the
battery
pack
before
use
Do
not
disassemble
tie
battery
pack.
Charge
the
battery
pack only
with
the
specified
printer
ör
station.
Do
not
short-circuit
the
battery
pack
contact
points
or
touch
them
seith
any
metal
such
as
a
coin
or
paper
clip
as
this
may
result
ip
burn
injury.
+
Do
nor
cover
the
measuring
unit.
printer,
or
station
when
charging
or
renewing
the
battery,
Because
charging
generates
heat,
high
temperature
may
result
if
he
measuring
unit,
printer,
oF
station
is
covered,
possibly
resulting
in
fire
or
seduced
battery
fe
duc
to
increased
toad,
Da
not
expose
the
battery
pack
to
excessive
heat
or
Names
as
this
may
cause
it
to
Jeak,
catch
fire.
oi
esplode.
Py
not
leave
the
battery
pack
ina
place
subject
to
strong
suntight
or
inside
a
car
ona
hot
day
with
the
windows
closed.
Do
not
drop
the
battery
pack
ar
subject
it
to
strong
impact
+
H
the
contact
points
of
the
battery
pack
become
dirty,
wipe
them
clean
with
a
soft
dry
cloth,
+
Ifthe
equipment
is
not
to
be
used
for
a
week
or
more.
remove
the
battery
pack
from
the
measuring
unit
and
the
printer
+
The battery
pack
is
a
disposable
product.
Although
it
can
be
used
repeatedly
through
recharging.
it
cannot
he
used
indefinitety
Once
Hie
battery
pack
can
no
longer
be
used,
purchase
a
how
one
from
the
retailer
where
vau
purchased
the
instrament

一
一
圖
Equipment
Suppliied
빨
When
you
open
the
package,
make
sure
that
all
the
following
items
are
included.
@
Measuring
ont
cl)
@
Station
(bs
@
Printer
th
&
Model
eye
th)
@
Printer
paper
rolls
(51
M.
8
Blower
ch
-
グフ
@
Contact
lens
holder
dd)
@
Power
cable
set
(14
@
Fuses
(2)
(125
VIA
0
8.2
4
20mm)
©
Instructions
(1)
@
Plastic
cover
th)
The
following
products
are
available
as
options,
É
AC
adaptor
É
DC
cord
©
Direct
communication
cable
$
Raltery
pack
Tİ
-一
一 人
æ
»
ロー
に
ー
ロ
EA
+
LE

6
Conients
Е
Caution
Symbol
in
This
Manual...
eee
ÓN
1
Bi
Meaning
oi
Symbol
on
the
İnstrument's
CoverandNameplate....................................
1
Please
Read
This
First
for
Your
Safety...
uri
ee
2
Equipment
Supplied
mnormsccrnancicinananacantarcarranororiararr
arenosa
rro
anar
rr
arrancaron
5
М
Nomenciature
.
El
Preparalion
.......
iene
iene
nine
neon
cenere
ie
12
2-
2-1
Attaching
the
Strap
K
LA
L
R
R
K
K
K
nK
R
12
22
Setting
Up
the
Instrument
eee
12
23
Measuring
the
Model
Eye
eee
14
2-4
CheckingSettings.......................
RE
R
LK RK
KAR
KK
K
E tecer
.
15
2-5
Charging
the
Battery
Lee
KRK
KKH
EE
RKK
K
K k
16
Notes
on
Charging
the
Battery
Pack
/
1.
The
Measuring
Unit’s
Battery
Pack
/
2.
The
Battery
Pack
Inside
the
Printer
/
3.
Renewing
the
Battery
/
4,
Charging
:
5.
Charging
the
Spare
Battery
Pack
(Option)
El
Measurement
Method
iron
ÓN
24
İİ
Measurement
Screen
seen
ee
24
#
Description
of
Test
to
Patient
Before
Measuring
..........
sereni
1
25
Bi
Measurement
Modes
and
R-K
Modes
ofthe
Unit
se
26
3-1
Auto
Measurement
Mode
.......
ee
eee
rana
kre
an
27
3-2
Continuous
Measurement
MOdB
see
30
33
Quick
Mode
ei
Bİ
3-4
Cornea
Peripheral
Measurement
(PERI
ii
32
3
33
3-6
Using
Multiple
Printers
3-7 For
More
Effective
Measurements
00
cile
iii
PE
36
1
When
the
Left
/
Right
Eye
Identification
is
Difficult
*
2.
Measurements
from
45°,
90°
and
135"
Positions
/
3,
Using
the
Forehead
Rest;
4.
When
Measurements
are
Unstable
(in
refractometry)
/
5.
Notes
/
6.
Playing
the
Melody
3-8
Miscellaneous
1.
Automatic
Fogging
/
2.
When
Keratometry
is
Impossible
{o
read/
3.
IOL
Patients
/
4.
Measuring
a
Hard
Contact
Lens
Base
Curve
/
5.
When
Measurement
Values
Cannot
be
Obtained
:
6.
Representatve
Values
for
Refractometry
and
Keratometry
7.
Refractometry
Confidence
Values
/
8
Auto
Power
Of!
DI
RetroMode..........
9.
Using
a
Password

Making
Various
Settings
(Setup)
rie
nere
nere
eine
eine
nce;
44
E
User
Settings
...
5-1
SETUP
Screen
nie
nei
ei
45
5-2.
Hold
Mode
Setting
Screen
sens
46
5-3.
Print
Setup
Screen
eee
eee
ene
eine
SR
E
E
R
가
47
5-4
Time
and
Dale
Setting
See
ини
48
5-5
Patient
No.
Input
Screen
seen
4g
5-6
Message
Entry
Screen...
iii
50
5-7.
Output Setup
Screen
erer
eee
esse
52
5-8
Password
input
Screen...
eee
eee
eee
eee
ee
KEE
KR
K
O K
K
54
Data
Transmission
to
External
Devices
..................
eee
rene
55
Maintenance
58
7-1
Checking
Measurement
AGCUracy
..........
iii
58
7.2
Replacing
a
Printer
Paper
Roll...
seen
58
7-3
Changing
the
Fuses
in
the
Station
иен
60
7-4
Cleaning
the
Forehead
ReSt
иене
mn
61
7.5.
Cleaning
the
Measuring
Window
e
61
7-6
Cleaning
the
Model
Eye
ene
61
7.7
Cleaning
lhe
Case...
ui
eee
K
E K
K
E
61
Troubleshooting
Specifications
.....
9-1
Measurement.
9-2
Mesuring
unit
and
Miscellaneous
seen
66

Nomenclature
System
Configuration
Measuring
unit
Station
Measuring
Unit
(Patient
side)
Horizontal
eye
position
target
line
/
Aliyn
with
the
patients
exe
too
=
determine
the
correct
horizontal
position.
(o
P.27)
mechanism.
Anterior
segment
illumination
window
and
cornea
peripheral
measurement
window
Forehead
rest
Push
so
that
forchead
comes
out
Touch
patients
forebead
to
stabilize
the
measunng
unit,
1-->
P.37)
This
window
is
used
when
iluminating
the
exterior
of
the
eye
and
when
performing
peripheral
keratometry
ando
observe
the
degree
of
cornes
distostion.
Rubber
pad
Shock
absorbing
rubber,
This
cushion
is
used
when
placing
the
measuring
unit
on
the
station,
Vertical
eye position
target
determine
Фе
coneci height
to
POD
Eye
sensor
Kerato-center
measuring
İlam
Automatically
identifies
the
windows
(four
windows)
paticae’s
right
and
feft
eyes
using
ulttasonio
waves
Used
to
meisure
the
comea
center
Battery
charge
contacts
Measuring
window
tal
一
一
~
(three
contacts)
The
patent
legks
at
the
target
(9
P25)
Hough
this
window
onnect
{to
the
Charin
céntacts
of
the
skinon
(3
PE
START
switch
e
to
chia
ge
the
battery
pack.
Stanly
sad
ends
measurement
179
027
10321

1,
Nomenclature
;
'
Measuring
Unit
(Operator
side)
Power/communication
Switch
panel
tor
This
connectar
js
used
to
1
leasing
Unit
Switch
connect
the
DO
curd
(option)
or
|
Panel”
shown
below,
direct
communication
cable
i
toptoni,
When
using
the
DC
cord
and
AC
adaptor
(oplon).
it
i
is
possible
to
operate
the
measurine
unit
with
the
power
from
a
wall
puttet.
1
P.5)
Strap
bracket
Diopter
adjustment
ring
|
Grip
Hold
this
gap
with
your
hand
when
handling
the
measuring
unit
View
finder
Look
atthe
patient's
eve
through
mis
view
finder
to
align
the
position
lo
measure
Battery
pack
cover
Remove
this
cover
when
eptacing
Ihe
battery
pack
Measuring
Unit
Switch
Panel
PERI
key
」
Used
for
measuring
the
comes
periphery.
ANGLE
key
Compensates
the
af
the
Ax
tevlindrical
axis)
for
the
amount
the
measuring
unit
is
tumed
(457,
90%,
or
135%
ele
reading
RETRO
key
№
Used
when
observing
inside
the
pupil
QUICK
key
Pots
the
measuring
walt
into
QUICK
mode,
(>
P.34)
Plays
a
melody
when
pressed
for
04
er
mare
seconde.
(>
P.39)
_
РАМТ
кеу
|
{nero
Swilches
the
brightness
of
the
E
target
between
FE
bright)
and
1
dark).
Target
brightness
key
i
OR
o;
POWER
switeh
Sends
the
measured
data
te
the
Turns
the
power
ot
the
measuring
priater,
(9
P23)
иви
ОМ
ава
ОРЕ.
Turning
ON
the
power
lights
the
A
T
ВА.
Кеу
lamp
above
the
switch
-
CO
AA
-
Switches
between
automatic
and
manual
detection
mode
Jor
MODE
key
一
ング
一
一
idenulying
the
left
and
right
Switches
the
made
beiween
RET
eves,
Ep
manpal
made.
vou
must
(Refractive)
KER
(Kern,
and
velvet
the
patients
right
and
left
REF/RER
(ReftacvefReratos
eyes
manually.
Co
46)

Station
'deasuring
unit
battery
charging
contacts
(3
contacts)
(+
P.14)
Power
lamp
|
_-
RENEW
lamp
for
the
printer
RENEW
lamp
fort
the
measuring
unit
©
(
оон
OK
BET
INDUAX
STATION
POKER
RENEW
key
for
一
the
measuring
unit
Charge
lamp
for
"7"
the
measuring
unit
Charge
key
for
the
measuring
unit
Charge
key
for
the
printer
Station
(Rear
view)
(
Fuse
holder
a“
Fuses
(-»
P.60)
ーー
Power
switch
ON:
OFF)
一
一
Power
cable
receplacie
10

1.
Nomenclature
;
Printer
x
:
ponti
>
External
communication
connector
OR
Power
it
Light
receiving
window
Printer
(Bottom
view)
Battery
pack
release
switch
Battery
box...
Dip
switeh
>
Contacts
for
connecting
the
station
Contacts
for
the
battery
pack

Preparation
Attaching
the
Strap
Attach
the
strap
to
the
strap
bracket
om
the
measuring
wnt.
CAUTION
=
+
Attach
the
strap
securely
1
#
i
keep
it
from
coming
off.
*
Ef
the
strap
is
scratched
or
damaged.
replace
it
With
a
new
one
3
Connect
the
power
cable
to
the
power
cable
receptacle
located
an
the
station.
Make
sure
that
the
station
power
switch
is
set
to
off
tside
marked
(2),
and
plug
the
power
cable
into
a
wall
outlet.
Turn
the
station
power
switch
on
(side
marked
|).
The
power
lamp
will
turn
on.
Install
ihe
battery
pack
into
the
measuring
unit.
{—
Р.18)
Charge
the
battery
by
placing
the
necasuring
unit
on
the
station,
Cl
tikes
about
90
minutes
to
charge
a
fully
discharned
battery.)
(9
Pa
2
Always
charge
a
battery
pack
before
nsing
jt
for
the
first
time.
When
purchased,
battery
packs
are
not
charged,
+
When
a
battery
pack
is
used
for
he
først
me
oy
for
the
first
ime
in
over
a
month,
the
battery
will
need
to
be
fully
charged
2
or
3
times
before
its
performance
retums
to
the
original
level.
G
When
you
charge
the
bavery
for
the
first
lime
or
charge
the
batery
after
it
has
been
unused
[
|
for
a
month
or
mare.
(he
charge
lamp
goes
off
after
about
(te
15
mingles
yo
show
that
the
battery
has
been
fully
charged.
This
occurs
when
you
charge
the
battery
pack
for
the
first
time.
[this
happens,
install
the
battery
pack,
press
tre
CHARGE
key
forthe
measuring
|
unit
battery
pack
or
printer
battery
pack
and
bevin
charging
again.
(3
Р.23}
И
the
charge
|
famp
does
rint
go
on
when
you
press
the
CHARGE
key.
press
again,
OF
renew
the
battery
since
the
battery
renewal
enables
you
to
fully
charee
the
battery
easily.
Co
1.22

2,
Preparation
install
the
printer
paper
roll
into
he
printer.
>
P.581
Connect
the
printer
to
the
station,
Printer
Tilting
and
aligning
the
seal
on
the
top
panel
Station
y
of
the
printer
with
the
switch
panel
of
the
\
station
as
shown
in
the
figure
at
the
right
allows:
\
^
.
Seal
this
connection
to
he
made
more
easily.
—
Turn
om
the
siatión
and
printer
power
switches,
Press
the
FEED
swnch
and
feed
the
paper
y
suitable
amount,
*
The
printer
can
also
be
operated
using
te
battery
pack,
(>
P.20}
Remove
the
measuring
anit
from
the
station
and
torn
on
the
power
switch
of
the
measuring
unit

Measuring
the
Model
Eye
Make
sure
thatthe
modei
eye
and
measuring
window
are
clean.
H
either
are
darty.
carefully
clean
them
according
tothe
instructions
given
in
77-5
Cleaning
the
Measuring
Window”
and
7-6
Cleaning
the
Model
Eye”.
Co
P.6D)
1.
Place
the
model
eye
on
the
model
eye
mount
located
on
the
station,
2
Measure
the
model
eye.
For
details,
sce
“3.
Measurement
Method”
(>
P.24
ta
421.
「@
Do
not
point
the
Measuring
windows
en
the
measuring
ubilloward
bright
fight
during
measurement.
Doing
so
may
adversely
affect
measurement
accuracy
or
make
measurement
Impossible,
3
The
values
measured
fer
the
model
eye
must
be
within
the
following
ranges
when
compared
with
the
values
(SPEL
CYL,
Ry
shown
in
the
label
attached
to
the
model
eye.
SPH
2
£0.251D
CYL
+
£0.25D
RJ
40,02
sm
R2
:40.02
ут
1
120,05
mm
N
240.05
mm
5
140.05
mm
I
140.05
mm
If
any
values
ave not
within
the
above
ranges,
see
72)
Measurement
Method”
(>
P24
to
424
and
check
that
the
measurement
method
used
is
correct
and then
measure
again
Next.
see
“ES
Cleaning
the
Measuring
Window?
and
“2-6
Cleaning
the
Model
Eye”
under
77.
Maintenance”
(o>
Plo
by
and
check
whether
iis
dirty.
itis
dirty
clean
it
He
values
still
are
ner
within
the
above
rante»,
contact
your
nearest
Righlon
representative,

2.
Preparation
Checking
Settings
The
initial
settings
are
Environment
settings
(—
P.45
for
the
SETUP
screen)
Measurement
mode
(READING)
Astigmatism
mode
(C¥L
MODE?
|
MINUS
>)
Cornea
vertex
distance
(VD)
shown
below.
AUTO
120
V:
13.75,
230
V:
12.00
BUZZER
ON
Ed
initialization
values
(-»
P.46
for
hold
mode
setting
screen)
QUICK
NORMAL.
(Cancels
QUICK
mode
when
initializing)
RE
SENSI:
TO
(Sets
AUTO
mode
for
right-left
eve
identification
at
mitializationi
R/R
MODE
に
E
Print
settings
REF
PRINT
KER
PRINT
RYK
(Sets
REF/KER
mode
at
inivializationi
NORMAL
(Cancels
Ax
compensation
node
at
initializattoni
(>
P.47
for
the
print
setup
screen)
ALL
¢Prints
out
all
the
data
measured
mt
REP
made)
MSG
PRINT
Date
punt
format
DATE-FORM)
OFF
(Does
not
print
out)
Time
print
format
CV
IME-FORM)
OFF
(Does
nor
print
eut}
120
Vi
MEN.
230
V:
DMY
(Displayed
in
the
sequence
yeat-month-day)
120
У;
АЛУРМ.
230
У:
АН
(Displayed
in
24-hour
time
format
Bİ
Output
settings
(-»
P.52
for
Output
setup
screen)
PRT
UNTE
NO
PRT
RS
OUT
1
Udentification
number
af
the
measuring
unio
OFF
(Sends
no
data
from
the
printer’s
external
communication
connector)
РКТ
КУ
PROT
NR
1200
(Sets
the
transmission
speed
from
the
printer
s
communication
connector
to
1200
bps
in
NK
formati
RS232C
OUT
RS232C
PROT
;
Connector)
comupunicalion
connector
to
1200
bps
in
NK
formats
OFF
(Sends
no
data
from
the
measuring
unit's
¢
AC
adaptor’s
communication
:
NK
1200
(Sets
the
tansinission
speed
from
tie
measuring
unit's
AU
adaptor
s
Gi

Charging
the
Battery
Be
absolutely
sure
to
read
these
precautions
before
charging
the
battery
for
ilie
first
time.
Bİ
Notes
on
Charging
the
Battery
Pack
EB
When
using
the
battery
for
the
first
time
Always
charge
the
battery
before
using
İL
A
newly
porchased
battery
pack
is
not
charged.
Be
sure
to
read
the
instructions
included
with
the
battery
pack
Ed
Notes
on
charging
the
battery
pack
+
When
charging
or
renewing
the
ballery
pack.
do
nol
cover
(he
measuring
unit,
printer
and/or
station
wath
the
cover,
Doing
su
may
result
in
fire
as
heat
is
generated
during
charging
and
builds
up
in
the
measuring
unl,
printer
and/or
station.
This
also
puts
a
load
on
the
battery
pack
and
may
shorten
its
fife.
+
When
you
charge
the
battery
for the
first
time
or
charge
the
battery
alter
it
has
been
unused
fora
month
Or
more:
Phe charge
lamp
gees
off
after
about
(0
to
15
minutes
to
show
that
the
battery
tas
been
fully
charged.
This
occurs
when
vou
charge
the
battery
pack
For
the
first
time.
I
this
happens,
install
the
battery
pack,
press
the
CHARGE
key
for
the
measuring
wit
battery
pack
or
printer
battery
pack
and
began
charging
ayain.
(3
P23)
Hf
the
charge
lamp
does
nol
go
on
when
you
press
tie
CHARGE
key,
press
il
again.
Or
renew
the
battery
since
the
battery
renewal
enables
you
lo
fully
charge
the
battery
easily.
(>
RENEW
To
charge
the
battery
To
discharge
(he
battery
and
begin
a
full
charge
cycle
むう
„Г.
pl lp
ES
KA
ri
는
+
The
havery
pack
aad
measuring
unit
snip
become
warm
immediately
after
the
battery
pack
is
charged
or
renewed,
This
is
not
abnormal
Battery
bfe
will
be
shortened
i
the
haltery
pack
is
manually
charged
after
the
batters
pack
dias
been
completely
charged
withouCusing
the
amt
Avoid
unnecessary
manual
charging.
When
performing
manual
charging.
be
sure
to
charge
the
battery
only
afters
using
the
measuring
unit
or
printer
for
20
to
30
minutes
or
more
ar
after
alles
ine
3
hours
to
elapse
since
the
previous
chareine
16

2.
Preparation
il
happen
when
the
CHARGE
key
or
RENEW
key
is
pressed
within
about
Qve
hours
after
+
Nothing
charging
or
renewing
the
battery
pack
if
the
measuring
unit
or
printer
has
not
been
removed
from
the
station.
This
is
a
protective
feature
to
prevent
excessive
charging
ol
the
battery
pack
and
is
normal,
ifthe
charge
lamp
or
renew
lamp
flashes
during
charging
or
renewal,
there
may
be
a
charging
error
Cheek
for
this
using
the
following
procedure.
~
1
Remove
the
measunng
unit
or
printer
|
|
À
maine
having
the
problem
from
the
station
A
Ý
-
Y
{
]
po
Re-altach
to
the
station
and
press
the
CHARGE
|
functioning
battery.
reattach
to
the
station
and
press
key
the
CHARGE
key.
i
Replace
the
battery
pack
inside
with
a
different.
|
|
1
~
1
charge
tamp
flashes
7
The
charge
kunp
will
tht.
Lf
after
several
|
Ý
minutes
to
YO
minates
the
hunp
goes
out
the
i
D
|
ㆍ
hatery
pack
is
normal.
Ifthe
kanp
flashes
agam,
|
Ithe
lamp
yees
aut
|
There
is
hkely
a
i
r
i ?
there
is
likely
a
problem
with
the
battery
pack
|
aller
several
minutes
problem
with
the
:
to
90
minutes.
there
is}
Staton.
Please
contact
一
一
!
likely
a
problem
wih
|
sour
pearest
Righton
the
previous
battery
|
representative
|
pack
which
resuhed
1:
|
E
the
lamp
Mashing.
|
ーー
«
Itis
possible
to
remove
the
measuring
unit
or
printer
from
the
station
and
use
it
even
before
charging
is
complete
Notes
on
the
contacts
+
the
contacts
become
dirty,
the
battery
cannot
be
charged
properly
due
to
the
faulty
electrical
contact
+
Be
careful
sot
to
touch
the
station
contacts
(pins),
measuring
nil
contacts
(plates),
or
printer
contacts
{pins
and
plates).
+
Also;
he
careful
not
to
touch
the
battery
pack
contacts
(plates).
+
Tf
you touch
&
camtact
or
it
becomes
duty.
wipe
with
a
diy
cloth,
17

1.
The
Measuring
Unit's
Battery
Pack
Replacing
the
battery
pack
1
Press
the
top
of
the
battery
pack
cover
located
an
the
grip
indirection
Eo
wath
your
finger
and
slide
in
direction
2.
2
Exchange
the
battery
pack
inside
for
a
new
one.
30
Clase
the
hattery
pack
cover.
Y
onu
に
1
2
Green
seal
\
©
When
installing
a
battery
pack.
aliga
the
green
seal
on
the
battery
pack
as
showa
in
the
figure
in
he
Бансту
box.
18

2.
Preparation
|
Automatic
charging
Follow
the
procedure
given
below
when
automatically
charging
the
bauery
pack
inside
the
measurme
unit.
4
Furn
on
the
station
power
switch
Ho
the
side
marked
2.
Place
the
measuring
unil
on
the
station.
6
Make
sere
the
measuring
unit
is
securely
housed
in
the
station.
1f
|
itis
nol
securely
housed.
there
may
not
be
proper
contact
berween
+
+
the
contacts.
Also,
be
sure
to
redact
the
forehead
rest
as
the
measuring
unit
cannot
be
securely
housed
in
the
station
when
ibis
estended
|
Check
(hata
battery
pack
is
installed
in
the
measuring
um
ㄴㄴ
—
The
battery
pack
will
be
charged
automatically
when
the
batter
pack’s
charue
becomes
low,
The
charge
lamp
for
the
measuring
unit
on
the
station
will
light
several
seconds
after
charging
begins.
Note
that
if
the
charge
in
the
battery
pack
is
at
about
50%
capacity
or
more,
the
lamp
wiff
not
fight
and
charging
will
not
be
performed.
This
is
a
protective
feature
to
prevent
shortening
of
the
battery
pack’s
life.
Hf
the
remaining
charge
is
about
S06
or
less.
the
battery
will
he
charged
to
maximum
capacity.
(Charging
takes
approximately
90
minutes.
The
charee
lamp
for
the
measuring
uniton
the
station
will
go
out
when
charging
is
complete.
about
50%
ar
møre
Charge
of
about
À
or
fess
OR
eca
Will
net
charge
automatically.
m
weaved
Will
charge
automatically
la
*
This
50%
value
is
merely
given
as
a
reference
figure
and
fluctuates
depending
on
how
the
battery
is
used
and
how
many
Timex
it
has
been
charged.
+
The
battery
pack
is
notalways
kept
fully
charged.
Press
the
CHARGE
key
or
the
RENEW
key
if
vou
want
to
fully
charge
the
battery
pack.
See
“Renewing
he
battery”
on
page
22
|
I
|
and
“Charging”
on
page
234
m
19
Table of contents
Other Right On Measuring Instrument manuals
Popular Measuring Instrument manuals by other brands

Mecmesin
Mecmesin Compact Force Gauge operating manual

PCB Piezotronics
PCB Piezotronics IMI SENSORS 645B01 Installation and operating manual

WYLER
WYLER Clinotronic S quick reference

Nidec
Nidec ST-1100 Operation manual

Tektronix
Tektronix TAP3500 instruction manual

Endress+Hauser
Endress+Hauser Micropilot S FMR540 Brief operating instructions