Printing from a Computer to a RISO HC5500
A4 and A5 Booklets
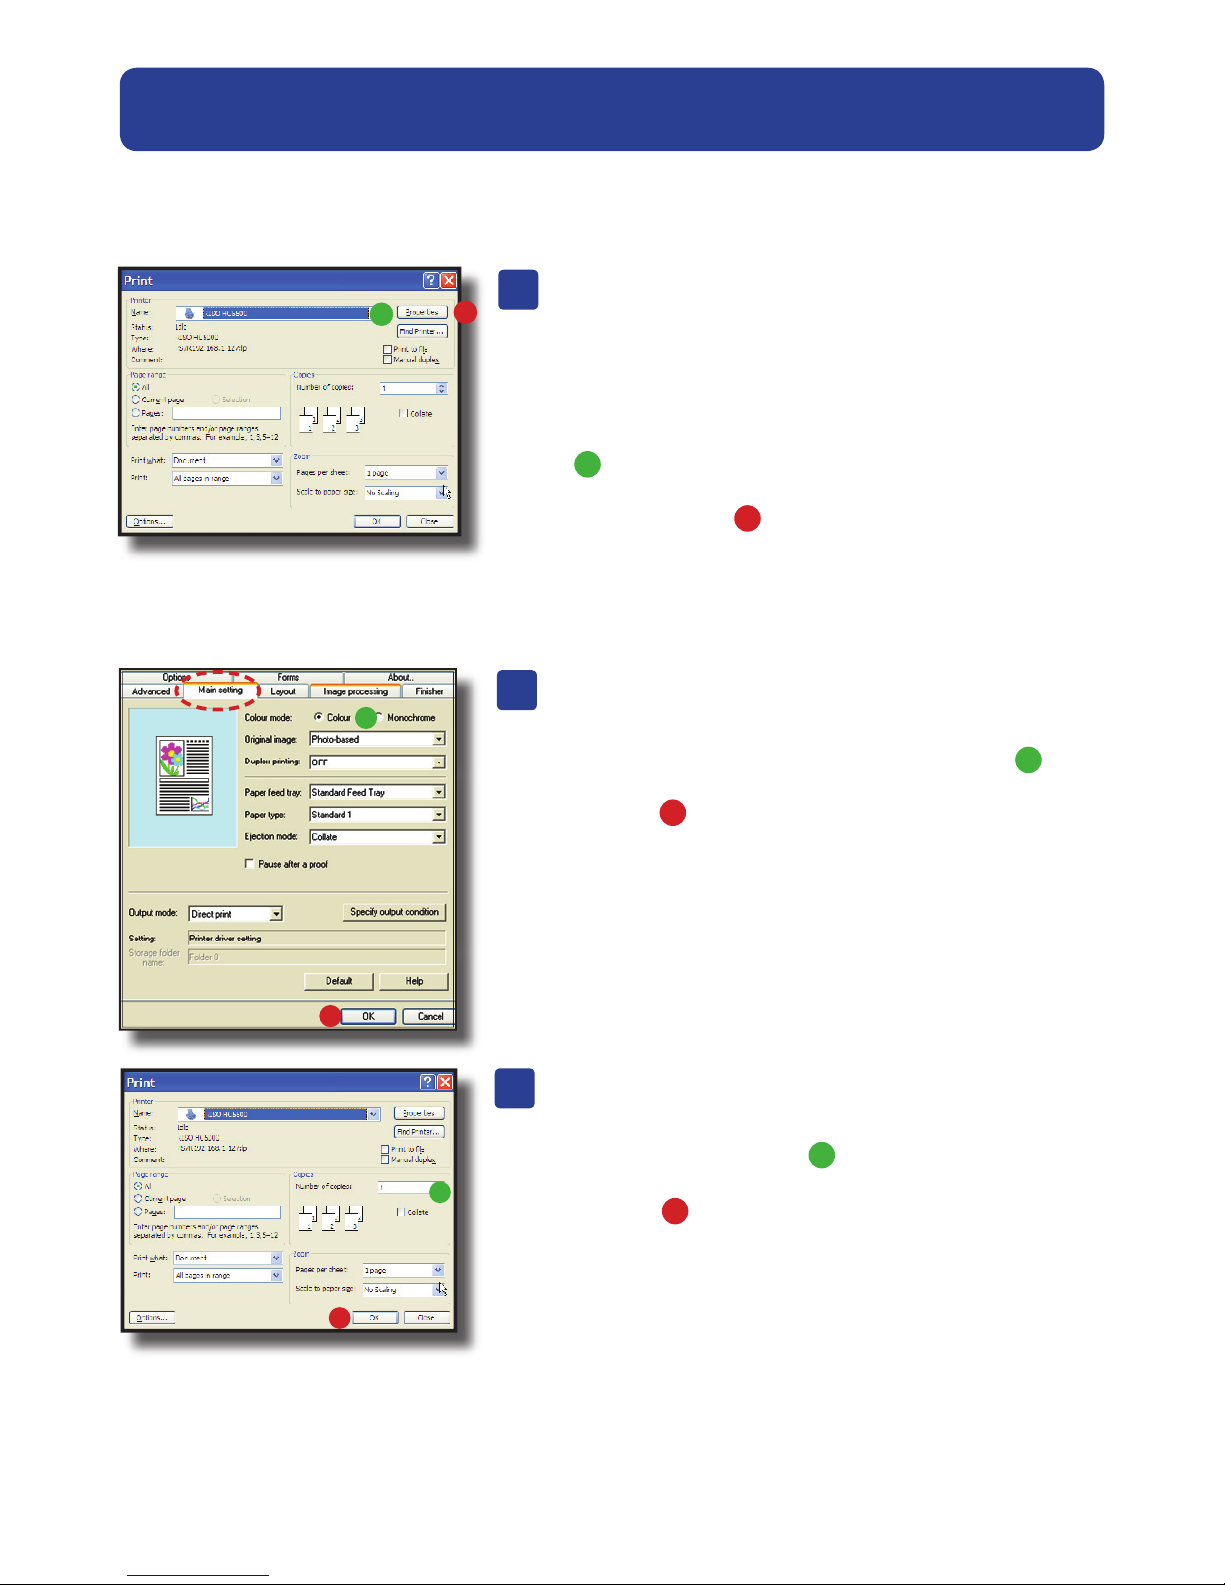
Follow section A of page 2 to open up the
Properties of the Riso HC5500 then:
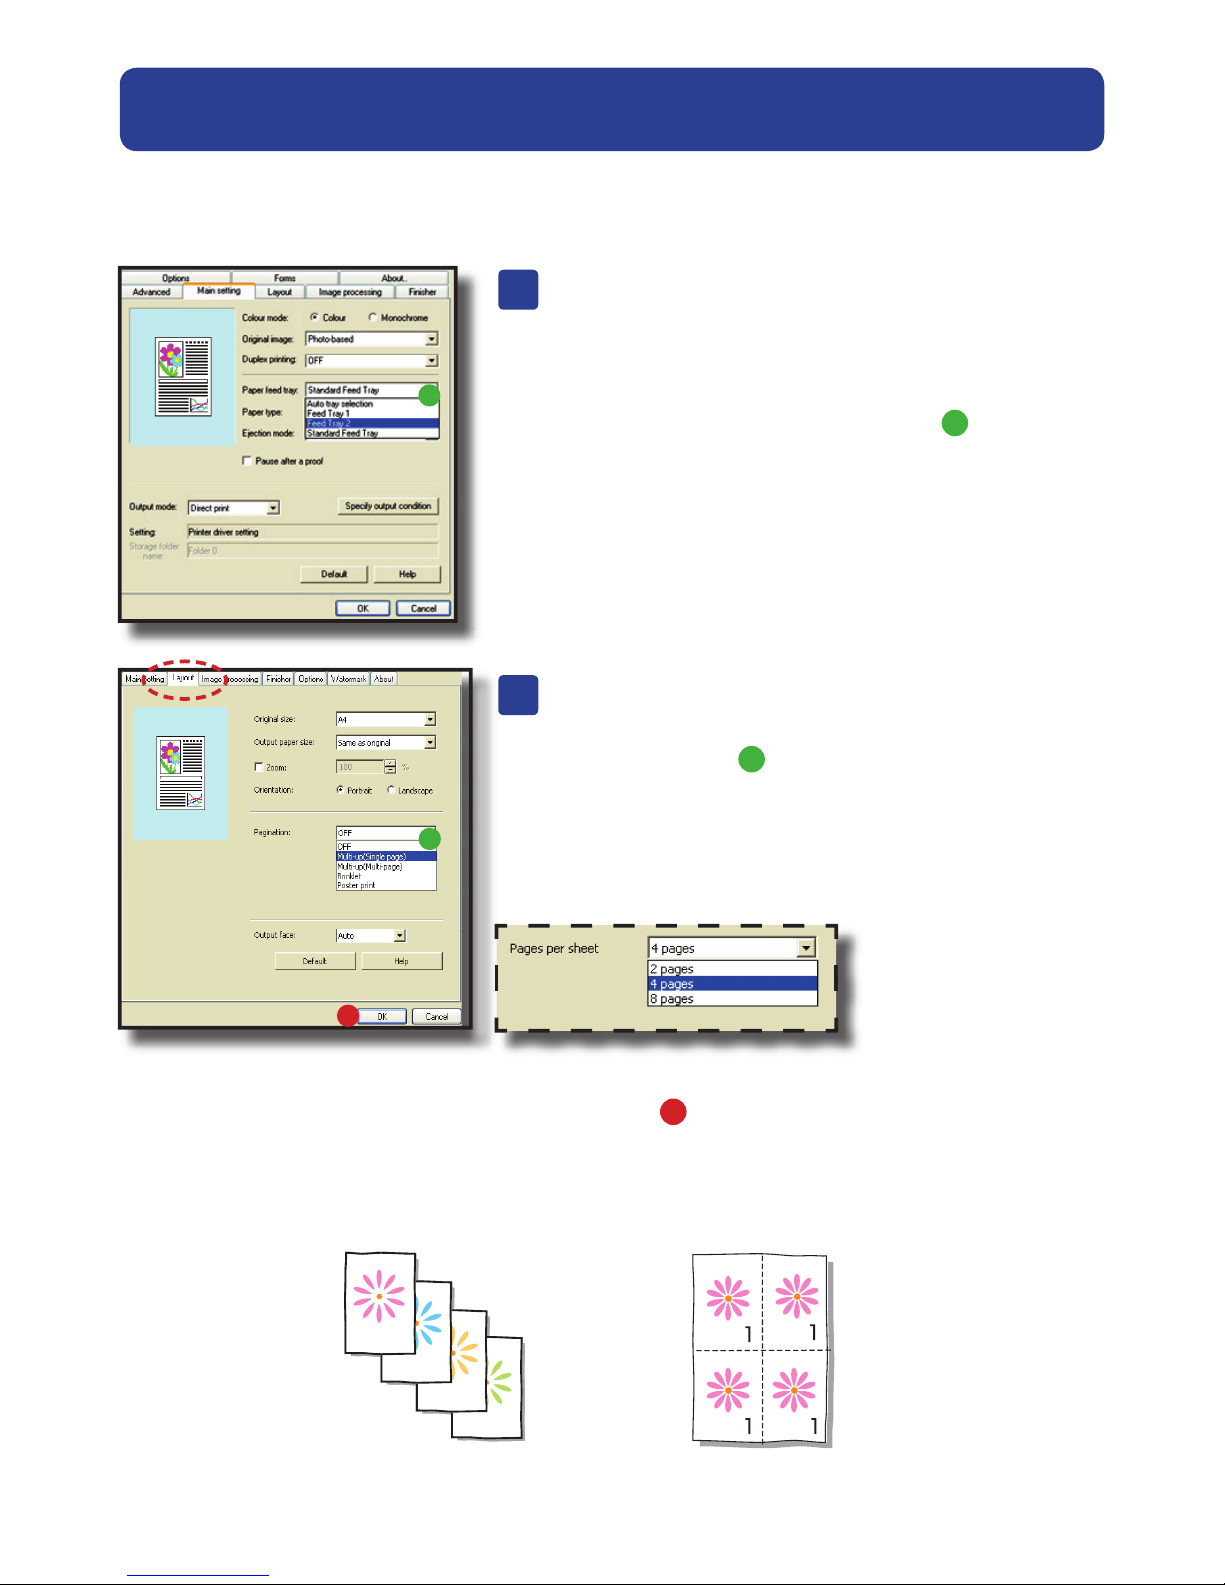
1). Select paper size you wish to print on from the drop
down menu > Paper Feed Tray
Choose > Standard Feed Tray for A4
Choose > Feed Tray 2 for A3
**Please note that if using the optional finishing unit to
fold and staple an A5 booklet (see step C):
Choose > Feed Tray 1 for A4
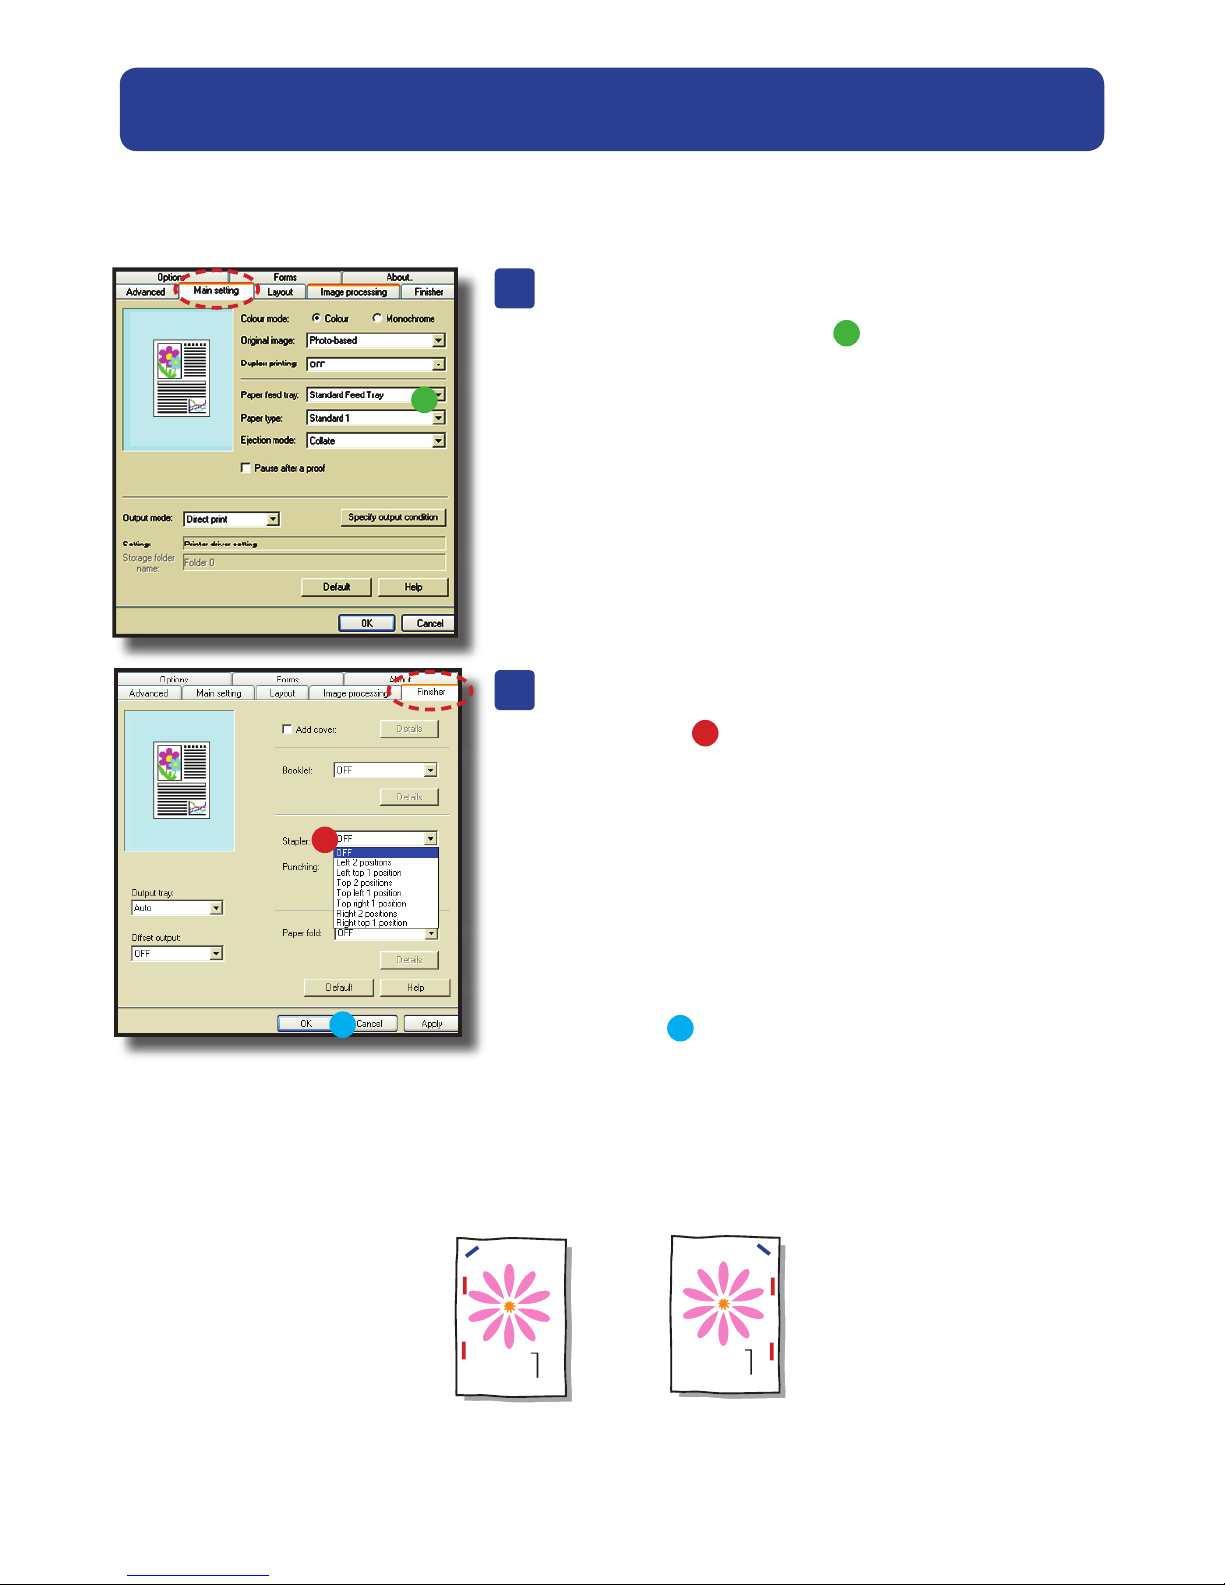
A
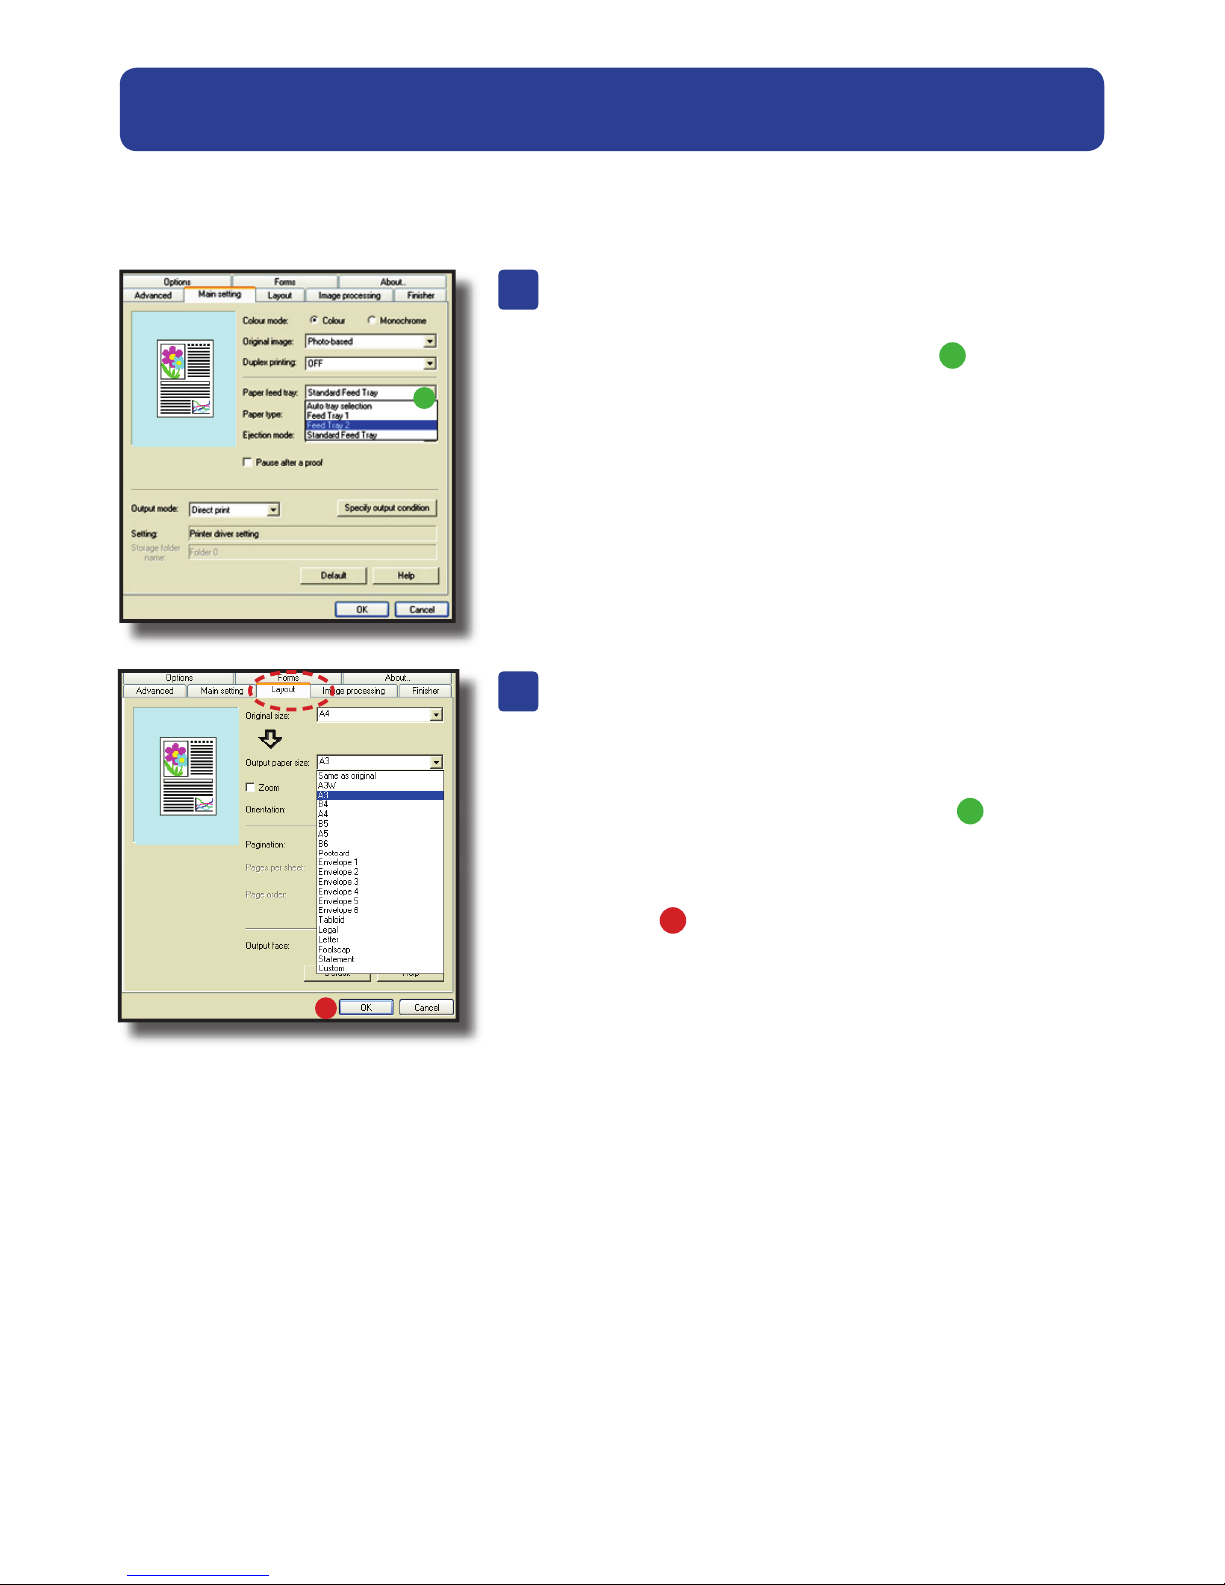
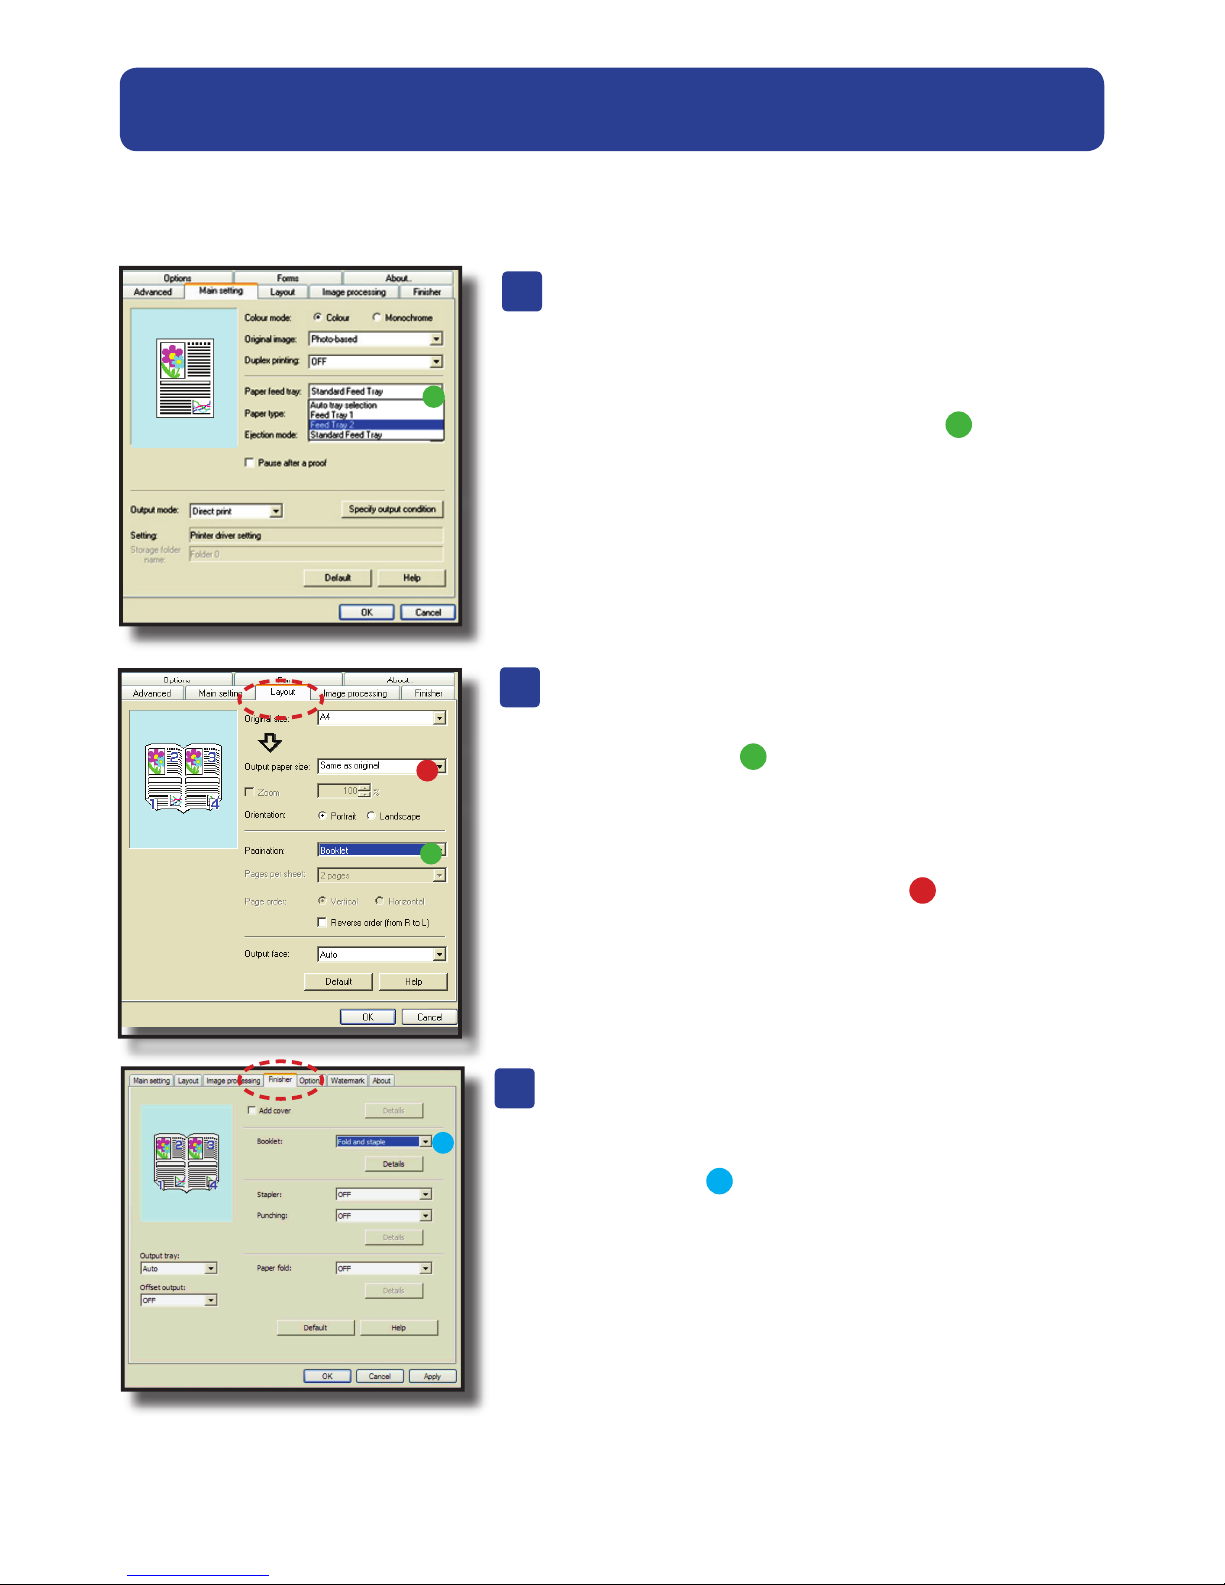
Select The “Layout” tab
1). Select > Pagination
From the drop down menu
Choose > Booklet
2). Select > Output paper size
to match paper size to be printed
B
The following function will require the
optional finishing unit to be fitted
1). Select > Booklet
From the drop down menu
Choose > Fold and Staple
3). Select > OK
C
6