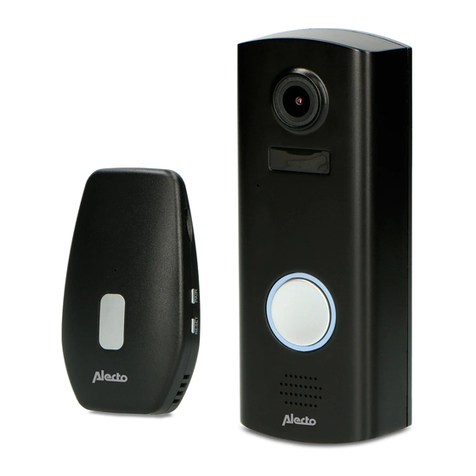
RL 0518L-3 User manual

Version1.1
1342
RL-0518L
1
AB
2 1
3 2
8 ringtones for option, 4 levels for adjusting the
ringtone volume.
One rechargeable lithium battery (18650) for the
indoor unit and outdoor unit respectively.
18650 lithium batteries on the indoor and outdoor
units can be charged alternatively through the USB
port on the indoor unit.
Indicator lights for low battery status and battery
charging status.
Wireless unlock.
IP44 waterproof for the outdoor unit.
Easy installation.
30mm
b. Indoor unit
c. Lock Opener
C
RL-0518L-2
RL-0518L-3
A
C
3
4
Outdoor Unit
*1
Screw Pack
*1
Rain shade
*1
Lock Opener
*1
Micro usb cable
*1
18650 rechargeable
lithium battery
Features
What's Included
Indoor Unit
Installation Instruction
A. Outdoor unit installation
1. Fasten the rain shade on the wall with screws.
( screw size: 4*30BA)1.4-1.6m high from the ground,
2. Put the outdoor unit into the rain shade, at the
bottom of the unit use the screw to fasten.
Place the indoor unit on desk or hang it onto wall.
B. Indoor unit installation
12
C. Lock Opener Installation
1. Paste the 3M sticker supplied on the back of the
lock opener.
2. Paste the lock opener on the wall or on the door.
a. Outdoor Unit
Coding
CALL
Front View Side View
Talk
Unlock
Chime
Selection
Volume
Adjustment
18650 Rechargeable
Lithium Battery
Micro USB
Charging Port
18650 Rechargeable
Lithium Battery
+ -
Unlock
Button
Indicator
Light
Coding Button
Front View Bottom View
Wiring Diagram
RVV2 x1.0mm² cable is
recommended.
Power
Electronic-lock
Non-polarity
B
Function Keys
Instructions
Calling and Talking
Visitors press the CALL button on the outdoor unit,
and then the indoor unit will ring . Press the TALK
button( ) to talk with the visitor.
Unlocking
Press the UNLOCK button( ) on the indoor
unit to release the electric lock.
In calling or talking status,
Ringtone Selection
Press the " " button on the indoor unit to select
the ringtone. When pressed, it will play the ringtone,
and if the complete ringtone is played, it is selected
successfully. Or, you can press the UNLOCK button
to select without waiting the ringtone to play
completely. 8 ringtones in total for selection.
Operation Instruction
Low Battery Indicator
- Outdoor unit: The Call button indicator light will
slowly flash.
- Indoor unit: The Unlock button indicator light will
slowly flash.
Battery Charging Indicator
- In charging: The Unlock button will fastly flash.
- Full charge: All indicator lights will be turned off.
Quick Installation Guide
Wireless
Audio Intercom

7 85 6
Press the coding button on the bottom of the lock
opener, the indicator light will flash to indicate that it
has entered into the coding status (60 seconds). In
Calling or Talking status, press the Unlock button on
the indoor unit, the lock opener indicator light will be
turned on for 3 seconds to indicate that the coding is
successful.
NOTE: No need to code unless it is necessary.
Press the " " button on the indoor unit to adjust
the ringtone volume. Each time you press the button,
it will switch to one volume level. There are 4 levels
can be adjusted. Wait until the ringtone is played
completely, the volume setting is done. Or, you
can press the UNLOCK button to quickly save the
volume setting.
Ringtone Volume Adjustment
D. Lock Opener Coding
<10mA
<80mA
≤3A
<300uA
<350mA
426~440 MHz
IP44
433.92MHz
-10ºC~50ºC
10%~90%(RH)
Operating Humidity
Lithium battery DC3.7V
Battery
Standby Current
Working Current
Wireless Frequency
Wireless Distance
Water-Resistant
Degree
≤ 500m (Open area)
Working Temperature
Lock Opener
Power Supply
Standby Current
Working Current
Max current of
connecting lock
Wireless Distance ≤50m (Open area)
Receiving Frequency
Outdoor Unit
DC5V
<2mA
<350mA
426~440 MHz
Indoor Unit
Lithium battery DC3.7V
Battery
Charging Power
Standby Current
Working Current
Wireless Frequency
Wireless Distance ≤500m (Open area)
Lock Type DC electric lock
Specifications
(The product is factory programmed already)
Coding Instructions
A. Coding the outdoor unit to the indoor
unit (1 outdoor unit + 1 indoor unit)
1. Press and hold the CALL button on the outdoor unit
for about 3 seconds, release the button when a "Di"
tone is heard. Now, the outdoor unit has entered to
Send Code status (The CALL button indicator light will
be turned on).
2. Press and hold the UNLOCK button on the indoor
unit for about 3 seconds, release the button when a
"Di" tone is heard. Now, the indoor unit has entered to
Receive Code status.
3. After receiving the code, both the outdoor and
indoor units will give two "Di" tones that will confirm
that the coding is successful. They will then
automatically exit the coding status.
B. Coding the indoor unit to indoor
unit (if multiple indoor units exist)
Explanation of the indicator tones given by indoor
units as below:
One "Di" tone: Receives the code from the outdoor unit
Two "Di" tones: Receives the code from another
indoor unit
Three "Di" tones: Sends the code to another indoor unit
The indoor unit coding with the outdoor unit will
be defined as #1 indoor unit
1. Send Code: Press and hold the UNLOCK button on
the #1 indoor unit for about 15 seconds, release the
button when three "Di" tones are heard. Now, it enters
to Send Code status (The TALK button indicator light
will be turned on). Wait until the #2 indoor unit has
received the code, then press the UNLOCK button to
exit.
2. Receive Code: Press and hold the UNLOCK button
on the #2 indoor unit for about 10 seconds, release the
button when two "Di" tones are heard. Now, it enters to
Receive Code status. Once it receives the code
successfully, it will give two "Di" tones and then will
automatically exit.
3. To code the #3 indoor unit, refer to the steps above
by taking the #2 indoor unit to send the code and the
#3 indoor unit to receive the code.
NOTE:
If multiple indoor units exist, the one that will
receive the code from the #1 indoor unit will
be defined as #2 indoor unit, and the one that will
receive the code from the #2 indoor unit will be
defined as #3 indoor unit.
AC/DC 12V
H154 x W54 x D36mm
Dimension
Dimension
H158 x W62 x D50.5mm
H68 x W44 x D23.5mm
Dimension
C. Coding if multiple outdoor units
exist
1. Send Code: Choose any one of the coded indoor
units, press and hold its code button for about 15
seconds, release the button when three "Di" tones are
heard. Now, it enters to Send Code status (The Talk
button indicator light will be turned on). Wait until the
outdoor unit you want to code has received the code,
then press the code button to exit.
2. Receive Code: Press and hold the call button on the
outdoor unit you want to code for about 10 seconds,
release the button when two "Di" tones are heard. Now,
it enters to the Receive Code status. Once it receives
the code successfully, it will give two "Di" tones and
then will automatically exit.
Warning: Changes or modifications to this unit not
expressly approved by the party responsible for
compliance could void the user ’s authority to operate the
equipment.
This device complies with Part 15 of the FCC Rules.
Operation is subject to the following two conditions:
(1) this device may not cause harmful interference
(2) this device must accept any interference received,
including interference that may cause undesired operation.
Shielded cables must be used with this unit to ensure
compliance with the Class B FCC limits.
NOTE:
This equipment has been tested and found to comply with
the limits for a Class B digital device, pursuant to Part 15 of
the FCC Rules. These limits are designed to provide
reasonable protection against harmful interference in a
residential installation.
This equipment generates, uses and can radiate radio
frequency energy and, if not installed and used in
accordance with the instructions, may cause harmful
interference to radio communications.
However, there is no guarantee that interference will not
occur in a particular installation. If this equipment does
cause harmful interference to radio or television reception,
which can be determined by turning the equipment off and
on, the user is encouraged to try to correct the interference
by one or more of the following measures:
-Reorient or relocate the receiving antenna.
-Increase the separation between the equipment and
receiver.
-Connect the equipment into an outlet on a circuit different
from that to which the receiver is connected.
- Consult the dealer or an experienced radio/TV technician
for help.
FCC WARNINGS
Table of contents


