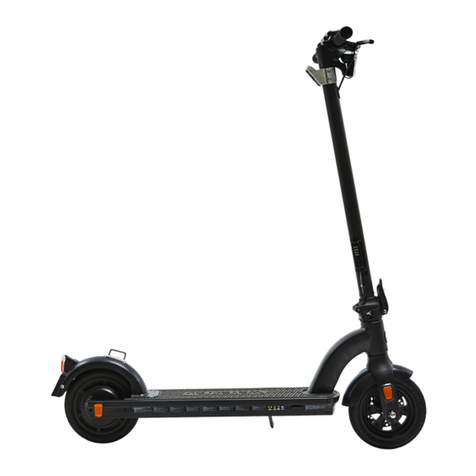
RND G3 User manual

WWW.SZRND.NET

Thank you for purchasing G3 Electric scooter
In order to ensure safety of you and others, please read the instruction before you use it.
There might be slightly dierent between the product and the picture
4.Battery charge
4.1 How to charge
4.2 Battery standard
5.Usage
5.1 Riding teaching
5.2 Practice guidelines
6.Cleaning and maintenance
6.1 Cleaning
6.2 Storing
6.3 Transport
7.Maintaining
1.Basic information
1.1 Important information
1.2 Safety warning
1.3 Scrap disposition
1.4 Product standard
2.Product introduction
2.1 Packing List
2.2 Diagram of G3
2.3 Button information
2.4 Display information
3.Fold and assemble the E-scooter
3.1 Assembly of handlebar
3.2 Assembly of rear fender
3.3 Kickstand of E-scooter
3.4 Fold and unfold the E-scooter
Catalogue

Purchase Data:
Scooter Code:
Chapter 1
Basic information
This instruction is including the function, usage and maintaining of the G3. Please prepare your purchase
information before contacting the customer service, because it is needed during the process.
please obey the rules in this instructionplease obey the rules in this instruction
1.1 Important information
Make sure to wear the protective sets(helmet, elbow pads, knee pads, ect.)
You must obey the law when riding the e-scooter. Users have to take risks and responsibilities. It includes, but
are not limited to muscle injuries, fractures, lacerations, serious injuries and death, and other risks that may be
associated with the riding of the e-scooter.
(on the bottom of the scooter)

1.3 Scrap disposition
Do not burn, bury or drop the e-scooter with the household garbage. If the battery is broken or got re, It will
cause danger and environment pollution. Please obey the rules and dispose it carefully.
Safely dispose the package. It is dangerous for kids and pets.
Checking the wholeness of the product, If any parts are missing, please contact the seller.
If there is any damaged, please don't use it.
Please use the standard charger.
Look after your kid if he or she rides the e-scooter.
Only use the components from our company.
Be careful with the electricity. No water or liquid contacted.
Use a dry cloth to remove dust. Do not spray liquid onto product.
Do not immerse the product, any of its components or accessories in water.
Do not use on the stairs.
The e-scooter could only take one person.
Cover the product to prevent dust. Do not store it in a dusty environment, which may cause damage.
Do not ride in areas with re hazards.
Risk of Fire – No User Serviceable Parts.
Prolonged Exposure to UV Rays, Rain and the Elements May Damage the Enclosure Materials, Store Indoors
When Not in Use.
1.2 Safety warning

1.4 Product standard
1200 x 660 x 550mm
1200x 660x 1270mm
25±1kgs
100kgs
≤20%
Smooth road, slope less than 20%
25°C
-10°C to 50°C
50 km / h
60km (load: 65kg Battery:18Ah)
10.5-inch
10.5-inch
18650 Rechargeable lithium ions/18650
Overcharge, over discharge, overheat automatically shut down
52V 18Ah
936Wh
AC100-240V 50/60Hz
DC 58.8v 2a
10~12Hours
Folded Size
Unfold Size
Net Weight
Maximum load
Grade ability
Suitable terrain
Operating temperature
Storage temperature
Maximum speed
Cruising distance
Front tyre
Rear tyre
Type
Battery protection type
Voltage and current
Total Power
Input voltage
Output voltage
Charging Time
Speed and mileage
Tyre
Battery Parameter
Charger parameters
Specication
Product performance
Items Details Parameters
The specic parameters are subject to the actual purchased and received products

Chapter 2
Product introduction
2.1 Packing List
2.2 Diagram
The actual product details and specications due to product upgrading and optimization shall be subject to change without notice
front light
side reector
side light cover
deck
foot pedal
DC IN
rear deck cover
rear suspension
rear deck bottom cover
rear disc brake
rear wheel
rear fender
rear reector
tail light
rear deck
rear foot pedal
kickstand
handle bar
steering bar
braking & bell
accelerator
power Button
handlebar base
locking ribbon
display
steering pole
folding screw
front reector
folding bar
front axel
front suspension base
front fender
front wheel
front suspension
front disc brake
1
2
3
4
5
6
8
7
9
10
11
12
13
14
15
16
17
18
19
20
21
22
23
24
25
26
27
28
29
30
31
32
33
34
35
G3 e-scooter x1
Charger x1
Instruction x1
Setting Tool x1
1
4
6
5
8
9
17
15
10
12
13 14
21 20 19
18
11
3
3
2
1
7
16
32
22232425
262728293031
3533 34

2.3 Button information
G3 have dierent parts of the display, you have to know them before your riding.
if there is no power please stop and turn o the power.
Real-time current
Temperature
Speed
Headlight status
Start mode
Speed mode
Setting button/
start mode
Cruise riding
Bluetooth
Setting button/
speed mode setting
Setting button/
headlight
Total mileage
Battery
Real-time Voltage
ON/OFF button: Power ON single click,Power OFF
long press,single click ON/OFF button to switch
on/o head light while scooter's power on
SET: Single click to switch units (miles & kilometers)
long press to switch on/o foot push
MODE: Single click to change speed mode (1-2-3-1)
Long press to open and close the cruise control
Light: Click to switch dierent light modes
2.4 Display instructions
1
2
3
4
1
2
3
4
5
6
7
8
9
10
11
12
13
14
1234
1 2 3 4 5
6
8 71314 1011 912

Chapter 3
Fold and assemble the scooter
Please ensure that the power of G3 has been turned o
before assembling the scooter.
Most of the parts have been assembled before leaving the
factory. A few parts are required to be assembled before
3.1
handlebars assembly
3.2
Rear fender assembly
Electric scooter installation kit and tools
Tool bag 15mm
wrench
M5
Allen
wrench
M4
Allen
wrench
M2. 5
Allen
wrench
Silicone
rolled
strip
Shock
absorber
M6 pan
head screw
M6 stud screw

1
2
3
Following the shown image, to adjust direction of the handlebar faucet.
Make sure the brake in left side facing frontward, thumb accelerator in right side facing backward.
Align & insert the mounting base in the faucet xing seat.
Adjust the direction and x it with four screws.
3.1 Handlebars assembly
Left Right
2
1
33
Front
Back
3
1

1
2
Find the kickstand beside the pedal
Push the kickstand down
1
2
3
Insert rear fender into the installation
position where has the left and right
suspension arms.
Pay attention to the left and right
direction, Only with correct direction the
rear fender can be inserted normally.
Just screw it tightly.
3.3 Kickstand of E-scooter
3.2 Kickstand of E-scooter
12
3

Loosen the folding set screw until the screw is out of the fold
Put down the steering pole.
Hang the locking ribbon to the bottom of the rear pedal
1
2
3
3.4 Fold the scooter
To unfold the scooter, please follow the above steps vice versa
11
2
3

Chapter 4
Battery charge
4.1 How to charge
Turn o the scooter before you start to charge.
Find the charging pot and insert charger into the socket.
Use the right charger.
The light will be red while charging.
The light will be green when charging completed.
If it is the rst charge, please charge the E-scooter at least 12 hours before using.
Under no circumstances should you use a scooter while charging.
Do not charge for longer than necessary. The standard charging time is about 12 hours (18ah battery).
Charging too long can aect battery life and performance.
To extend battery life, charge it at least every two months.
Please charge the scooter before use.
1
2
3
4
5

4.2 Battery standard
Rechargeable lithium ions
10~12hours
52V
18Ah
-10°C to 40°C
5°C to 45°C
-20°C to 50°C
936Wh
Overcharge, overdischarge, overheat automatically shut down
Type of the battery
Charging time
Voltage
Battery capacity
Operating temperature
Charging temperature
Storage temperature
KWh
Protection
Chapter 5
Usage
Before riding the G3, please read the following information.
You have to wear the helmet and other protective clothing.
Only under 100Kg are allowed.
Obey the local law.
The G3 contains the motor, which may be classied as a motor vehicle according to your local regulations. It
is your responsibility to comply with local regulations.
Components Parameter

To slow or stop the scooter, release trigger and hold the
handbrake.
Leave one foot on ground to keep the balance after scooter
stopped.
Turn the handle with both hands.
Hold the handlebars with your hands and put your
right foot on the deck. With little left foot push(5km/h)
to engine scooter and Right hand triggers the
accelerator for riding.
5.1 Riding teaching
Suppose you are wearing appropriate protective gear and have placed your scooter on a level road with
sucient power, follow these steps.
Keep your body and scooter balanced by looking straight ahead
Turn right
Turn left
To turn o the scooter, please press the turn o button for 3 seconds after scooter stopped.

5.2 Practice guidelines
Please practice riding until you can easily use all scooter functions. See the tips below.
Avoid passing through anything that may stick on or stuck in the wheels.
Wear fat shoes for fexibility and stability.
Keep practising until you can easily get on, forward, turn, stop and get o.
Riding on the road with a 20 degree slope is OK for G3, but not recommended.
G3 is preferred to relatively fat road conditions.
Do not ride on slopes, pedestrians or obstacles until you are profcient with the scooter.
The G3’s weight is about 25 KGs. Remember to fold the scooter before you pick it up.

Chapter 6
Cleaning and maintenance
6.3 Transport
Close and fold the scooter before moving, lifting, or transporting it (see section 3.4 for instructions).
When lifting the whole scooter, please note the weight of G3 is about 25KGs.
6.2 Storing
To store G3, please follow the below instructions:
6.1 Cleaning
After long time riding, you need to clean it to ensure the G3 works well.
Turn o the scooter before cleaning.
Use dry cloth to scrub it.
Avoid contacting from liquid.
Do not use alcohol and detergent.
Do not spray the liquid directly on any part of the scooter.
Please charge it before you store it.
Charge it every 2 month.
Cover G3 to prevent dust.
Do not store it in a dusty or moisture environment, which may cause damage.

Chapter 7
Maintaining
Your G3 electric scooter is warranted to the original owner for one year from the date of purchased against
defects in material and workmanship under normal use and service.
This warranty gives you specic legal rights and you may have other rights depending on local laws. This
warranty lasts for one year from the date of purchase.If the product is repaired or replaced, the warranty period
will not be extended.This warranty only covers technical hardware defects under normal use conditions during
the warranty period.
Statement: we are not responsible for the accidental use of this product and its liability will not exceed the
purchase price of the product in any condition.
Guarantee does not include
(a)transport (b) store (c)usage (d)don t obey the instruction (e)change (f)repair without
authorization (g) abrasion (h)accident

Table of contents
Other RND Scooter manuals

