RO Aerodyne 500 scale fuselage Airwolf User manual

1
500 scale fuselage Airwolf
INSTRUCTION MANUAL
Produced By:

2
TABLE OF CONTENTS
Additional items required…………….
Adhesives and building supplies…..
Disclaimer……………………………………
Parts sheet………...……………………….
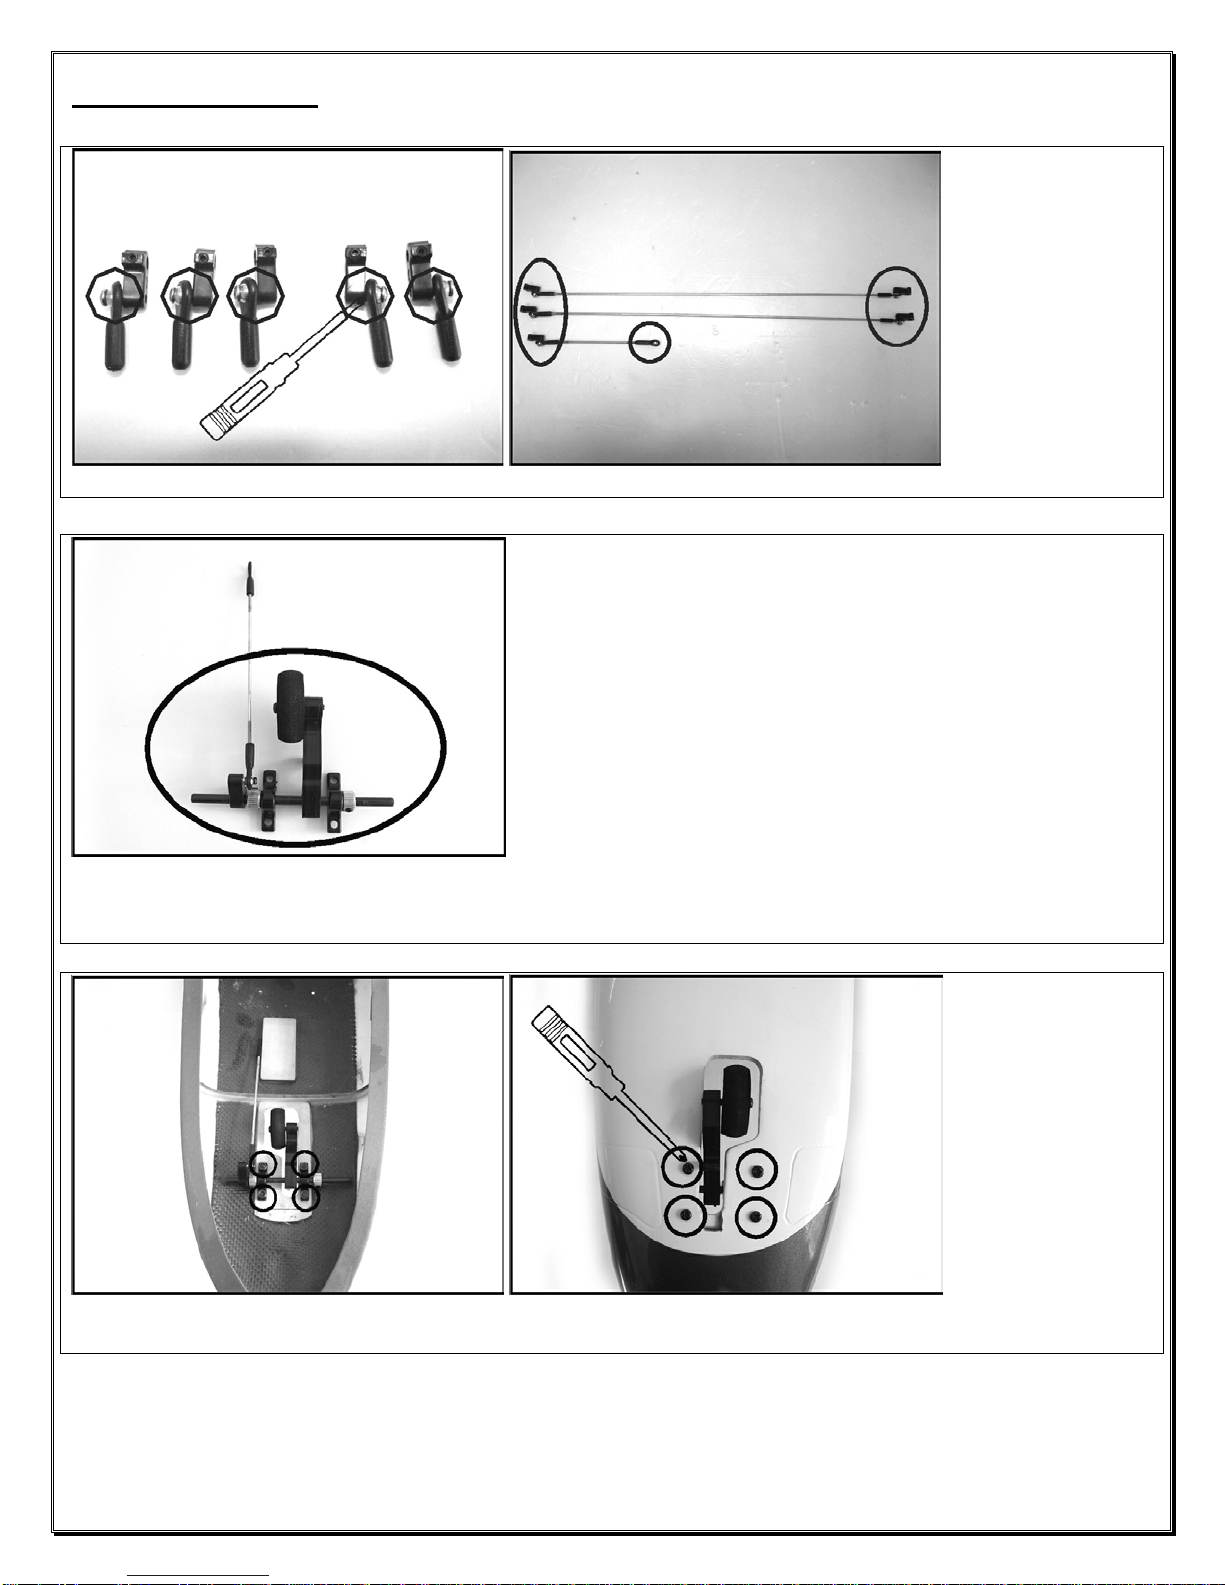
Initial setup…………….………………
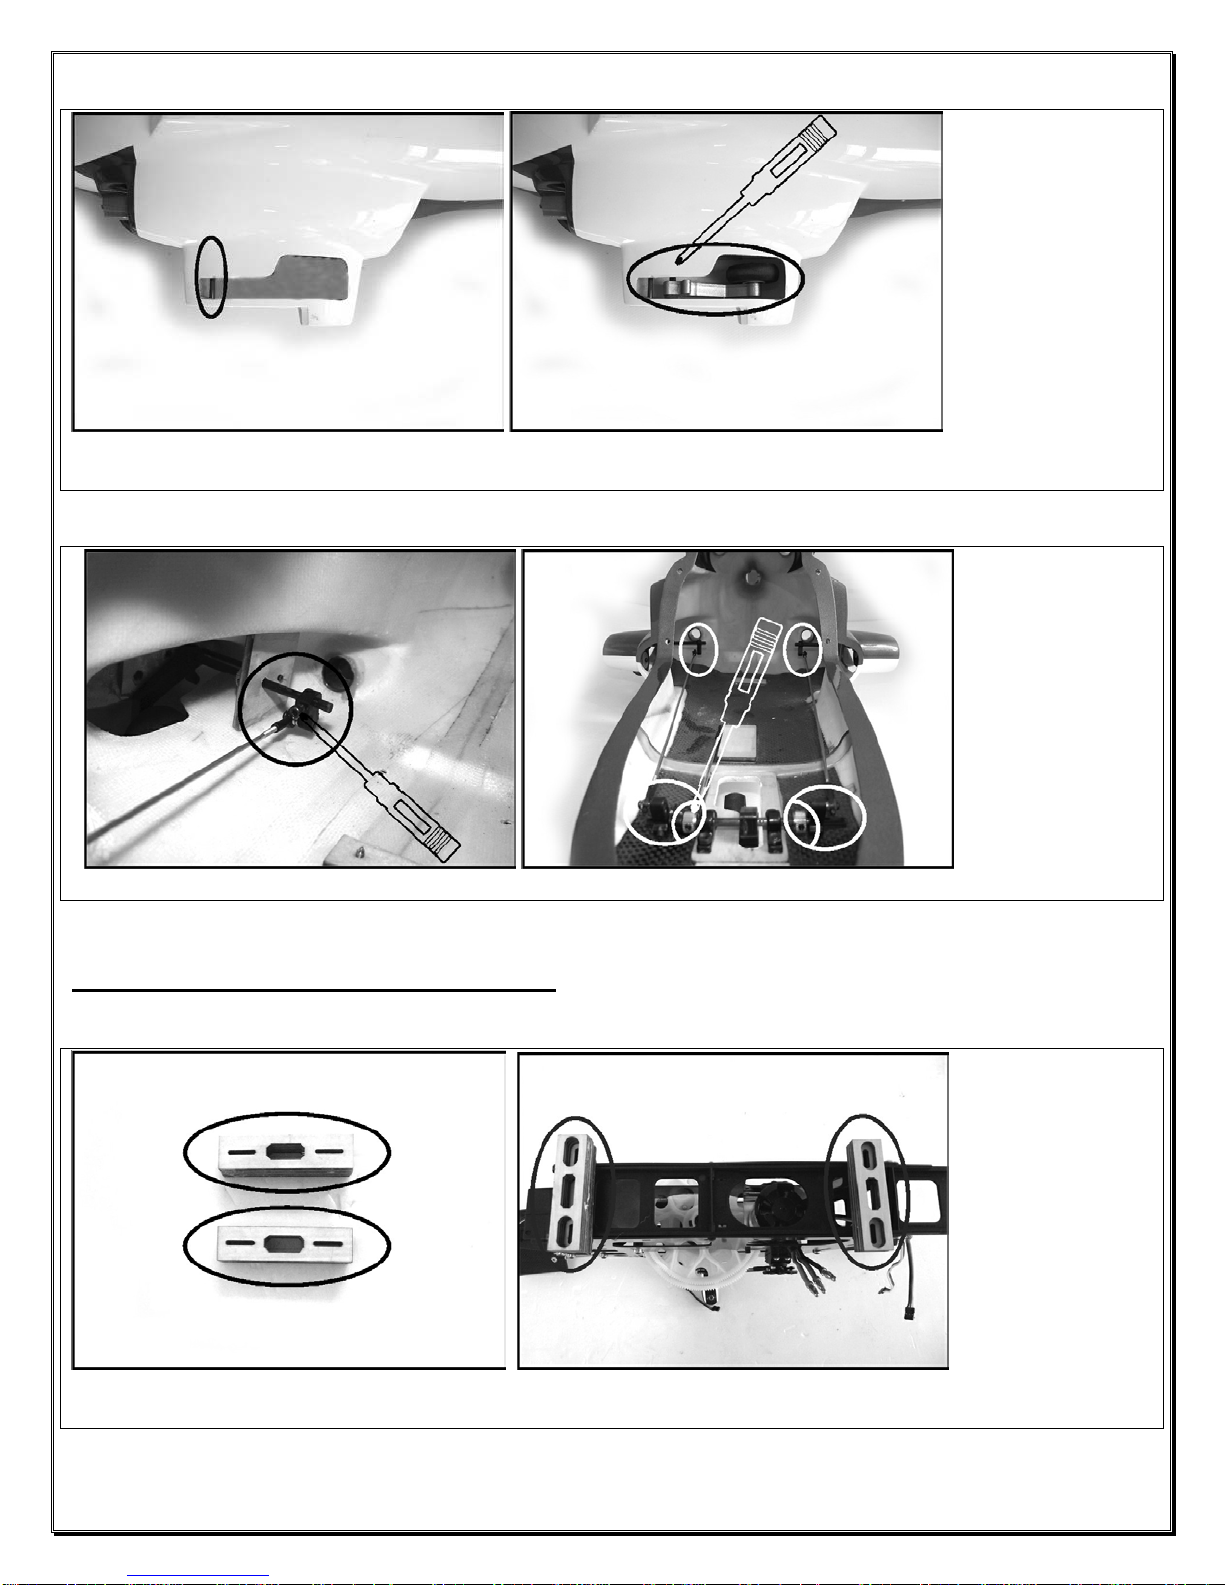
Installing the mechanics……………..
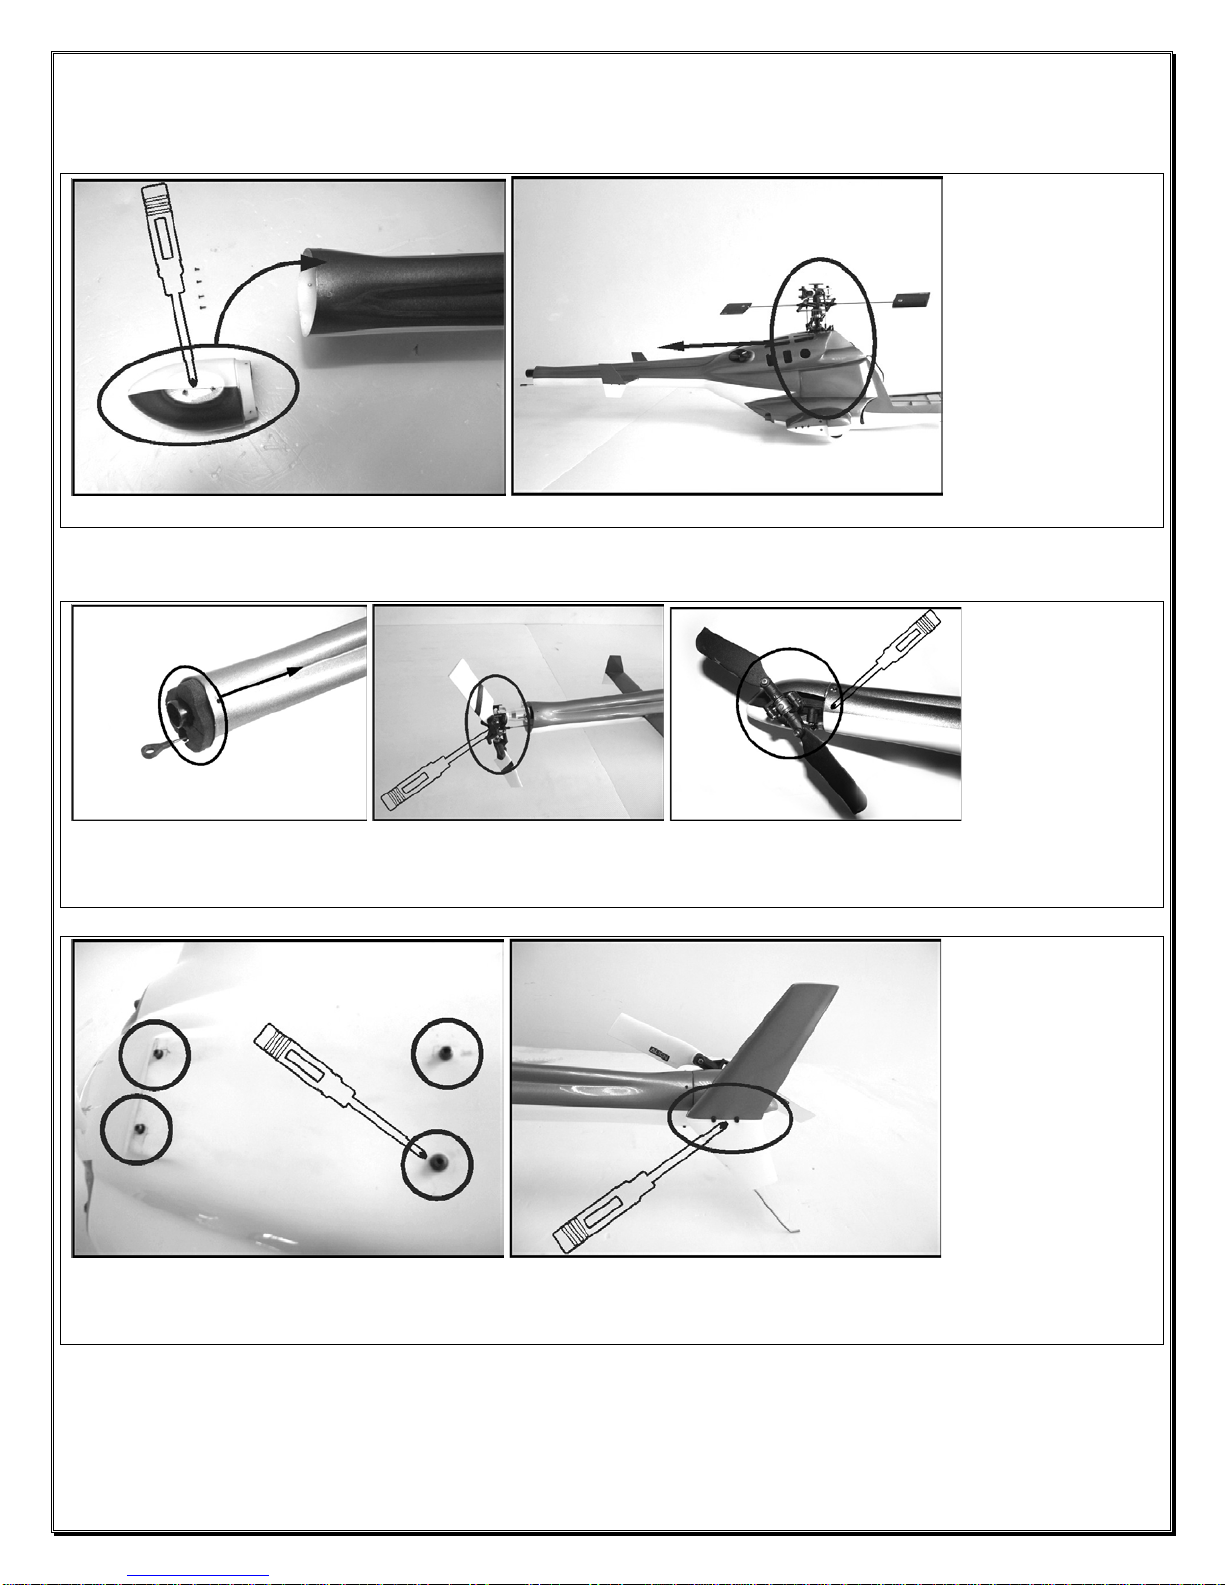
Final steps…………………………………..
Flying characteristics………………….
2
2
2
3
4
5
7
8
Introduction:
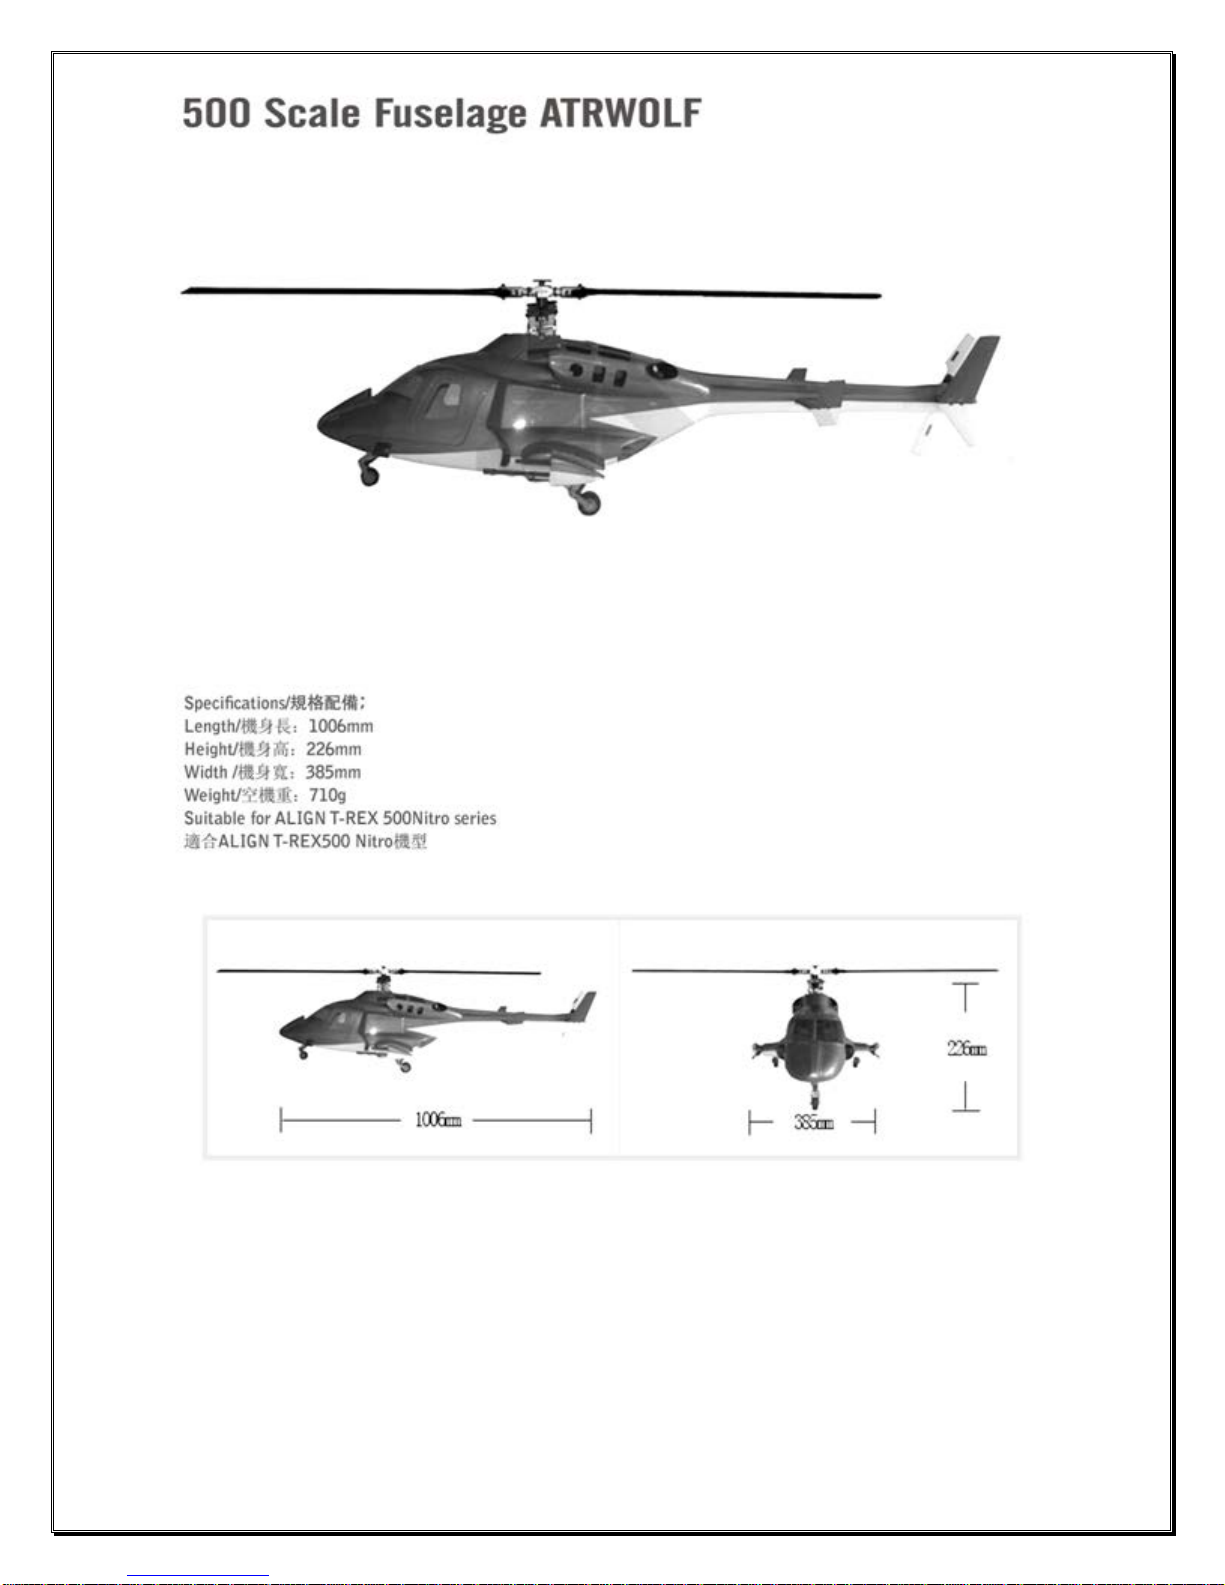
Thank you for your recent purchase of our 500
size Airwolf. This fuselage is made up of
fiberglass and plywood formers This helicopter
fuselage is sure to bring you great joy with its
amazing flight characteristics and scale
appearance. So from all of us here at RC
Aerodyne, thank you for your recent purchase
and enjoy your new Airwolf.
Additional items required
Trex 500 electric or Chaos 500
Motor, ESC, gyro, servos for a stock 500 size
helicopter
3000mah 6 cell LiPo battery
Adhesives and building supplies
Metric hexagon driver set
Drill bit set
Phillips screw diver
Rotary tool
5 min epoxy
Disclaimer
R.C. Aerodyne Heli’s and Aircraft are not to be treated as toys. Although every effort is made to provide a
superior and dependable product, improper use can cause serious injury and death. Be sure to read this manual
carefully, paying close attention to all warnings, precautions and recommendations. You should insure your
personal safety and that of others when operating R.C. Helicopters or Aircraft.
R.C. Aerodyne and the manufacturer assume no liability for the assembly, maintenance and operation of this
product. This product is intended for use only by adults having extensive experience flying remote controlled
helicopters and Airplanes. You should fly this product only at legal flying fields, away from homes, other
people and traffic.
We strongly recommend that you obtain liability insurance for this product. One source for such insurance is
thru AMA.
AMA
AMA (Academy of model aeronautics) is a self-supporting, non-profit organization whose purpose is to
promote development of model aviation as a recognized sport and worthwhile recreation activity. AMA is the
chartering organization for more than 2,500 model airplane clubs across the country. AMA offers its chartered
clubs official contest sanction, insurance, and assistance in getting and keeping flying sites. AMA is the voice
of its membership, providing liaison with the Federal Aviation Administration, the Federal Communications
Commission, and other government agencies through our national headquarters in Muncie, Indiana. AMA also
works with local governments, zoning boards, and parks departments to promote the interests of local chartered
clubs. The purpose of attaining a membership through the AMA is to have some sort of liability insurance in
the chance of an accident. Though AMA will not cover the airplane/ helicopter in a crash the do have

3
assistance in person or property damage. We strongly recommend you attain a membership with the AMA. The
contact information for the AMA is:
Academy of Model Aeronautics.
5161 E. Memorial Dr.
Muncie IN 47302
(800) 435-9262
Helicopter and Aircraft operation requires a high degree of skill. Accidents, modifications or damage during
flight are not covered by any warranty and are solely the pilot’s responsibility. Parts and service can, of course,
be obtained thru R.C. Aerodyne or our authorized service centers.
When flying for the first time or if you are an inexperienced flyer, we strongly recommend you obtain
assistance from an experienced pilot. Finding an experienced person to help you in assembly, set up and flying
is the best way to insure a satisfying and safe flying experience.
Parts sheets:

4
INITIAL SET UP
1. Assemble the control arms and add the ball links to the arms. Attach the ball links to the control rods.
2. Attach the control arms to the control rods. Attach the small rod to the nose control arm. Attach the nose
gear to the control arms with the smaller carbon fiber rod. Ensure that the metal spacers and the mounts are on
the rod as shown above.
3. Attach the nose gear to the fuselage using the bolts and nuts provided. Bolt from the underside of the
fuselage.

5
4. Install the carbon fiber brace rod into the fuselage. Install the main retract into the fuselage as shown
above.
5. Attach the control arm to the retract rod and secure.
INSTALLING THE MECHANICS
6. Glue the wood spacers into 2 even blocks. Attach them to the bottom of the mechanics using the skid
bolts from the mechanics.

6
7. Detach the tail cover and place aside. Insert the mechanics into the fuselage.
8. Install the foam spacer and attach the tail case to the tail boom. Attach the tail cover to the fuselage.
9. Secure the mechanics to the fuselage using the screws provided. Attach the vertical fin to the tail of the
helicopter.

7
10. Install the retract servo to the nose of the fuselage and connect the ball link to the retract system.
FINAL STEPS
11. Glue the horizontal stab to the tail of the fuselage using epoxy. Attach the vertical fins to the horizontal
stabs.
12. Install the weapons to the wings of the fuselage using epoxy.

8
13. Install the weapons cap to the weapons. Install the windshield to the fuselage body.

9

10
FLYING CHARACHTERISTICS
Since this fuselage adds weight to the helicopter we
advise that you do not attempt any 3D maneuvers to
ensure the integrity of the helicopter. With the
added weight the blades may come into contact with
the fuselage and destroy the helicopter if any were
attempted.
The fuselage will make your helicopter look and fly
more like the full scale helicopters, and that is how
we advise you fly it.
Thanks again from all of us here at RC Aerodyne
and enjoy flying your new fuselage.
Printed in China
Table of contents
Other RO Aerodyne Toy manuals