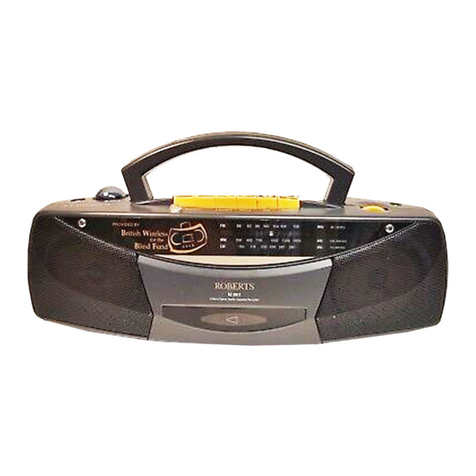
Roberts SC9908 User manual

SC9908
3 Band Stereo Radio Cassette
Recorder
Please read this manual before use
ROBERTS
SoundforGenerations
Power
Time Di splay
Alarm off M ode Se t
540
15 0
600
18 016 0 2 00
800
220 240
10 00
260
12 00 1600
kH z
kH z
MW
LW
FM 88 94 96 10 0 10 4 10 6 10 8
MHz
88 -108 M H z
5 40 -16 00 kH z
150 -26 0 kH z
3 B a nd S tere o R a dio C as sette R e co rd er
w ith P rog ram m ab le C lock A larm
SC 9908
SC9908 Instruction Book.pm6 24/10/99, 14:251

Controls
1. Headphonesocket
2. Volumecontrol
3. Telescopicaerial
4. Deep bass boost switch
5. Microphone
11.Play button
12. Rewindbutton
13. Fastforwardbutton
14. Stop/eject button
15. Pausebutton
1
6. Operationswitch
7. Function switch
8. Wavebandswitch
9. Tuningcontrol
10. Recordbutton
On
Off
Mic
Function
Radio
Tape
Off
FM MW LW
Play
RewindF.Forward Record
Stop/Eject
Pause
FMStereo
Tuning
Phones
Volume
O p e r a t io n
AutoB uzz M a nu al
123 4
56 7 8
9
10
11
12
13
14
15
(Top)
SC9908 Instruction Book.pm6 24/10/99, 14:252

If you need any further advice, please call our Technical Helpline on :-
01817580338(Mon-Fri)
Mains
Tim e Disp lay
FM
88 94 96 100 104 106 108
MHz
88-108MHz
Alarmoff Mode Set
540
150
600
180160 200
800
220 240
1000
260
1200 1600
KHz
KHz
MW
LW
540 -1600 kHz
150-260kHz
3 Band Stereo Radio Cassette Recorder
with Programmable Clock Alarm
SC 9908
Controls
16. Alarmoffbutton
17. Mainsindicator
18. Clock display
19. Modebutton
20. Set button
21. Mono/Stereoswitch(onrear)
2
16
17
18
19
20
21
(onrear)
(Front)
SC9908 Instruction Book.pm6 24/10/99, 14:253

Battery operation
IMPORTANT - The LR6 (AA size battery) must be fitted at all times to
providepowerfortheclock.
1. Remove the Battery cover on the rear of the unit by pushing the
catches in the direction of the arrow.
2. Insert one LR6 (AA size) battery into the small space in the battery
compartment.The clock display willnowappear.The LR6 (AA size)
batteryprovidespowerfortheclockandmustremainfittedatall
times.
3. Insert four LR14 (C size) batteries into the remaining spaces in the
battery compartment. Take care to ensure all batteries are inserted
with the correct polarity as shown inside the battery compartment.
Replacethebatterycover.
4. Reduced power, distortion, and a ‘stuttering’ sound are all signs that
thebatteries may need replacing.
5. Ifyourradiocassette isnottobeusedforanyextendedperiodoftime
it is recommended that the batteries are removed from the radio.
We would recommend for economy, that the SC9908 is used on the
mains whenever possible with battery operation for occasional or
stand-byuse only.
ON
Mainsoperation
1. Place your radio cassette on a flat surface.
2. PlugthemainsleadintotheMainssocketlocatedontherearofyour
radio cassette ensuring that the plug is pushed fully into the socket.
3. Plug the other end into a wall socket and switch on. The Mains
indicator will light up indicating that the radio is connected to the
mains supply. The batteries will be automatically disconnected.
3
SC9908 Instruction Book.pm6 24/10/99, 14:254

If you need any further advice, please call our Technical Helpline on :-
01817580338(Mon-Fri)
Listening to the radio
FMoperation
1. Ensure that theOperation switch is in the 'Manual' position.
2. Set theFunction switch to the 'Radio' position.
3. Select 'FM' using theWaveband switch.
4. Adjust the Volume control until a hissing sound is heard.
5. TheTelescopicaerial whichisonlyoperationalonFM,shouldbefully
extended.
6. Carefully tune to the desired station using the Tuning control.
7. Angle and rotate the Telescopic aerial to a position giving the best
reception.Aknucklejointatthebaseoftheaerialallowsthismovement
andan angleof 45 degreeswill usuallybe satisfactory. TheFM band
is marked in Megahertz (MHz).
8. To receive stereo broacasts set the Mono/Stereo switch located on
the rear of your radio cassette to the 'FM ST.' position the Stereo
indicatorwilllightup. Ifthestationbeingreceivedisweaksomehiss
maybeaudible,toreduce thehisssettheMono/Stereo switchtothe
'Mono'position to returnto mono operation.
9. Adjust theDeep bass boost switch tothe required position.
10. To switch off the radio set the Function switch to the 'Tape Off '
position.
O peration
Auto
Buzz M anual
Function
Radio
Tape
Off
LW M W F M
Volum e
Tuning
4
Function
Radio
Tape
Off
Power
Tim e D is p l ay FM
88 94 96 100 104 106 108
MHz
88-108MHz
Alarm of f Mode Set
540
150
600
180160 200
800
220 240
100 0
260
1200 1600
KHz
KHz
MW
LW
540-1600 kHz
150-260 kHz
3 BandStereo Ra dioC assetteRecorder
with Progr ammable Clock Al arm
SC 99 08
On
Off
SC9908 Instruction Book.pm6 24/10/99, 14:255

5
Mediumandlong waveoperation
1. Ensure that theOperation switch is in the 'Manual' position.
2. Set theFunction switch to the 'Radio' position.
3. Select 'MW' or 'LW' using theWaveband switch.
4. Adjust the Volume control until a hissing sound is heard.
5. Carefully tune to the desired station using theTuning control.
6. Rotate your radio cassette for optimum reception.
7. The MW and LW bands are marked in kilohertz (kHz).
8. Adjust theDeep bass boost switchto therequired position.
9. To switch off the radio set the Function switch to the 'Tape Off'
position.
O peration
Auto
Buzz M anual
Function
Radio
Tape
Off
LW M W F M
Volum e
Tuning Function
Radio
Tape
Off
Power
Tim e D is p l ay FM
88 94 96 100 104 106 108
MHz
88-108MHz
Alarm of f Mode Set
540
150
600
180160 200
800
220 240
1000
260
1200 1600
KHz
KHz
MW
LW
540-1600 kHz
150-260 kHz
3 BandS tereo Radio Cass ette Record er
with Progr ammabl eCl ockAlarm
SC 99 08
On
Off
SC9908 Instruction Book.pm6 24/10/99, 14:256

If you need any further advice, please call our Technical Helpline on :-
01817580338(Mon-Fri)
Listening to cassette tapes
1. Ensure that theOperation switch is in the 'Manual' position.
2. Set theFunction switch to the 'Tape' position.
3. Press theStop eject button to open theCassette compartment .
4. Insertapre-recordedcassettewiththetapesurfaceuppermostandthe
side with the desired recording facing towards you.
5. ClosetheCassettecompartment.
6. DepressthePlay button andadjusttheVolumecontrol tosuityour
personaltaste.
7. Adjust theDeep bass boost switch tothe required position.
8. Use theFast forward orRewind buttons tolocate a specificpart of
the tape.
9. IfyouwishtotemporarilystoptheplaybackdepressthePausebutton.
When you are ready to resume playback press the Pause button a
second time.
10. To stop the tape and switch off your radio cassette press the Stop/
Ejectbutton.
Play
RewindF.F orw ard Record
Stop/Eject
P ause
6
O peration
Auto
Buzz M anual
Function
Radio
Tape
Off
Play
RewindF.F orw ard Record
Stop/Eject
P ause
Volum e
Play
RewindF.F orw a rd Record
Stop/Eject
P ause
On
Off
SC9908 Instruction Book.pm6 24/10/99, 14:267

7
Recording from the Radio
1. Ensure that theOperation switch is in the 'Manual' position.
2. Set theFunction switch to the 'Radio' position.
3. Tune in to the desired station.
4. Adjust the Volume control to suit your requirements.
6. Insert a blank cassette with the tape surface uppermost.
7. Depress theRecord button to commence recording.
8. The recording level is set automatically and is not affected by the
setting of the Volume control.
9. To stop the recording press theStop/Eject button.
Play
RewindF.F orw ard Record
S top /E ject
P ause
Play
RewindF.F orw ard Record
S top/E ject
P ause
O peration
Auto
Buzz M anual
Function
Radio
Tape
Off
Volum e
Tuning
SC9908 Instruction Book.pm6 24/10/99, 14:268

If you need any further advice, please call our Technical Helpline on :-
01817580338(Mon-Fri)
Recording from the Internal Microphone
1. Ensure that theOperation switch is in the 'Manual' position.
2. Set theFunction switch to the 'Tape' position.
3. Insert a blank cassette with the tape surface uppermost.
4. Press theRecord button to commence recording.
Note : to reduce background noise it is important to speak as close as
possible to the Internal microphone .
Mic
8
O peration
Auto
Buzz M anual
Function
Radio
Tape
Off
Play
RewindF.F orw ard Record
Stop/Eject
P ause
SC9908 Instruction Book.pm6 24/10/99, 14:269

Setting the clock
1. Press theSet button six times, the display will show the hours digit.
2. Press the Mode button until the required hour is displayed.
3. Press the Set button, the display will show the minutes digit.
4. Press the Mode button until the required minute is displayed.
5. Press the Set button to return to the normal clock display.
6. Press the Mode button to start the clock at the selected time. The
colonbetween the hours andminutes digit will flashshowing that the
clock is running.
Note : When setting the hours digit pressing and holding down the mode
buttonuntilthe hoursdigithas gonethroughmidnight willchangethe
clock to 24hr mode, this is indicated by the letter 'H' after the hours
digit.Tochangebackto12hrmoderepeattheprocedure.12hrmode
is indicated by the letter 'A' for AM or 'P' for PM after the hours digit.
A larm off M ode S et
A larm off M ode S et A larm off M ode S et
A larm off M ode S et
A larm off M ode S et A larm off M ode S et
A larm off M ode S et
9
SC9908 Instruction Book.pm6 24/10/99, 14:2610

If you need any further advice, please call our Technical Helpline on :-
01817580338(Mon-Fri)
Setting the date
1. PresstheSetbutton fourtimes,thedisplaywillshowthemonthsdigit.
2. Press the Mode button until the required month is displayed.
3. PresstheSetbutton,thedisplaywillshowthe dayofthemonthdigit.
4. Press the Mode button until the required day of the month is
displayed.
5. PresstheSetbuttonthreetimestoreturntothenormalclockdisplay.
A larm off M ode S et A larm off M ode S et
Alarm off M ode Set
A larm off M ode S et
A larm off M ode S et A larm off M ode S et
Setting the alarm time
1. Press the Set button twice, the display will show the hours digit .
2. Press the Mode button until the required hour is displayed.
3. Press the Set button the display will show the minutes digit.
4. Press the Mode button until the required minute is displayed.
5. Press the Set button to return to the normal clock display.
A larm off M ode S et
AL
A larm off M ode S et
AL
A larm off M ode S et
AL
A larm off M ode S et
AL
10
A larm off M ode S et
SC9908 Instruction Book.pm6 24/10/99, 14:2611

Setting the alarm to wake to radio
1. Set the alarm as previously described.
2. Tune in to the desired station, and adjust the volume to the required
level.
3. Set theOperation switch to the 'Auto' position.
4. Press the Set button the hours and minutes digits will flash.
5. Repeatedly presstheMode buttonuntil the symbolisshowing.
6. PresstheSetbuttonthreetimestoreturntothenormalclockdisplay.
The radio will now turn on at the selected alarm time.
7. To cancel the alarm whilst thealarm is sounding press theAlarm off
button.
A larm off M ode S et
Setting the alarm to wake to buzzer
1. Set the alarm as previously described.
2. Set theOperation switch to the 'Buzz' position.
3. Press the Set button the hours and minutes digits will flash.
4. Repeatedly presstheMode buttonuntil the symbolisshowing.
5. PresstheSetbuttonthreetimestoreturntothenormalclockdisplay.
The radio will now turn on at the selected alarm time.
6. To cancel the alarm whilst thealarm is sounding press theAlarm off
button.
A larm off M ode S et
A larm off M ode S et A larm off M ode S et A larm off M ode S et
11
O peration
Auto
Buzz M anual
O peration
Auto
Buzz M anual
SC9908 Instruction Book.pm6 24/10/99, 14:2612

If you need any further advice, please call our Technical Helpline on :-
01817580338(Mon-Fri)
Activating the hourly alarm
1. Press the Set button, the hours and minutes digits will flash.
2. Repeatedly press the Mode button until the symbol is showing.
3. PresstheSetbuttonthreetimestoreturntothenormalclockdisplay.
4. Set the Operation switch to the Buzz position. The alarm will now
bleeponeachhour.
Note:this functionis notavailableif eitherthe radioortape functions
arebeingused.
A larm off M ode S et A larm off M ode S et
A larm off M ode S et
Making a timed recording
1. Tune in the station you wish to record at the preset time
2. Set the alarm to wake to radio as previously described.
3. Insert ablank cassette intotheCassette compartment.
4. Ensure that the Operation switch is set to the 'Auto' position
3. Press theRecord button.
4. Theradiowillturnonatthepresetalarmtime.Thetapewillstopwhen
tapeend is reached.
12
O peration
Auto
Buzz M anual
Play
RewindF.F orw ard Record
Stop/Eject
P ause
O peration
Auto
Buzz M anual
SC9908 Instruction Book.pm6 24/10/99, 14:2613

Displayingthealarmtime
1. Whilstthecurrenttimeisdisplayedpressthemodebuttononce.The
alarmtimestored willbedisplayed;afterapproximatelytwoseconds
the display will automatically switch back to current time.
Displaying the date
1. WhilstthecurrenttimeisdisplayedpresstheModebuttontwice.The
datewillbedisplayed;afterapproximatelytwosecondsthedisplaywill
automatically switch back to current time.
Displayingtheseconds
1. Whilst the current time is displayed press the Mode button three
times. The seconds will be displayed.
2. Press the Mode button to switch back to current time.
A larm off M ode S et A larm off M ode S et
AL
A larm off M ode S et
A larm off M ode S et A larm off M ode S et A larm off M ode S et
13
SC9908 Instruction Book.pm6 24/10/99, 14:2614

If you need any further advice, please call our Technical Helpline on :-
01817580338(Mon-Fri)
Headphonessocket
A3.5mm Headphone Socket locatedonthe topof youradio cassette is
providedforusewitheitherheadphonesoranearpiece.Insertingapluginto
the socket automatically mutes the internal loudspeaker.
Preventingaccidentalerasure
To safeguard your recordings against accidental erasure, break off the
appropriatetab onthecassette asshown . Thereis one tabfor each side
ofthecassette.ThiswillpreventtheRecordbuttonfrombeingpressed.To
restorethecassettetonormal,sealthetabopeningswithasmallpieceof
self-adhesivetape.
A
Safety tab side A Safety tab side B
14
On
Off
Mic
Function
Radio
Tape
Off
FM MW LW
Play
RewindF. Fo rw ard R ecord
Stop/Eject
Pause
FMStereo
Tuning
Phones
Vol ume
O peration
AutoBuzz Manual
SC9908 Instruction Book.pm6 24/10/99, 14:2615

15
Cleaningthe Heads
The binder and oxide from magnetic tapes can accumulate on the pinch
roller(A)thecapstanshaft(B)andalsotheheads(CandD).Thiswillimpair
the sound quality.
To clean these parts proceed as follows:-
1. Turn off the power to the unit.
2. Press the Stop/Eject button (3).
3. Press the Play button (6) and the heads will be clearly seen.
4.Cleanthesurfaces(A,B,C,D)withalintfreeragorcottonswabsoaked
in alcohol. Press the stop/eject button as soon as cleaning is over. ABCD
SC9908 Instruction Book.pm6 24/10/99, 14:2616

16
The wire coloured BLUE must be connected to the terminal marked N or
colouredBLACK.
ThewirecolouredBROWNmustbeconnectedtotheterminalmarkedLor
colouredRED.
General
Donotallowthisunit tobeexposedtowaterorsteam.Itis recommended
that the FM band be used wherever possible as better results in terms of
qualityandfreedomfrominterferencewillusuallybeobtainedthanonthe
MW or LW bands.
Mainssupply
The SC9908 will operate from a supply of AC 230 volts, 50Hz only.
DO NOT cut off the mains plug from this equipment.If the plug fitted
is not suitable for the power points in your home or the cable is too short
to reach a power point, then obtain an appropriate safety approved
extension lead or adaptor. If in doubt consult your dealer.
Ifnonethelessthemainsplugiscutoff,removethefuseanddisposeofthe
plugimmediately,toavoidapossibleshockhazardbyinadvertentconnection
to the mains supply.
Ifthisproductisnotsuppliedwithamainsplug,oronehastobefitted,then
followtheinstructionsgivenbelow:
IMPORTANT.DONOTmakeanyconnectiontothelargerterminalwhich
is marked with the letter E or by the safety earth symbol or coloured
GreenorGreen-and-yellow.
Thewiresinthemainsleadarecolouredinaccordancewiththefollowing
codes :-
BLUE - NEUTRAL BROWN - LIVE
E
L
N
3 amp
Brown
Blue
(Live)
(Neutral)
(Earth)
Cord
Fuse
Whenreplacingthefuseonlya3AASTAapprovedtoBS1362typeshould
be used and be sure to re-fit the fuse cover.
IFINDOUBT-CONSULTAQUALIFIEDELECTRICIAN.
Replacement fuse holders are available from Roberts Radio Technical
Services Department at the address shown on the rear of this manual.
SC9908 Instruction Book.pm6 24/10/99, 14:2617

The Company reserves the right to amend the specification without notice.
Specifications
Power Requirements
Mains: AC 230 volts, 50Hz only
Batteries: Radio/Cassette 4 x LR14 (C size)
Clock Battery 1 x LR6 (AA size)
Frequency Coverage
FM 87.5 - 108MHz
MW 525 -1610kHz
LW 150-260kHz
Circuit Features
Loudspeakers 2 x 75mm diameter
Output power 2 x 700mW
Aerial System FM WireAerial
MW Built-inFerriteaerial
LW Built-inFerriteaerial
ROBERTSRADIOLIMITED
PO BOX 130
MEXBOROUGH
SOUTH YORKSHIRE
S64 8YT
17
SC9908 Instruction Book.pm6 24/10/99, 14:2618

Guarantee
Thisinstrumentisguaranteedfortwelvemonthsfromthedateofdeliveryto theoriginalowneragainstfailureduetofaultyworkmanshiporcomponent
breakdown,subjecttotheprocedurestatedbelow.Shouldanycomponentorpartfailduringthisguaranteeperioditwillberepairedorreplacedfreeof
charge.
Theguaranteedoesnotcover: 1. Damage resulting from incorrectuse.
2.Consequentialdamage.
3.Receiverswithremovedordefacedserialnumbers.
Procedure:
Any claim under thisguarantee should be made throughthe dealer from whom theinstrument was purchased. Itis likely that your Roberts' dealerwill
beabletoattendtoanydefectquicklyandefficiently,butshoulditbenecessarythedealerwillreturntheinstrumenttothecompany’sservicedepartment
forattention.IntheeventthatitisnotpossibletoreturntheinstrumenttotheRoberts'dealerfromwhomitwaspurchased,pleasecontactRobertsRadio
TechnicalServices department at the address shown on the rear ofthismanual before taking further action.
These statements do not affect the statutory rights of a consumer.
SC9908 Instruction Book.pm6 24/10/99, 14:2619

ROBERTSRADIOTECHNICALSERVICESDEPARTMENT
97-99 Worton Road
IsleworthMiddlesex
TW7 6EG
TechnicalHelpline:-01817580338(Mon-Fri)
Issue 1
SC9908 Instruction Book.pm6 24/10/99, 14:2620
Table of contents
Other Roberts Cassette Player manuals