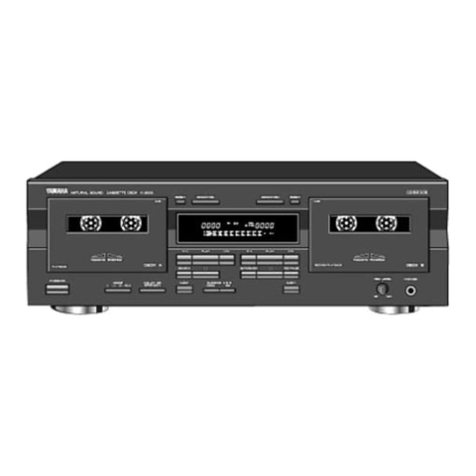
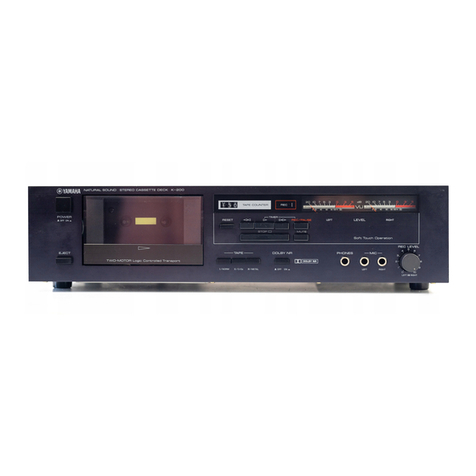
Yamaha KX-800/U User manual

o
...J
D..
::E
w
Q
w
c
o
::E
....I
<
::)
z
<
::E
tn
ex:
w
z
3:
o

• Explanation of Graphical Symbols
CAUTION: TO REDUCE THE RISK OF
ELECTRIC SHOCK. DO NOT REMOVE
COVER (OR BACK). NO USER-SERVICEABLE
PARTS INSIDE. REFER SERVICING TO
QUALIFIED SERVICE PERSONNEL.
it
Lh
it
&
The lightning flash with arrowhead
symbol, within an equilateral triangle,
is intended to alert you to the presence
of uninsulated "dangerous voltage"
within the product's enclosure that
may be of sufficient magnitude to
constitute a risk of electric shock to
persons.
The exclamation point within an
equilateral triangle is intended to alert
you to the presence of important
operating and maintenance (servicing)
instructions in the literature accom-
panying the appliance.
SAFETY INSTRUCT!ONS
1Read Instructions - All the safety and
operating instructions should be read before the
appliance is operated.
2Retain Instructions - The safety and
operating instructions should be retained for
future reference.
3Heed Warnings - All warnings on the
appliance and in the operating instructions
should be adhered to.
4Follow Instructions - All operating and
other instructions should be followed.
5Water and Moisture - The appliance
should not be used near water - for example,
near a bathtub, washbowl, kitchen sink, laundry
tub, in a wet basement, or near swimming pool,
etc.
6Carts and Stands - The appliance should
be used only with a cart or stand that is
recommended by the manufacturer.
7Wall or Ceiling Mounting - The appliance
should be mounted to a wall or ceiling only as
recommended by the manufacturer.
sofa, rug or similar surfaced that may block the
ventilation openings: or placed in a built-in
installation, such as a bookcase or cabinet that
may impede the flow of air through the
ventilation openings.
9Heat - The appliance should be situated
away from heat sources such as radiators,
stoves, or other appliances that produce heat.
10 Power Sources - The appliance should
be connected to a power supply only of the type
described in the operating instructions or as
marked on the appliance .
11 Power-Cord Protection - Power-supply
cords should be routed so that they are not likely
to be walked on or pinched by items placed
upon or against them, paying receptacles, and
the point where they exit from the appliance.
12 Cleaning - The appliance should be
cleaned only as recommended by the
manufacturer.
13 Nonuse Periods - The power cord of the
appliance should be unplugged from the outlet
when left unused for a long period of time.
WARNING
To prevent fire or shock hazard, do not
expose this appliance to rain
or moisture.
8Ventilation - The appliance should be
situated so that its location or position does not
interfere with its proper ventilation. For example,
the appliance should not be situated on a bed,
14 Object and Liquid Entry - Care should be
taken so that objects do not fall into and liquids
not spilled into the insided of the appliance.
CAUTION: READ THIS BEFORE OPERATING YOUR UNIT.
• Thank you for purchasing the YAMAHA KX-BOO/U stereo cassette deck.
15 Damage Requiring Service - The
appliance should be serviced by qualified
service personnel when:
A. The power-supply cord or the plug has been
damaged; or
B. Objects have fallen, or liquid has been
spilled into the appliance; or
C. The appliance has been exposed to rain; or
D. The appliance does not appear to operate
normally or exhibits a marked change in
performance; or
E. The appliance has been dropped, or the
cabinet damaged.
16 Servicing - The user should not attempt
to service the appliance beyond those means
described in the operating instructions. All other
servicing should be referred to qualified service
personnel.
IMPORTANT
Please record the serial number of your unit
in the space below.
Model: KX-800/U
Serial No: EOl..//D885U
The serial number is located on the rear of
the unit.
Retain this Owner's Manual in a safe place
for future reference.
1. This unit is a sophisticated stereo cassette
deck. To ensure proper operation for the best
possible performance, please read this manual
carefully.
2. Choose the installation of your unit carefully.
Avoid placing it in direct sunlight or close to
source of heat. Also avoid locations subject to
vibration and excessive dust, heat, cold or
moisture. Keep it away from such sources of
hum as transformers or motors.
3. Do not open the cabinet as this may result in
damage to the deck or electrical shock. If a
foreign object should get into the deck, contact
your local dealer.
4. When removing the power plug from the wall
outlet, always pull directly on the plug; never pull
the cord itself.
5. Do not use force when operating switches
and knobs.
6. When moving the deck, be sure to first pull
out the power plug and remove all cords
connecting the deck to other equipment.
7. Do not attempt to clean this unit with
chemical solvents as this may damage the
finish. Use a clean, dry cloth.
I
8. Never allow metallic items (e.g. screwdrivers,
tools, etc.) to come near the record/playback
head assembly. Doing so may not only scratch
or damage the head's mirror-smooth finish, it
may change the magnetic characteristics of the
heads, causing a deterioration in reproduction
performance quality.
9. Although the record/playback head used in
this unit is a high quality Amorphous head with
outstanding reproduction characteristics, it can
become dirty through the use of old tapes of
from dust accumulation over time.
This can have a serious effect on reproduction
quality. Clean the h~ads regularly with one of the
commonly available head cleaners or with
cleaning solutions as explained later in this
manual.
10. Be sure to read the "Troubleshooting"
section of this manual for advice on common
operating errors before concluding that your unit
is faulty.
11. Keep this manual in a safe place for future
reference.
12. Voltage Selector (General Model only)
The voltage selector on the rear panel of this
unit must be set for your local mains voltage
BEFORE plugging in the AC mains supply.
Voltages are 110/120/220/240V AC, 50/60 Hz.
2/

IFRONT PANEL PARTS AND FUNCTIONS I
~
~1~
~t;
n
CD
=-
Amorphous 3 Head
HX PRO Dynaml~ Bias Servo
" m
PHONES
oPOWER switch
Press this switch to turn the power on. Press again to turn the power off.
f) EJECT button
To load a cassette tape, press the EJECT button and the cassette
compartment will open. Depress the cassette compartment to close it.
8Cassette compartment
oCOUNTER buttons
RESET: Press the RESET button to reset the counter reading to "0.00". It
can also be used to cancel the memorized counter reading.
MEMORY: Press the MEMORY button when the counter is at the desired
counter reading for O-M repeat playback. Press the button again to
release the memory function ..
When the memory position is set, the tape.will automatically stop at
that position during fast-rewind or forward mode.
oMASTER FADER control
Used to fade in or fade out during recording. Normally it should be set to
the "0" position.
*The MASTER FADER control will function only during the recording.
3
oREMAIN button
When the tape length is memorized with TAPE button, display shows the
remaining tape time by pressing this button.

oTAPE button
Used to memorize the tape length. Each time this button is pressed,
display shows C60 - C90 - C46 - C46L. Tap the button until the
loaded tape length appears. The displayed tape length is memorized.
(!) MONITOR button
This button switches the monitor function between the SOURCE and the
TAPE. This unit is equipped with an auto monitor function, but it can be
changed to manual if so desired, for example, monitoring the just-
recorded signal during tape recording.
oDisplay
CD Linear counter/tape length/remaining time/program/direct
search display
Linear counter: Displays the elapsed time of the tape's running.
*The linear counter is not a actual watch and its accuracy of the
linear counter depends on the kind of the tape used.
Tape length: Displays the tape length (C60, C90, C46 and C46L) by
pressing the TAPE button.
Remaining time: Displays remaining tape time by pressing REMAIN
button.
Program: Displays the program number and selection number to be
memorized.
Direct search: Displays the selection number to be searched.
®Repeat function indicators
MEMORY: When the count number is memorized by pressing
MEMORY button, MEMORY indicator lights.
O-M REPEAT: This initiates repeat playback 8 times between "0.00"
setting of the counter and the memorized counter number. When
the AUTO MODE selector is set to O-M REPEAT position, the O-M
REPEAT indicator lights.
FULL REPEAT: When the AUTO MODE selector is set to FULL
REPEAT position, the FULL REPEAT indicator lights.
One side of the cassette is repeatedly played back 8 times from
beginning to end.
®PEAK level meters
Indicate the peak of the signal level during recording and playback
over a range from -20 dB to +16 dB. It will also display the optimum
recording level monitor.
®Tape type indicators
When a tape is loaded, the deck's circuitry will automatically adjust for
proper bias, level, and equalization for that type of tape, and the type
of tape will be indicated.
• Automatic tape selection does not function for the old type metal
tapes which do not have a detection hole on the cassette shell.
• This deck is not suited for use with Ferrichrome (FeCr) tapes.
®Noise reduction indicators
The corresponding noise reduction indicator will light up by pressing
the DOLBY NR buttons or dbx button.
4
I

®MPX FILTER indicator
This indicator will light up when the MPX FILTER switch is set to ON.
(j) BIAS tuning indicator
Indicates turning direction of BIAS ADJUST control for optimum bias
setting.
®TAPE/SOURCE monitor indicator
Indicates either the tape or source monitor position.
®TEST indicator
This indicator will light up during the ORBiT (Optimum Recording Bias
Tuning) operation (bias adjustment). It will flicker during the standby
mode.
®REC indicator
This indicator will light up during recording and rec/pause modes. It
will flicker during the auto rec mute mode.
@REMAIN indicator
By pressing the REMAIN button, this indicator flickers then lights for 5
seconds during remaining tape time display.
@PROG indicator
Lights when the RUN key on the remote control transmitter is pressed
for the programmed playback.
4D BIAS TEST switch
This switch will cause the ORBiT (Optimum Recording Bias Tuning)
function to operate to check the adjustment of the bias. Normally this
switch should be turned off.
5
4D MPX FILTER switch
Press this switch when recording from an FM station while using the
Dolby-NR system. As the 19 kHz pilot signal may leak into the audio
output, depending on the tuner and the broadcast condition and may
cause improper operation of the Dolby NR system, this switch should be
turned on when recording from an FM station to filter out the (19 kHz)
pilot signal. This switch should be turned off when recording from other
program sources.
4D DOLBY NR buttons
OFF/ON: For recording and playback without using the DOLBY NR
system, set this button to OFF.
B TYPE/C TYPE: Dolby noise reduction is an extremely effective
method of reducing background hiss on tapes. This unit incorporates
both Dolby B NR and the Dolby C NR systems. Dolby C NR is
approximately twice as effective as Dolby B NR.
Tapes recorded with Dolby B NR should be played back with Dolby B
NR on, set the OFF/ON button to ON and B TYPE/C TYPE button to B
TYPE. Tapes recorded with Dolby C NR should be played back with
Dolby C NR on, set the OFF/ON button to ON and B TYPE/C TYPE
button to C TYPE.
*Dolby and the double D symbol are trademarks of Dolby Laboratories
Licensing Corp. Dolby noise reduction system manufactured under
license from Dolby Laboratories Licensing Corp.

4D dbx button
When recording with dbx NR, input signals with a large dynamic range
are compressed to 1/2, and expanded by a factor of 2 to their original
state when played back. This means that a large dynamic range can be
obtained even from cassette tapes with small dynamic range recordings,
and noise can also be reduced at the same time. If metal tapes are used
for recording and playback, a dynamic range which would have been
thought impossible with cassette tapes can be obtained. For recording
and playback with the dbx system, set this button to ON.
For playing back tapes which are not dbx recorded, set to OFF position.
*"dbx" is a trademark of dbx incorporated.
4D REMOTE CONTROL sensor
Receives the signal from the remote control transmitter.
CD PRESET REC LEVEL controls
Adjusts the input level of the recording signal coming from the rear panel
LINE IN/REC jacks, and adjustable signal level is displayed on the PEAK
level meters. Independent left/right controls also permit balance level
setting.
~AUTO MO DE selector
OFF: For normal playback or recording, set to this position.
FULL REPEAT: One side of the cassette is repeatedly played back 8
times from beginning to end.
Q-M REPEAT: Desired section can repeatedly be played back 8 times
between "0.00" on linear counter reading and the counter number
memorized with the MEMORY button.
TIMER PLAY: By using a commercially available audio timer, this
function permits timer activated playback.
TIMER REC: By using a commercially available audio timer, this function
allows you to carry out unattended recording.
• Be sure to set this selector to OFF when not using the repeat playback
feature or the timer feature. If power is turned on with a cassette
loaded in the deck and the selector in the TIMER REC position, the
record mode will be engaged and the prerecorded contents of the tape
will be erased.
4D BIAS ADJUST control
This function is provided to adjust the recording bias to its optimum value
according to the type of tape used.'
Choose the optimum bias by watching the BIAS tuning indicator.
*Refer to page 12, "BIAS ADJUSTMENT".
4Ji) Main operation buttons
~/ ••• : Press this button to rapidly rewind the tape. To release the
rewind mode, press the STOP button. When the button is kept pressed,
the tape is rewound at a high speed. After setting the tape length, keep
the button pressed for more than 1 second to rewind the tape at high
speed.
By pressing this button during recording, the tape will rewind to the
beginning of the recording and stop (Rec Return). If the counter is set
to "0.00" during recording, the tape will rewind and stop at that position
by pressing this button.
PLAY: Press for playback. It is also necessary to use this button to
engage the record mode.
~l~: Press this button to rapidly advance the tape. To release the
fast forward mode, press the STOP button. When the button is kept
pressed, the tape is advanced at a high speed. After setting the tape
length, keep the button pressed for more than 1 second to forward the
tape at high speed.
6
I

IREMOTE CONTROL TRANSMITTER I
2
c:::J
I
34
56
III lie;
c::Jc:::Jc::J
88
8
0
c:::J c::Jc:::Jc::J
CLEAR ff
f::J SEARCH <J
-
<!<J
'i3i:AY
C>t>
c::::J c::::J
c:::J
REC/PAUSE
STOPREC MUTE
c:::J c:::J
c:::J
.J.
---,
-
YAMAHA
REMOTE CONTROL
TRANSMITTER
RS-K12
\.
@) PHONES jack
Connect headphones to this jack for monitoring recording or playback.
Q) OUTPUT LEVEL control
Used to adjust the output level at the PHONES jack and LINE OUT/PLAY
jacks at the rear.
REC/PAUSE: Pressing this button engages the Rec Standby mode, and
REC indicator will light. While in this mode, the PEAK level meters will
function, allowing you to monitor the recording signal level of your
program source. (Refer to the "SETTING RECORDING LEVEL"
section of this manual.) To initiate recording from the Rec Standby
mode, press the PLAY button. Pressing the REC/PAUSE button during
actual recording engages the Pause mode. To resume recording,
press the PLAY button.
STOP: Press this button to stop the tape while in any mode.
MUTE/SEARCH:
During Recording: When the MUTE/SEARCH button is pressed at any
time during recording, a 4- second blank interval is automatically
recorded on the tape (Auto Rec Mute mode). Then, the Rec Pause
mode is engaged automatically.
In order to record a blank interval longer than 4 seconds, press the
MUTE/SEARCH button and hold it in for the desired length of time.
After the button is released, the 4-second blank interval will also be
recorded automatically, then the Rec Pause mode is engaged
automatically.
To resume recording, press the PLAY button.
During Playback: By pressing either the ~ / ~ or ~ / ••• button
simultaneously with this button, the tape will move to the beginning of
the next or current selection, from which point play will be resumed.
7

oMEMO (memory) key
This key has the same function as that on the main unit.
f) RESET key
This key has the same function as that on the main unit.
8Numeric keys
Used to directly select the selection number to be played.
oCLEAR key
Used to clear the memorized program .
oSEARCH keys
•••• : By pressing this key, the tape will be rewound to the beginning of
the current selection.
~: By pressing this key, the tape will be advanced to the beginning of
the next selection.
These keys are also used to directly select the selection if the selection
number is selected with numeric keys.
oMONI (monitor) key
This key has the same function as that on the main unit.
oMain operation keys
These keys have the same functions as those on the main unit.
(i) INTRO scan keys
Press one of these keys to play back the beginning of the selection for
about 14 seconds in the selected direction.
oRUN key
Press this key for program execution.
----I
4D PROG (program) key
Used to memorize the selection number to be programmed, check or
correct the program content.
4D TAPE key
This key has the same function as that on the main unit.
48 REMAIN key
This key has the same function as that on the main unit.
• BATTERY INSTAllATION
CD Slide out the battery compartment lid in the direction of the arrow .
®Install the batteries (size "AA", R06) with correct polarities.
®Attach the battery compartment lid until it clicks.
CD\
o
8

• REMOTE CONTROL OPERATION RANGE
9
• BATTERY REPLACEMENT
When the remote controllable distance becomes short, batteries are
exhausted. Replace two batteries with new ones.
Battery cautions
Incorrect use of the battery may cause leakage or explosion.
Be careful the following items:
When replacing:
• Place the batteries in correct (+) and (-) polarities as indicated in the
battery compartment.
• Do not use the old battery together with new one.
• Do not use the different kind of batteries at the same time even though
in the same shape.
Rechargeable batteries:
• There are two kinds of batteries in the market: rechargeable and non-
rechargeable. Read the caution labels on the battery carefully.
Use with the remote control transmitter:
• When not in use for an extended period of time, remove the batteries
from the remote control transmitter.
• Replace the exhausted batteries earlier in good time.
To prevent accident:
• Never disassemble, heat the battery, or throw into the fire. Dispose the
batteries in the specified places.
• Do not connect (short) (+) and (-) directly with the metal piece, etc.
In case of leakage:
Wipe off the electrolyte in the battery compartment completely before
replace with the new batteries.

3-HEAD CONFIGURATION AND AUTO MONITOR SYSTEM
This unit uses a full-scale three-head configuration, with independent
recording, playback and erase tape heads, as well as independent
recording and playback amplifiers. Sint;::ea major characteristic of a
three-head tape deck system is simultaneous tape recording and tape
playback, tapes can be monitored directly as they are made.
The auto monitor function automatically switches to source monitor
during the rec/pause and recording, and to tape monitor during the
playback. The auto monitor function can also be manually switched by
using the MONITOR button if required (tape monitor during recording).
DOLBY C TYPE NOISE REDUCTION
same noise reduction effect at both high and low signal levels and to set
the recording level at a point where side effects such as "breathing" are
eliminated. Also, by expanding the operating frequency range to two
octaves more than that of Dolby B NR, overall noise balance is obtained
and the system also becomes effective against high frequencies from the
power supply.
The graph shows the frequency response and the noise reduction effect
of recording and playback with Dolby B NR and Dolby C NR. The noise
reduction effect of Dolby C NR is larger - approximately 20 dB.
Dolby noise reduction is a 2 part process that acts both on recording and
playback; be sure that the noise reduction button is set to the same
position on record and play.
*Noise in the source material cannot be reduced with the Dolby NR
system.
I
Noise reduction effect
20 100 500 1k 2k 5k 10k 20k
Frequency (Hz)
With cassette tapes, the most noticeable form of noise is high frequency
hiss. To reduce this hiss noise, the KX-800/U has been equipped with
Dolby Band C noise reduction systems. Either type of noise reduction
may be selected with the switch provided.
Dolby B NR has a noise reduction effect of about 10 dB in the high
frequency range. The corresponding figure with Dolby C NR is about 20
dB, but this is over the entire range where the human ear is most
sensitive to noise (2 kHz to 8 kHz). Dolby C NR also improves the tape's
MOL (Maximum Output Level).
Dolby C NR has two circuits; a spectral skewing circuit and an anti-
saturation network. By improving the saturation level of the tape it is
possible to prevent high frequency loss and encode/ decode error, etc.,
improve dynamic range and signal-to-noise ratio, and make it easier to
set the recording level. With Dolby C NR it is possible to achieve the
+10
0
-20
rn ~-40
a; >
OJ...J
Frequency response C Type
-- (OdB) ~
-- (-10 dB) ~
-- (-20 dB) --......
10

•
HX PRO DYNAMIC BIAS SERVO SYSTEM
Dolby Noise reduction and HX Pro headroom extension manufactured
under license from Dolby laboratories Licensing Corporation. HX Pro
originated by Bang & Olufsen.
With this system, the deterioration of the high frequency signal
components has been drastically improved, resulting in dynamic and
clear recording with sufficient headroom. The circuit works independently
on each channel, and no decoding is necessary during playback.
*The HX Pro is not the noise reduction system, Since it functions only in
recording, the tape recorded with HX Pro system can be played back
on any types of cassette decks, with a richer dynamic range.
+20.
u
o'E ID
CIJ'O
- 20 ~ ~
'00>
-40 :; g>
Q..CIJ
-60 :; "-
o
- So.J.
dbx recording
r+20
'~ID 0
E'O
~8-20
>,..-
'0 0> -40
-0)
::J c:
g- ~ -60
- .l-so
dbx SYSTEM
-+OMPREsso+-l~ ~ \ 1HEXPANDERf--
ENCODE Tape's full capacity level DECODE
The built-in dbx system works by compressing the dynamic range of the
record signal by half and then doubling the dynamic range of the playback
signal, resulting in expande dynamic range of cassette tapes.
With the dbx system functioning, a program source compressed to 50 dB
at recording will be expanded to a dynamic range of 100 dB. At the same
time, noise levels will be reduced throughout the entire frequency range,
and the effective saturation level of the tape will be increased.
*Tapes not recorded with the dbx system should be played back with the
dbx system off.
"DOLBY", the double-D symbol DO and "HX PRO" are trademarks of
Dolby laboratories Licensing Corporation.
Frequency
With HX Pro
Conventional respo '>'\./
nse ~ \\I
I
'"
>
'"
-'
It is important that the optimum bias current be supplied to the recording
head during recording. However, an excessively high bias current with
cause the loss of the high frequency range and an excessively low bias
current will cause the distorted sound.
In addition, the high frequency content of the recording signal tends to act
as bias upon itself, and it becomes difficult to carry out recording with the
optimum bias. To prevent this, the HX Pro Dynamic Bias Servo System
constantly monitors the recording signal and instantly decreases the
increased bias to keep the total effective bias constant.
11

5. After completing bias adjustment, press BIAS TEST switch to off. The
tape will be rewound to the beginning of the bias adjustment.
• If the heads are dirty or the tape is unsatisfactory, etc., it may not be
possible to carry out bias adjustment.
• When the BIAS TEST switch is ON, ordinary recording and playback
cannot be carried out.
+20
0
m::::
-20
-! W-40
>W-!
I- -60
:::J [l.I- -80
:::J 0
-80 -60 -40 -20
INPUT LEVEL (dB)
+20
CD
~ 0
~ -10
~ =::
a: -40
10Hz
frequency (Hz)
rBIAS ••..•• ]
o
$
-2(}\ +20'~
BIAS ADJUST
Optimum bias setting
Fiat frequency response
Normal sound quality
I
Insufficient bias (Under bias)
High frequency response rising
BIAS ADJUSTMENT
The ORBiT (Optimum Recording Bias Tuning) system, with its
microprocessor, makes the trouble-some task of bias adjustment easier
and clearer, so that tape performance can be fully exploited. The optimum
bias level can be set very easily; further adjustment is made to the bias
level selected by the auto tape selector, watching the BIAS tuning
indicator and adjusting the BIAS ADJUST control.
*When the BIAS TEST switch is ON, recording and playback cannot
take place.
1. Load cassette tape to be recorded.
2. Press BIAS TEST switch.
3. Press the REC/PAUSE button and the PLAY button.
The deck then enters the recording mode.
4. Watching the BIAS tuning indicator, adjust the BIAS ADJUST control
so that both left and right indicators light to give a flat frequency
response.
~ 0
~ - 10
&. -20
~ -30
II -40
10Hz
Frequency (Hz)
Frequency (Hz)
IBIAS ~'4IJ
o
- 20\ +20~,
BIAS ADJUST
Excessive bias (Over bias)
[BiA-s •• <II
o
§
-20\ +20',
BIAS AD..JUST
12

ICONNECTIONS I
KX-800/U
~
A A
ATTENTION -RISQUE DE tHOt mCTRIQUE HE PAS
DUVRIR
WARNING - TO PREVENT FIRE OR SHOCK HAlARD, 00
NOT DPOSE THIS APf'lIANCE 10 RAIN OR MOISTURE "'=--"'~""'~="''''"IIIIIIIIIIIIIIII JI,~~~~~rt1~&~~~f~g~;~~~~~~~~~~~~~. ]1,
D@YANAHA·DI_li_Iji
To an AC outlet
• REAR PANEL CONNECTIONS
Amplifier or receiver
D~ ~:~ ~?~:.o\
H* __ • _
-,o06QQQ~;:«D':';:iD~'
The White plug on the paired connecting cables corresponds to the Left
channel and the Red plug corresponds to the Right channel. The LINE
OUT /PLAY jacks on the KX-800/U should be connected to the Tape PB
(Playback/Input) jacks on your amplifier, and the LINE IN/REC jacks on
the KX-800/U should be connected to the Rec Out (Rec/Output) jacks
on your amplifier. Make sure that the left and right channel connections
13
are properly made, and that he plugs are inserted firmly.
Connect the power cord to an AC outlet or to the AC outlet provided on
the rear panel of your receiver or amplifier, etc. Make sure that power to
both the KX-800/U and your amplifier (receiver, etc.) are turned off
before making connections.

ICASSETTE TAPES "' I
• CASSETTE TAPES
There are many different types of cassette tapes available, however, they
all conform to standard specifications so any brand may be used with the
KX-800/U.
*Classification of Cassettes Tapes by Formulation
Cassette tapes are available in four basic types depending on their
formulation, or type of magnetic material and manufacturing process.
These four types are commonly known as Normal (II NORM), Chrome
(1I/Cr02), Ferrichrome (1II/FeCr), and Metal (IVIMETAL), and they
each require specific optimum performance.
The KX-800/U has an Auto Tape Selector which automatically adjusts
for the proper bias, level and equalization according to the tape
formulation - all you have to do is load a cassette and the Auto Tape
Selector does the rest.
*Old-type Metal tape cassette shells do not have the necessary hole for
Auto Tape Selector operation. It is recommended that you do not
record with this kind of Metal cassette. However, Metal tape cassettes
recorded on another deck may be played back with the KX-800/U at
the Chrome (IIICr02) settings. All current cassette tapes will have this
small opening in the cassette shell, so be sure you use suitable
cassettes with the KX-800/U.
*The KX-800/U does not have the required setting for Ferrichrome (1111
FeCr) tape, since this tape formulation is not widely used. Should you
use a Ferrichrome tape, it will be recorded and played back at the
Normal (I/NORM) settings. And this will result in an unnatural high
frequency emphasis. This effect may be compensated for somewhat
by adjusting the tone controls of your amplifier.
*YAMAHA does not recommended the use of C-120 cassettes since
the extreme thinness of the tape makes them susceptible to
mechanical and electrical problems.
-.
• PROTECTING YOUR RECORDINGS
~=,c=.
~
~
All cassette tapes are provided with erasure protection holes to prevent
recorded tapes from being accidentally erased. There is a small tab
covering the hole on each cassette, and it should be broken off with the
screwdriver after recording a tape. Without this tab covering the hole, it is
impossible to record on that tape again; thus, you can keep any recorded
tape for as long as you wish without fear of accidental erasure. Should
you wish to use a cassette tape protected in this way for later recording,
simply covering the hole with adhesive tape will permit erasure and re-
recording.
* When using Chrome (1I/Cr02) or Metal (IV/METAL) tape, make sure
you do not cover the hole intended for the tape formulation check.
14

• TAKING UP SLACK IN THE TAPE
Slack in the tape inside of the cassette shell can be corrected by simply
inserting a pencil into one of the spools and winding it until all the slack is
taken up.
• STORAGE OF YOUR CASSETTE
After putting a cassette tape back into its case, store in a location away
from exposure to direct sunlight, humidity, high temperatures, and
magnetic fields (away from television sets, speakers, etc.). High
temperatures and humidity will damage the tape itself, while exposure to
magnetic fields may cause a loss of recorded material.
15
I .. OPERATION IW I
RECORDING
1. Make sure that the AUTO MODE selector is set to the OFF position,
then turn on the POWER switch.
2. Open the cassette compartment by pressing the EJECT button and
load a cassette tape with the exposed tape face down.
3. Set the optimum bias for the tape according to "BIAS ADJUSTMENT"
if necessary.
4. Select the noise reduction system with DOLBY NR buttons or dbx
button.
Press the MPX FILTER switch when recording FM stations while using
Dolby NR.
5. Press the REC/PAUSE button. The deck enters the Rec Standby
mode.
6. Set the MASTER FADER control to the "0" position.
7. Adjust the recording level to optimum point using PEAK level meters
and PRESET REC LEVEL controls.
8. To start recording with fade in, set the MASTER FADER control to
"-00" position, press the PLAY button and gradually raise the MASTER
FADER control to the "0" position.
To start recording conventionally, press the PLAY button.
9. To temporarily stop the recording, press the REC/PAUSE button. To
resume recording, perform above step 8.
10.To stop recording with fade out, gradually lower the MASTER FADER
control to "-00" position.
To stop recording conventionally, press the STOP button .
• When the MUTE/SEARCH button is pressed during recording, a 4-
second blank interval is automatically recorded on the tape, then the
Rec Pause mode is engaged. To resume recording, perform above
step 8.
• When the ~ / ~ button (or ~ key on the remote control
transmitter) is pressed during recording, the tape is automatically
rewound to the point at which the recording has been started (Rec
Return).
•

• When the linear counter is set to 0.00 during recording, pressing the
••••• / •••• button (or •••• key on the remote control transmitter) will
automatically rewind the tape to the point at which counter reading is
0.00.
NOTE
Please check the laws on copyright in your country to record from
records, discs, tapes, radio, etc.
Recording the prerecorded tapes or other published or broadcast
material may infringe copyright laws.
Fade-in, Fade-out recording
Fade-in will cause the recording level to gradually increase to the preset
level, and Fade-out will cause the recording level to gradually decrease
from the preset level. Both functions can be controlled as desired. Using
these functions to commence recording during a selection or for the
gradual fading out of a selection will lend a distinctly professional touch to
your recordings .
• Fade-in recording
Set the MASTER FADER control to "-00". After the recording starts,
gradually raise the control setting to the "0" position.
• Fade-out recording
Gradually lower the MASTER FADER control setting to the "-00" position,
and then stop the recording.
NOTE
The fade-in and fade-out features will not function during playback.
These functions will operate only during recording.
• SETTING THE RECORDING LEVEL
Setting the recording level is an important point for proper recording. The
PEAK level meters of this cassette tape deck are equipped with an
optimum level recording monitor function, simplifying the process of
setting the level. The optimum level indicator will automatically change
position according to the type of tape being used and the noise reduction
system selected. Consequently, setting the optimum recording level is an
accurate and simple operation, enabling the full dynamic range of the.
tape to be exploited.
1. Load a cassette tape to be recorded.
2. Select the noise reduction system with DOLBY NR buttons or dbx
button. Dot indicator indicates the optimum recording level.
3. Press the REC/PAUSE button to engage the Rec Standby mode, and
playa selection of the program to be recorded.
4. Watch the PEAK level meters and keep the meter reading no higher
than dot indicator (optimum level indicator) by adjusting the REO
LEVEL controls.
• Make sure that the MASTER FADER control is set to "0" position.
Dot indicator (optimum level indicator)
LEFT ~I _
NORMAL/Cr02 IPEAK/d~-~O ."" 1:5."" (0 "'" !.",.i,,,"!.""9 '"'' 11Xi i",,1 7 10 16 +
RIGHT
Dot indicator (optimum level indicator)
LEFT I~ _
METAL IPEAK/dBHo '"'' 1:5"." (0 "'" !'"''i'"''!"'"9 "'" 1 III i'"''?",,110 16 +
RIGHT
dbx on
Dot indicator (optimum level indicator)
LEFT ~I _
j' IPEAK/dB -~o"'" 1.5•••" 1.0'"'' !'"''~"'"~"",g" ..• ? IXI ~ ",,' : '"'' 1,0"," 1,6'" +
RIGHT
16

• AUTO REC MUTE
Use this function to effectively cut off unwanted material during recording
or to provide blank section between selections.
1. Press the MUTE/SEARCH button at the beginning of the section not to
be recorded. The unit makes a blank section of about 4 seconds, then
enters rec pause mode.
2. To resume recording, press the PLAY button.
Keep the MUTE/SEARCH button pressed to provide a blank section of
more than 4 seconds.
PLAYBACK
1. Make sure that the AUTO MODE selector is set to the OFF position,
then turn on the POWER switch.
2. Open the cassette compartment by pressing the EJECT button and
load a recorded cassette tape.
3. For a tape recorded with a noise reduction system, set the DOLBY NR
buttons or dbx button according to the system used.
4. Press the PLAY button to start playback.
5. Set the volume and tone controls on the amplifier to adjust sound
quality as desired.
6. To stop playback, press the STOP button.
• O-M REPEAT PLAYBACK
With this function, the desired section can be played back repeatedly up
to 8 times.
1. Set AUTO MODE selector to O-M REPEAT position. The O-M REPEAT
indicator lights.
2. Press RESET button at the beginning of the selection you want to play
again, and set the counter to "0.00".
17
3. Press the MEMORY button at the end of the selection you want to play
again.
The MEMORY indicator lights up and the tape immediately begins
rewinding.
4. The tape is rewound until the counter has returned to "0.00"
(beginning of selection). The deck then enters the playback mode.
5. The tape plays back until it reaches the memorized counter number
(end of selection). In this way, the same selection can be played again.
6. To erase the memory, press the MEMORY button once again.
The MEMORY indicator goes out.
• The length of the start and end points of the O-M repeat section should
be more than 4 seconds:
• The O-M repeat can be carried out between minus counter reading to
0.00.
• FULL REPEAT PLAYBACK
Set the AUTO MODE selector to FULL REPEAT and start playback. The
one side of the cassette is repeatedly played back 8 times. During full
repeat playback FULL REPEAT indicator lights.
• INTRO SCAN
During playback or stop mode, press either of the INTRO keys on the
remote control transmitter. The beginning of each selection is played
back for about 14 seconds in the selected direction. Press the PLAY
button while the beginning of the desired selection is being played back
to set the unit to normal play mode.
I

• MEMORY STOP
When the MEMORY button is pressed at the desired point, the tape
automatically stops at that point during fast-forward or rewind operation.
*This is possible even when the counter. reading is minus.
*To release memory, press the MEMORY button again.
*When the AUTO MODE selector is set to O-M REPEAT or FULL
REPEAT position, this function can not be activated.
•0 STOP
When the AUTO MODE selector is set to O-M REPEAT position and the
memory function is not used, the tape stops at a counter reading of 0.00
during fast- forward or rewind operation.
• SINGLE SELECTION
This function is convenient for searching selection when listening to
playback.
When the'" / ~ button is pressed simultaneously with the MUTE/
SEARCH button, or when the SEARCH ••• key on the remote control
transmitter is pressed, the tape will move to the beginning of the current
selection from which point play will be resumed.
When the ~ /~ button is pressed simultaneously with the MUTE/
SEARCH button or when the SEARCH ~ key on the remote control
transmitter is pressed, the tape will move to the beginning of the next
selection from which point play will be resumed.
• DIRECT MUSIC SEARCH (Using the remote control transmitter)
Direct music search is possible up to the selection located 99 selections
after and 98 selections before that which you are now listening to.
Example: For listening to the selection located 10 selections after.
1. Press "1" key and "0" key on the remote control transmitter. Display
indicates "--10".
2. Press the SEARCH key (~) on the remote control transmitter. The
tape will be fast forwarded to the beginning of the selected selection,
display will show the counter and playback will start automatically.
• Be sure to press the SEARCH key within 3 seconds. Otherwise, the
direct music search is not possible.
Example: For listening to the selection located 10 selection before.
1. Press "1" key twice on the remote control transmitter.
Display indicates "--11 ". When the selection number is set to "10", the
beginning of the selection located 9 selections before is searched. In
this way, selection is possible up to the selection located 98 selections
before.
2. Press the SEARCH key (••• ) on the remote control transmitter. The
tape will be fast rewound to the beginning of the selected selection,
display will show the counter and playback will start automatically;
• When the specified selection does not exist on the tape, the tape will
be fast forwarded or fast rewound to the end and the direct music
search will be cleared.
• When the fast rewind, fast forward, PLAY or STOP button is pressed
while searching, the direct music search will be cleared.
18

• RANDOM PROGRAMMED PLAYBACK (Using the remote control
transmitter)
You can select 9 selections and rearrange them in your desired order of
selections. For the selection numbers, the first selection to the 99th
selection can be specified.
Example: P1 - 2nd selection
P2 - 4th selection
1. Set the unit to stop mode.
2. Press the PROG key on the remote control transmitter. The program
number "P1." appears on the display.
3. Press "2" key on the remote control transmitter. "P1.2" appears on the
display and the selection number "2" blinks.
* Be sure to press the numeric key within 20 seconds. Otherwise, the
program display change to counter display and programming is not
possible. In this case, press the PROG key to call the program number
to be memorized.
• To correct the selection number, press "0" key and then memorize the
selection number by pressing numeric key.
4. Press the PROG key to memorize the selection number. The
programmed first selection is memorized, program number "P2."
appears on the display and the second selection can be selected.
5. Press "4" key. "P2.4" appears on the display and the selection number
"4" blinks..
6. Press the PROG key to memorize the second selection.
7. Press the RUN key on the remote control transmitter. The PROG
indicator lights, the tape will be fully rewound and the playback starts in
the programmed order of selection. (The program number blinks.
during music search.)
Display shows the program number and the selection number which is
now playing.
19
After termination of programmed playback, "End" display lights on the
display.
To stop the playback, press the STOP button.
• Programmed playback does not repeat. To start programmed playback
once again, press the RUN key.
• Programming is possible during stop, playback, fast forward or fast
rewind mode, but programmed playback can start only during stop
mode.
• When the specified selection number does not exist on the tape, "End"
display blinks and the playback stops. When this display appears,
check the program content.
For check of program content
1. Press the STOP key and PROG key.
2. Each time the PROG key is pressed, the memorized selection number
and program number are displayed.
For clearance of all the program content
1. Press the STOP key and PROG key.
2. Press the CLEAR key on the remote control transmitter.
• When the POWER switch is pressed to OFF, the content of the
program is also cleared.
For correction of the program content
1. Press the STOP key.
2. Press the PROG key to call the program number to be corrected.
3. Press the numeric key according to new selection number.
4. Press the PROG key to memorize the new selection number.
'.
Table of contents
Other Yamaha Cassette Player manuals

Yamaha
Yamaha MT100 User manual

Yamaha
Yamaha KX-W952 User manual

Yamaha
Yamaha TC800GL User manual

Yamaha
Yamaha K-222 User manual

Yamaha
Yamaha KX-260 RS User manual

Yamaha
Yamaha MT8X User manual

Yamaha
Yamaha MT100II User manual

Yamaha
Yamaha KX-650 User manual

Yamaha
Yamaha MT120 User manual

Yamaha
Yamaha K-1020 User manual

Yamaha
Yamaha KX-250 User manual

Yamaha
Yamaha KX-300 User manual

Yamaha
Yamaha KX-W382 User manual

Yamaha
Yamaha KX-500A User manual

Yamaha
Yamaha MT8X User manual

Yamaha
Yamaha MT120 User manual

Yamaha
Yamaha KX-W382 User manual

Yamaha
Yamaha KX-500 User manual

Yamaha
Yamaha KX-330 User manual

Yamaha
Yamaha MT120S User manual