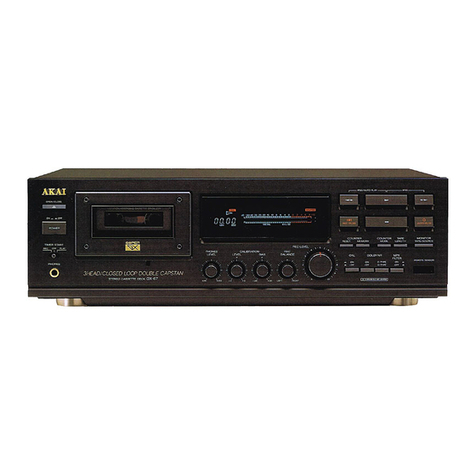
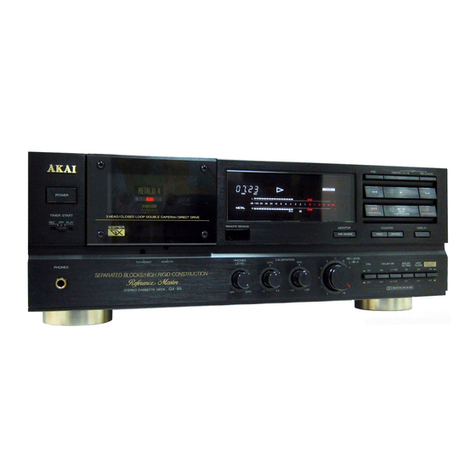
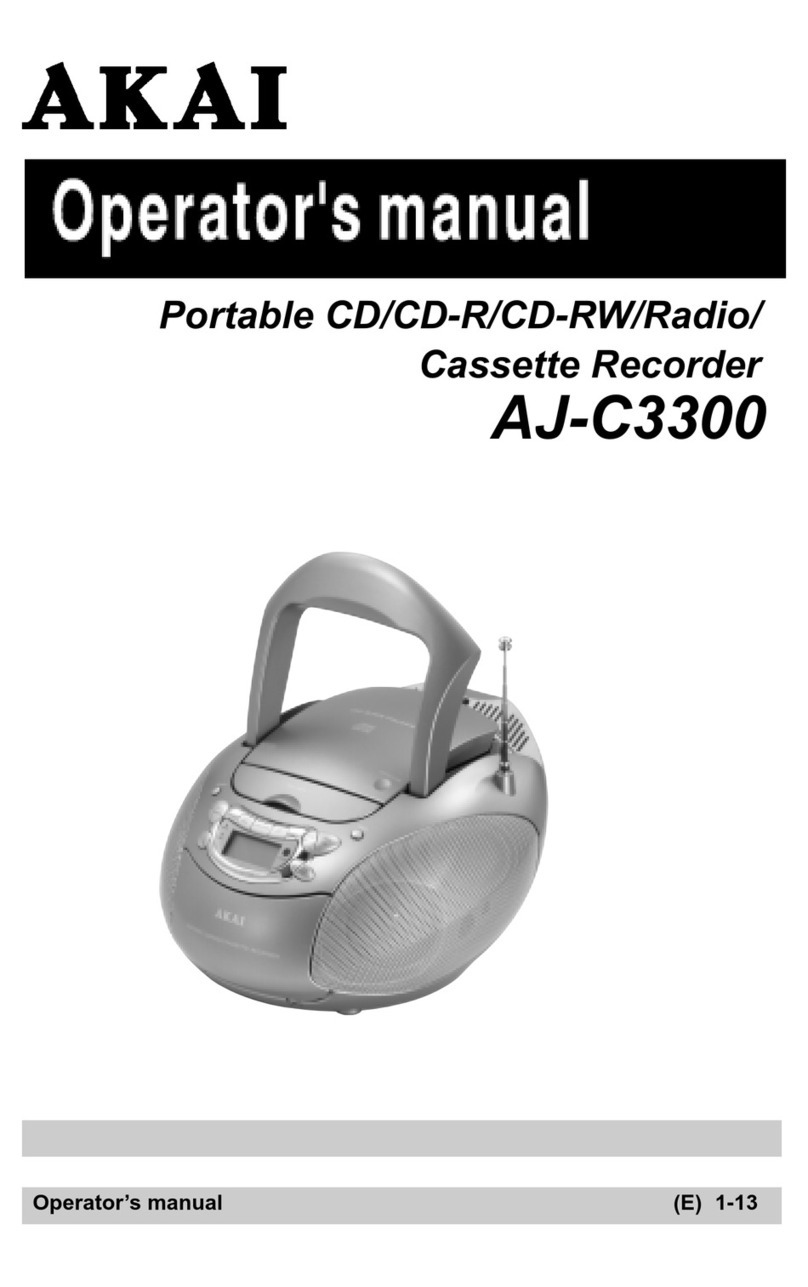
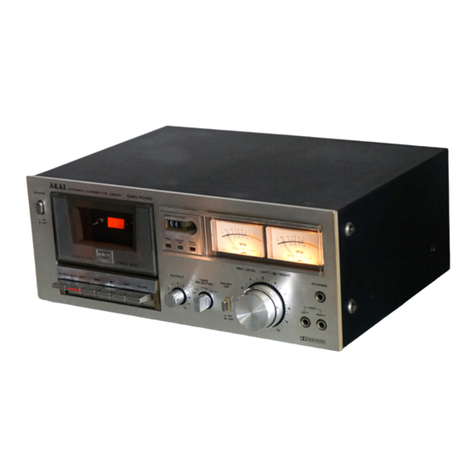
Akai GX-75 User manual

AKAI
Sigpfounce
Nate
oe
x
|
b
STEREO
CASSETTE
DECK
e)”
oma
@e)°
A
A
SEPARATED
BLOCK
S/HIGH
RIGIO
CONSTRUCTION
Master
seni
CASSETTE
NOK
G75
To
assure
optimum
performance
and
listening
enjoyment,
please
read
this
operator’s
manual
thoroughly.
Cassette
tapes
shown
in
the
illustrations
are
not
standard
accesso-
ries.
English.....s..sccescessesseenes
Page
1—28
Deutsch
.......ceeeceeereeeeees
Seite
29—56

Precautions
and
table
of
contents
©
WARNING
To
prevent
fire
or
shock
hazard,
do
not
expose
this
appliance
to
rain
or
moisture.
1-En
Power
requirements
Power
requirements
for
electrical
appliances
differ
from
area
to
area.
Please
ensure
that
your
unit
meets
the
re-
quirements
in
your
area.
If
in
doubt,
consult
a
qualified
electrician.
220
V,
50
Hz
©
‘This
equipment
conforms
to
No.
82/499/EEC
stand-
ard.
3-En

What
you
should
know
to
protect
yourself
@
Never
touch
the
piug
with
wet
hands.
@
Always
pull
out
by
the
plug
and
never
the
cord.
@
Only
let
a
qualified
professional
repair
or
reassemble
the
stereo
cassette
deck.
An
unauthorized
person
might
touch
the
internal
parts
and
receive
a
serious
electric
shock.
@
Never
put
anything,
especially
metal,
into
the
stereo
cas-
sette
deck.
‘
Protect
the
stereo
cassette
deck
too
e@
Use
only
a
household
AC
power
source.
Never
use
a
DC
power
source.
©
If
water
is
spilled
on
the
stereo
cassette
deck,
disconnect
it
and
call
your
dealer.
@
Make
sure
that
the
stereo
cassette
deck
is
well
ventilated
and
away
from
direct
sunlight.
@
To
avoid
damage
to
the
internal
circuits
and
the
external
surface,
keep
it
away
from
heat
(stoves,
etc.).
@
Avoid
using
spray
type
insecticide
near
the
stereo
cassette
deck.
It
can
damage
the
finish
and
might
ignite
suddenly.
@
To
avoid
damaging
the
finish,
never
use
paint
thinner
or
other
similar
chemicals
to
clean
the
stereo
cassette
deck.
@
Place
the
stereo
cassette
deck
on
a
flat
and
solid
surface.
@
If
you
don’t
plan
to
use
the
stereo
cassette
deck
for
a
long
period
of
time,
disconnect
the
power
cord.
Dew
formation
Dew
is
the
term
used
for
the
formation
of
moisture
on
the
very
important
tape
transport
sections
such
as
the
heads
and
the
capstan,
when
‘the
deck
is
used
in
places
where
humidity
is
high,
or
moved
from
a
cold
place
to
a
warm
one.
If
the
deck
is
used
when
dew
is
present,
the
tape
will
stick
to
the
head
and
be
ruined,
or
it
will
not
be
transported
properly.
In
that
case,
do
not
use
the
deck
for
epee
one
hour
until
the
deck
is
accli-
matized.
Placement
If
the
cassette
deck
and
tuner
are
placed
on
top
of
each
other,
humming
noise
may
result
during
playback.
Also
beat
noise
may
resuit
during
recording
of
AM
broadcasts.
In
this
case,
the
position
of
the
deck
should
be
changed.
We
recommend
that
the
amplifier
or
a
space
the
size
of
an
amplifier
be
left
between
the
deck
and
the
tuner.
Table
of
contents
Precautions
and
table
of
contents
...........
saebaggenetaaeeeeress
goes
Connections
Before
using.
your
stereo
cassette
deck
Controls
(Cassette
deck)
...........cceeeseereees
Controls
(Optional
remote
control
unit)...
RECOIPGING...:.........scscssseesecrsccessereeabeaseeceres
Tape
pla
yDack
<5.
fos...
sciscdstdecascdveeseiseeesiesccscaessvecsieerutatacssanns
For
improved
reCordingS...........cescscsessesssessecsseenenssenes
Recording
calibration
..........ceceectesessseeesessseeseessesasensenes
Recording
level
adjustment
...............cscccscessseeseseesenennens
Monitoring):
:
262
:5:.cciveccessteiide.
fora
euaai
aol
canistiaddnaasitesicied
;
Convenient
recording
features
Recording
Cancel
...........:cccesscteesseeeseees
SPOt
CLASS
csscecisciccliieehecaebes
chides
sceesds
lieve
ccacteaeesessedioederie
A
little
know-how
goes
@
1ONG
WaY
........cssccssseesessessserseeasecees
Convenient
playback
features
0.0...
.ccececesseseeesereeenens
IPSS
sessed,
sicseacasecseeseescinn
Sastevaccontentaes
wacculiagtaasuesonsaiéstsases
Repeat
playback
.........
cc
cecsssssessscssesseesessescssessesseeneeees
Auto
play
......eccseeeeneeees
Headphone
listening
....
Memory
auto
stop........
Memory
auto
play
00.00...
eecseesscecesesseesseenessessseseseesers
Timer
controlled
recording
and
playback...........ccsceuseneees
Operation
details
..........cccccecssseccseesssseressnecseceseedenseees
CD/DAT
DIRECT
IN
jacks...
eeseeseesesseeseesssesseneeees
To
turn
the
FL
display
on
and
Off
..........csescecestereesesenees
Recording
with
microphones
.........:cccsscscsccesseserssreecens
The
MPX
(Multiplex)
filter...
eeeeseeeeeeeee
Tape
Gubbing......
iii
icasedsscsceesseseseessenesteaaess
The
auto
stop
mechanism
and
tape
transport
Auto
tape
selector
system
On
the
tape
COUnter
.........cesecseereeeees
The
peak
level
Meter...
es
cseeeseseeeseceeseeneneesecseteeees
Doiby
NR
SyStem
.......c
ce
eeeeeeesesserseeeerens
Double
process
noise
reduction
system
On
the
Dolby
HX
PRO
Headroom
extension
system
.....23
Cassette
deck
MAiINteNANCE
..........ccccssecesssseeeessesessseeeseeess
24
-
TTOUDIESHOOTING.........
ee
seeeseeceesssseeessseceecesbaneeseesceeecerecs
25—26
Specifications
«2...
eecccseesssscseessseccesccecssoncseneassnescanseasssees
27
FOAtUPOS
.
os
scccicesecsnascdsosstaaeiaedvatasscedsenecciencvessececseveaceideess
27

Connections
Before
beginning
White
:
White
@
Turn
off
all
the
components
before
making
connections.
L©
©t
@
Connect
everything
securely.
Loose
connections
can
lead
to
malfunction.
.
R
a)
ae
©
R
@
Toprevent
damage
to
the
cords,
connect
and
disconnect
by
Red
Red
:
holding
the
plug,
not
the
cord.
@
Make
sure
that
you
connect
the
white
PIN-plugs
to
the
left
(L-white)
jacks
and
the
red
PIN-plugs
to
the
right
(R-red)
jacks.
Connections
CD/DAT
DIRECT
IN
jacks
(For
direct
LINE
IN
jacks
(for
recording
signal
input)
recording
signal
input
from
the
.
OUTPUT
jack
of
the
CD
player
or
DAT
; ;
deck.
Refer
to
page
20
for
connection
LINE
OUT
jacks
(for
playback
signal
output)
details.)
Power
cord
and
plug
1
Connectthe
L
(Left)
and
R
(Right)
LINE
IN
jacks
of
the
cas-
sette
deck
to
the
L
(Left)
and
R
(Right)
TAPE
REC
jacks
of
your
stereo
amplifier
with
the
provided
connection
cord.
Amplifier
5
i
“@€O6o
©©®©®
2
Connect
the
L
(Left)
and
R
(Right)
LINE
OUT
jacks
of
the
cassette
deck
to
the
L
(Left)
and
R
(Right)
TAPE
PLAY
jacks
of
your
stereo
amplifier
with
the
provided
connection
cord.
3
After
you
have
connected
everything
TAPE
PLAY
Connect
the
cassette
deck’s
power
cord
to
the
AC
OUT-
Lo
LET
of
your
stereo
amplifier,
optional
audio
timer
or
direct-
2
ly
to
your
household
AC
outlet.
LINE
OUT
Cassette
deck
Important
The
illustrated
power
plugs
and
cords
are
intended
for
general
reference.
The
power
plug
and
cord
used
in
your
country
may
differ
from
the
illustrations.
(Example;
U.K.,
Australia,
U.S.A.,
Europe
etc.)
25-En
Note
If
your
amplifier
has
2
or
more
sets
of
TAPE
jacks,
the
TAPE
1
REC
and
PLAY
jacks
are
recommended
for
connections.

Before
using
your
stereo
cassette
deck
How
to
load
a
cassette
tape
Press
the
POWER
button
to
turn
the
power
on.
The
FL
display
and
cassette
holder
light
will
be
turned
on
and
the
MIN
and
SEC
indicators
will
flash
on
and
off
for
a
few
seconds.
Press
the
Mi/#
button
to
open
the
cassette
holder
and
load
a
cassette
tape.
Insert
exposed
tape
side
down.
Pressthe
Mi/#
button
againtoclose
the
cassette
holder.
The
tape
position
of
the
loaded
tape
will
appear
on
the
FL
display
(METAL,
CrO2
or
NORM).
*
Pressing
any
tape
operation
button
(except
©
)
will
automatically
close
the
cassette
holder.
Once
closed,
the
deck
will
immediately
go
into
the
operation
mode
of
the
chosen
button.
The
cassette
holder
can
also
be
closed
by
gently
press-
ing
it.
On
the
recording
prevention
system
and
recording
defeat
tabs
You
can
protect
your
tapes
from
accidental
recording
by
re-
moving
the
recording
defeat
tabs
(one
for
each
tape
side)
locat-
ed
above
the
A
and
B
side
indicators.
When
the
recording
defeat
tabs
are
broken,
the
recording
pre-
vention
system
will
be
automatically
activated
to
protect
the
tape
if
the
ses
button
is
accidentally
pressed
during
playback.
Torecord
over
the
pre-recorded
cassette
tape
again,
cover
the
holes
with
adhesive
tape.
Note
-
Do
not
cover
the
tape
position
detecting
holes
as
this
will
hinder
proper
operation
of
the
auto
tape
selector.
Remove
to
protect
Cover
with
adhesive
tape
to
re-record
Tape
position
detecting
hole
A
Word
about
cassette
tapes
Handling
:
@
Do
not
touch
the
tape
with
your
fingers
as
high
frequency
signals
cannot
be
recorded
in
places
which
are
not
clean.
Dirty
tapes
may
also
cause
distortion
or
sound
loss
during
playback.
@
Donotleave
the
cassette
tape
near
equipment
which
gener-
ates
a
magnetic
field.
(TVs,
speaker
systems,
etc.)
Tape
slack
and
leader
tape
advancement
Tape
slack
can
cause
the
tape
to
twist
or
tangle
around
the
cap-
stan
and
pinch
roller
and
ruin
important
recordings.
Before
us-
ing
a
cassette
tape,
take
up
tape
slack
with
a-pencil.
Most
cassette
tapes
include
clear
leader
tape
at
the
beginning.
As
recording
is
impossible
on
this
leader
tape,
it
should
be
ad-
vanced
before
recording
is
begun.
Storage
©
Always
put
the
cassette
tape
back
into
its
plastic
case
after
using
it.
Store
it
in
a
dry
place,
away
from
direct
sunlight,
heat
(stoves,
etc.)
and
equipment
which
generates
a
mag-
netic
field
(TVs,
speaker
systems,
etc.).
@
Store
the
cassette
tape
with
the
tape
taken
up
at
the
fixed
speed
of
recording
or
playback.
When
the
tape
is
not
taken
up
in
anorderly
manner
(in
other
words,
fast
forwarded
or
re-
wound),
the
tape
might
stretch
or
warp.
@
if
you
are
not
going
to
use
the
cassette
tape
for
a
long
time,
rewind
or
fast
forward
the
tape
once.in
a
while.
This
is
to
pre-
vent
music
signals
from
imprinting
themselves
over
other
music
signals
when
tape
surfaces
are
in
close
contactfor
a
long
time.
Rewinding
or
fast
forwarding
the
tape
also
pre-
vents
moisture
condensation.
Regarding
cassette
tapes
@
Werecommend
the
use
of
cassette
tapes
specifically
made
for
recording
hi-fi
music.
@
We
do
not
recommend
the
use
of
C-120
(120
minute)
cas-
sette
tapes.
The
tape
is
very
thin
and
can
easily
twist
or
tangle
around
the
capstan
and
pinch
roller.
@
We
do
not
recommend
the
use
of
cassette
tapes
of
poor
quality.
You
will
not
be
able
to
fully
utilize
the
capability
of
your
stereo
cassette
deck
with
this
type
of
cassette
tape.
@
We
do
not
recommend
the
use
of
ferri-chrome
cassette
tapes
for
recording.

Controls
(Cassette
deck
On
the
FL
(FLuorescent)
display
The
FL
display
can
be
turned
on
and
off
by
pressing
the
DIS-
PLAY
button
on
the
front
panel.
DOLBY
NR,
B
and
C
Indicators
HX
PRO
Indicator
FILTER
Indicator
Digital
Tape
Counter
and
Program
A
=
B
Indicators
Number
Display
CAL
(Calibration)
Indicator
TAPE
and
SOURCE
Indicators
Deck
Mode
Indicators
MEMORY
Indicator
(REC,
<q,
>
and
PP)
ree
4
Pil
ry
fi,
Li
»
MIN
mi
SEC
6
4
IPSS
(Instant
Program
Searching
System)
Indicator
Recording
Level:
Guide
Indicators
Left/Right
Channel
Peak
Level
Meter
BIAS
indicator
NORM
(Normal),
CrO2
(Chrome)
and
LEVEL
Indicator
METAL
Tape
Position
Indicators

Tarkan
SEPARATED
BLOCKS:HIGH
RIGIO
CONSTRUCTION
SSSETTE
DECK
GX-75
@
POWER
button
To
turn
the
power
on
and
off.
@
Cassette
Lid
and
Holder
Load
a
cassette
tape
here.
To
open
and
close
the
holder,
press
the
#/4
button.
@
REMOTE
SENSOR
Window
For
reception
of
the
remote
control
signal
from
the
optional
RC-G75
re-
mote
control
unit.
Keep
away
from
strong
light
and
di-
rect
sunlight
as
this
will
interfere
with
the
remote
control
function.
@
FL
Display
Tells
you
what
the
cassette
deck
is
doing.
©
MONITOR
Button
(TAPE/SOURCE)
To
select
between
TAPE
and
SOURCE
monitor
modes.
This
button
is
incorporated
with
an
auto
monitor
system.
@
IPSS
(Instant
Program
Searching
System)
Button
To
turn
the
IPSS
on
and
off.
@
MEMORY
A-—B
Button
To
memorize
the
repeat
playback
in-
tervals
for
2-point
repeat
playback
or
the
erase
intervals
for
the
spot
erase
function.
©
REC
CANCEL
Button
To
erase
the
recorded
program
dur-
ing
recording
or
to
cancel
the
memo-
rized
intervals
for
the
spot
erase
func-
tion.
©
Operation
Buttons
(<<
:
Rewind
button,
>
:
Play
button,
>>
:
Fast
forward
button,
ses:
REC
PAUSE
button,
M/2
:
STOP
EJECT/
CLOSE
button,
©:
AUTO
MUTE
button)
To
open
and
close
the
cassette
hold-
er,
to
start
and
stop
recording
and
playback,
to
wind
the
tape
and
to
en-
gage
the
auto
mute
mode.
@
COUNTER
RESET
and
MEMORY
Buttons
To
reset
the
digital
tape
counter
to
the
“00
min:
00
sec”
position
and
to
turn
the
memory
system
on
and
off.
@®
DISPLAY
Button
To
turn
the
FL
display
on
and
off.
@®
CD/DAT
DIRECT
Switch
(
=
ON/
m=
OFF)
To
select
between
input
sources
con-
nected
to
the
LINE
IN
or
CD/DAT
DI-
RECT
IN
jacks.
For
normal
recording,
set
this
button
to
m
.
@®
MPX
FILTER
Switch
(
=
ON/
m
OFF)
To
turn
the
multiplex
filter
on
and
off.
@
DOLBY
HX
PRO
Switch
(
=
ON/
m
OFF)
To
turn
the
Dolby
HX
PRO
system
on
and
off.
The
Dolby
HX
PRO
system
will
affect
recording
only
when
the
button
is
set
to
=
.
Otherwise
it
is
automatically
defeated
during
play-
back.
@®
DOLBY
NR
ON/OFF
Switch
and
'
C-TYPE/B-TYPE
Select
Switch
To
turn
the
DOLBY
NR
system
on
and
off
and
to
select
between
B
type
or
C
type
noise
reduction
for
recording
and
playback
purposes.
®
CAL
(Calibration)
Switch
(=
ON/
m
OFF)
To
turn
the
recording
calibration
sys-
tem
on
and
off.
@
REC
LEVEL
Controls
(Left
-®—
Right)
To
set
the
recording
input
level.
The
knob
is
for
left
channel
level
control
and
the
inside
knob
is
for
right
channel
level
control.
For
normal
stereo
recording
the
red
lines
should
be
set
to
the
same
position.
®
BIAS
CALIBRATION
Control
To
adjust
the
recording
bias
current
during
recording
calibration.
The
bias
adjustment
range
is
be-
tween—20%
and
+20%
ofthe
proper
bias
current
for
Normal,
CrO2
and
Metal
position
tapes.
Normally
set
the
control
to
the
center
click
“O”
position.
@®
LEVEL
CALIBRATION
Control
-
Toadjustthe
recording
sensitivity
lev-
el
during
recording
calibration.
-
The
recording
sensitivity
level
adjust-
ment
range
is
between
—3%
and
+3%
of
the
proper
recording
sensitiv-
ity
level
for
Normal,
CrO2
and
Metal
position
tapes.
Normally
set
the
con-
trol
to
the
center
click
“O”
position.
@
PHONES
LEVEL
Control
To
adjust
the
output
level
of
the
PHONES
jack.
@
PHONES
Jack
For
headphone
connection.
@
TIMER
START
Switch
(REC/OFF/
PLAY)
To
select
operation
of
the
timer
start
function
when
the
power
is
turned
on.

Controls
(Optional
remote
control
unit)
The
optional
remote
control
unit
includes
many
of
the
operation
buttons
found
on
the
cassette
deck
and
canbe
used
to
conven-
iently
control
most
of
its
functions.
;
.
window
MONITOR
DISPLAY
Button
[J
TAPE
/SOURCE
COUNTER
=
areal
COUNTER
RESET
and
MEMORY
Buttons
IPSS
Button
__
[22
.
IPBS
MEMORY
REC
AB
CANCEL
<¢q
Button
i
SP
Button
Siten
Hs
“real
O
Button
REC
1!AUSE
sfoP
AUTO MUTE
EJECT}
CLOSE
reese
INFRARED
RAYS
FULL
FUNCTION
CONTROL
MEMORY
A-—B
Button
REC
CANCEL
Button
ses
Button
@/
Button
WIRELESS
REMOTE
CONTROL
UNIT
AKAI

Operation
Pointthe
remote
control
unitatthe
REMOTE
SENSOR
window,
and
press
the
desired
operation
button.
If
the
remote
control
unit
will
only
operate
from
a
short
distance
or
narrow
angle,
this
indicates
that
the
battery
voltage
is
low.
Replace
all
the
batteries
with
new
ones.
When
replacing
the
batteries,
clean
all
the
remote
control
and
battery
terminals
with
a
dry
cloth.
:
PhS
MOT
SEPMAATED
OCKSHEH!
AGO
CONSIALCTON
How
to
load
the
batteries
Use
UM-3,
SUN-3,
AAsize,
R6or
ee
batteries
for
the
remote
control
unit.
1
Remove
the
battery
compartment
cover
by
depressing
the
lever
and
pulling
it
up.
Load
the
batteries
as
indicated
in
the
battery
compart-
ment.
3
Replace
the
battery
compartment
cover.
Cautionary
notes
On
the
remote
control
unit
@
Avoid
dropping
the
remote
control
unit
or
getting
it
wet.
@
Avoid
exposing
the
remote
control
unit
to
direct
sunlight
or
strong
light
as
this
may
cause
malfunction.
@
Donot
use.
re-chargeable
batteries.
On
the
dry
batteries
@
Refer
to
the
markings
on
the
remote
control
unit
for
the
cor-
rect
batteries.
@
When
you
donotplan
to
use
the
remote
control
unitfor
along
._period
of
time,
remove
the
batteries.
@
Read
the
cautions
printed
on
the
batteries
before
using
them.
@
Insert
the
batteries
matching
their
polarity
guides
with
those
in
the
remote
control
battery
compartment.
@
When
replacing
the
batteries,
replace
them
all
at
the
same
time.
Do
not
mix
up
oid
batteries
with
new
ones.

Recording
@
Check
the
cassette
tape
being
used
for
recording.
Make
sure
the
recording
defeat
tabs
are
intact
and
that
the
tape’s
recording
time
is
of
sufficient
length.
Before
beginning
@
Set
the
TIMER
START
switch
to
OFF.
@
Set
the
CAL
and
CD/DAT
DIRECT
switches
to
m
.
@
Setthe
MPXFILTER
switchto
m
fornormalrecording
pur-
poses.
@
Turn
on
the
power
of
all
the
components.
After
the
power
is
turned
on,
the
operation
buttons
cannotbe
used
for
a
few
seconds
while
the
cassette
deck
stabilizes
it-
self.
;
@
Select
the
recording
source
with
the
amplifier’s
input
selec-
tor
or
the
recording
output
selector.
Cr
MM
Pane:
GR
GEO
mam
D>
Se
imei
B
Operation
Press
the
Mi/#
button
and
load
a
cassette
tape.
Insert
exposed
tape
side
down.
Set
the
DOLBY
NR
ON/OFF
and
C-TYPE/B-TYPE
select
switches
as
follows:
Recording
with
DOLBY
C-type
NR...........
ce
ceeseeseesseeeeee
Set
the
DOLBY
NR
ON/OFF
switch
to
.=
and
the
C-TYPE/B-TYPE
select
switch
to
=.
.
Recording
with
DOLBY
B-type
NR............cessessseseseeeeees
Set
the
DOLBY
NR
ON/OFF
switch
to
=.
and
the
C-TYPE/B-TYPE
select
switch
to
m
.
Recording
without
Dolby
NR
..........:ceseceseseseeseseeseeeteres
Recording
level
adjustment
Test
play
the
source
and
set
the
recording
level
with
the
REC
LEVEL
controls.
The
standard
recording
level
should
not
exceed
the
end
of
the
recording
level
guide
on
the
peak
level
meter.
To
start
recording
Press
the
®
button.
The
[>
indicator
will
stay
lit
and
the
SOURCE
indicator
will
be
replaced
by
the
TAPE
indicator.
The
cassette
deck
will
stop
automatically
when
the
end
of
the
tape
is
reached.
Set
the
ON/OFF
switch
to
m
.
.
To
stop
recording
Press
the
a/+
button.
To
stop
recording
temporarily
Press
the
ses
button
during
recording.
The
D>
indicator
will
flash
on
and
off
and
the
TAPE
indicator
will
be
replaced
by
the
SOURCE
indicator.
To
resume
recording
Press
the
>
button.
Notes
for
recording
@
Set
the
BIAS
and
LEVEL
CALIBRATION
controls
to
their
center
click
“O”
positions
for
normal
recording.
@
Set
the
CD/DAT
DIRECT
button
to
=
before
recording
from
the
CD/DAT
DIRECT
IN
jacks.
Refer
to
page
20
for
op-
eration
details.
Set
the
DOLBY
HX
PRO
buitonto
=
for
better
recording
results.
Standby
for
recording
Press
the
see
button.
The
cassette
deck
will
go
into
the
recording
standby
mode
and
the
MONITOR
switch
will
be
automaticaily
set
to
SOURCE.
The
REC
and
SOURCE
indicators
will
light
and
the
[>
indi-
cator
will
flash
on
and
off.

Tape
playback
Before
beginning
Set
the
TIMER
START
switch
to
OFF.
Set
the
CAL
and
CD/DAT
DIRECT
switches
to
m
.
Set
the
MPX
FILTER
switch
to
=
.
Turn
on
the
power
of
all
the
components.
After
the
power
is
turned
on,
the
operation
buttons
cannotbe
used
for
a
few
seconds
while
the
cassette
deck
stabilizes
it-
self.
©
‘
@
Set
the
amplifier’s
input
selector
to
the
TAPE
position.
@
Check
the
cassette
tape
being
used
for
recording.
Make
sure
the
recording
defeat
tabs
are
intact
and
that
the
tape’s
recording
time
is
of
sufficient
length.
SEPARATED
BLOCKS
HIGH
RIGID
CONSTRUCTION
STEREO
CASSETTE
OCOX
GX-75
Press
the
M/2
button
to
open
the
cassette
holder
and
load
the
cassette
tape.
Insert
tape
exposed
side
down.
2?
Set
the
DOLBY
NR
ON/OFF
and
C-TYPE/B-TYPE
select
switches
according
to
how
the
tape
was
recorded:
Tapes
recorded
with
DOLBY
C-type
NR...
ee
eeeeseees
Set
the
DOLBY
NR
ON/OFF
switch
to
=
and
the
C-TYPE/B-TYPE
select
switch
to
=
.
Tapes
recorded
with
DOLBY
B-type
NR...
eee
Set
the
DOLBY
NR
ON/OFF
switch
to
.=
and
the
C-TYPE/B-TYPE
select
switch
to
m
.
Tapes
recorded
without
Dolby
NR..........eeeeeeeereeeereeees
Set
the
ON/OFF
switch
to
m
.
:
3
To
start
playback
‘Press
the
®
button.
The
[>
and
TAPE
indicators
will
appear
on
the
FL
display
and
playback
will
begin.
The
cassette
deck
will
stop
automatically
when
the
end
of
the
tape
is
reached.
To
stop
playback
Press
the
Mi/#
button.
The
deck
mode
indicator
will
go
off.
To
wind
the
tape
quickly
To
wind
the
tape
to
the
end
Press
the
>
button.
La
The
>>
indicator
will
light
up
while
the
tape
is
winding.
To
rewind
the
tape
to
the
beginning
Press
the
<q
button.
:
The
<q
indicator
will
light
up
while
the
tape
is
rewinding.
Press
the
>
button
to
start
playback
from
the
fast
forward
or
re-
wind
modes
or
press
the
Hi/#_
button
to
stop
the
tape.
Note
@
During
playback,
the
DOLBY
HX
PRO
system
will
be
defeat-
ed
automatically
if
the
DOLBY
HX
PRO
switchissetto
om
.

For
improved
recordings
2
an
a
i
Tee
a
Recording
calibration
:
Calibrating
the
loaded
cassette
tape
1
Load
the
cassette
tape
for
recording.
Set
the
CAL
switch
to
=
.
2
The
calibration
signal
will
be
supplied
and
the
peak
level
meter
will
be
replaced
by
the
BIAS
and
LEVEL
calibration
indicators.
3
Press
the
s@#
button
and
the
®
button
simultaneously
to
start
recording
calibration.
The
calibration
level
meter
will
appear
on
the
FL
display.
Turn
the
BIAS
CALIBRATION
control
toward
the
left
or
right
until
the
level
meter
does
not
exceed
the
BIAS
indica-
tor.
Turn
the
LEVEL
CALIBRATION
control
toward
left
or
right
until
the
level
meter
does
not
exceed
the
LEVEL
indicator.
Repeat
steps
4
and
5
until
the
proper
bias
and
level
is
ad-
justed.
Press
the
REC
CANCEL
button
to
cancel
the
calibration
signal.
The
calibrated
section
of
the
tape
will
be
rewound
and
the
deck
will
go
into
the
recording
standby
mode
automatical-
ly.
Set
the
CAL
switch
to
m
.
The
calibration
level
meter
will
be
replaced
by
the
peak
level
meter
and
the
cassette
deck
will
go
into
the
stop
mode
automatically.
Press
the
ses
and
P
button
to
start
recording.
Cassette
tape
and
recording
calibration
Cassette
tapes
can
be
separated
widely
into
3
types;
Normal
position,
Chrome
(CrO2)
position
and
Metal
position.
Record-
ing
characteristics
vary
slightly,
even
with
tapes
that
have
the
same
tape
position.
For
good
recording
results,
precise
adjustment
of
the
tape’s
bias
current
and
sensitivity
level
is
necessary.
Calibration
improves
the
performance
of
the
cassette
tape
and
noise
reduction
system
being
used.
This
cassette
deck
calibrates
the
bias
current
and
sensitivity
level
according
to
the
loaded
cassette
tape.
Calibrating
the
sensitivity
level
to
its
optimum
level
helps
the
noise
reduction
system
to
operate
accurately
and
effectively
during
recording.
If
the
bias
and
sensitivity
levels
of
the
cassette
deck
are
not
set
properly,
the
recorded
sounds
will
include
some
coloration
and
loss
of
maximum
output
levels
(MOL)
at
high
frequencies
and
the
noise
reduction
system
will
not
operate
properly.
Bias
and
level
calibration
indicators
Turn
the
BIAS
and
LEVEL
CALIBRATION
controls.
CALIBRATION
LEVEL
BIAS
ie)
0
2
s°~
A
s
%
Ss
? S
7
SS
oe
a.
Notes
for
calibration
@
For
standard
bias
and
sensitivity
level
calibration,
set
both
the
BIAS
and
LEVEL
CALIBRATION
controls
to
their
center
positions.
@
([fthe
tape
is
not
rewound
after
calibration,
recorded
calibra-
tion
signals
will
be
left
on
the
tape.
@
Be
sure
to
set
the
CAL
switch
to
.m
after
calibration.
@
If
you
change
cassette
tapes
during
recording,
repeat
the
calibration
operation
for
the the
newly
loaded
cassette
tape.
@
The
noise
reduction
system
is
defeated
while
the
CAL
switch
is
setto
=
.
@
After
calibration
is
finished
and
recording
has
begun,
do
not
adjust
the
BIAS
or
LEVEL
CALIBRATION
controls.
@
The
BIAS
and
LEVEL
CALIBRATION
controls
are
ineffec-
tive
during
playback.
e@
Pressing
the
CAL
switch
cancels
all
other
tape
operations.
The
cassette
deck
will
go
into
the
stop
mode
if
the
CAL
switch
is
pressed
when
the
cassette
tape
is
running.

Recording
level
adjustment
Basic
recording
level
adjustment
Basically,
adjust
the
REC
LEVEL
controls
so
that
the
recording
level
does
not
exceed
the
recording
level
guide
indicators
on
the
peak
level
meter
when
the
cassette
deck
is
in
the
tape
moni-
tor
mode
(the
TAPE
indicator
will
be
on
the
FL
display).
The
recording
level
guide
indicators
will
vary
according
to
the
tape
position
of
the
loaded
tape.
Recording
Level
Balance
For
normal
stereo
recording,
make
sure
the
red
lines
on
the
Left
and
Right
REC
LEVEL
controls
are
aligned
and
then
adjust
both
controls
to
the
desired
level
at
the
same-time.
If
necessary
the
Left
and
Right
REC
LEVEL
controls
can
also
be
adjusted
separately.
To
decrease
the
right
channel
level:
Turn
down
the
R
REC
LEVEL
control.
To
decrease
the
left
channel
level:
Turn
down
the
L
REC
LEVEL
control.
Monitoring
:
Comparing
the
source
sound
with
the
just-recorded
sound
during
recording
Monitoring
the
source
sound
Press
the
MONITOR
button
during
recording.
The
TAPE
indicator
will
be
replaced
by
the
SOURCE
indicator
and
the
cassette
deck
will
be
set
to
the
source
monitor
mode.
Monitoring
the
just-recorded
sound
Press
the
MONITOR
button
again.
The
SOURCE
indicator
will
be
replaced
by
the
TAPE
indicator
and
the
cassette
deck
will
be
set
to
the
tape
monitor
mode.
What
is
the
auto
monitor
system?
The
independentrecording
and
playback
heads
in
combination
with
two
independent
amplifiers
(one
for
recording
and
another
for
playback)
let
you
listen
to
a
recording
as
it
is
being
made.
This
is
called
tape
monitoring.
By
switching
the
auto
monitor
system
during
recording,
you
can
compare
the
just-recorded
music
(TAPE
position)
with
the
source
music
(SOURCE
posi-
tion).
In
this
way
you
can
make
sure
that
you
have
set
the
re-
cording
input
levels
correctly.
The
tape
monitor
system
of
this
cassette
deck
is
an
“Auto
Monitor
System”.
Besides
letting
you
manually
set
the
tape
monitor
system,
it
also
does
it
automati-
cally.
When
the
cassette
deck
is
recording,
the
auto
monitor
system
is
set
automatically
to
TAPE.
During
recording
standby,
it
is
automatically
set
to
SOURCE.
Therefore,
under
normal
circumstances
there
is
no
need
for
you
to
set
the
MONITOR
switch
yourself.
Recording
level
adjustment
example
-
Metal
position/Type
IV
Normal
position/Type
|
-
CrO2
(Chrome)
position/Type
II
To
make
better
recordings
To
make
better
recordings,
the
recording
input
levels
must
be
correct.
The
recording
input
levels
should
be
set
as
high
as
possible,
without
exceeding
the
recommended
levels
indicated
on
the
peak
level
meter.
If
the
recording
levels
are
too
high,
distortion
will
result.
If
the
input
levels
are
too
low,
noise
such
as
tape
hiss
will
become
noticeable.
Make
certain
that
the
recording
input
levels
match
the
maximum
saturation
levels
of
the
music
source,
which
can
be
monitored
on
the
peak
level
meter.
Monitor
the
input
source
signals
by
pressing
the
sea
button
be-
fore
you
begin
recording
(while
you
are
test
playing
the
music
source).
The
recording
level
will
be
displayed
on
the
peak
level
meter
and
can
be
adjusted
accordingly.
with
the
REC
LEVEL
controls.
fetes
CD/DAT
IN
©
LINE
IN
©
©
LINE
OUT
Recording
amplifier
Super
GX
head
for
recording
Super
GX
head
for
playback
Notes
for
the
auto
monitor
system
@
After
comparing
sounds,
set
the
cassette
deck
to
the
tape
monitor
mode
by
pressing
the
MONITOR
button.
@
The
MONITOR
switch
is
automatically
switched
between
the
source
and
tape
monitor
mode
when
operation
buttons
are
pressed
(the
>
button
for
example).
@
Set
the
tape
monitor
switch
on
your
amplifier
to
the
tape
po-
sition
before
monitoring.
Refer
to
your
amplifier’s
operator’s
manual
for
tape
monitoring
operation.
@
The
MONITOR
switch
is
automatically
set
to
the
tape
moni-
tor
mode
when
the
cassette
deck’s
power
is
turned
on.

Conveninent
recording
features
Recording
cancel:
Cancelinga
_
section
that
has
just
been
recorded.
Press
the
REC
CANCEL
button
while
the
tape
deck
is
in
the
re-
cording
mode.
The
cassette
deck
will
rewind
the
tape
to
the
beginning
of
the
section
that
has
just
been
recorded,
create
a
blank
space
and
then
standby
for
recording.
The
REC
indicator
stays
lit,
the
[>
indicator
flashes
on
and
off
and
the
TAPE
indicator
is
replaced
by
the
SOURCE
indicator.
To
resume
recording
Press
the
®
button.
Notes
®
Inorder
for
recording
cancel
to
function
properly,
there
must
be
4
seconds
or
more
of
blank
space
at
the
beginning
of
the
recorded
section.
To
create
blank
spaces
between
selec-
tions,
use
the
©
button
during
the
recording
standby
mode.
@
After
recording
cancel!
has
been
performed,
always
make
certain
that
you
are
at
the
beginning
of
the
selection
before
re-recording.
Spot
erase
:
Erasing
part
of
a
recorded
program
Use
the
REC
CANCEL
and
MEMORY
A-—-B
button
if
you
wish
to
erase
part
of
a
recorded
program.
Check
before
erasing
the
program
Make
sure
the
recording
defeat
tabs
of
the
cassette
tape
are
not
removed.
The
cassette
deck
will
not
go
into
the
recording
can-
cel
mode
if
they
are.
Refer
to
page
5,
“cassette
tapes”
for
more
details.
Operation
1
Press
the
>
button
to
start
tape
playback.
Memorizing
the
starting
point
of
the
section
to
be
er-
ased
Press
the
MEMORY
A-~B
button
once
at
the
point
you
wish
to
begin
the
spot
erase
function.
The
A—
indicator
will
flash
on
and
off.
3
Memorizing
the
end
point
of
the
section
to
be
erased
Press
the
MEMORY
A-—
8B
button
again
when
you
reach
the
point
at
which
you
wish
to
end
the
spot
erase
function.
The
A-—B
indicator
will
appear
and
the
cassette
deck
will
stop.
To
start
erasure
4
Press
the
REC
CANCEL
button
to
start
the
spot
erase
function.
The
cassette
deck
will
rewind
the
tape
and
begin
erasing
the
recorded
section
between
the
two
points
you
have
pro-
grammed.
When
erasure
is
finished
the
cassette
deck
will
stop
automatically.
"
MEMORY
A—B
Button
REC
CANCEL
Button
To
confirm
the
portion
to
be
erased
(Before
beginning
erasure)
After
operation
1,2
and
3,
press
the
>
button
for
playback.
The
cassette
deck
will
go
into
the
repeat
playback
mode.
After
the
memorized
portion
is
played,
the
cassette
deck
will
stop
au-
tomatically.
After
confirmation
Press
the
REC
CANCEL
button
to
start
erasing.
When
the
end
of
the
section
to
be
erased
is
reached,
the
A
indicator
will
disappear
and
the
cassette
deck
will
stop
automatically.
To
cancel
the
spot
erase
function
Press
the
Hi/#
button.
The
A-—B
indicator
will
disappear.
Erasing
a
short
section
of
tape
during
playback
After
playback
has
begun
and
you
are
near
the
portion
of
tape
you
wish
to
erase,
depress
the
®
button
for
approx.
1
second.
The
cassette
deck
will
go
into
the
half
speed
playback
mode.
The
[>
indicator
will
flash
on
and
off
during
half
speed
playback.
Press
the
MEMORY
A-—8
button
and
REC
CANCEL
button
as
in
the
previous
procedures
2
to
4
to
erase
the
desired
section.
To
resume
normal
speed
playback
during
half
speed
playback
Press
the
»
button
again.
The
[>
indicator
will
stay
lit.
Notes
@
Tape
check: Before
erasing
the
tape,
take
up
slack
with
a
pencil.
@
When
erasing
tape
in
the
half
speed
playback
mode,
confir-
mation
of
the
portion
to
be
erased
can
be
made
asin
normal
playback.
@
During
half
speed
playback,
other
functions
such
as
record-
ing,
rewinding
or
fast
forwarding
cannot
be
used.
The
only
button
that
will
operate
when
pressed
is
the
Mi/#.
button
stop
the
cassette
deck.

A
little
know
how
goes
a
long
way
Auto
mute:
To
make
a4
second
blank
space
during
recording
With
the
.0
AUTO
MUTE
button
you
can
automatically
make
a
4
second
blank
space
between
selections
without
adjusting
the
REC
LEVEL
controls.
During
recording:
Press
the
©
button
once
at
the
place
you
wish
to
make
a
blank
space.
The
cassette
deck
will
go
into
the
mute
recording
mode.
The
REC
indicator
will
flash
on
and
off.
After
making
a
4
second
blank
space,
the
deck
will
go
into
the
recording
standby
mode
and
the
[>
indicator
will
start
flashing.
The
TAPE
indicator
will
be
replaced
by
the
SOURCE
indicator.
To
resume
recording
Press
the
®
button.
The
cassette
deck
will
return
to
the
normal
recording
mode.
The
SOURCE
indicator
will
be
replaced
by
the
TAPE
indicator.
To
make
a
blank
space
of
any
length
The
©
button
can
also
be
used
to
make
longer
or
shorter
blank
spaces
or
to
erase
long
portions
of
tape.
During
recording:
Press
the
©
button
twice
at
the
place
you
wish
to
make
a
blank
space.
The
cassette
deck
will
go
into
the
mute
recording
mode.
The
REC
indicator
will
flash
quickly.
To
resume
recording
Press
the
»
button.
The
cassette
deck
will
return
to
the
normal
recording
mode.
*
If
you
wish
to
go
to
the
recording
standby
mode
first
before
entering
the
normal
recording
mode,
press
the
ses
button
before
pressing
the
>
button.
Note
The
mute
recording
function
can
also
be
used
from
the
stop
mode
(to
erase
the
beginning
of
a
tape
or
for
bulk
erasing
for
ex-
ample)
by
first
pressing
the
s@#
button.
After
this,
press
the
O
buttononce
or
twice
depending
on
howlong
you
wish
mute
recording
to
continue.
Stop
mute
recording
by
pressing
the
@/
+
button.
EDIT
—————
REC
CANCEL
201
mn
/
>
O-
STOP
REC
PAUSE
EJECT
CLOSE
AUTO
MUTE
To
start
recording
immediately
Simultaneously
press
the
se
button
and
the
»
button.
The
REC
and
[>
indicators
will
light
and
the
cassette
deck
will
immediately
go
into
the
recording
mode.
To
go
from
playback
to
recording
without
stopping
the
tape
‘Simultaneously
press
the
®
button
and
the
ses
button.
The
REC
indicator
will
light
and
the
cassette
deck
will
go
directly
into
the
recording
mode.

Convenient
playback
features
IPSS:
Instant
Program
Searching
System
IPSS
canbe
used
to
directly
locate
and
start
playback
from
any
recorded
segment
on
the
tape,
within
16
segments
of
your
starting
point,
in
either
the
forward
or
reverse
direction.
1
Press
the
IPSS.
button.
The
IPSS
indicator
will
light
up.
Press
the
PR
or
<¢q
button
repeatedly
until
the
number
of
the
program
you
wish
to
start
playback
from
is
displayed
on
the
digital
display.
When
pressing
the
>
or
<<
button,
the
digital
counter
display
will
be
replaced
by
the
program
display.
When
lo-
cating
a
program
in
the
forward
direction,
01,
02
etc.,
will
be
displayed
on
the
program
display
and
when
locating
a
program
in
the
reverse
direction,
-01,
-02
etc.,
will
be
dis-
played.
The
[>
indicator
will
flash
on
and
off
while
the
tape
is
wind-
ing
and
the
displayed
number
will
decrease
by
1
each
time
a
blank
space
between
selections
(unrecorded
section)
is
passed.
When
the
chosen
selection
is
found,
the
cassette
deck
will
begin
playback
and
the
program
display
will
be
replaced
by
the
digital
tape
counter.
3
To
cancel
IPSS
Press
the
IPSS
button
again.
The
IPSS
indicator
will
go
off.
If
IPSS
is
canceled
while
the
tape
is
being
wound,
the
cas-
sette
deck
will
continue
winding
the
tape
until
the
end.
If
the
selection
is
not
found
during
IPSS
operation
The
cassette
deck
will
continue
searching
to
the
end
of
tape
is
reached
and
stop automatically.
The
Program
display
will
be
replaced
by
the
digital
counter
dis-
play.
+
eDit
-—_-——
MEMORY
A--B
REC
CANCEL
Y]
dies
REC
PAUSE
EJECT.
CLOSE
AUTO
MUTE
Notes
for
IPSS
function
@
IPSS
detects
low
volume
levels
(blank
spaces
between
se-
lections)
in
order
to
determine
when
each
selection
begins
and
ends.
When
the
music
signals
are
below
a
specific
volume
level
for
a
length
of
time
which
is
more
than
approxi-
mately
4
seconds,
that
interval
is
detected.as
a
blank
space
between
selections.
@
During
classical
music
selections
and
music
selections
which
have been
recorded
“Live”,
some
parts
may
contain
low
signals
for
an
interval
of
more
than
4
seconds,
and
IPSS
may
detect
this
space
as
an
interval
between
selections.
|
@
During
some
“Live”
recordings,
there
may
be
applause
be-
tween
the
selections.
Such
intervals
(which
have
a
volume
which
is
too
high)
will
not
be
detected
as
blank
spaces
and
will
be
skipped
by
the
IPSS
system.
@
Pressing
the
>>
or
<q
button
at
the
very
beginning
or
end
of
a
selection
may
cause
malfunction
of
the
IPSS
function.
@
IPSS
is
automatically
defeated
when
the
power
is
turned
off.

Repeat
playback
:
Repeated
playback
of
a
memorized
section
By
memorizing
two
points
on
the
tape
(beginning
and
end),
you
can
repeat
playback
of
any
section
that
you
wish.
This
is
ideal
for
times
that
you
wish
to.listen
to
one
particular
section
of
a
song
repeatedly.
One
complete
song
or
the
whole
tape
can
also
be
memorized
for
repeated
playback.
Use
the
MEMORY
A-:—B
button
as
follows.
Operation
1
Start
playback.
Press
the
MEMORY
A—
B
button
to
memorize
the
be-
ginning
(start)
of
the
section
you
wish
to
playback
repeat-
edly.
The
A-—
indicator
will
flash
on
and
off.
Press
the
MEMORY
A
8
button
again
to
memorize
the
end
of
the
section.
The
A<—B
indicator
will
light
and
the
cassette
deck
will
stop
automatically.
To
start
repeat
playback
Press
the
<4
button.
The.cassette
deck
will
rewind
the
tape
to
the
beginning
of
the
memorized
section
and
begin
playback.
Playback
of
the
section
will
be
repeated
an
infinite
number
of
times.
To
stop
and
cancel
repeat
playback
Press
the
Mi/#
button.
The
cassette
deck
will
stop
and
the
A<—B
indicator
will
disappear.
5
Memorizing
a
few
selections
or
the
whole
tape
for
repeated
playback
After
pressing
the
MEMORY
A:—B
button
you
canuse
the
>>
button
or
<q
button
to
speed
things
up
when
memorizing
a
large
section
of
tape
for
repeat
playback.
Once
you
are
near
the
point
you
intend
to
end
your
memorized
section,
press
the
>
button
to
return
to
the
normal
playback
speed.
Memorize
the
end
by
pressing
the
MEMORY
A-—8
button
again
(The
A
indicator
will
flash
on
and
off
until
this
is
done).
Press
the
<q
-
button
to
rewind
the
tape
and
start
repeat
playback.
Auto
play
:
Automatic
playback
from
the
beginning
of
a
tape
Press
the
<q
and
>
buttons
simultaneously.
The
<4
indicator
will
light
and
the
[>
indicator
will
flash
on
and
off
when
auto
play
is
engaged.
The
tape
will
be
rewound
to
the
beginning,
and
playback
will
be-
gin
automatically.
108
on
/
o
AUTO
MUTE
STOP
EJECT
CLOSE
REC
PAUSE
Notes
on
repeat
playback
@
Ifthe
>
button
is
pressed
to
start
playback
after
memorizing
a
section
of
tape
for
repeat
playback,
the
cassette
deck
will
playback
the
memorized
portion
one
time
only,
then
auto-
matically
stop.
Do
not
touch
the
REC
CANCEL
button
after
memorizing
as
this
will
erase
the
memorized
section.
The
IPSS
and
memory
system
are
automatically
canceled
during
the
memorizing
operation.
The
memorized
section
will
be
canceled
automatically
when
the
power
is
turned
off.
:
Headphone
listening
1
Connect
a
pair
of
headphones
to
the
PHONES
jack.
2
Adjust
the
playback
level
with
the
PHONES
LEVEL
control.
Caution
|
Listening
at
high
volume
levels
for
long
periods
of
time
may
damage
your
hearing.

Memory
auto
stop
:
Winding
and
stopping
the
tape
at
the
“00:00”
position
of
the
tape
counter
automatically
1
Press
the
MEMORY
button.
The
MEMORY
indicator
will
light
up.
2
Press
the
RESET
button
before
recording,
playback
or
at
any
point
that
you
wish
the
tape
to
be
wound
to.
3
Press
the
®}
or
<4
button
during
recording
or
playback
as
follows;
To
stop
the
tape
from
the
fast
forward
mode
Press
the
>
button.
To
stop
the
tape
from
the
rewind
mode
Press
the
<q
button.
When
the
“00:00”
position
of
the
digital
tape
counter
is
reached,
the
tape
will
be
stopped
automatically.
If
youwish
to
playback
the
tape
press
the
®
button.
Notes
®
The
memory
system
will
be
defeated
automatically
if
the
IPSS
button
is
pressed.
The
IPSS
and
memory
systems
cannot
be
used
at
the
same
time.
@
Thememory
system
will
be
defeated
automatically
while
the
recording
cancel
system
is
engaged.
Memory
auto
play
:
Automatic
rewind
and
playback
from
the
“00:00”
point
on
the
tape
counter
Press
the
MEMORY
button.
The
MEMORY
indicator
will
light
up.
2
Press
the
RESET
button
to
reset
the
counter
to
“00:00”.
3
Press
the
<q
button
and
>
button
simultaneously.
The
memory
auto
play
system
will
be
engaged.
The
<q
indicator
will
light
and
the
[>
indicator
will
flash
on
and
off
while
the
tape
is
being
wound.
When
the
tape
reaches
the
“00:00”
point
on
the
tape
counter,
the
cassette
deck
will
start
playback
automatical-
ly.
_Note
The
memory
auto
play
system
will
be
engaged
from
the
rewind
mode
only.
It
cannot
be
used
from
the
fast
forward
mode.

Timer
controlled
recording
and
playback
This
cassette
deck
has
a
built-in
timer
start
function.
When
used
in
combination
with
an
optional
audio
timer,
recording
or
playback
can
be
started
automatically
at
any
programmed
Timer
controlled
recording
After
preparing
for
recording,
set
the
timer
to
the
timer
opera-
tion
mode.
The
connected
audio
components
will
be
turned
off
automatically.
Set
the
cassette
deck’s
TIMER
START
switch
to
REC.
TIMER
START
REC
OFF
PLAY
time.
Refer
to
the
audio
timer’s
operator's
manual
for
operation
deiails.
Timer
controlled
playback
After
preparing
for
playback,
set
the
timer
to
the
timer
operation
mode.
The
connected
audio
components
will
be
turned
off
au-
tomatically.
Set
the
cassette
deck’s
TIMER
START
switch
to
PLAY.
TIMER
START
REC
OFF
PLAY
After
timer
controlled
recording
or
playback
is
finished
Set
the
TIMER
START
switch
to
OFF
before
turning
on
the
power
of
the
cassette
deck.
Notes
for
the
timer
operation
@
Timer
start
recording
or
playback
will
begin
4
seconds
after
the
power
has
been
turned
on.
@
Once
the
timer
start
function
has
begun
the
operation
but-
tons
can
be
used
freely
for
normal
recording
or
playback
op-
eration.
Timer
controlled
recording
@
Make
sure
your
tape
is
of
sufficient
length
for
your
recording
needs.
@
Donot
forget
to
tune
in
the
station
you
wish
to
record
with
the
connected
tuner,
and
to
set
the
amplifier
for
broadcast
sta-
tion
recording.
@
Normally,
keep
the
VOLUME
control
set
to
the
minimum
po-
sition
during
timer
controlled
recording.
If
you
wish
to
listen
while
recording,
set
the
VOLUME
control
to
the
normal
lis-
-
tening
level.
Important!
The
illustrated
power
plugs
and
cords
are
intended
for
general
reference.
The
power
cord
and
plug
used
in
your
country
may
differ
from
the
illustrations.
(Example;
U.K.,
Australia,
U.S.A.,
Europe,
etc.)
;
25-En
Example
connection
of
the
power
cord
Tuner
D
od
MB?
coo
Amplifier
;
O
BamcD)
$888
en
Household
AC
outlet
*
If
your
amplifier
is
not
equipped
with
AC
outlets,
con-
nect
the
power
cords
to
the
timer’s
AC
outlet.

_
Operation
details
_
tS
>
CD/DAT
DIRECT
IN
jacks:
Connection
and
recording
operation
This
cassette
deck
is
equipped
with
exclusive
digital
source
re-
cording
input
jacks.
Although
this
cassette
deck
cannot
record
‘digital
signals
(a
D/A
(Digital
to
Analog)
converter
is
necessary
for
this),
use
of
the
CD/DAT
DIRECT
IN
jacks
for
connection
ofa
CD
player
or
DAT.
deck
for
recording
improves
the
S/N
(signal
to
noise
ratio)
of
the
cassette
deck’s
line
amplifier.
For
improved
signal
quality
when
recording
from
a
CD
player
or
DAT
deck
it
is
recommended
that
these
jacks
be
used
for
con-
nections.
Connections
CD-
CD
player
or
DAT
deck
Cassette
deck
Note
As
this
cassette
deck
does
not
include
a
D/A
(Digital
to
Analog)
converter
it
cannot
be
connected
to
the
digital-output
jacks
of
a
CD
player
or
DAT
deck.
Operation
Set
the
CD/DAT
DIRECT
switch
to
.=
before
recording.
For
normal
recording
Set
the
CD/DAT
DIRECT
switch
to
m
.
To
turn
the
FL
display
on
and
off
Press
the
DISPLAY
button.
FL
Display
DISPLAY
Button
In
the
stop
mode
the
digital
tape
counter
will
remain
on
the
FL
display.
During
playback
or
recording
all
indicators
on
the
FL
display
will
be
turned
off.
When
recording
or
playbackis
begun
after
pressing
the
display
button,
the
deck
mode
indicator
will
momentarily
appear
and
then
disappear.
The
digital
tape
counter
will
also
disappear.
To
turn
the
FL
display
back
on
Press
the
DISPLAY
button
again.
The
FL
display
generates
a
small
amount
of
noise
when
indica-
tors
turn
on
or
off.
For
the
best
sound
results
during
recording
and
playback,
it
is
recommended
that
the
FL
display
be
turned
off
when
it
is
no
longer
necessary.
Note
@
Pressing
the
DISPLAY
button
does
not
turn
the
CAL
indica-
tor,
BIAS
and
LEVEL
indicators
off.
@
TheFLdisplay
is
automatically
turned
on
when
the
cassette
deck’s
power
is
turned
on.
Recording
with
microphones
To
record
from
microphones
it
will
be
necessary
to
connect
a
microphone
mixer
(not
included)
to
the
LINE
IN
jacks
of
the
cas-
sette
deck.
The
microphones
can
then
be
connected
to
the
mi-
crophone
mixer.
Other manuals for GX-75
1
Table of contents
Languages:
Other Akai Cassette Player manuals