manuals.online logo
Brands
  1. Home
  2. •
  3. Brands
  4. •
  5. Robertshaw
  6. •
  7. Thermostat
  8. •
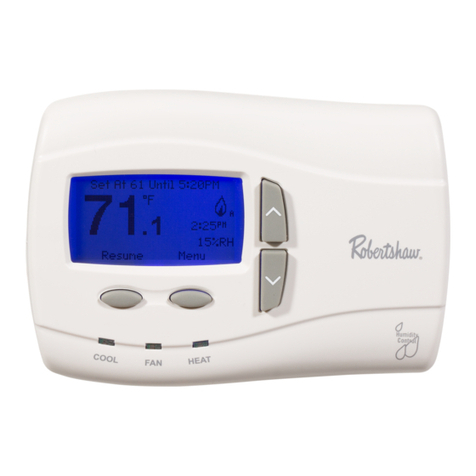
  9. Robertshaw 8625 User manual

Robertshaw 8625 User manual

atMPORTANT
SAFETY
INFORMAT|ON
WARNTNG:
. Alwaysturnoff
power
atmainfuse
orcircuitbreaker
panel
before
installing,removing,cleaning,orservicing
thermostat.
. Readallthe
informationin
thismanual
beforeinstalling
thisthermostat.
. D0NOTCONNECTT0120VAC.Thisis
a24VAC
low-vottaoe
thermostat.
Donotinstall
on
voltages
higher
than
30VAC.
-
. Allwiringmustconform
tolocalandnational
building
andelectrical
codesandordinances.
. Donotshort(jumperl
acrossterminalsonthe
gas
valve
oratthe
system
controltotest
installation.
Thiswill
damagethethermostat
and
void
thewarranty.
. Donot
connect
ground
toanyterminalinthis
unit.
Recycling
Thermostat
lf
thisthermostatREPLACES
athermostat
thatcontains
mercury,
D0N0Tdiscardthe
oldthermostatin
theregulartrash.
MercurV
isharmfultohumans
andthe
environment.Forthisreason,do
not
open,
break,
orcrushthemercury
cell.
lfmercuryleaksfrom
adamagedcell,D0N0Ttouch
orhandlemercury
withbare
hands.Use
protective,
non-absorbentgloves
to
place
mercury
intoa
sealablecontainer.Fillthe
container
with
sandoranother
absorbentmaterialandsealthe
containercompletely-
Return
themercuryormercury
products,
in
asealedcontainer,to
InvensysClimate
Controlsoralocalrecyclingcenterfor
proper
disposal.lf
you
haveany
questions,
callRobertshawtechnical
support
at
1
-800-445-8299.
InvensysClimateControls
28CLeighFisherBlvd.
ElPaso,
TX79906
Attn:Mercury
RecyclingCenter
Step1:ReplacingExisting
Thermostat
WiringTable
OldTerminal NewLabel Description
R,V-VRorVR-R 24VAC,return
Y,YI,M Compressorrelay
{Stage
1
)
0orR Reversingvalve
(cool
active)
Reversingvalve
(heat
active)
ForG Fancontrol
relay
2"d
stage
coolingcircuit
W2,
W-UorE2"'stageheatingcontrol
or
emergencyheatingfor
heat
pumps
C,XorB 24VAC,transformer
common
side
LorX Systemmonitor
WorWl 1ststageheat
-nonheat
pump
1{0TE:
THISTHERM0STATREOUIRESA24VACCOMMONWIREFORPR0PEROPERATI0N.
1{0TE:
0l{S0ME0LDERM0DELS,THECIERMII{A|CAli8EEITHERTHEC00tlllcC0l{TR0t
0R
THE
COMMOI{SIOEOFTHETRAI{SFORMER.CHECKFURI{ACEWIRII{GDIAGRAMTOVERIFY
C
IERMII{AL.
IFITISTHECOMMOI{SIDE
OFTHEInAI{SFORMER,
COIIIIECTTOTHECTERMIiIAL.
a TMP0RTANT
SAFETYtNFORMATION
WARNTNG:
In
heat
pump
applications,donot
connectanythingtotheWl
terminal.When
switchedtoHPmode,Wl isconnectedinternally
to
Yl onthethermostat.ConnectAUXheat
totheWZEterminal.
1. Turnoff
power
toheating
andcooling
system.
2. Removecoverofold
thermostattoexposewires.Donot
disconnectwires.
(See
Figure'l)
3. Labelwires
per
theWiringTable.
4. Afterlabeling
wires,removewiresfromterminals.
5. Remove
existingthermostatbasefrom
wall.
6. Refer
tothefollowingsectionforinstructionson
how
to
install
thermostat. Figure1
Installing
ltem8625Thermostat
NOTE: Fon NEWtNsTALlATroNs,MoUNTTHERMosTAT
oN AN lNstDEwlLL, 4-5 rrrr
ABovETHEFLooR.Do NoTrNsTAtL
BEHTNDA DooR,
rNA coRNER,NEARAtRvENTs,
IN DIRECTSUNLIGHT/
ORNEARANY HEATORSTEAMGENERATINGFIXTURES.INSTALIATIOI'
ATTHESEPLACESWILLAfFECTIHERMOSTATOPERATION.
110-1101
AsanErurRev
SIAR@
partner,
Climate
Controls
Americas
hasdetermined
that
thisthermostat
product
meets
the
Elrenoy
Srnn'
guidelines
for
energy
efficiency"
Application
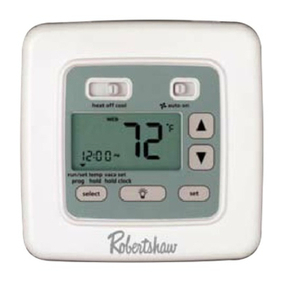
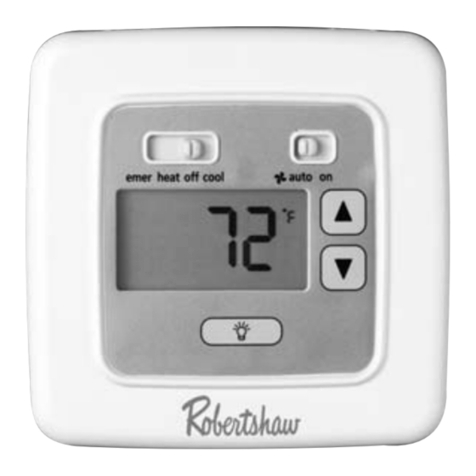
TheRobertshaw
8625
is
a
multi-stage
thermostatdesignedtocontrol
24VACheat
pump
systems.
Features
. Large
backlitdisplay.
. Four
preprogrammed
Eruenoy
Srnn@setpointsforeachdayoftheweek.
. Adjustable
1"stagetemperature
differential:1.0"Fto3.0'F
(0.5'C
to
1.5.C).
. Adjusta
ble2"dstagetemperaturedifferentia
l:
1.0'F
to6.0'F
(0.5"C
to
3.0"c).
. Adiustable2"dstagedelay
(10-40
minutes).
. EnergyEfficientRecovery
(EERTM).
. Residualcoolingfor
addedairconditioningefficiency.
. Zonecomoatible
asmasterthermostat.
. FahrenheiVCelsius
displayoption.
. Programmable
from45"F
(4"C)
to
90"F
(32'C).
. Accuracywithin
t 1degree.
. Separateheatingandcooling
programs.
GAS ELECTRIC
5-2DayProgrammable
2 HeatI 2Cool
User'sManual
Quick
Start
Installation
and
Programming
YI
1. Turn
power
offto
theheatingandcoolingsystems.
PlaceEMER-HEAT-0FF-C001
in
0FF
position.
Place
* AUTo-oNswitch
intoAUT0
position.
Remove
thecoverusingacoin
orscrewdriver
(see
Figure2).
Placethermostatagainstthe
wallatdesiredlocation.Make
sure
wireswillfeedthrough
openingon
base
ofthermostat
tigwe2
waE
W1
tr
HEAT
ONLY COOLONLY
2-W|RE 3-W|RE
SINGLETBANSFORMER SINGLETRANSFORMER
.--il K-l
x, t ,frt x.l
"#{tH-^T:Pi | "#{lH.
- P;I
nt'ulEfpil -1-l_p:l
1.9'l l-iEfpll
n\o I
X"l q-Ltisl
R' I Eh'
9AI XAI
o' I P'l
tat 9l
,@
HEAT/COOL
2STAGE
6. Mark
placement
ofmountingholes
(see
Figure3).Setbaseaside.
7. Drillthemarkedholesusinga
3/16"
(5mm)
drillbit.N0TE:Enclosed
plastic
anchorsdonot
require
adrilled
holefor
drywall.
WiringDiagrams
The
followingis
just
asampleofthemostcommontypesofHVAC
systems.Refer
to
your
system'sinstallationmanualforwiringinformation.
HEAT/COOL HEATOilLY
&WIRE }WIRE
STNGLETRANSFoRMER ",no..Jo":1+5"
rffirl rd l:'l
=!fi!1 ----1, : | "f.fll-l-.,
f_1e : I
"*u-1€}Fll -=l-rFfEbtl
l-l=l-b8l I b3l
tEibrl El-PIl
-8'l H't
b
@_.1 El
HEATPUMPWIRING
HEATPUMPWITH
COOL
ACTIVE
REVERSIT{GVALVE
To
TestThermostat
WARl{ll{G:
D0NOTSHORT
(JUMPER)
ACR0SSTERMINAIS0FGAS
VALVEORSYSTEM
CONTROT
TOTEST
OPERATION.THISWIII
DAMAGETHETHERMOSTATAI{DVOIDYOURWARRAI{TY.
GAUTION:
D0NOTSWITCHSYSTEMT0C00tlFTHETEMPERATURE
IS
BETOW
sO'F
(10'C).
THISCANDAMAGETHEAIR
COTIDITIONING
SYSTEMAI{D
CAUSE
PERS()NATINJURY.
l. Placethe
EMER-HEAT-0FF-C001switchinto
the
C00L
position.
The* will
bedisplayed.
2. Press
the
V buttonuntilthetemoerature
setting
is
at
least3degreesbelowtheroom emerheatoff
cool
temperature.
Theairconditioningsystemshould
turn
onwithina
few
seconds.
NOTE:0NGETHE
THERMOSTATTURNS
OFF
WHENltl THEC00t MODE,
ABUITTINs-MINUTE
DETAYPREVENTSTHESYSTEMFROM
TURNINGON
AGAIN.THISPROTECTS
THECOMPRESSOR.
NO
ADDITIONAT
TIMEDELAYRELAY
ISREQUIRED.TOOVERRIDETHE
s-MI]{UTEDELAYFORIi{STATTATIOI{.PRESSTHERESETBUTTON.
3. PuttheEMER-HEAT-OFF-C001
switchintothe
0FF
position.
Theairconditioningsystem
shouldturnoff.
4. Put
theEMER-HEAT-0FF-C001switch
intothe
HEAT
position.
The
dwillbedisplayed.
5. Pressthe A buttonuntilthetemoerature
settingisatleast3degreesaboveroom emerheatoffcool
temperature.Theheatingsystemshouldturnon.Thefanmay
notturnonimmediately,dependingonthefandelaybuiltinto
thefurnace.
N0TE:lf HPisselected,theheatwillnotcomeonuntilthe5 minute
shortcycle
protection
hasexpired.
6. PuttheEMER-HEAT-0FF-C001switchintothe
EMER
position.
The0
' willbedisplayed.
7. PresstheA buttonuntilthetemDerature
settingisatleast3degreesaboveroom emerheat
offcool
temperature.Thesecondaryheatingsystem
should
turnon.
NOTE:The
compressor
willnot
turn
whenin
emergency
heatmode.
PuttheEMER-HEAT-OFF-Co01switchintothe
OFF
position.
Theheatingsystem
should
turn
off.
The
fanmavcontinue
torunfor
ashort
oeriodoftime.
Figure
3
MountingHoles
HPOPTIONSWITCH
Heat
pump
switch.
Tap
plastic
anchorsinto
thewall.
Alignbasewith
plastic
anchorsand
feedwiresthrough
opening
(see
Figure
3).
Securebase
towall
withsuppliedscrews.
Connect
wirestoterminalstrip.Refertowiring
diagrams
on
page
5.
Makesurewireconnectionsare
secure.
PlaceElectric/GasswitchintoeithertheELECorGAS
position
dependingonthetypeoffurnace
(see
Figure3).
PlacetheHPoptionswitchintoeithertheN0N_HPorHP
position
dependingonthetype
of
system
you
areusing
(see
Figure3).Use
theHP
position
forheat
pumps
0NLYUsetheNON_HPsettingfor
everythingelse.
Replacecover0nthermostatbysnappinginto
place.
Turnonoowertosvstem.Testthermostatasdescribedin
the
sectionToTestThermostat.
HEATPUMP+ AUx COOL
COOL
ACTIVE
REVERSINGVALVE
I i_-
-l:
-r{,
Eor
ELECTRIC/GAS
SWITCH
Selectsfancontrol.
d.
9.
10.
11.
12.
13.
14.
emerheatoffcool
emerheatoffcool
9. Putthe
Theblo
showa
1
0. Putthe
AUT0-0Nswitchintothe0N
position.
fan
should
turnon.Thedisplaywill
* AUfO-OtrtswitchintotheAUTo
oosition.
Theblowerfanshould
turn0ff.
/F\
tr a_l]l
|| t ltl
-/
auto on
/:\
IrT-t I
|t t tl
\-/
auto on
*
*
DIAGRAMS
-
HEATPUMPWITH
HEAT
ACTIVE
BEVEBSINGVALVE
h_l
'**l X Il
sfLl r 19 !|
-9il!5 h El
U I_EIFI
H:H-F Ml
l-trr5
3l
l-6 rl
EHo ;I
9l
E:l
v I
'" S?l15.f,l1$;,,
HEATPUMP+AUX
HEAT
HEATACNVE
BEVERSING
VALVE
*
wer
*
Programming
Guide
-a.F
t:.1
n
U
(I.
tr-ril
It''
off.
6. After
pressing
SET
for
the4theventthe
dayoftheweekalongthetopwillswitch
toSATSUl{andAMl willbe
displayed.
Repeatsteps2-4
to
programkhe
weekend
settinos. ie,0il"
7. Withtheweekend
settings
programmed,place
theHEAT-0FF-C001
switch
inthe
C00Lposition.Repeatsteps2-6to
programthe
coolingsettings.
CUSTOMIZINGIHE
THERMOSTAI
Settings
System
Cool:The
thermostatcontrols
thecoolinq.
0ff: Theheatingandcooling
systemsa;eoff.
HeatThethermostatcontrolstheheat.
Emer:
Thethermostat
controls
thesecondstage
emergency
heat.Use
onlywhen
the
primary
stage
of
heatis
notfunctioning
orrequires
service.
Thedisplaywillshow
GHECK
HP
when
theheat
pump
requires
service. -l -l 'f
Fan ! e!
Auto:
Equipment
controlsthefan.
. i]'fi | L
0n: The
fanoperatescontinuously. I
rl
TemperatureDifferential
Thetemperaturedifferentialfor1*stageisfactorysetat1.0'F
(.5'C).
This
meansthatwhenevertheroomtemperaturechangesbyonedegree
Fahrenheitfromthetemperaturesetting,thesystemwillturnon.lfthe
sys-
temturnsontoooften,
increase
thetemperaturedifferential.
NOTE:Thetemperaturedifferentialfor2"0stageisfactorysetat
2.0"F
(1.0"C)
Changing
Fahrenheit
('F)
to
Celsius
('C),
ClockSetting,Temperature
Differential.
and
FilterMonitor
'1.Thethermostatis
preset
todisplaythe
temperaturein
degrees
Fahrenheit
{US l-
models)
or
degrees
Celsius
(Canadian i-
models).The
temperature
displaycanbe 5[ Ft t
changed.Pressand
hold
both
the
SELECTandSETbuttons
for
threeseconds.
Thedisplaywillflash
eitheranForC.Releasebuttons.
Press
the
A or
V buttontoswitch
thedisplay.
PressSET.Thedisplaywillswitch
to
theclock
setting
Press
SET.
The
display
willswitchtothedifferentialsettin
g
for2"d
stageheatingandcooling.
ThedisplaywillreaddiF2.PresstheA
or
V button
toadjustthedifferential
up
0r00wn.
PressSET.Thedisplaywill
switchtothe d 'Fe
differentialdelav.
Thedisplaywillread
dLY2.
The
differentialdelayisthelengthoftime -l
(in
minutes)
fromwhenthelststage l-r
engages,
untilthe
2nd
stage
engages
to dL 5r- l-
assist
inheatingorcooling.
Press
theA
orV buttontoadjust
thedelay
upordown.
Press
SET.
Thedisplay
willswitchtotheEnergyEfficient
Recovery
(EERTM)
setting.
11.Thedisplaywill
readEER.Whenturned
on,the
thermostat
willlook
aheadto
determine
whentoturnonthe
heating/cooling
systeminorder
toreach
thedesiredtemperatureatthedesired
time.PresstheA or
V buttontoturnEERon
or
10.
SETTINGTIMEOTDAYAND
DAY
OFWEEK
1. Press
SELECTuntilthe
cursoris
overSETCL0CK.PressSET.The
H0URSsegmentwillbeblinking.
UsetheA orV buttontoadjust
thetime.
NOTE:
TheAM
or
PM
indicatorwillchangeasthe
H0URSdisplayrollsthrougha24
hourcvcle.
MON= MONDAY
TUE = TUESDAY
WED
= WEDNESDA
THU = THURSDAY
FRI = FRIDAY
SAT = SATURDAY
SUN = SUNDAY
MOtr ruE WED THU FRI
rl.nn ^.
IL'UIJ
13.
12. PressSET.Thedisplay
will
switchtothe
filtermonitorsetting
CHECKFILTERandthe
lengthofhoursfor
thefiltermonitor
will
be
displayed.
Use
the or
V toadjustthe
filter
timer
from0
(0FF)
to9900
hours.NOTE:The
filtertimerisbasedonequipmentrun
time.
Selectthe
lengthoftimebasedontherecommended
service
intervalfor
vour
filter.
15. Press
SET
toreturntonormaloperation.
Begin
ProgrammedOperation
1. MakesurethecursorisaboveRUN/SETPR0G.
2. Place
* nUfO-Olt
swirchintoAUTO.
3. PlaceHEAT-0FF-C001switchinto
C00Lor
HEATdependingon
theseason.
Temporary
ProgramHold
You
cantemporarily
increaseor
decrease
thetemperatureandhold
itfor
3hoursoruntilthe
next
program
event,
whichever
comes
first.
i. Press
theA or
V button.Thetemperaturewillblink.Using
theA
V orbutton,adjustthe
temperature
to
the
desired
level.
2. PressSET. q
2. PressSET.TheMlNUTESsegmentwillbeblinking.UsetheA or
V
buttontoadjusttheMINUTESsetting.
3. Press
SET.
TheDAY
segment
will
beblinkingat
thetopofthe
display.Usethe
A or
V buttontoadjustthedayofthe
week.
Press
SET.
PROGRAMMINGYOURTHERMOSTAT
The8625thermostatfeatures1-button
programming.
Simply
followthese
stepsto
customize
your
thermostatfor
your
lifestyle.
1. PlacetheHEAT-OFF-C001switchintotheHEAToosition.
Make
sure
thecursorisintheRUN/SETPR0G
position.
PressSET.The
H0URS
segmentwillbeblinking.MONthruFRI
(the
workweek)will
bedisplayed
across
thetop.
AMIwillbeilluminatedinthe
lower
right
handcorner.
You
can
now
start
programming
thefirsteventofthe
workweek.
UsetheA orV buttontoadjustthehourofthefirstevent.
Press
SET.
TheMINUTES
segmentwill
beblinking.UsetheA or
V buttonto
adjusttheminutes.PressSET.
Thetemperatureshouldbeblinking.Usethe or
V button
to
adjustthedesiredtemperatureofthefirstevent.PressSET.
AM2
should
nowbedisplayed.Hepeat
steps2-4to
program
the
remaining
events MoNru€wEDrHuFRI
(PMl
andPM2)fortheworkweek.There
areatotalof4events. !f,[[ ^"
The
display
willreadCLOC.Use
theA
orV buttontotogglebetween
'12
or24
fortheclocksetting.
PressSET.
The
displaywillswitch
tothe
differential
settingfor1*stage
heating
andcooling.
Thedisolav
willreaddiFF.
Press
the or
V buttontoadiust
the
differentialupor
down.
J.
5.
Tr ni-
LL UL !T
ih
vaca set
hold clock
/-- n-
run/settemp
prog hold
G"b.D
rnnn
IU
UU
d,FF
Another
wayto
select
a
temporaryholdis:
1. Press
SELECTuntilthecursoris
overTEMPH0LD.
Press
SET.
Thetemperaturewillbe
blinking.Usethe
A or
V button
tochange
thetem0erature.
2. Press
SET.
To
cancelatemporary
hold,
press
SELECTuntilthe
cursoris
aoove
RUN/SET
PR0G.PressSET.
Vacationl'lold
Youcansetyourthermostattoholdadesiredtemperature
for1-365
days.
Vacationhold
terminatesatmidnightofthelastday.Thethermostat
returnstonormal
operationthenextdayat
12:01AM.
1. Press
SELECT
untilthecursor
isoverVACH0LD.
Press
SET.The
temperature
willbeblinking.UsetheA or
V buttontochange
the
temperature.
2. Press
SET.
7dwill
be
displayed.
UsetheA or
V button
toadjust
between1and365davs.
3. PressSET.
Tocancelavacationhold.
oress
SELECTuntilthecursor
isabove
RUN/SETPR0G.Press
SET.
Check
Filter
Reset
0ncethe
filter
timerhasexpired,
CHECKFIITERwillturnonandstay :
on. To clearthe messageand resetthe cHEcKFTLTER
trmer: I
1.PressSELECTand
SET
andholdfor
3seconds.C[rwillaooearinthe
timedisplay.
2.Pressanykeyto
clear
themessage.
Thedisplaywilltransition
tothetem-
perature
scale
display.Seestep
4in
CUSTOMIZING
YOURTHEBMOSTAT.
3.
Nofurtherinput
isneeded-
Within
a
return
tothe
normal
operating
mode.
few
seconds,thedisplay
will
Reset
The
BESET
buttonislocatedabovetheupperleftcornerofthe
display.
0nlyusetheresetfeatureifthethermostatismalfunctioning.
BESET
BUTTON
lf
problems
withthermostatcannotberesolved,call:
Technical
SupporL
(800)
445-8299
Monday-Friday7:30-5:30CST
Forafterhours
service,a
24-hour
automated
helolineisavailable.
Forwarrantyreturns,sendthermostat,
shipping
prepaid
to:
ClimateControlsAmericas
WarrantyDepartment
515SouthPromenadeAvenue
Corona.CA
91719
TWO.YEAR TIMITEDWARRANTY
Climate
ControlsAmericaswarrantstothe
originalcontractor
installerortothe
originalconsumeruser,eachnewRobertshawthermo-
stat
to
be
free
fromdefectsinmaterialsandworkmanshioundernormal
useandservicefora
period
oftwo
(2)
years
from
dateof
purchase.
This
warranty
andour
liability
doesnotapplytobatteriesor
merchandise
that
has
beendamagedbymisuse,neglect,mishandling,alterations,improper
installation,orusein
a
wav
other
thanin
accordance
withClimate
ControlsAmericasrecommendations
andinstructions.
ClimateControlsAmericas
agreesto
repair
or
replace
at
its
option
anythermostatunderwarranty
provided
itisreturnedwithinthewarranty
period,
postageprepaid,
with
proof
ofthedate
of
purchase.
Cost
ofther-
mostatremoval
orreinstallationisnottheresponsibilitvofGlimate
Controls
Americas.
Repair
orreplacementas
provided
under
this
warrantyistheexclusive
remedy
oftheconsumer.ClimateControlsAmericasshallnotbeliable
foranyincidentalorconsequentialdamages
for
breach
ofanyexpressor
impliedwarrantyonthis
product,
orunder
anyothertheoryofliability.
Excepttotheextent
prohibited
by
applicable
law,any
implied
warrantyof
merchantability
or
fitness
fora
particular
purpose
onthis
product
islimit-
edto
the
durationofthiswarranty.
Somestatesdo
not
allowtheexclusionorlimitationof
incidental
orcon-
sequentialdamages,orallow
limitations
onhowlongan
implied
warranty
lasts,
sotheabove
limitations
orexclusionsmaynotapplyto
you.
This
warranty
givesyou
specific
legalrights,
and
you
mayalso
have
other
rightswhichvaryfrom
state
to
state.
InvgnSyS. Climate
ControlsAmericas
191E.NorthAvenue
Carol
Stream.lttinois
60188
United
Statesof Amenca
O2004Climate
Controls
Americas 12
Troubleshooting
symptom Remedy
Thermostat
does
notturn
onsystem. Check
wiring.
(See
Installinglrem
8625
Themostat)
Thermostatturnsonand
offtoo
frequently. Increase
temoerature
differential.
{See
Programming
Guide}
System
fan
does
not
operate
properly. MovetheElectric/Gasswitchto
either
gas
orelectric,tomatch
system.
(See
Installingltem
8625
Thermostat)
llmeshown
ondisplayisnot
the
currenttime
ofday. Change
timeofdaysetting.
{See
Programming
Guide}
t
-l
Thermostat
doesnot
follow
program. Thermostatmaynothavebeen
programmed
inHEATorC00L
position.
Verify
program.
Check
AM/PMindicators
at
time
ofdayand
programmed
time
cnanges.
(See
ProgrammingGuide)
Verify
program
and
dayof
week
arecorrect
(See
Programming
Guide)
lL'-
10

Other manuals for 8625

2

Other Robertshaw Thermostat manuals

Robertshaw 300-224 Technical specifications

Robertshaw

Robertshaw 300-224 Technical specifications

Robertshaw RS456-WIFI User manual

Robertshaw

Robertshaw RS456-WIFI User manual

Robertshaw 9401 User manual

Robertshaw

Robertshaw 9401 User manual

Robertshaw C8601 User manual

Robertshaw

Robertshaw C8601 User manual

Robertshaw 9720 User manual

Robertshaw

Robertshaw 9720 User manual

Robertshaw RS4110 User manual

Robertshaw

Robertshaw RS4110 User manual

Robertshaw 9405 User manual

Robertshaw

Robertshaw 9405 User manual

Robertshaw 9820I User manual

Robertshaw

Robertshaw 9820I User manual

Robertshaw RS4000C Series User manual

Robertshaw

Robertshaw RS4000C Series User manual

Robertshaw 9701i2 User manual

Robertshaw

Robertshaw 9701i2 User manual

Robertshaw 9851i User manual

Robertshaw

Robertshaw 9851i User manual

Robertshaw 9725i2 User manual

Robertshaw

Robertshaw 9725i2 User manual

Robertshaw 9620 User manual

Robertshaw

Robertshaw 9620 User manual

Robertshaw RS4110 User manual

Robertshaw

Robertshaw RS4110 User manual

Robertshaw smart 3000 User manual

Robertshaw

Robertshaw smart 3000 User manual

Robertshaw RS9210 User manual

Robertshaw

Robertshaw RS9210 User manual

Robertshaw RS6110 User manual

Robertshaw

Robertshaw RS6110 User manual

Robertshaw 8400 User manual

Robertshaw

Robertshaw 8400 User manual

Robertshaw 9515 User manual

Robertshaw

Robertshaw 9515 User manual

Robertshaw 8425 User manual

Robertshaw

Robertshaw 8425 User manual

Robertshaw RS9220 User manual

Robertshaw

Robertshaw RS9220 User manual

Robertshaw RS9320T User manual

Robertshaw

Robertshaw RS9320T User manual

Robertshaw 9560 User manual

Robertshaw

Robertshaw 9560 User manual

Robertshaw 9801I User manual

Robertshaw

Robertshaw 9801I User manual

Popular Thermostat manuals by other brands

Vive TP-N-801 operating manual

Vive

Vive TP-N-801 operating manual

Daikin TSTATD2200C-2 Owner's manual and installation instructions

Daikin

Daikin TSTATD2200C-2 Owner's manual and installation instructions

AuVerte Ondur C501 installation guide

AuVerte

AuVerte Ondur C501 installation guide

Verdant VX Series installation manual

Verdant

Verdant VX Series installation manual

Chacon 54311 user guide

Chacon

Chacon 54311 user guide

Honeywell CT3451 owner's guide

Honeywell

Honeywell CT3451 owner's guide

Regulus BB1-1000 instruction manual

Regulus

Regulus BB1-1000 instruction manual

Lux Products PSDFC159 Installation and operating instrictions

Lux Products

Lux Products PSDFC159 Installation and operating instrictions

Honeywell CT3200 series Installation and programming instructions

Honeywell

Honeywell CT3200 series Installation and programming instructions

Honeywell VisionPRO TH8000 Series installation guide

Honeywell

Honeywell VisionPRO TH8000 Series installation guide

UPM Elite THM701 user guide

UPM

UPM Elite THM701 user guide

Siemens RDF340 Series operating instructions

Siemens

Siemens RDF340 Series operating instructions

Celect DRF3 instruction manual

Celect

Celect DRF3 instruction manual

Verdant V8-BB-7S instruction manual

Verdant

Verdant V8-BB-7S instruction manual

Continal 39003-tsrf quick start guide

Continal

Continal 39003-tsrf quick start guide

TOTALINE Easy Stat owner's manual

TOTALINE

TOTALINE Easy Stat owner's manual

NPower Smartpower quick start guide

NPower

NPower Smartpower quick start guide

Drayton Digistat 1 Installation and operating instructions

Drayton

Drayton Digistat 1 Installation and operating instructions

manuals.online logo
manuals.online logoBrands
  • About & Mission
  • Contact us
  • Privacy Policy
  • Terms and Conditions

Copyright 2025 Manuals.Online. All Rights Reserved.