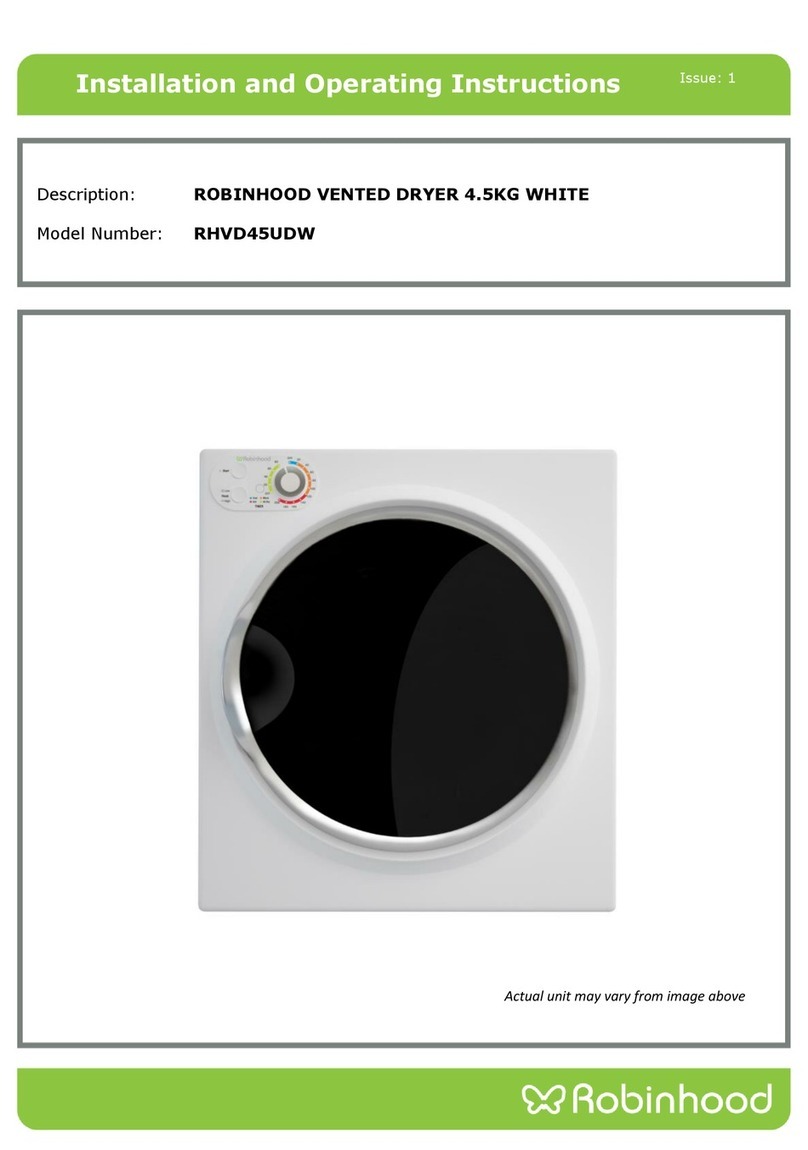
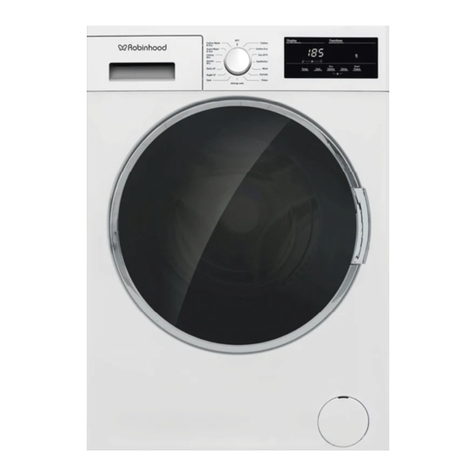
ROBINHOOD RHHPD7W User manual

Issue1
Robinhood Clothes Dryers
RHHPD7W
Description:
Model Numbers:

Catalogue
Safety information.............................................................1
Installation.........................................................................6
Attention and advice...........................................................?
Part description..................................................................8
Description ofcontrols......................................................10
Operation instruction........................................................12
Programme table.............................................................13
Specialty drying function .................................................14
Cleaning androutine maintenance..................................16
Error codes, solutions and precautions......................................17
Technical specifications...................................................18
Safety information
Laundry Symbols
Before placing clothes in this dryer, check for laundry symbols
which may indicate the suitability of using this appliance:
□
D
ry
□
N
orma
l
Not tumble
dry normal
)Z[
Do not dry
El
Line dry / hang to dry
[ill]
Dripdry
E]
Dry flat
In the shade
0
Dry clean
©
Do not dry clean
@
Dry
clean
norma
l
cycle
with any solvent
®
Dry clean normalcycle
petroleum solvent only
Safety notes
To prevent dama
g
e to your appliance and prevent personal in
j
ury
,
please read and follow the following safety information.
1.
Thisapplianceisnotintendedforusebypersons(includingchildren)
with reduced physical, sensory or mental capabilities, or lack of
experienceorknowledge,unlesstheyhavebeengivensupervisionor
instructionconcerningtheuseoftheappliancebyapersonresponsible
fortheirsafety.Childrenshouldbesupervisedtoensurethattheydonot
play with theappliance.
2.
In certain circumstances electrical appliances may be a danger hazard.
Check theconformity of voltage and power settings, whichare specified on
theinformationplateattachedtotheapplianceand/orpackaging,withthe
usage conditions available.
3.
Donotplaceheavyobjectsinorontheseappliances,oruseforstorage,
orletchildrenplayorswingfromthedoor.Donotusetheappliancesuntil
fully installed.
4.
The electrical connection must be accessible after installation. The
appliancemustbeelectricallyisolatedbeforeanymaintenancecanbe
performed.Theapplianceisnotintendedtobeoperatedbymeansofan
external timer orseparate remote controlsystem.
1
6.

5.
Ifthesupplycordisdamaged,itmustbereplacedbythemanufacturerorits
serviceagentorasimilarlyqualifiedpersoninordertoavoidahazard.
6.
Thetumbledryerisnottobeusedifindustrialchemicalshavebeenusedfor
cleaning.
7.
WARNING: Clean the lint trap regularly.
8.
Lint must not be allowed to accumulate around the dryer. Not applicable for
appliances intended to be vented.
9.
Adequateventilationhastobeprovidedtoavoidthebackflowofgasesinto
theroomfromappliancesburningotherfuels,includingopenfires.
10.
CAUTION-Ifthisapplianceissuppliedfromacordextensionsetor
an
electricalportabledevice,thecordextensionsetorelectricalportable
device
must be positioned so that it is not subjected to splashing or ingress of
moisture.
11.
Itemsthathavebeenspottedorsoakedwithvegetableorcookingoil
constituteafirehazardandshouldnotbeplacedinatumbledryer.Oil-affected
itemscanignitespontaneously,especiallywhenexposedtoheatsourcessuch
as a tumble dryer. The items become warm, causing an oxidation reaction in the
oil.Oxidationcreatesheat.Iftheheatcannotescape,theitemscanbecomehot
enoughtocatchfire.Piling,stackingorstoringoil-affecteditemscanprevent
heat from escaping and so create a fire hazard.
12.
Ifitisunavoidablethatfabricsthatcontainvegetableorcookingoilor
have beencontaminatedbyhaircareproductsbeplacedinatumbledryer
they shouldfirstbewashedinhotwaterwithextradetergent-thiswill
reduce,but
not eliminate, the hazard. The "cool down" cycle of tumble dryers
should not be used to reduce the temperature of the items. They should not be
removed from
thetumbledryerorpiledorstackedwhilehot.
13.
This appliance is for indoor use only.
14.
Items that have been previously cleaned in, washed in,
soaked in or spottedwithpetrol/gasoline,Dry-cleaningsolventsorother
flammableor
explosive substances should not be placed in a tumble dryer.
Highly flammable
substances commonly used in domestic environments
include acetone,
denatured alcohol, petrol/gasoline, kerosene, spot
remover (some brands),
turpentine, waxes and wax removers.
15.
Itemcontainingfoam rubber (alsoknownaslatexfoam)orsimilarly
texture rubber-like materials should not be dried in a tumble dryer on a heat
setting.
Foam rubber materials can, when heated, produce fire by
spontaneous
combustion.
16.
Fabric softeners or similar products should not be used in a
tumble dryer to eliminate the effects of static electricity unless this practice
is specifically
recommendedbythemanufacturerofthefabricsofteneror
product.
17.
Undergarments that contain metal reinforcements should not be
placed in a tumble dryer. Damagetothe tumble dryer can result if metal
reinforcements come loose during drying. When available a drying rack could
be used for such
items.
18.
Plastic articles such as shower caps or babies' waterproof napkin
covers
should not be placed ina tumble dryer.
19.
Rubber-backed articles, clothes fittedwithfoam rubber pads,
pillows, galoshes and rubber-coated tennis shoes should not be placed in
a tumble
dryer.
20.
Do not cover the air inlet or exhaust openings.
21.
If appliances has ventilation openings in base, ensure carpet
does not
obstruct theopenings.
22.
Theappliancemustnotbeinstalledbehindalockabledoor,a
slidingdoor oradoorwithahingeontheoppositesidetothatofthetumble
dryerinsucha
waythatafullopeningofthetumbledryerdooris
restricted.
23.
The maximum mass of dry load is 7kg.
24.
The final part of a tumble dryer cycle (cool down cycle) occurs
without heat
toensurearticlesareleftattemperaturesthatwon't
damagethem.
25.
WARNING: Never stop a dryer before the end of the drying cycle
unless
allitemsarequicklyremovedandspreadouttoallowheat
dissapation.
26.
Donotoverturntheapplianceeither duringoperation
or during
maintenance.

2
�
Robinhood
3
�
Robinhood

27.
Alwaysremoveitemsfrompockets(especiallyflammableslike
matches).
Correct Disposal of this product:
Thismarkingindicatesthatthisproductshouldnotbe
disposedwithotherhouseholdwastesthroughoutthe
EU.To preventpossibleharmtotheenvironmentor
human health from uncontrolled w�ste disposal, recycle
itresponsiblyto promotethesustainablereuseof
material resources. To return your used device, please
usethereturnandcollectionsystemsorcontactthe
retailerwheretheproductwaspurchased.Theymay
takethis productfor environmental saferecycling.
4
r:;t;;Robinhood
Electric shock hazard
1.
Do notpull the power cord to disconnect with the power
source. Always grasp the plug to pull it out.
2.
Donotusewethandswhen disconnecting thepower.
3.Donotdamagethepowercordandthepowerplug.
Injury danger
1.
Donotdisassembleandinstallthedryerundernoinstruction
or supervision.
2.
Do not stack this dryer on washing machine without stacking
kits.(ifwantstackingonwashingmachine,pleasepurchasethe
Independentpartsanditmustbeinstalledbythemanufacturer,
itsserviceagentorsimilarlyqualifiedpersonsinordertoavoida
hazard.)
3.
Donotleanontheopeneddoorofthedryer.
4.
Donotplacehotorburningitems (forexamplecandles)on
this appliance.
Damage danger
1.
Donotdryover therated capacity.
2.
Donotoperatethedryerwithoutthefilterdoor andfilterbase.
3.Do notdrytheclothes before being spun.
4.
Donotexposethedryerdirectlyunderthesun, andindoor
use only.
5.
Donotinstall thedryerinthehumidanddrenching
environment.
6.
Atthecleaningandmaintenance, pleasedoremembertopull
outthepowerpluganddonotdirectlywashthedryerwith
water.
Explosion danger
Pleasedonotdrytheclotheswithsomeflammablesubstances
suchascoaloil, alcoholortherecould beanexplosion.
5
r:;t;;
Robinhood

�
check that the dryeris absolutely levelwith the aid
(about800g)
800gincotton)
(about800g)
Q
BlendedCoats
�
Jackets (about
@
0
Transport
M
ove cautiously. Do not grasp any salient parts of machine. The appliance door must not
be used as the handle for delivery. If the dryer can
'
t be transported erect, the dryer can be
slanted to right less than 3
0
0
.
Installation Position
1.
Itisrecommendedthat,foryourconvenience,themachineispositionedclosetoyourwashing
machine.
2.
Thetumbledryer mustbeinstalledinacleanplace,wheredirtdoesnotbuildup.Airmustbeable
to circulate freely all round the appliance. Do not obstruct the front air inlet or the air intake grilles
at the back of the machine.
3.
To keep vibration and noise to a minimum when the dryer is in use, ii should be placed on a firm
and levelsurface.
4.
The feet must never be removed. Do not restrict the floor clearance through deep pile carpets,
strips of wood or similar. This might causeheatbuilt-up which wouldinterfere with the operation
of the appliance.
Level Adjusting
Attention
0
Leave to stand for 2 hours after transporting. Be fore first use, please use soft fabric to
to clean the inside drum.
a)
Put someclean ragsinto thedrum.
b)Plugin the power, press [On/Off
l
c)
Select the
[
Refreshl Programme, press
[
Start/Pausel button.
d)
After finishing this programme, please follow the "cleaning and routine maintenance" (refer to page
15) to clean the filter door.
During drying, the compressor and the water pump generate some noise.
Advice
1.
Before drying, thoroughly spin the laundry in washing machine. High spin speed can reduce the drying
time and save energy consumption.
2.
For uniform drying result, sort the laundry according to fabric type and drying programme.
3.Before drying, pleaseclose zips, hooksand eyelets,buttonup, tiefabricbelts, etc.
4.
Do not over dry the clothes, becauseover dried clothes can easily get creases or shrinkage.
5.
Do not dry the articles containing rubber or similar elastic materials such as raincoats, bicycle covers and
etc.
6.
Do not open the door before the program is finished - doing so may cause injury via heat.
?.Cleanthe lintfilter and emptycontainer after each useto avoid extensionofdryinglime andenergy
consumption.
8.
Please choose the related programme when drying wool material. This will ensure woolens are fresh
and fluffy.
9.
The Weight
R
eferences as follows:
I
WorkClothes
SingleSheets (upperandlower)
Pajamas
Shirts (about
Power Supply Connection
(about600gin
(about1120gin
cotton) cotton)
�
(about200g) 300g incotton)
1.
Makesure thatthevoltageofthepowersupplyis the sameastheelectricspecificationofthe dryer.
Undershirts
(about 180gin
Underpants Socks (about 30g in
�
(about70gin blendedmaterial)
2.
Do not connect the dryer with the power connection board, the universal plug or socket.
6
ftfJRobinhood 7
�
cotton)
cotton)
ftfJRobinhood
Once in its permanent operating position,
ofaspiritlevel.Ifitisnot,adjustthefeetwithatool.
0
{IJ;j)
(about900g
o
Jeans Trousers
Towel Quilts
in cotton)

Filtercover
Airinlet
Door
Controlpanel
6.Pressthe[Start/Pause
l
button
8.Pressthe[ On/Off
l
key
)
7.Removethelaundrywhen
shed
5.Selectthedesired
programme
j
I.
4.Plugthepowercordand
pressthe[On/Off]key
\
empty container
\
9.Cleanthefiltersand
10.Unplugthepower cord
j
LJ
loadthelaundry
I
3.Close themachinedoor
2.Openthedoorand
1.Checkifthecontainerandfilters
havebeen cleaned up
Quick start
Step3:putthehoseholderonthewashingbasinoranyothersink.
Part description
Step2:insert theexternaldrainagehose.
Step1:removingthedrainhosefromthe
hoseconnector usingplier.
Installation step:
Condensing drain
hose(optional)
Hose holder(optional)
b
e
l
ow.
Accessories
The following parts are optional for specific models.
Ifyourdryerhasfollowingparts,pleaseinstallthemfollowingtheinstruction
Part Description
Part description
8
9

1.
Programme Selection knob
2.Display
3.Specialty function buttons ( Delay, Time, Intensity, Lamp, Signal, Anti-Crease, Childlock)
4.Start/Pause button
5.0n/Off button
Display
;
a
..
10
f;:;JRobinhood
11
f;:;JRobinhood
0
Delay start
0.)
Time
[-9-
Child lock
B:BB
Remaining Time indicator/Error message
BE>Mllll
Cycle phase status
m
Filter
Clean filters (warning)
Full ID Empty water container (warning)
-
'
•
I
,
-
,,,
·:$:· ·P:· ·:$:· ·»-·
Dryness level (four grades)
Drum lamp indicator
c(I>>)
Signal indicator
R)
Anti-crease mode

LED display screenlightsup, rotatethe programme
2.
Ifthereisanunexpectedstoppageduringthedryingcycleandthemachinedisplaysanderror
code, please refer to page 17.
Occasionally the drum may suspend for approximately 4
0
seconds during the drying process.
Thisisnormal.Thedryerisautomaticallyadjustingitstimeandwillcontinueoperationshortly.
The drum will keep rotating after the program starts, the status light in the display area will flash in
Selecting the programme
12
13

Specialty drying function
1.
Instruction
to
the
[
Delay
l
drying
procedure
To delay the drying programme from O hour to 24 hours. The delay time means the programme
will start after x hours. When the delay programme starts, the time starts to decrease on the
display and the
0
icon blinks.
Steps in details
(1).Load your laundry and make sure the machine door is closed.
(2).Press
the
[
On/O
ff
]
button,then
to
turn
the
programme
selector
knob
and
select
a
desired
programme.
(3).You
can
select
the
[Anti-Crease
l
or
[
Signal
l
functions
according
to
your
need.
(4).To press the [Delay] key.
(5).Continue
to
press
the
[
Delay
l
to
select
the
delay
time.
(6).After
the
[
Start/Pause
l
key
is
pushed,
the
dryer
is
at
the
run
condition.
The
drying
procedure
willbe automatically performedwhenthedelaytime is over.
(7).lfyoupush the [Start/Pause] buttonagain,thedelay functionwillbepaused.
(B).If
you
want
to
cancel
the
"Delay"
function,
please
press
the
[
On/O
ff
]
button.
2.
Instruction of the [Time l function
When
the
time
p
ro
gramme
i
s
selected,
the
[T
ime
]
button
c
an
b
e
used
to
adjust
the
drying
t
i
me
i
n
10 min. steps. The maximum time is 150 min.
3.
I
nstruction
o
f
the
[
Intensity
l
function
U
sed
to
adjust
the
dr
y
ness
level
o
f
the
laundry.
T
he
l
eve
l
has
four
grades
*
*
.,:,.
*.
The drying time increases 3 minutes in every grade.
(1).The intensity function can be activated only before the programme start.
(2)
.
P
ress
the
[
I
nt
e
ns
i
t
y
l
button
repeatedly
to
select
the
drying
time.
(3).E
xcept
the
[
Cotton
Iron]
[Delicate]
[Synthetic
Iron]
[Wool][Time]
,
all
other
p
ro
g
r
ammes
can
h
a
ve
the
[
I
ntensity
l
function
applied.
4.
Instruction
of
the
[
My
Cycle
l
function
Used to define and save your favorite proragmmes that are used frequently.
(1).Use the programmeselectorto selecttherequiredprogrammeandotherdrying functions.
(2).Press
and
hold
the
[
Intensity
l
button
for
3
s
eco
nds
until
the
display
flashes
and
the
required
programme has been saved.
(3).Turn
the
programme
selec
t
or
to
the
[
My
Cycle
l
position,
you
c
an
start
y
our
favorite
proragmme.
If
yo
u
want
to
c
hange
the
[
My
Cycle
]
settings,
repeat
the
steps
(1)
and
(2).
5.
Instruction of the [Lampl
Thelamp inside the drum will come on for 3 minuteswhenthe buttonispressedor1 minute whenthe
door is opened.
6.
[
S
ignal]
Turning the buzzer on or off. The buzzer is automatically set to "on". Press the [signal]
key to change.
(1)
D
ryer will sound if extra functions are selected.
(2)
If t
h
e dryer is running and the function knob is rotated the dryer will sound to remind
the user this is not a valid operation.
(3)
W
h
en the dry cycle is complete the buzzer will sound.
7.
Instruction of the [Anti-Crease l function
At the end of the drying cycle, the anti-crease operation time is 30 minutes (default )
or 120 minutes (selected).
The
[
An
ti
-Creas
e]
light
shall
illuminate
when
the
anti-crease
function
is
selected.
This
function
prevents the laundry from creases. The laundry can be removed during the anti-crease phase. Except
[
Cool
l
,
[
Refresh]
and
[Wool
l
,
all
the
other
programmes
have
this
function.
8.
Instruction
of
the
[
Child
Lock]
feature
(1).This machine incorporates a special child safety lock, which can prevent children from carelessly
pressing keys.
(2).When t
h
e dryer isin operation, press the [anti-crease]and [signal] buttons at the same time for
3secondstoengage c
h
ildlock.Whenc
h
ildlockissetthedisplaywillshow"{,-9-"iiconandnoother
keys except [on/off] can beused. To remove child lock pressthe [anti-crease] and [signal]
buttons at the same time for 3 seconds.
14
r:;;oRobinhood
15
r:;;oRobinhood

•
Empty the water container
1.
Hold and pull out the water container
with two hands;
2.
Tilt the water container, pour out the
condensed water intobasin;
3.
Install the water container.
WARNING:
Malfunction display and solutions
Dispiay Reason Solutions
Containerisfull
Empty container
"ID "is on Water pump failure or water
level sensor failure Please contact your
1.
Empty the water container after each use, the programme will be paused and the"ID "
icon will flash ifthe water container isfull during thedryingprocess.After the container
is
emptyed, the dryer can be restarted by pressing [ Start/Pause] button.
2.
Do not drink the condensed water
3.
Do not use the dryer without the water container.
Clean the filter door
"E32" Humidity sensor failure
"E33"
Temperature sensorfailure
Precautions
0Only authorisedtechnicanscancarryoutrepairs.
local service center
if the problem
persists
1.0pen the door.
2.
Take out the filter door.
3.
Clean the filter door; wipe offthe scrap threads
accumulated on the filter door.
4.
Reinstall the filter door.
Clean filter base
1.0pen the filter cover.
2.Unscrew both locking levers towardas each other.
3.Clean the filler base completely.
4.Re-insert the filter base!
5.Screw both locking levers.
6.Close the filter cover flap until it locks into position.
NOTE! Lockin lever
1.The fluff accumulated on the filter will block the air circulation,
which will cause the extension of drying time and energy consumption;
2.Do disconnect the power cord before cleaning!
3.
Do not operate the dryer without thefilter!
4.
Clean thefilteraftereachuse to prevent lint accumulation insidethedryer.
Clean heat exchanger
Asnecessary, approx. once every 2months, remove thefluff from
theheat exchangerusingthe sponge or soft brush.
Whendoingthis, please use gloves.
Note: The fluff can be removed more easily if it isfirst
dampened e. g. with a laundry dampener.
Beforeyoucallcustomerservice, pleasecheckifyoucandealwith thefaultby
yourself or if you have followed the user instructions.
A technician will charge you for advice, even during the warranty period.
Problem
Solution
•
Display does not •Check if the main plugisinserted.
light up
•Check if the programme is selected.
Check the main power supply.
•Check if the start button is pushed.
•Check if the door is entirely closed.
•
Press door until it "clicks"into position.
•
Check if the clothes is over load .
•
Degreeof drynessisnot
•
Clean the filter door and filter base.
reachedordryingtimetoo •Usetheappropriateprogramme.
long • keep the Air inlet clear.
0 If you cannot deal with the fault by yourself and need help:
1.
Pre
ss
the
k
ey
[
O
n/Off
]
.
2.
Pull out the mains plug and call the service department.
16 (;t)Robinhood 17
r;:;:;Robinhood
•
Dryer doesnot start
•
Door is open by itself

Specification
, Power supply 220-240V~ 50Hz .,,
Rated power 650W
Refrigerant R134a
Ambient temperature
+5c:~+35c
OverallSize 595x622x845(mm)
RatedDrying Capacity 7. 0kg
NetWeight 51kg
\..
,J
Contains fluorinated greenhouse gases covered by the Kyoto Protocol.
Hermetically sealed
Note:
1.
Therated capacity is the maximumcapacity, make sure that the dry clothes which are loaded to the appliance do not
exceed the rated capacity each time.
2.
Donot install the tumble dryer ina roomwhen there is a risk of fros t occurring. Attemperatures around freezing point the
tumble dryer may not be able to operate properly.
3.
There is a risk of damage if the condensed water is allowed to freeze in the pump, hoses and/ or condensed water container.
18
f;:;JRobinhood
19
f;:;JRobinhood

Warranty Certificate (New Zealand)
Terms and Conditions
The following conditions apply in respect of the warranty given in this certificate:
1. Monaco Corporation Limited (“Monaco”) warrants the following Robinhood products against manufacturing defects and
faulty materials, under normal use and subject to the exclusions in this certificate, for a period of:
Rangehood, Ovens, Cooktops, Dishwashers, Refrigeration, Washing machines, Clothes Dryers - 24 months from
date of original purchase for domestic
use.
Uniduct – 12 months from date of original purchase for domestic use.
Ironing centre – 12 months from date of original purchase for domestic use.
Sinks sets– 5 years on stainless steel sink including draining bench from date of original purchase for domestic use, 6
months on all stainless steel accessories, including wire rack, colander and tray from date of original purchase for domestic use
Laundry Tub - 5 years on stainless bowl, 24 months on Tap, Cabinet and other components from the date of original
purchase for domestic use.
“Original purchase”, when used in this certificate, means purchase by the customer directly from Monaco or one of its approved suppliers.
2.
This warranty is limited to the repair or replacement, at our option, within the warranty period of any component part
which we at our discretion determine to contain faulty materials or a manufacturing defect in breach of this warranty.
This warranty is subject to terms and conditions set out in this certificate.
3.
The warranty only applies within New Zealand.
4.
The customer must produce the original invoice or other purchase documentation as proof of the original purchase
date.
Warranty exclusions
1.
The warranty does not apply where, in Monaco’s opinion:
The defect is caused by misuse, wear and tear, dirt, fire or accidental damage.
The product has been repaired or serviced by an unauthorised person.
The product was not installed in accordance with our instructions.
The product was purchased overseas or was not designed for use in New Zealand.
The product was not used, cleaned or cared for in accordance with our instructions.
The product was used outdoors.
2.
In addition, this warranty does not extend to damage or defects which in our opinion, directly or indirectly arise from or
are due to:
Exposing the product to acidic or corrosive materials or chemicals such as dyes, solvents, denture cleaner or acetone;
Using inappropriate household cleaning products such as abrasive cream or powder cleansers, furniture polish, bleach
mentholated spirits, drain cleaners, sugar soap, metal pads and strongly alkaline or acidic cleaners;
Heat damage, including from washing the product at high temperatures;
Impact or mishandling the product, including the impact caused by objects scraped along, thrown or dropped on the
Failure to clean or maintain the product as recommended; or
product surface or excessive weight being placed on the product;
Structural or support changes in or affecting the building or the application where the product has been installed;
any other causes specified in the product information as being excluded from this warranty.
3.
Variations with the colour or gloss within the product or any ageing or fading of colour, shine or gloss level over time
are not covered by this warranty. The warranty does not cover visual imperfections or blemishes in the surface and
edges of the product that were not brought to your supplier’s attention at the time you inspected the product.
4.
Costs incurred on installation or removal of a product, or any reinstallation of a product, or any associated costs, are
not covered by this warranty.
5.
Monaco will not be liable for consequential or indirect loss or damage whatsoever and however arising out of or in
connection with the supply, performance or removal of the product, including (but not limited to) loss of profit, loss of
revenue, loss of contract, loss of goodwill or increased cost of workings, even if due to the negligence of Monaco or
any of its approved suppliers, employees or agents.
6.
Charcoal filters and light bulbs are not covered by this warranty
7.
This warranty and the statements contained in this certificate or other documents given to you do not exclude, restrict or
modify the application of any term implied into this warranty by statute, provided that (to the extent any statutory
provision permits Monaco to limit its liability for a breach of an implied condition or warranty) Monaco’s liability for such
breach is limited to the payment of the cost of replacing the product, repairing the product or acquiring an equivalent
product.
8.
Subject to clause 5, our obligations under this warranty are limited to those set out in this certificate, and this warranty
is expressly instead of all other warranties, express or implied, including any implied warranty of merchantability or fitness
for a particular purpose and notwithstanding any course of dealing between the parties or custom and usage in trade to
the contrary.
Terms and conditions are subject to change.
Warranty Certificate (Australia)
Terms and Conditions
If you are a consumer under the Australian Consumer Law, our goods come with guarantees that cannot be excluded under the Australian Consumer
Law. You are entitled to a replacement or refund for a major failure and for compensation for any other reasonably foreseeable loss or damage. You are
also entitled to have the goods repaired or replaced if the goods fail to be of acceptable quality and the failure does not amount to a
major failure
1.
ShriroAustraliaPtyLimited(“Shriro”)also warrantsthefollowing Robinhoodproductsagainstmanufacturingdefectsandfaulty
materials, under normal use and subject to the exclusions in this certificate, for a period of:
Rangehood, Ovens, Cooktops, Dishwashers, Refrigeration, Washing machines, Clothes Dryers -
24 months from date of original purchase for
domestic use.
Uniduct –
12 months from date of original purchase for domestic use.
Ironing centre –
12 months from date of original purchase for domestic use.
Sinks sets
– 5 years on stainless steel sink including draining bench from date of original purchase for domestic use, 6 months on all
stainless steel accessories, including wire rack, colander and tray from date of original purchase for domestic use.
Laundry Tub -
5 years on stainless bowl, 24 months on Tap, Cabinet and other components from the date of original purchase for
domestic use. “Original purchase”, when used in this certificate, means purchase by the customer directly from Shriro or one of its
approved suppliers.
2.
This warranty is limited to the repair or replacement, at our option, within the warranty period of any component part which we at our discretion
determine to contain faulty materials or a manufacturing defect in breach of this warranty. This warranty is subject to terms and conditions set out in
this certificate.
3.
The warranty only applies within Australia.
4.
For warranty service outside of capital city metropolitan area or 30 km from nearest authorised service agent you will be liable for reasonable
travelling expenses and the cost of transport of the product or parts to and from the service agent
5.
To make a claim under this warranty, you must produce the original invoice or other purchase documentation as proof of the original purchase date.
You must send your claim to Shriro Australia Pty Limited, 104 Vanessa Street, Kingsgrove NSW 2208 within 7 days of any alleged defect or failure of
the product first becoming apparent, you are responsible for the expense of making a claim under this warranty.
This warranty is given by:
Shriro Australia Pty Ltd
ABN 28 002 386 129
Telephone: 1800 648 556
Facsimile: 1800 628 577
Email: customercare@shriro.com.au
www.robinhood.com.au
Attention Customer Services Manager
Warranty exclusions
1.
The warranty does not apply where, inShriro’s opinion:
The defect iscaused bymisuse,wear andtear, dirt, fire or accidental damage.
The product has been repaired or serviced by an unauthorised person.
The product was not installed in accordance with our instructions.
The product was purchased overseas or was not designed for use in Australia.
The product was notused,cleanedor cared forin accordance with ourinstructions.
The product was used outdoors.
2.
All Robinhood Rangehoods are suitable for indoor use only and not suitable over BBQs or charcoal cookers designed for outdoor use.
3.
In addition, this warranty does not extend to damage or defects which in our opinion, directly or indirectly arise from or are due to: exposing the
product to acidic or corrosive materials or chemicals such as dyes, solvents, denture cleaner or acetone; using inappropriate household cleaning
productssuch as abrasivecream orpowdercleansers,furniture polish, bleach, mentholatedspirits, drain cleaners, sugarsoap, metalpadsand strongly
alkaline or acidic cleaners; heat damage, including from washing the product at high temperatures;
impact or mishandlingthe product, includingthe impact caused byobjectsscraped along, thrown or dropped onthe product surface orexcessiveweight
being placed ontheproduct; structural orsupport changes in or affectingthe building or theapplication where the product has been installed; failureto
clean or maintain the product as recommended; or any other causes specified in the product information as being excluded from this warranty.
4.
Variations with thecolourorglosswithin the product orany ageing orfading of colour, shine or gloss levelovertime are not covered by this warranty.
The warranty does not covervisual imperfections or blemishes inthesurface and edges of theproductthatwerenotbrought toyoursupplier’s attention
at the time you inspected theproduct.
5.
Wewill not beresponsible under this warranty for, nor pay thecosts of, removing the existing product, orreinstalling thenewproduct, orany
associated costs or damages.
6.
Charcoal filters and light bulbs are not covered by thiswarranty
The benefits given by this warranty are inaddition to otherrights andremedies of consumers under any law in relation tothe goods which cannot be
excluded.
This warranty certificate is not intended to create a contract between Shriro Australia Pty Limited and the purchaser.
20 ftfJRobinhood
New Zealand
Monaco Corporation Ltd
Telephone: (09) 415 6000
Facsimile: (09) 415 7400
Email: customercare@monacocorp.co.nz
www.robinhood.co.nz
Australia
Shriro Australia Pty Ltd
ABN 28 002 386 129
Telephone: 1800 648 556
Facsimile: 1800 628 577
Email: customercare@shriro.com.au
www.robinhood.com.au
Table of contents
Other ROBINHOOD Dryer manuals
Popular Dryer manuals by other brands

Amana
Amana 40086101 installation instructions

Dri-Air Industries
Dri-Air Industries HP4-X 300 operating manual

Bosch
Bosch Vision 300 Operating Operating, care and installation instructions

American Dryer Corp.
American Dryer Corp. ML-75DII installation manual

GE
GE DBVH510 owner's manual

Samsung
Samsung DV90TA240AE user manual

Electrolux
Electrolux EDC 77150W user manual

Frigidaire
Frigidaire 137101400 installation instructions

Alliance Laundry Systems
Alliance Laundry Systems AE Series manual

GE
GE DDE8000M Use and care guide

Zanussi
Zanussi TD163 Instruction booklet

Alliance Laundry Systems
Alliance Laundry Systems CHD25G2-CT025L Programming guide