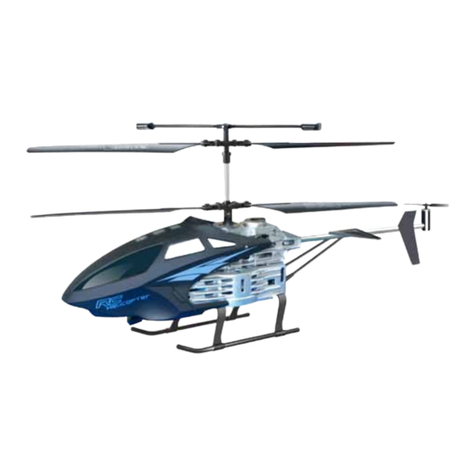
Robinson R-66 Series Lithium-Ion User manual

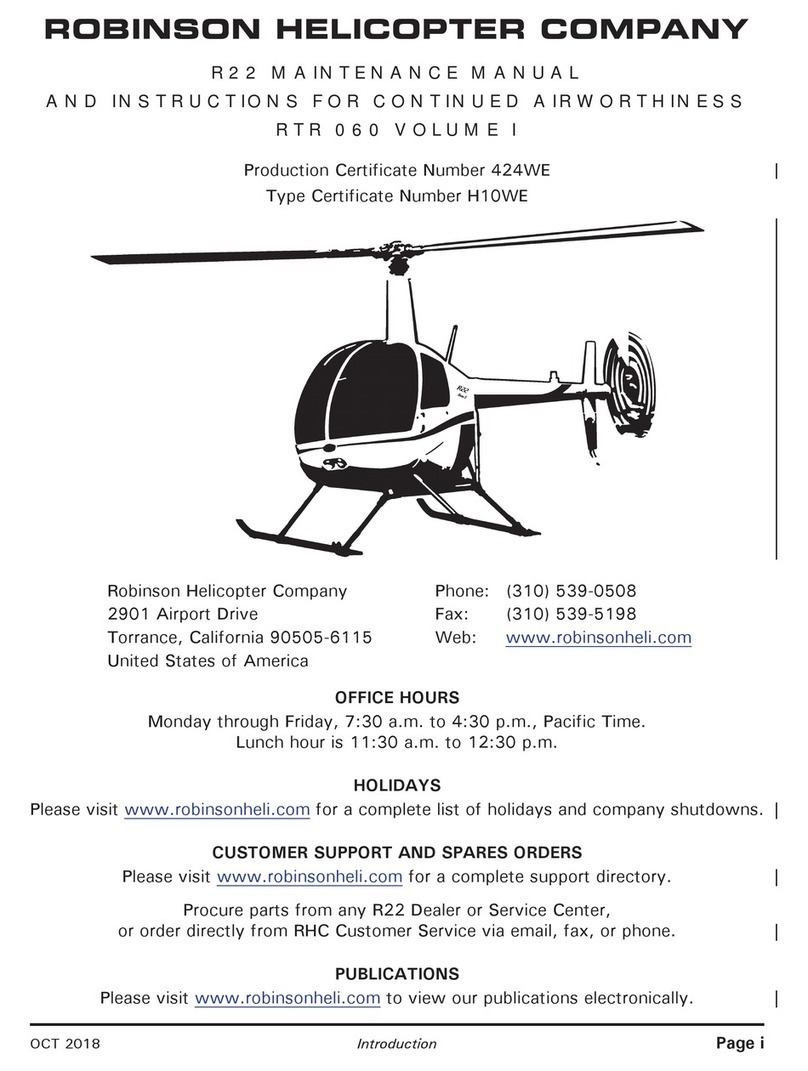
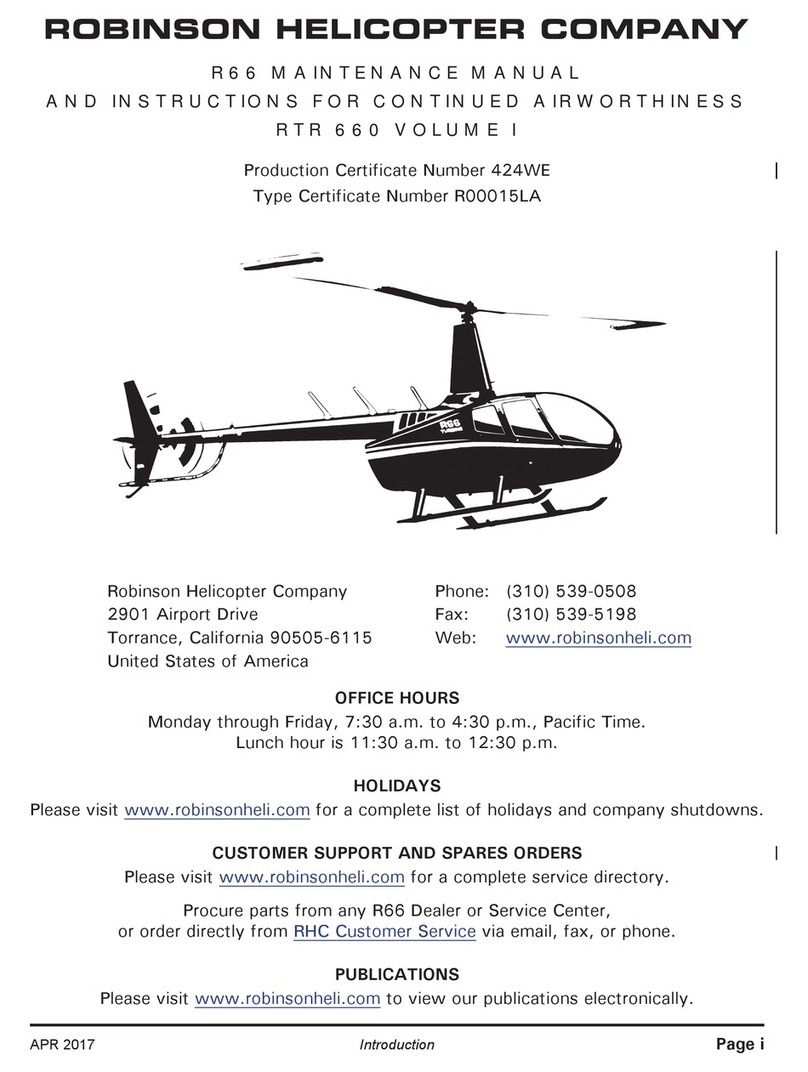
R66 MAINTENANCE MANUAL
AND INSTRUCTIONS FOR CONTINUED AIRWORTHINESS
RTR 660 VOLUME I
Production Certificate Number 424WE
Type Certificate Number R00015LA
Robinson Helicopter Company Phone: (310) 539-0508
2901 Airport Drive Fax: (310) 539-5198
Torrance, California 90505-6115 Web: www.robinsonheli.com
United States of America
OFFICE HOURS
Monday through Friday, 7:30 a.m. to 4:30 p.m., Pacific Time.
Lunch hour is 11:30 a.m. to 12:30 p.m.
HOLIDAYS
Please visit www.robinsonheli.com for a complete list of holidays and company shutdowns.
CUSTOMER SUPPORT AND SPARES ORDERS
Please visit www.robinsonheli.com for a complete service directory.
Procure parts from any R66 Dealer or Service Center,
or order directly from RHC Customer Service via email, fax, or phone.
PUBLICATIONS
Please visit www.robinsonheli.com to view our publications electronically.
APR 2019 Introduction Page i

SUBSCRIPTION ORDER AND RENEWAL FORMS
Subscription order and renewal forms are located at www.robinsonheli.com.
WARRANTY INFORMATION
Helicopter and parts warranty information is located at www.robinsonheli.com.
Page ii Introduction APR 2019

CHAPTER LIST
Introduction
Chapter 1 General
Chapter 4 Airworthiness Limitations
Chapter 5 Inspections
Chapter 6 Dimensions and Descriptions
Chapter 7 Jacking and Hoisting
Chapter 8 Weight and Balance
Chapter 9 Ground Handling
Chapter 10 Parking and Storage
Chapter 11 Placards and Markings
Chapter 12 Servicing
Chapter 18 Track and Balance
Chapter 20 Standard Practices
Chapter 21 Environment Control
Chapter 22 Autopilot
Chapter 25 Furnishings
Chapter 28 Fuel System
Chapter 29 Hydraulics
Chapter 32 Landing Gear
Chapter 33 Lights
Chapter 52 Doors and Windows
Chapter 53 Fuselage
Chapter 62 Main Rotor
Chapter 63 Main Rotor Drive System
Chapter 64 Tail Rotor
Chapter 65 Tail Rotor Drive System
Chapter 67 Flight Controls
Chapter 71 Powerplant
Chapter 75 Engine Air Systems
Chapter 76 Engine Controls
Chapter 79 Engine Oil System
Chapter 90 Police Version
Chapter 92 E.N.G. Version
Chapter 95 Instrument System
Chapter 96 Electrical System
Chapter 97 Avionics
Chapter 98 Wiring Diagrams
Chapter 99 Special Tools
Chapter 100 Revision Log
JUL 2020 Introduction Page iii

Intentionally Blank
Page iv Introduction JUL 2020

APR 2017 Introduction Page v
TECHNICAL PUBLICATIONS
RECOMMENDED CHANGE REPORT
Please direct recommended changes to RHC Technical Publications via the email address
listed below, by phone, or by submitting a duplicate of this completed form by fax or mail.
Please include or have available the information detailed in this form.
Recommended changes may include but are not limited to general comments, corrections,
omitted information, or clarification of instructions.
Please send recommendations to:
Email: [email protected]
Phone: (310) 539-0508
Fax: (310) 539-5198
Robinson Helicopter Company
Attention: Technical Publications
2901 Airport Drive
Torrance, CA 90505-6115
UNITED STATES
Date: Publication:
Name: Chapter:
Company: Section:
Helicopter Model: Page:
Serial Number: Revision:
Phone:
Email:
COMMENTS:

Intentionally Blank
Page vi Introduction APR 2017

CHAPTER 1
GENERAL
Section Title Page
1-00 Introduction . . . . . . . . . . . . . . . . . . . . . . . . . . . . . . . . . . . . . . . . . . . . . . 1.1
1-10 R66 Maintenance Manual Revisions . . . . . . . . . . . . . . . . . . . . . . . . . . . . . . 1.1
1-20 R66 Maintenance Authorization . . . . . . . . . . . . . . . . . . . . . . . . . . . . . . . . . 1.2
1-30 Component Maintenance Authorization . . . . . . . . . . . . . . . . . . . . . . . . . . . 1.2
1-40 Maintenance Record . . . . . . . . . . . . . . . . . . . . . . . . . . . . . . . . . . . . . . . . 1.2
1-50 Notations . . . . . . . . . . . . . . . . . . . . . . . . . . . . . . . . . . . . . . . . . . . . . . . . 1.3
1-55 Maintenance Manual and Illustrated Parts Catalog References . . . . . . . . . . . . 1.3
1-60 Definitions and Abbreviations . . . . . . . . . . . . . . . . . . . . . . . . . . . . . . . . . . 1.4
1-70 Service Information . . . . . . . . . . . . . . . . . . . . . . . . . . . . . . . . . . . . . . . . . 1.4B
1-71 Part Designation . . . . . . . . . . . . . . . . . . . . . . . . . . . . . . . . . . . . . . . . . 1.4B
1-72 Returning Parts . . . . . . . . . . . . . . . . . . . . . . . . . . . . . . . . . . . . . . . . . . 1.4B
1-73 Ordering and Shipping . . . . . . . . . . . . . . . . . . . . . . . . . . . . . . . . . . . . . 1.4B
1-74 Warranty Claims . . . . . . . . . . . . . . . . . . . . . . . . . . . . . . . . . . . . . . . . . 1.4B
1-75 Customer Service Directory . . . . . . . . . . . . . . . . . . . . . . . . . . . . . . . . . 1.4B
1-80 Assembly Instructions for R66 Helicopter Crated for Export . . . . . . . . . . . . . 1.5
1-90 Helicopter Servicing . . . . . . . . . . . . . . . . . . . . . . . . . . . . . . . . . . . . . . . . . 1.11
1-91 Scheduled Maintenance and Inspections . . . . . . . . . . . . . . . . . . . . . . . . 1.11
1-92 Additional Component Maintenance . . . . . . . . . . . . . . . . . . . . . . . . . . . 1.12
JUL 2020 Chapter 1 General Page 1.i

Intentionally Blank
Page 1.ii Chapter 1 General JUL 2020

CHAPTER 1
GENERAL
1-00 Introduction
The R66 Maintenance Manual contains instructions necessary for proper maintenance,
servicing, and handling of the R66 helicopter. The R66 Instructions for Continued
Airworthiness (ICA) includes the R66 Maintenance Manual (MM), R66 Illustrated Parts Catalog
(IPC), R66 Service Bulletins (SB), R66 Service Letters (SL), RR300 Series Operation and
Maintenance Manual (OMM), applicable Rolls-Royce technical publications, and applicable
component manufacturer technical publications.
Service Bulletins are issued by Robinson Helicopter Company (RHC), Rolls-Royce, and
component manufacturers. RHC Service Bulletin compliance is mandatory; comply with
other applicable Service Bulletins as directed. RHC technical publications are available
online at www.robinsonheli.com. Rolls-Royce technical publications are available online at
https://fast.aeromanager-online.com.
Kit instructions are issued for field installation of either optional or mandatory (due to
Service Bulletin or parts obsolescence) equipment upgrades, or provisions for upgrades. Kit
instructions issued by RHC either implement approved type design data, or are approved
as type design data.
The R66 Maintenance Manual is formatted in Air Transport Association of America
Specification No. 100 (ATA-100). Style, content, and structure deviates from ATA-100
when necessary for clarity, and for logic of presentation. A list of chapters and a complete
list of contents is located in the Introduction. Chapters are separated by tab dividers and
chapter contents are listed in the chapter front pages.
CAUTION
Always read instructions completely before performing a task.
1-10 R66 Maintenance Manual Revisions
Before using the R66 Maintenance Manual, verify it consists of current effective pages.
The list of effective pages is located in the Revision Log in Chapter 100. When a new
manual is purchased, complete and submit the Subscription Order Form available online at
www.robinsonheli.com. Subscribers receive publication revisions for a two-year period.
Renew subscriptions annually. The revision status for all RHC technical publications is
available online at www.robinsonheli.com.
APR 2019 Chapter 1 General Page 1.1

1-20 R66 Maintenance Authorization
Only appropriately certificated mechanics who have successfully completed an R66
factory-sponsored maintenance course, or are under direct supervision of the above-
stated mechanic, are authorized to perform maintenance, repairs, or inspections on the
R66 helicopter. Annual inspections of U.S.-registered light helicopters must be performed
by holders of an Inspection Authorization (IA) certificate or by repair stations certificated
by the Federal Aviation Administration (FAA). The daily preflight and some preventive
maintenance may be performed by the above-stated mechanics, or by the pilot/owner after
receiving appropriate instruction in accordance with the R66 Pilot’s Operating Handbook
and applicable aviation regulations.
1-30 Component Maintenance Authorization
Only appropriately certificated mechanics who have successfully completed both a factory-
sponsored maintenance course and component maintenance course, and who possess
technical data supplied by RHC, are authorized to perform maintenance specified in the
Component Maintenance Manual (CMM). Component maintenance may only be performed
at an RHC-authorized Service Center that has required special tools.
1-40 Maintenance Record
The Airframe Maintenance Record is available online at www.robinsonheli.com.
Airframe Maintenance Record blank PDF forms may be used for R22-series, R44-series,
and R66 Turbine helicopters. Component Record blank PDF forms may be used for life-
limited or TBO components. Blank paper copies are available for purchase (P/N R8478
Airframe Maintenance Record and P/N R8479 Component Record [pack of 20]).
A Component Record is a maintenance record of the removals, installations, or maintenance
performed on a life-limited or TBO component. When a life-limited or TBO component is
installed in the helicopter, the Component Record card is inserted in the Airframe Maintenance
Record. When a life-limited or TBO component is removed from the helicopter, remove the
Component Record card and keep the card with the Component. Major assemblies may
contain one or more life-limited or TBO component.
RHC encourages operators to utilize Component Record cards to assist in tracking time on
interchangeable parts since service lives may be different between models.
RHC does not create Component Record cards for spares, however, operators may create
their own.
RHC’s Repair Station does not require a Component Record card in order to perform work
on a component, unlike a Component/Return Authorization form.
RHC recommends using a toner-based laser, or a pigment-based inkjet, color printer and 65
lb white (96 bright) premium card stock for Maintenance Record or Component Record card
production. Maintenance Record binders and tab sets are available separately (P/N R8656
Maintenance Record Binder and P/N R8650 Maintenance Record Tabs).
Page 1.2 Chapter 1 General APR 2019

1-50 Notations
The following notations will be found throughout the manual:
NOTE
A NOTE provides emphasis or supplementary explanation.
CAUTION
Equipment damage can result if a CAUTION is not followed.
WARNING
Personal injury or death can result if a WARNING is not followed.
1-55 Maintenance Manual and Illustrated Parts Catalog References
Maintenance Manual and Illustrated Parts Catalog Section and Figure references are subject
to relocation and renumeration. Effort will be made at the time of RHC technical document
revisions to correct superseded references, however, certain documents may not otherwise
require revision and superseded references may remain. A keyword or part number search
in online documents (Ctrl+F [PC] or Command+F [Mac]) may help to locate applicable data.
APR 2019 Chapter 1 General Page 1.3

Page 1.4 Chapter 1 General APR 2019
1-60 Definitions and Abbreviations
Refer to R66 Pilot's Operating Handbook (POH) Section 1 for additional definitions and
abbreviations.
A. Definitions
14 CFR § 27.602
Critical Part:
A part identified as a 14 CFR § 27.602 critical part within this
manual is subject to special inspection requirements. RHC
Technical Support must be notified whenever the part fails to meet
the special inspection requirements.
12 years: With respect to a 12 year inspection or life-limit, 12 years means 12
years from the date of the factory-issued airworthiness certificate
or factory-issued authorized release certificate (FAA Form 8130-3,
Airworthiness Approval Tag).
Annually: With respect to an annual inspection, annually means within the
preceding 12 calendar months.
Datum: An imaginary vertical plane from which all horizontal measurements
are taken for balance purposes with the aircraft in level flight
attitude. Refer to §6-20 for R66 datum location.
Empty Weight: Empty Weight includes the weight of the airframe, powerplant,
required and installed equipment, fixed ballast, unusable fuel, and
gearbox oil. Refer to R66 Turbine Type Certificate Data Sheet
(TCDS) in §4-30. Refer to Equipment List/Weight and Balance
Data Sheet (RF 134) and Weight and Balance Record in R66 POH
Section 6 for installed equipment.
Life-Limited Part: Refer to §4-10. Any part for which a mandatory replacement
limit is specified in the type design, the Instructions for Continued
Airworthiness, or the maintenance manual.
Time in Service: With respect to maintenance time records, time in service means
the time from the moment an aircraft leaves the surface of the
earth until it touches it at the next point of landing.

1-60 Definitions and Abbreviations (continued)
B. Abbreviations
14 CFR: Title 14 of the Code of Federal Regulations. The Federal Aviation
Regulations (FARs) are part of the CFR.
AOG: Aircraft on Ground
ATA-100: Air Transport Association of America Specification No. 100
BL: Butt Line Station locations
CRA: Component Return/Authorization
ELT: Emergency Locator Transmitter
EMU: Engine Monitoring Unit
FCU: Fuel Control Unit
FS: Fuselage Station locations
GCU: Generator Control Unit
HID: High Intensity Discharge
HS: Horizontal Stabilizer Station locations
ICA: Instructions for Continued Airworthiness
LBL: Left Butt Line Station locations
LED: Light Emitting Diode
LH: Left-hand
LRU: Line-Replaceable Unit
MRDS: Main Rotor Drive Shaft
MRGB: Main Rotor Gearbox
OEM: Original Equipment Manufacturer
PTG: Power Turbine Governor
R66 IPC: R66 Illustrated Parts Catalog
R66 MM: R66 Maintenance Manual
R66 POH: R66 Pilot’s Operating Handbook
RBL: Right Butt Line Station locations
RH: Right-hand
RHC: Robinson Helicopter Company
RR300 Series OMM: Rolls-Royce RR300 Series Operation and Maintenance Manual
RS: Rotor Station locations
SB: Service Bulletin
SL: Service Letter
TBO: Time Between Overhaul
TCDS: Type Certificate Data Sheet
TRDS: Tail Rotor Drive Shaft
TRGB: Tail Rotor Gearbox
TS: Tailcone Station locations
TSN: Time Since New
TSO: Time Since Overhaul
WL: Water Line Station locations
JUL 2020 Chapter 1 General Page 1.4A

Page 1.4B Chapter 1 General JUL 2020
1-70 Service Information
1-71 Part Designation
RHC parts are designated with an alphanumeric part number beginning with letter “A”,
“B”, “C”, etc., followed by three digits and a dash number.
A revision letter or letters follow(s) the stamped or ink-marked part number. Revision
progression is A thru Z, followed by AA thru AZ, followed by BA thru BZ, etc. Unless
otherwise specified, any revision of the same part number is interchangeable, such as
“A101-1 A” and “A101-1 D”.
A change in dash number indicates a change in form, fit, and/or function (e.g. part
number C339-1 is not interchangeable with part number C339-10 even though both are
jackshaft weldments for [hydraulic] R44s). Similarly, part numbers F049-6 and F049-06
are not interchangeable because the dash numbers are different.
1-72 Returning Parts
All parts shipped to RHC must include a signed Component Return/Authorization (CRA)
Form available online at www.robinsonheli.com.
1-73 Ordering and Shipping
Procure parts from any R66 Dealer or Service Center, or order directly from assigned RHC
Customer Service Representative via email, fax, or phone.
1-74 Warranty Claims
Complete CRA Form (refer to §1-72) and, in the Warranty Claim section, indicate if
rotorcraft or component is under warranty. If claim is for parts or for labor allowance
due to a Service Bulletin issued against rotorcraft or component, write in “per SB-XX”
adjacent to requested warranty action.
1-75 Customer Service Directory
Please visit www.robinsonheli.com for a complete service directory.

1-80 Assembly Instructions for R66 Helicopter Crated for Export
NOTE
Aircraft assembly to be performed by a certificated mechanic.
1. Remove top of cabin assembly crate. Remove wall marked “A” by removing lag bolts
painted black. Remove empennage assembly. Remove remaining walls. Remove all
parts, except cabin assembly, from crate base. Open crate containing blades, skid tubes,
and tailcone.
2. Refer to R66 Illustrated Parts Catalog (IPC) Figure 32-1. Install hardware securing forward
and aft strut assemblies (cross tubes installed) onto skid tubes. Standard torque bolts per
Section 20-32 and torque stripe per Figure 5-1.
3. Remove tailcone cowling per Section 53-23. Remove engine cowling per Section 53-21.
4. Remove shipping supports (ty-raps, foam, tape, etc.) from main rotor gearbox compartment,
but leave cannon plugs taped and fluid line dust caps installed. Remove engine air intake
cover by opening air filter bypass door and pulling string and cover through the door.
Remove main rotor gearbox mounting hardware, nylon spacers, and upper frame strut
assemblies.
5. Remove top of main rotor gearbox crate and position crate so gearbox is upright. Refer
to Section 7-20. Install hoisting equipment and lifting fixture or nylon rope on main
rotor hub. Remove hoist slack to support gearbox, remove lag bolts securing gearbox to
wooden divider, and carefully hoist gearbox from crate (do not damage pitot tube).
6. Install main rotor gearbox per Section 63-20 steps 1 thru 9, but do not remove hoisting
equipment and lifting fixture or nylon rope.
7. Perform (engine driveline) forward flex plate shimming per Section 63-11.
8. Refer to Section 7-20. Remove hoist slack to support cabin assembly, remove lag and
carriage bolts securing metal angles to crate, and hoist cabin & attached metal angles off
of crate base.
CAUTION
Do not lift helicopter and attached crate using main rotor hub;
damage to main rotor gearbox and frames could result.
9. Remove metal angles from cabin assembly landing gear attach points. Install landing gear
assembly per Section 32-10.
SEP 2012 R66 Maintenance Manual Chapter 1 General Page 1.5

Page 1.6 Chapter 1 General R66 Maintenance Manual SEP 2012
FIGURE 1-1 ASSEMBLY INSTRUCTIONS FOR R66 HELICOPTER CRATED FOR EXPORT
FIGURE 1-2 ASSEMBLY INSTRUCTIONS FOR R66 HELICOPTER CRATED FOR EXPORT

1-80 Assembly Instructions for R66 Helicopter Crated for Export (continued)
10. For air-conditioned ships:
a. Refer to Figure 1-1. Remove shipping supports (ty-raps, foam, tape, etc.) from G777-
1 compressor assembly. Install hardware securing G782-1 mount weldment to main
rotor gearbox. Standard torque hardware per §20-32 and torque stripe per Figure
5-1. Hook B774-3 spring in drilled hole of NAS1352-4H14 screw. Verify security.
b. Refer to Figures 1-1 and 1-2. Verify B173-5 v-belt is in good condition. Fit belt around
G779-1 pulley and compressor pulley, and install hardware securing compressor to
G782-1 mount weldment. Standard torque bolts per §20-32.
c. Refer to Figure 1-2. Install hardware securing compressor to G781-1 arm weldment.
Rotate compressor up and outboard to tension belt, then tighten hardware securing
compressor to weldment. Verify belt is properly aligned on both pulleys. Adjust belt
tension until 4.5-5.5 lb of force applied mid-span deflects belt 0.16-inch. Standard
torque bolts per §20-32.
d. Connect compressor assembly wiring to airframe harness at connectors and install
ty-raps as required. Cinch ty-raps until snug without over-tightening, and trim tips
flush with heads.
11. Refer to IPC Figure 79-1. Remove F237-1 tailcone frame weldment and F305-5 (aft)
inlet. Install tail rotor drive fan shaft (fanwheel installed) through scroll assembly. Install
hardware securing aft inlet to scroll assembly. Verify security.
12. Refer to IPC Figure 65-1. Install hardware securing C947-3 plate assembly to F908-1
yoke and tail rotor drive fan shaft. Standard torque bolts and palnuts per §20-32 and
torque stripe per Figure 5-1.
13. Remove shipping supports (ty-raps, foam, tape, etc.) from tailcone assembly, and install
tailcone per Section 53-40 steps 1 thru 7. Install strobe light. Install communication and
GPS antennas (if equipped).
14. Install empennage assembly per §53-50. Install aux stabilizer assembly per §53-52.
15. Service tail rotor gearbox per §12-21. Service main rotor gearbox per §12-11.
16. Remove hydraulic reservoir shipping plug. Install D487-3 vent assembly, special torque
vent to 100 in.-lb, and torque stripe per §Figure 5-1 (do not safety wire).
17. Install tail rotor assembly per §64-10. Match color-coded markings on blades with pitch
links.
18. Install main rotor blades per §62-10. Match color-coded markings on blades with
markings on hub and pitch links.
19. Inside engine compartment, remove anti-ice valve cap, starter-generator cap, inducer
bleed hose cover, exhaust pipe cover and desiccant, and combustion case drain valve
cap. Connect inducer bleed hose to box assembly and tighten clamp. Verify security.
MAY 2015 Chapter 1 General Page 1.7

1-80 Assembly Instructions for R66 Helicopter Crated for Export (continued)
20. If ship is equipped with attitude horizon, directional gyro, turn coordinator, and/or vertical
card magnetic compass:
A. Attitude Horizon, Directional Gyro, and Turn Coordinator Installation
CAUTION
Directional gyro mount screws must not exceed 1-inch in length.
1. Place a piece of foam under instrument face. Remove (6) screws securing face
to console and gently pull face forward. Remove hardware securing instrument
hole covers to face and remove covers. Install instruments and secure to face
with hardware provided.
2. Connect straight connector(s) to directional gyro and/or turn coordinator. Connect
angle connector to attitude horizon, ensuring strain relief points down. Ensure
connectors lock. Ty-rap excess wiring. Install screws securing instrument face
to console.
B. Vertical Card Magnetic Compass Installation
1. Locate airframe wiring (in windshield center bow), install 2-inch length of B158-3
heat shrink over wiring, and connect compass pins to airframe sockets (polarity
is not critical). Slide heat shrink over connection and apply heat. Install (4)
screws securing compass to mount, securing wiring atop compass.
21. Connect battery per §96-10.
NOTE
Check battery open circuit voltage and perform boost charging
or capacity tests as required per Concorde Battery Instructions
for Continued Airworthiness.
22. Perform pitot-static leak check per §95-10.
23. Install Emergency Locator Transmitter (ELT) per §25-61, as required. Install tailcone
cowling assembly per §53-23.
24. Install fire extinguisher per §25-62, as required.
25. Fuel helicopter per §12-41.
26. Verify all shipping supports (ty-raps, foam, tape etc.) have been removed from helicopter.
Refer to §6-70. Secure access panels and inspection doors.
NOTE
Flight checks to be performed by a qualified pilot and certificated
mechanic.
27. Perform ground check per §5-41 steps 2 thru 9.
Page 1.8 Chapter 1 General MAY 2015

1-80 Assembly Instructions for R66 Helicopter Crated for Export (continued)
28. Depreserve the engine after storage per RR300 Series Operation and Maintenance Manual
(OMM). Install starter-generator cooling hose. Install engine cowling per §53-21.
29. Install tail rotor dynamic balance equipment per §18-21.
30. Perform run-up per §5-42 steps 2 thru 16.
31. Perform tail rotor dynamic balance per §18-20.
32. Remove tail rotor dynamic balance equipment. Install main rotor balance equipment
per §18-11.
CAUTION
Mast fairing, cowlings, and panels must be installed for flight.
33. Perform hover checks per §5-43 step 1. DO NOT proceed into forward flight.
34. Track and balance main rotor per §18-12.
35. While climbing at maximum continuous torque, 60 KIAS:
a. Evaluate vibration level and controllability.
b. Perform momentary 30° left yaw to check for adequate directional control.
36. Level flight at 2000 feet density altitude (deviate as required for weather and terrain),
maximum continuous torque:
a. Evaluate longitudinal and lateral cyclic control forces.
b. Evaluate collective control forces.
37. Evaluate vibration level at maximum continuous torque and straight-and-level flight.
38. During autorotation at 50 KIAS and 90% rotor RPM, perform momentary 30° right
yaw to check for adequate directional control.
39. Check all instruments, gages, and avionics for proper operation.
JUL 2020 Chapter 1 General Page 1.9

*One-time maintenance after new or overhauled main rotor gearbox is installed.
** Recurring inspection not to exceed given interval.
*** See §1-60 Definitions and Abbreviations.
TABLE 1 SCHEDULED INSPECTIONS
Consult latest revision of listed
publications for specific applicability.
First 100 Hours*
100 Hours**
200 Hours**
300 Hours**
400 Hours**
600 Hours**
1000 Hours**
2000 Hours**
Annually***
12 Months**
24 Months**
3 Years**
5 Years**
6 Years**
12 Years**
15 Years**
3000 Cycles**
Replace main gearbox oil filter per §12-12. • •
Perform 100-hour / annual inspection per §5-45. • •
Perform main rotor blade tip maintenance per §
62-60. •
As required by RR300 Series Operation and
Maintenance Manual (OMM), perform maintenance
and inspection.
• • • • •
Service inlet barrier filter per § 71-21. • •
Replace main gearbox oil per §12-11. •
Drain and flush tail rotor gearbox per §12-23. •
Replace hydraulic filter per §12-32. •
Clean gearbox chip detectors per §12-13 & 12-22. • •
Lubricate swashplate bearings per §12-90. • •
Perform 2000-hour inspection per §5-50. •
Perform main gearbox internal visual inspection per
§ 5-74. •
Inspect emergency locator transmitter (ELT) per 14
CFR §91.207. •
Perform pop-out float leak check per §32-64 Part A. •
Test and inspect transponder per 14 CFR §
91.413. •
Perform pop-out float inflation check per §32-64
Part B. •
Peform pop-out float pressure cylinder hydrostatic
test. •
Perform 12-year inspection per §5-55. •
Pop-out float pressure cylinder maximum life. •
Page 1.10 Chapter 1 General JUL 2020
Other manuals for R-66 Series Lithium-Ion
4
Table of contents
Other Robinson Toy manuals
Popular Toy manuals by other brands

LeapFrog
LeapFrog Learn & Groove Rainbow Lights Piano instruction manual

Madcow Rocketry
Madcow Rocketry Mini Bomarc Assembly

Martha Stewart
Martha Stewart Farmer's Market Play Tent Assembly and care instructions
Dancing Wings Hobby
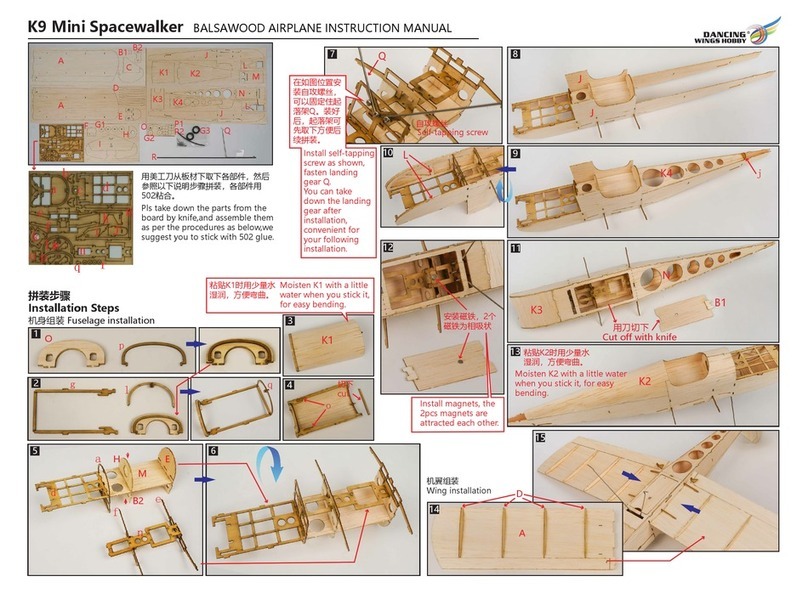
Dancing Wings Hobby K9 Mini Spacewalker instruction manual

Vollmer
Vollmer 45762 Mounting instruction

Eduard
Eduard 73405 instruction sheet
