Hubsan Spy Hawk H301S User manual

Ages 14+
Please read the instructions carefully before use.
BC
®
www.hubsan.com
SPY HAWK

2.4GHz & 5.8GHz TRANSMITTER
CHARGING THE LI-PO BATTERY
HOW TO LAUNCH
22
SPY HAWK
H301S
01
SPY HAWK
H301S
www.hubsan.comwww.hubsan.com
5.8GHZ TECHNICAL TIPS
CATALOG
SAFETY NOTES
ASSEMBLY INSTRUCTIONS
02
EXPLODING VIEW
02
INCLUDED ACCESSORIES
02
04
06
06
10
11
14
15
VIDEO RECORDING
ADVANCE PERFORMANCE SET UP
H301S TROUBLESHOOTING 17
H301S SPARE PARTS CHART 20

02
SPY HAWK
H301S
21
SPY HAWK
H301S
www.hubsan.comwww.hubsan.com
H301S-20
Servo set
H301S-19
Lipo battery Lipo battery
H301S-23
SD Card
SD Card Manual
H301S-18
5.8GHz TX module
H301S-22
LED light bars
H301S-24
Body stickers
Body stickers
H301S-21
Linkage wires
Adapter Balance charger
Camera module
H301S-17
3.7G Servo Brushless motor
ESC
GPS
3.7G Servo
Red LED light bar
3.7G Servo
2.4GHz RX Antenna
5.8GHz TX Antenna
1080 Camera module
5.8GHZ TX module
Lipo battery
Green LED light bar
Camera cap
RX board
Exploding View
Included Accessories
1 SAFETY NOTES
If you do not plan to y the plane for a week or more, store the battery approximately 50%
charged to maintain battery performance and life.
To avoid risk of re or damage, never recharge your battery while it is inserted in the plane.
The Spy Hawk is powered by a lithium-polymer(Lipo) battery.
This RC Spy Hawk is not a toy. Any improper use of this product will result in serious injury. Be
aware of your personal safety, safety to others and your surrounding environment.
We recommend beginners learn to y with more experienced pilots playing nearby before
attempting to y the spy hawk for the rst time.
Thanks for buying HUBSAN products.
1.2 LiPo Battery Safety Notes
1.1 Important Notes

H301S SPARE PARTS CHART
20
SPY HAWK
H301S
03
SPY HAWK
H301S
www.hubsan.comwww.hubsan.com
H301S-13
Brushless motor
H301S-11 H301S-12
Adapter Balance charger
H301S-09
Push rod
H301S-05
H301S-03
H301S-02
Propeller
H301S-08
Servo sleeve set
H301S-04
H301S-07
H301S-10
Screw set
H301S-06
H301S-16
GPS module
H301S-01
EPO Body Kit Canopy
Camera sleeve set
H301S-14
RX
H301S-15
ESC
Buckles set Linkage set
Camera Cap and
motor sleeve set
Charge and store LiPo batteries in a location where a battery re or explosion
(including smoke hazard) will not endanger life or property.
Keep LiPo batteries away from children and animals.
Never charge the LiPo battery that has ballooned or swelled .
Never charge the LiPo battery that has been punctured or damaged.
After a crash, inspect the battery pack for the sign of damage. Discard in
accordance with your country’s recycling laws.
Never charge the LiPo battery in a moving vehicle.
Never overcharge the LiPo battery.
Never leave the LiPo battery unattended during recharging.
Do not charge LiPo batteries near ammable materials or liquids.
Ensure that charging leads are connected correctly. Reverse polarity charging can
lead to battery damage or a re or explosion.
Have a suitable re extinguisher (electrical type) OR a large bucket of dry sand near
the charging area . Do not try to extinguish electrical (LiPo) battery res with water.
Reduce risks from re/explosion by storing and charging LiPo batteries inside a
suitable container.
Protect your LiPo battery from accidental damage during storage and
transportation. (Do not put battery packs in pockets or bags where they can short
circuit or can come into contact with sharp or metallic objects.).
If your LiPo battery is subjected to a shock (such as a crash), place it in a metal
container and observe for signs of swelling or heating for at least 30 minutes.
Do not attempt to disassemble or modify or repair the LiPo battery.
LiPo batteries are dierent from conventional batteries in that their chemical contents
are encased in a relatively lightweight foil packaging. This has the advantage of
signicantly reducing their weight, but does make them more susceptible to damage if
roughly or inappropriately handled. As with all batteries, there is a risk of re or
explosion if safety practices are ignored:
!

6、Snap-t the Main Wing and the Main Body
(sort out the wires)
5、Finish the linkage as the above picture
Do not enter into the transmitter setting status during ight! The controller will not transmit a signal
in the setting status. Carefully start the recording function key by just briey clicking the “ENTER”
key. Do not press the “ENTER” key more than 1 second or the controller will stop transmitting!
Question 13 : The values on each channel showing on the LCD screen are not correct.
Answer:
The transmitter need to recalibrate after Mode reverse, airplane crash, or rest for a long time.
(MODE 1 transmitter)
Push the left joystick to the top on the left, and the right joystick to the top on the right, keep them
in this position and then turn on the transmitter, the LCD screen will show “CALIBERATE STICK”,
Move the joysticks in a circling motion about 3 times, and then release the joystick and press “EXIT”
key to save and exist.
(MODE 2 transmitter)
Push the two joysticks to the top on the left and keep them in this position, and then turn on the
transmitter, the LCD screen will show “CALIBERATE STICK”, Move the joysticks in a circling motion
about 3 times, and then release the joystick and press “EXIT” key to save and exist.
Question 14: The transmitter will not power on.
Answer:
Check the battery connection.
If the transmitter battery power is low, you will need to replace with new AA batteries or any 2S or
3S Lipo battery tted with a JST connector.
(MODE 1 transmitter) (MODE 2 transmitter)
The air plane is already 90% pre-assembled so there is little to do before ight. Please refer to
the following assembly steps to assemble your Air Plane.
2. ASSEMBLY INSTRUCTIONS
3、Receiver PCB board in main body
2、See the above direction on the Receiver PCB
board
4、Connect the wires accordingly, be aware of
the direction and follow the notes
ESC Power plug
04
SPY HAWK
H301S
19
SPY HAWK
H301S
www.hubsan.comwww.hubsan.com
1、See the above directions on the
Main Wing
ESC signal plug(THRO)
LED light bar plug
ESC power plug)
aileron plug(AILE)
LED light bar socket
Elevator signal socket
Aileron signal socket
Rudder signal socket
Throttle signal socket

7、Insert the battery into the compartment 8、Connect the plugs
9、Lay the canopy, aim into the buckles 10、Put on the body stickers
The parameters of the stabilization system are factory preset, no need for initialization.
Question 6: The LCD screen is not viewable outdoors with bright sunshine.
Answer:
Check the packaging inside the box, there is an anti-glare sticker, it will help you to reduce glare in
full sunshine. Peel the protective membrane and put it onto the screen.
Question 7: The battery life is too short and the battery will not charge.
Answer:
The Lipo battery has a protective voltage safety board with a cut o function. Once the Lipo battery’s
individual cell voltage drops below 3 volts, you will need to use an intelligent charger to revive the
battery.
Question 8: The video is not being saved to the SD card.
Answer:
Always stop the video recording function and power o the battery rst. After that you can take out
the SD card.
Always turn o the power to the Air Plane before inserting or removing the SD card.This allows the
memory to be properly saved to the SD card.
Question 9: I can not launch the airplane.
Answer:
The direction and strength of the wind will have a great eect on the ight performance of your
model. Launch and release your airplane against the wind with its nose pointing slightly above the
horizon. The wind speed should be not more than 3M/S.
Question 10 : The servos are getting too hot with noise.
Answer:
Check all connections on the pushrods, servo arm and servo horn for smooth operation and adjust
the connections as required.Adjust the servo travel on each channel, or reduce the sensitivity on
each channel in the transmitter settings.
Question 11: It is not arming after binding.
Answer:
Minimize the throttle to zero, or adjust the throttle trim to zero.
Question 12: The airplane out of control during ight
Answer:
11、Open the camera cap before recording 12、The camera cap can hang on the
Transmitter's handle
18
SPY HAWK
H301S
05
SPY HAWK
H301S
www.hubsan.comwww.hubsan.com

4.1 Identication and functions
Main Menu
4. 2.4GHz & 5.8GHz TRANSMITTER
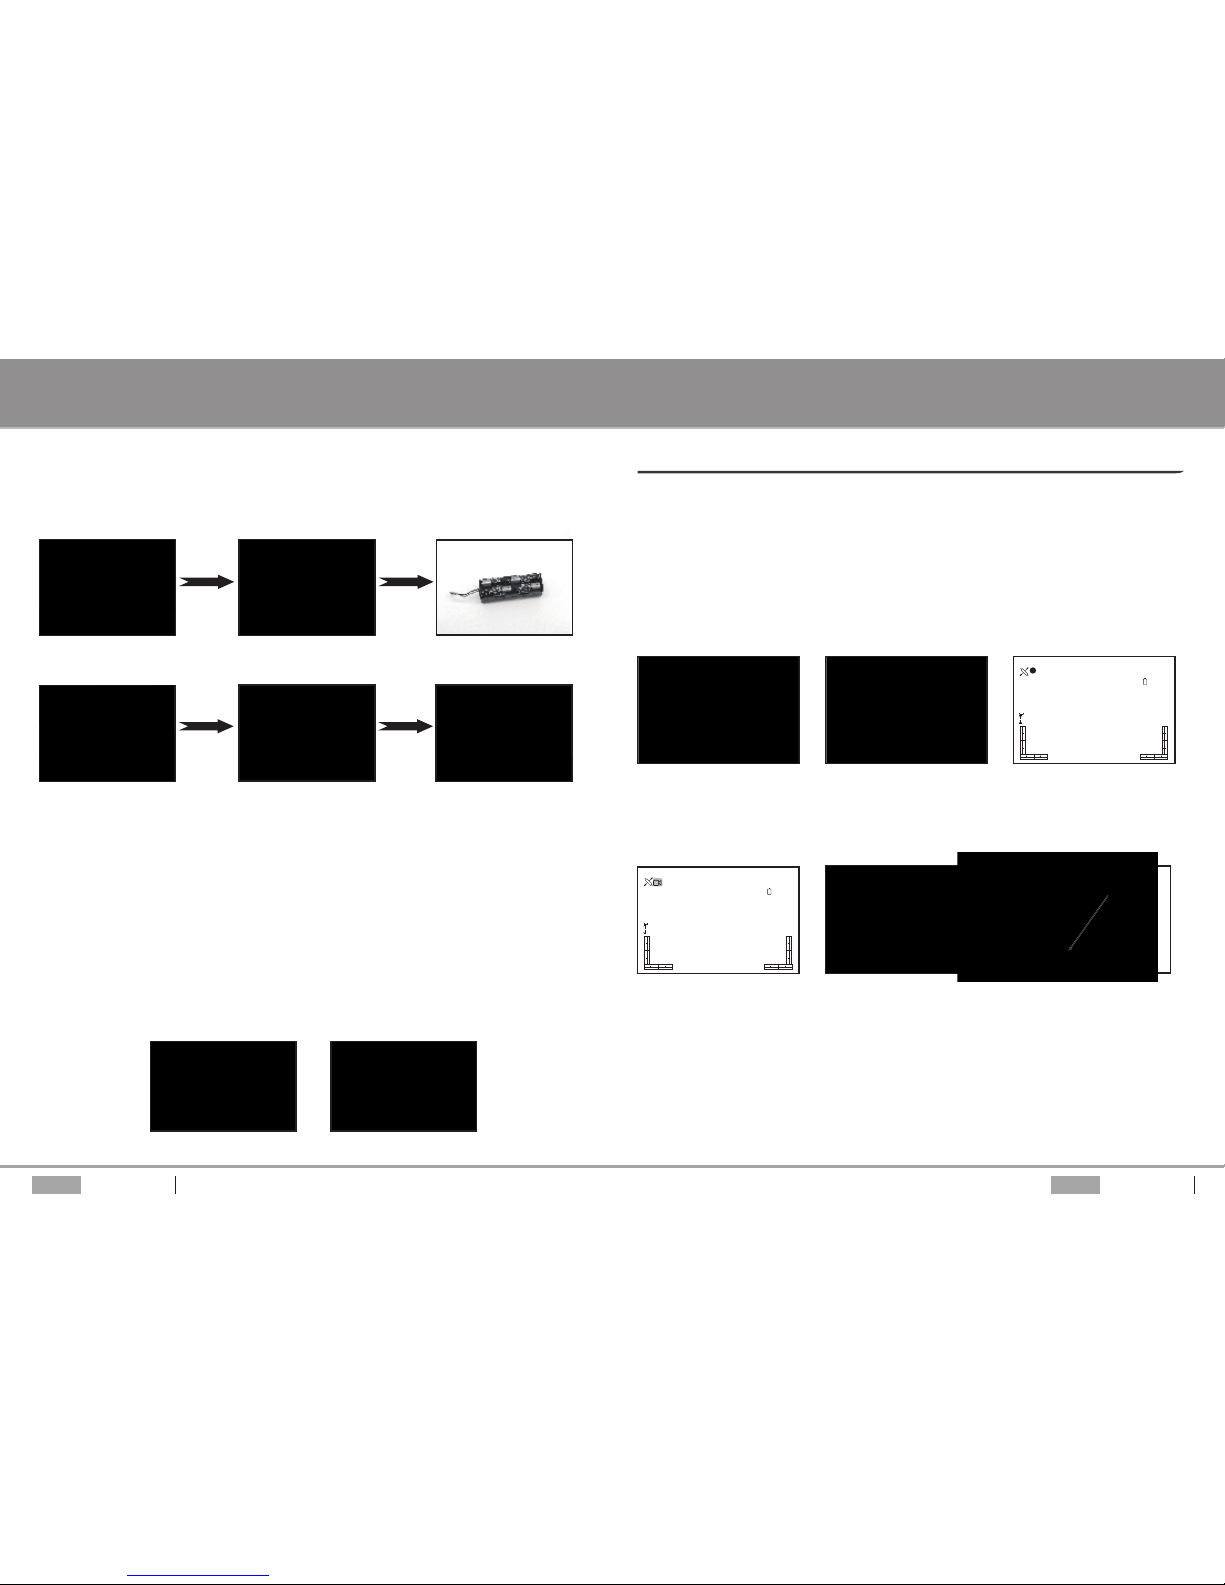
3. CHARGING THE LI-PO BATTERY
The Air Plane is equipped with a LiPo battery:
3.1 7.4V 2 Cell 1300mAh x 1 unit
Connect battery to balance charger and wall charger, the two LED lights will turn red whilst
charging and turn green when charging is nished, charging time is around 80 min.
3.2 Always partially charge your LiPo battery before storage.
LiPo batteries retain a charge over a reasonable period; It is not normally necessary to recharge
stored LiPo batteries unless stored for periods longer than 3-6 months.
If your LiPo battery has been over-discharged, it will not be possible to recharge it again.
7.4V
Question 1:The Air Plane dives when switching on/o the autopilot button.
Answer:
Always check the rudder, aileron and elevator both on stabilization status and non-stabilization
status if you would like to switch on/o autopilot mode during ight.
Rudder,aileron and elevator need to be adjusted in the same position for stabilization status and
non-stabilization status, Check the receiver module inside the fuselage, If this board not mounted
in horizontally, correct it and glue it properly back in place.
Question 2: Black Video
Answer:
Re-bind the transmitter with your Spy Hawk.
If the recording module become overheated, please check to see if the cooling-event blocked.
Check for any loose cables on the recording module.
Do not keep your airplane in the rest more than 2 minutes, as the recording module needs intake
airow for better cooling. The LCD on transmitter will go dark if the temperature of the recording
module is over 60℃.
If the transmitter battery power is low, you will need to replace them with new AA batteries or any
2S or 3S Lipo battery that has a JST connector.
Question 3: Blue Video
Answer:
Out of the video range, always face the Air Plane as the video signal transmission is directional and
needs direct line of site.
Check for any cable being loose on the 5.8Ghz TX module inside the fuselage of Air Plane.
Keep the 5.8 GHz antenna under the fuselage of the Air Plane and check to see that the antenna is
pointed straight down.
Question 4: Why can't I perform aerobatics?
Answer:
Your Spy Hawk is designed for beginners only. It is a ying video platform and therefore the
stabilization of the Air Plane was designed.
You can switch o the stabilization system and enter manual control system.
Question 5: Do I need to initialize the autopilot/stabilization system?
Answer:
H301S TROUBLESHOOTING
06
SPY HAWK
H301S
17
SPY HAWK
H301S
www.hubsan.comwww.hubsan.com
MODE 1
HUBSAN 11.5V
7.6V
0
N00.0000000 E000.0000000
M1 0:01:59
R
X
GPS
H+45°
R+7°
P+1°
S0. 0
0m
+0.0m
/
m
s
Dist
A
L
T
MODE 2
HUBSAN 11.5V
7.6V
0
N00.0000000 E000.0000000
M2 0:01:59
R
X
GPS
H+45°
R+7°
P+1°
S0. 0
0m
+0.0m
/
m
s
Dist
A
L
T
Recycling
Lithium-Polymer(LiPo) batteries must not be placed in with household trash. Please contact
your environmental or waste agency or the supplier of your model for local regulations and
the location of your nearest LiPo battery recycling center.

MODE 1
MODE 2
TRANSMITTER
HUBSAN
Set reverse X
Set sensitive X
Plane type air plane
Expert mode Yes
Stick mode Mode 2
HUBSAN
Set reverse X
Set sensitive X
Plane type air plane
Expert mode Yes
Stick mode Mode 2
In expert mode, the sensitivity can be adjusted even further (up to 100) to give the user even more
ability to manoeuver the Air Plane. Follow instructions below to switch this on/o.
Hold the ENT key for 1 second to enter the settings menu. Move the arrow to “Expert mode” with
the up/down keys. Press ENT to switch between Yes and No for turning the expert mode on or o.
The transmitter can change the sensitivity value to adjust the ight experience.
Hold down the Throttle Stick, press the ENT button for 1 second to enter into the setting menu,
press UP/DOWN to select "Set Sensitive", press ENT button to conrm, then press the Rudder/
Elevator/ Aileron Trim to change Rudder/ Elevator/ Aileron values accordingly.
A higher sensitivity will enable larger/ faster movement of the aircraft, while a lower sensitivity will
enable smaller/ slower movement.
8.2 Expert mode
8.3 Sensitivity set up
16
SPY HAWK
H301S
07
SPY HAWK
H301S
www.hubsan.comwww.hubsan.com
7 Power SW
4 Elevator Trim
(2) Elevator/Rudder Stick
5 Rudder Trim
UP Function
EXT Function Key
LCD
10 SA
SB SC
5.8GHz Antenna
SD
9 Antenna
8 Neck Strap Eyelet
6 Throttle Trim
(1) Throttle /Aileron stick
3 Aileron Trim
ENT Function Key
Down Function
5.8GHz Antenna
10 SA
SB SC
SD
7 Power SW
6 Throttle Trim
1 Throttle /Rudder Stick
5 Rudder Trim
UP Function
EXT Function Key
LCD
9 Antenna
8 Neck Strap Eyelet
4 Elevator Trim
2 Elevator/Aileron stick
3 Aileron Trim
ENT Function Key
Down Function
No function
Video glasses socket DSC
Earphone socket

4.2 Input Key Function
S/N Identication Function
1 Throttle/Rudder Stick
2 Elevator/Aileron Stick
Forward and backward movement of the stick makes the Air Plane nose
point up/down respectively. Left and right movement of the stick
makes the Air Plane roll left/right to initiate a turn.
(1) Throttle /Aileron stick
Forward and backward movement of the stick will make the Air Plane
increase or decrease speed respectively.Left and right movement
of the stick makes the Air Plane roll left/right to initiate a turn.
(2) Elevator/Rudder Stick
Forward and backward movement of the stick makes the Air Plane
nose point up/down respectively. Left and right movement of the
stick makes the Air Plane yaw left/right respectively.
3 Aileron Trim Aileron trim adjusts left and right roll.
4 Elevator Trim Elevator trim adjusts up and down movement.
5 Rudder Trim Rudder trim adjusts left and right yaw.
6 Throttle Trim Throttle trim adjusts speed of motor.
7 Power SW Pushing the switch up powers on the transmitter, pulling it down
switches it o.
8 Neck Strap Eyelet For the attachment of a neck strap which eases the tension of your
hands from holding the transmitter.
9
10
Antenna
SA
Transmits the 2.4Ghz wireless signal.
GPS function: Push SA, the plane will return to home; Pull SA, the RTH
function turns o.
11
12
SB/SC
SD
No function for now.
Control LED light bars under the wings: Push SD, the LED lights on;
Pull SD, the LED lights o.
13 DSC (Optional) Connects to the data cable of computer simulator.
Forward and backward movement of the stick will make the Air Plane
increase or decrease speed respectively.Left and right movement of the
stick makes the Air Plane yaw left/right respectively.
Hold down ENT key for 1 Second to enter setting status.
Press the ENT key to enter reverse setting status.
Move arrow to Stickmode with up/down key, push the left stick from up to down 3 times,
the Mode 2 will change to Mode 1 automatically, Press EXT key to conrm and exit, Power o/on
again and it will work as changed.
08
SPY HAWK
H301S
15
SPY HAWK
H301S
www.hubsan.comwww.hubsan.com
8.1 Mode 1 and Mode 2 Reversing setup
8. ADVANCE PERFORMANCE SET UP
a
a
a
b
b
1) Open the cover of transmitter by
unscrewing the 4 screws as picture
shows.
2) Screw a/b in the TX
b
3) Fasten the screw a on the Spring and the screw b on the Shrapnel, the stick will be Throttle Stick;
Loosen the screw a on the Spring and the screw b on the Shrapnel, the stick will be non Throttle
Stick .

(MODE 1 transmitter)
Push the left joystick to the top on the left, and the right joystick to the top on the right, keep them
in this position and then turn on the transmitter, the LCD screen will show “CALIBERATE STICK”,
Move the joysticks in a circling motion about 3 times, and then release the joystick and press “EXIT”
key to save and exist.
(MODE 2 transmitter)
Push the two joysticks to the top on the left and keep them in this position, and then turn on the
transmitter, the LCD screen will show “CALIBERATE STICK”, move the joysticks in a circling motion
about 3 times, and then release the joystick and press “EXIT” key to save and exist.
(MODE 1 transmitter) (MODE 2 transmitter)
Notice:
>Do not mix old and new batteries
>Do not mix dierent types of batteries
>Do not charge non-rechargeable battery.
Open the cover Take out the holder According to the correct
polarities,install 8 x AA battery
Insert the plug into Return the holder Fasten the screw
the power jack back to the compartment
4.3 Battery mounting
4.4 Transmitter Stick Calibration
7.1.1 Remove the canopy to
locate the SD card slot
Note:
Always turn OFF the Air Plane's power before inserting or removing the SD card.
Always stop the video recording function and power o the battery rstly, and then you
can take out the SD card.
Try to avoid letting the Air Plane rest for any longer than 2 minutes, otherwise the camera module will
OVERHEAT! This will result the screen on the remote going dark and poor quality recordings.
There are cooling vents on the canopy to keep the camera module below 60 C. DO NOT cover this
vent or prevent the air ow into the camera compartment.
WARNING:
7. VIDEO RECORDING
14
SPY HAWK
H301S
09
SPY HAWK
H301S
www.hubsan.comwww.hubsan.com
7.1.2 Insert the SD card
Note:Avoid removing the SD
card and re-inserting again
too quickly otherwise the
recording module will not
work properly
7.1.4 When the red dot
become
the recording logo, indicating
recording stopped
7.1.5 You can start/stop
recording by either pressing
the button next to the SD
card slot on the Air Plane or
using the remote
7.1.6 Using Enter button on
Remote controll to stop/start
recording
7.1.3 Recording time:
The red dot blinking,
indicating recording started,
and the video recording time
will start to count
Press ‘Enter’ button
to switch ON/OFF
video recording
HUBSAN 8.0V
7.3V
+165
96
3
Stabili Mode
N00.0000000 E000.0000000
00:00:00
1080FHD
00:00:00
R
X
GPS
H+251°
R+16°
P+0°
S0. 0
0m
+0.0m
/
m
s
Dist
A
L
T
M2 0:04:47
HUBSAN 8.0V
7.3V
+180
96
0
Stabili Mode
N00.0000000 E000.0000000
00:00:00
1080FHD
00:00:00
R
X
GPS
H+254°
R+17°
P+0°
S0. 0
0m
+0.0m
/
m
s
Dist
A
L
T
M2 0:04:47

Keep the FPV 5.8Ghz antenna pointing as straight down as you can to give you a clear video picture
and to avoid interference.
The transmitter will automatically nd the best frequency to ensure the quality live video
transmission. in case there is any interference in your location, you can change the setting from the
range 5725MHz~5865MHz to get longer range and better video transmission.
Fig 1
5 5.8GHZ TECHNICAL TIPS
10
SPY HAWK
H301S
13
SPY HAWK
H301S
www.hubsan.comwww.hubsan.com
While if the GPS value shows NA, indicating the GPS is not connected or broken, need to check the
connect wires and the GPS module. The plane can take o without GPS function, only in that way
the Return to Home function is useless.
6.3 Launch the plane
6.4 RTH function
6.3.1 The direction and strength of the wind will have a great eect on your model. Always launch
your Air Plane into/against the direction of the wind.
6.3.2 Keep the Air Plane horizontal(the nose slight pointing above the horizon) push the throttle to
the upmost, throw the Air Plane with your most strenght,hold down the Elevator Sticker,then release
it after the Air Plane reach a certain height.
When the GPS signal is good and the controller had the record of the position when the plane take
o, the plane will enter into the RTH Mode after the signal lost or the battery voltage is low. The
plane will hold the altitude and return to the take o position. When the plane returned, it will exit
the RTH Mode.
When the plane enter into RTH Mode, pull down the SA(Switch A), the plane will exit the RTH Mode.
6.5 Landing
Lower the throttle stick slowly to a quarter position, the plane will lose speed and slowly landing
down.
Push up the SA, the plane will enter RTH Mode Pull down the SA, the plane will exit RTH Mode Frequency selectable 5.8Ghz
The live video distanc is around 1000 meters. In order to gain the furthest communication distance,
make sure the transmitter's antenna pionted vertically and no obstacles between it and the Air Plane
when in ight.
Keep the antenna vertical and let the signal surface(the logo side) towards the Air Plane video
signal antenna.
Bend the transmitter antenna vertically, and keep the signal surface towards the Air Plane
video signal antenna; Ensure there is no obstacles between the two, or the Air Plane will
lose control.
!

HUBSAN 11.5V
Set reverse +
Set sensitive +
Plane type Air plane
Expert mode Yes
Stick mode 2
5.8G frequence
Hold down the ENTER key for 1 second to enter setting status, move the arrow to 5.8G FREQUENCE
with up/down key, press the ENTER key again and select the frequency you need with up/down key,
hold down the EXIT key for 2 seconds to conrm and exit.
12
SPY HAWK
H301S
11
SPY HAWK
H301S
www.hubsan.comwww.hubsan.com
HUBSAN 11.5V
7.6V
5
N22.7911066 E114.0477988
M2 0:04:47
R
X
GPS
H+49°
R+7°
P+3°
S0. 0
0m
+0.0m
/
m
s
Dist
A
L
T
7
GPS HUBSAN 11.5V
Set reverse +
Set sensitive +
Plane type Air plane
Expert mode Yes
Stick mode 2
5.8G frequence
5725 MHz
7
GPS
Make sure the plane installed correctly, the lipo battery is full charged and the transmitter loaded
with 8 x AA batteries.
6.1 Bind the transmitter and the plane
Power on the transmitter, then the plane; the transmitter will show the lipo battery voltage and other
values as below shows. If no value shows, need to bind the transmitter to the plane, hold down the
ENTER button, power on the transmitter, wait the LCD screen shows “Bind to plane”, then power on
the plane.
6.HOW TO LAUNCH
Level calibration method:
Hold the Throttle stick to the full down position and move the Rudder stick to the lower right position.
Quickly move the Aileron stick to the left and right repeatedly until the Red LED and Green LED lights
on the Main Wing blinks two times, indicating successful calibration.
6.2 Check everything before ight
6.2.1 Check the plane’s horizon level
Lay the plane on a level surface, see the value of Pitch(P) and Roll(R), the normal range should in 5°to
-5°, if it is not in this range, the plane need to do level calibration.
Check the rudder and the aileron servo, make sure they are in the lines with the Main Wing, adjust
push rod if needed. All plane will be regulated in the proper position factory defaulted.
6.2.2 Check the Electronic compass
Hold the plane, keep it levelly, then spin the plane slowly to watch the Head(H) value, it will change
from 0°to 360°continuouslyandevenly. When the plane point to Star North,the value will be 0°, or
the compass need to do calibration.
Compass calibration method:
Hold the Rudder Stick in the down left, quickly move the Aileron Stick to the left and right until the
Red LED and Green LED lights blinks alternately, indicating the the calibration is in process. In this
moment, levelly spin the plane slowly for a 360°, and vertically spin the plane for a 360°to wait the
LED stop blinking, indicating successful calibration.
6.2.3 Check the GPS signal
Outdoors, after the plane power on for 2-5 minutes, the GPS value will be change into 6 or above 6,
please wait until then to y the plane.
Bind to plane

Other manuals for Spy Hawk H301S
1
Table of contents
Other Hubsan Toy manuals

Hubsan
Hubsan H101D User manual

Hubsan
Hubsan F22 User manual

Hubsan
Hubsan X4 H107 User manual

Hubsan
Hubsan H205B User manual

Hubsan
Hubsan h102f User manual

Hubsan
Hubsan SpyHawk User manual

Hubsan
Hubsan Spy Hawk H301S User manual

Hubsan
Hubsan H101 User manual

Hubsan
Hubsan H202F User manual

Hubsan
Hubsan spy hawk User manual