manuals.online logo
Brands
  1. Home
  2. •
  3. Brands
  4. •
  5. Robus
  6. •
  7. Light Fixture
  8. •
  9. Robus RHZSP306060-01 User manual

Robus RHZSP306060-01 User manual

SPACE HUMANITAS 30W ZIGBEE
CONTROLLED TUNABLE WHITE HCL LED
PANEL, 600X600MM, 2700K-6500K, UGR<19
Issue 2 141021 Page 1
Information for the Product user:
Installation
1. Please note the requirement to dispose of Waste Electrical & Electronic
Equipment separately from household waste (WEEE marked with crossed out
wheelie bin symbol).
2. Please consider your role in contributing to re-use and recycling by returning
this product at end of life to a collection centre for waste electrical equipment or
a Civic Amenity site, or to a retail outlet from which you are purchasing a
replacement.
3. This equipment may contain substances that are hazardous to health and the
environment if disposed of carelessly. It is important that it is separated from
normal household waste and recycled in the WEEE chain.
4. The “crossed out wheelie bin symbol” on a product indicates this equipment
must not be disposed of in normal household waste, but should be disposed of
according to local WEEE regulations.
-20°C < Ta < +40°C, 220-240V ~ 50/60Hz, Class II, IP20
Suitable for mounting on a normally flammable surface.
Driver must never be “hot-plugged” or connected to the fitting
when live.
Doing this may damage the fitting and will void the warranty.
The fitting is tunable from 2700K to 6500K through Zigbee signal
-20°C < Ta < +40°C, 220-240V ~ 50/60Hz, Klasse II, IP20
Geschikt voor montage op normaal ontvlambaar oppervlakte.
De driver mag nooit worden aangesloten op het armatuur wanneer deze
onder stroom staat (“hot plug”). Hierdoor kan het armatuur worden
beschadigd en vervalt de garantie.
De fitting is instelbaar van 2700K tot 6500K via het Zigbee-signaal via de
ROBUS HUMANITAS-app. Zie voor het regelen van de montage
de handleiding voor RHZMM-01 op de ROBUS website
-20°C < UT < +40°C, 220-240V ~ 50/60Hz, Klasse II, IP20
Kann auf normal entflammbaren Oberflächen montiert werden.
Der Treiber darf nie bei eingeschaltetem Gerät eingesteckt oder an die
Lampe angeschlossen werden, wenn sie Strom führt. Das kann die Installation
beschädigen und macht die Garantie ungültig.
Die Armatur ist über das ZigBee-Signal über von 2700K bis 6500K abstimmbar
die ROBUS HUMANITAS App. Informationen zur Steuerung der Armatur finden
Sie unter die Bedienungsanleitung für RHZMM-01 auf der ROBUS Website “
Installatie Installation
Informatie voor de gebruiker van het product:
1. Hou bij het verwijderen van afval rekening met de regeling voor afgedankte elektrische
en elektronische apparatuur, gescheiden van gewoon huishoudelijk afval (AEEA,
pictogram van een kliko met een kruis erdoorheen).
2. Neem uw verantwoordelijkheid op het vlak van hergebruik en recycling door dit product
aan het einde van zijn levenscyclus in te leveren bij een inleverpunt voor elektronisch
afval, een milieupark of een winkel waar u een nieuw product koopt.
3. Deze apparatuur kan stoffen bevatten die gevaarlijk zijn voor de gezondheid en het
milieu indien ze onachtzaam wordt weggegooid. Het is belangrijk dat ze
gescheiden gehouden wordt van het normaal huishoudelijk afval en gerecycled wordt in
het netwerk voor AEEA.
4. Het pictogram van een kliko met een kruis erdoorheen op een product betekent dat dit
apparaat niet samen met het gewone huishoudelijk afval mag worden weggegooid,
maar dat het dient te worden verwijderd in overeenstemming met de lokale regelgeving
voor AEEA (afgedankte elektrische en elektronische apparatuur).
Informationen für den Benutzer:
1. Beachten Sie, dass die Entsorgung von ausgedienten Elektro- und Elektronikgeräten
getrennt vom Hausmüll erfolgen muss (die Geräte sind mit dem Symbol einer
durchgestrichenen Tonne gekennzeichnet).
2. Beachten Sie Ihre Rolle im Wiederverwendungs- und Recycling-Zyklus, indem Sie
dieses Produkt am Ende der Nutzungsdauer bei einer Sammelstelle für
Elektronikaltgeräte oder einer städtischen Müllkippe, oder einer Verkaufsstelle, wo Sie
einen Ersatz besorgen, entsorgen.
3. Dieses Gerät kann Substanzen enthalten, die gesundheits- und umweltschädlich sind,
falls sie achtlos entsorgt werden. Es ist wichtig, dass es vom normalen Hausmüll
getrennt und in der Kette der Elektro-Altgeräte recycelt wird.
4. Das „durchgestrichene Tonnen-Symbol“ auf einem Produkt bedeutet, dass dieses
Gerät nicht mit dem normalen Hausmüll, sondern gemäß der Entsorgungsvorschriften
für Elektro-Altgeräte entsorgt werden muss.
EN NL DE
1. Ensure mains supply is switched off before commencing work.
2. Remove 600 x 600mm tile from ceiling.
3. Ensure the area above the fitting is free from obstacle pipes cable tray etc.
4. Connect AC power supply cable to the terminals of Swift connector.
Brown/Live to LS, Neutral/Blue to N.
5. Ensure the connections going to and from the driver are secure.
6. Place connector, drivers and cable into the ceiling void.
7. Offer luminaire up to the ceiling void and manoeuvre into final
position similar to standard ceiling tile.
1. Zorgdat het lichtnet is uitgeschakeld voordat u begint te werken.
2. Verwijdere en plafond tegel van 600 x 600 mm.
3. Zorgdat de ruimte boven het armatuur vrij is van belemmeringen,
leidingen, kabelgoten, enz.
4. Sluit de AC-voedingskabel aan op de aansluitklemmen van de
Swift-schakelaar. Bruin/ Stroom op LS en Neutraal/ Blauw op N.
5. Zorgdat de verbindingen naar en van de driver goed vast zitten.
6. Plaats de koppeling, drivers en kabel in de vrije ruimte in het plafond.
7. Hef het armatuur op naar de ruimte in het plafond en plaats in de
eind positie zoals een standaard plafond tegel.
1. Vergewissern Sie sich, dass das Versorgungsnetz ausgeschaltet ist,
bevor Sie mit der Installation beginnen.
2. Entfernen Sie eine 600 x 600 mm große Fliese aus der Decke.
3. Vergewissern Sie sich, dass sich in der Deckenöffnung keine
Rohrleitungen, Kabel etc. befinden.
4. Verbinden Sie das Stromkabel mit den Anschlussklemmen des
Schnellverbinders: Braun/spannungsführend an LS, Blau/neutral an N.
5. Achten Sie darauf, dass die Anschlüsse vom und zum Treiber fest sitzen.
6. Platzieren Sie Anschlussbuchse, Treiber und Kabel in der Deckenöffnung.
7. Heben Sie die Leuchte an die Deckenöffnung und bringen Sie sie in
die Position der zuvorentnommenen Fliese.
RHZSP306060-01
RUIMTE HUMANITAS 30 W ZIGBEE
GECONTROLEERDE STEMMEL MET HCL
LED-PANEEL, 600X600 MM, 2700 K-6500 K,
UGR <19
RHZSP306060-01
SPACE HUMANITAS 30W
ZIGBEE-GESTEUERTES, ABSTIMMBARES
WEIßES HCL-PANEL, 600X600MM, UGR <19
RHZSP306060-01
PLEASE READ INSTRUCTION BEFORE COMMENCING INSTALLATION
AND RETAIN FOR FUTURE REFERENCES.
! Electrical products can cause death or injury, or damage to property.
The Installation must be carried out by a qualified electrician
.
Note:
The luminaire must be disconnected before carrying out any insulation
resistance testing. Product technical information and specification may
change over time without prior notification. For the latest technical
information please visit our web site www.robus.com or robusdirect.com
LEES DE INSTRUCTIES VOORDAT U BEGINT MET DE INSTALLATIE EN
HOU ZE BIJ VOOR LATER.
! Elektrische producten kunnen de dood of letsel veroorzaken of
eigendommen beschadigen.
De installatie dient te worden uitgevoerd door
een elektricien
.
Opmerkingen:
De lamp moet worden losgekoppeld voordat de isolatieweerstand wordt
getest. Technische gegevens en specificaties van dit product kunnen zonder
voorafgaande kennisgeving wijzigen. Ga voor de meest recente technische
gegevens naar onze website www.robus.com of robusdirect.com
LESEN SIE DIE ANLEITUNG, BEVOR SIE MIT DER INSTALLATION BEGINNEN,
UND BEWAHREN SIE SIE FÜR DIE SPÄTERE VERWENDUNG AUF.
! Elektronikprodukte können Tod, schwere Verletzungen oder Sachschaden
verursachen.
Die Installation muss von einem Elektriker vorgenommen werden
.
Hinweis:
Vor der Durchführung von Isolationswiderstandsprüfungen muss die Leuchte
vom Strom getrennt werden. Technische Produktinformationen und Angaben
können sich im Lauf der Zeit ohne weitere Mitteilung ändern. Besuchen Sie
unsere Webseite www.robus.com oder robusdirect.com für aktuelle technische
Informationen.
Market Surveillance:
LS Code of energy efficiency Class D. RHZSP306060-LS
Disconnect LED panel.
Remove screws and remove diffuser (LS). Markttoezicht:
LS Code van energie-efficiëntie van Klasse
D. RHZSP306060-LS
Koppel het LED-paneel los.
Verwijder schroeven en verwijder diffuser (LS).
Marktüberwachung:
LS Code der Energieeffizienz der Klasse D. RHZSP306060-LS
Trennen Sie das LED-Panel.
Entfernen Sie Schrauben und entfernen Sie Diffusor (LS)
Page 2
-20°C < Ta < +40°C, 220-240V ~ 50/60Hz, Classe II, IP20
Convient à une installation sur une surface normalement inflammable.
Le branchement de l’alimentation ne doit jamais être fait lorsque le luminaire
est en marche. Cela peut endommager le luminaire et annuler la garantie.
Le raccord est réglable de 2700K à 6500K via le signal Zigbee via l'application
ROBUS HUMANITAS. Pour contrôler le raccord, veuillez consulter le manuel
d'instructions pour RHZMM-01 sur le site Web de ROBUS
-20 °C<Ta<+40 °C, 220–240 V ~50/60 Hz, razred II, IP20
Primerno za montažo na normalno vnetljivo površino.
Gonilnika ni dovoljeno priključiti “na živo” ali povezati na fiting, ko je fiting pod
napetostjo.
Nevarnost poškodb fitinga in izničenja garancije.
Fiting alhko nastavite z 2700 K na 6500 K preko signala Zigbee.
1. Veuillez vous assurer que l’alimentation soit coupée avant de commencer.
2. Enlevez une dalle de 600 x 600mm du plafond.
3. Assurez-vous qu’il n’y ait pas d’obstacles (câbles, tuyaux etc..) dans
l’espace situé au-dessus du luminaire.
4. Connectez le câble d’alimentation en courant alternatif aux bornes du
connecteur SWIFT : Marron/Phase à LS et Bleu/Neutre à N.
5. Veuillez vous assurer que les connexions provenant de / allant vers
l’alimentation soient sécurisées.
6. Placez le connecteur, l’alimentation et les câbles dans le faux plafond.
7. Positionnez le luminaire et manœuvrez jusqu’à ce que celui-ci soit
correctement positionné comme l’était initialement la dalle d’origine.
1. Pred začetkom dela izključite omrežno napajanje.
2. Odstranite ploščo 600 x 600 mm s stropa.
3. Preglejte in potrdite, da v območju nad fitingom ni motečih cevi in
kabelskih pladnjev ipd.
4. Priključite napajalni kabel AC na sponke konektorja Swift. rjava (faza) na
LS, in modra (nevtralna) na N.
5. Trdno in varno napeljite povezave na in z gonilnika.
6. Namestite konektor, gonilnike in kabel v luknjo na stropu.
7. Pridržite svetilko na luknji v stropu in jo poravnajte v končni položaj,
podobno kot bi poravnali standardno stropno ploščo.
Informations pour l’utilisateur du produit :
Installation
1. Veuillez, s’il vous plait, noter l’importance de disposer des Déchets
d’Equipement Electriques et Electroniques séparément des déchets ménagers
(DEEE représenté par une poubelle barrée d’une croix).
2. Veuillez tenir compte de l’importance de votre contribution à la réutilisation et au
recyclage de ce produit en fin de vie en le retournant dans un centre de collecte
de déchets des équipements électriques ou dans le point de vente à partir
duquel vous effectuez l’achat du produit de remplacement.
3. Cet équipement peut contenir des substances dangereuses pour la santé et
l’environnement s’il est jeté n’importe où. Il est important de le séparer des
ordures ménagères et le recycler dans une consigne DEEE appropriée.
4. La “poubelle barrée d’une croix” présent sur le produit indique que cet appareil
ne doit pas être jeté dans les ordures ménagères mais doit être éliminé
conformément à la réglementation DEEE locale.
FR
SPACE HUMANITAS PANNEAU HCL BLANC
RÉGLABLE CONTRÔLÉ ZIGBEE 30W,
600X600MM, 2700K–6500K, UGR <19
RHZSP306060-01
SPACE HUMANITAS 30W ZIGBEE
KONTROLIRANA, NASTAVLJIVA BELA PLOŠČA
LED HCL, 600X600MM, 2700K–6500K, UGR<19
RHZSP306060-01
Surveillance du Marché:
LS Code» d'efficacité énergétique de Classe D. RHZSP306060-LS
Déconnectez le panneau LED.
Retirer les vis et retirer le diffuseur (LS).
Nadzor Trga:
(LS) Šifra svetlobnega vira’ z energijsko učikovitostjo razreda D.
RHZSP306060-LS
Odklopite LED panel.
Odvijte vijake in odstranite difuzor (LS).
Informacije za uporabnika:
Montaža
SL
PRED MONTAŽO SKRBNO PREBERITE NAVODILA ZA UPORABO IN JIH
SHRANITE NA VARNO MESTO, SAJ JIH BOSTE POZNEJEMORDA ŠE
POTREBOVALI.
! Električne naprave lahko povzročijo telesne poškodbe, smrt in
materialno škodo.
Priklop sme izvesti le strokovnjak za elektrotehniko
.
Opomba:
Pred preizkusi izolacijske upornosti svetilko obvezno izključite.
Pridržujemo si pravico do sprememb proizvoda in tehničnih specifikacij
brez predhodnega obvestila. Za najnovejše tehnične informacije obiščite
našo spletno stran www.robus.com ali robusdirect.com.
1. Upoštevajte predpise o odstranjevanju odpadne električne in elektronske
opreme – proizvoda ni dovoljeno odstraniti med gospodinjske odpadke (OEEO
s simbolom: prekrižanim zabojnikom za odpadke na kolesih).
2. Prispevajte k varovanju okolja in omogočite reciklažo proizvoda – po koncu
njegove življenjske dobe ga predajte pristojnemu zbirnemu centru za odpadke
ali vrnite trgovcu, pri katerem ste ga kupili.
3. Ta oprema lahko vsebuje snovi, ki so v primeru malomarnega ravnanja
nevarne za zdravje in okolje. Pomembno je, da proizvod ločite od drugih
gospodinjskih odpadkov in ga predate v reciklažo (OEEO).
4. Simbol »prekrižani zabojnik za odpadke na kolesih« na proizvodu pomeni, da
tega proizvoda ni dovoljeno odstraniti med običajne gospodinjske odpadke,
temveč skladno s predpisi o OEEO.
VEUILLEZ LIRE LES INSTRUCTIONS AVANT DE COMMENCER L’INSTALLATION
ET CONSERVEZ-LES POUR TOUTES UTILISATIONS FUTURES.
Les produits électriques peuvent causer la mort, de graves blessures ou des
dégâts matériels.
L’installation doit être effectuée par un électricien qualifié
.
Remarque :
Le luminaire doit être déconnecté avant d'effectuer tout test de résistance a
l’isolation. Les informations techniques et caractéristiques peuvent changer
au fil du temps sans notification préalable. Pour rester informé de ces
possibles modifications, veuillez consulter le site internet www.robus.com ou
robusdirect.com.
595mm
595mm
9mm
LS E LPN
1 2
34
5Page 3
IT: AVVERTENZA – I dispositivi elettrici possono causare lesioni gravi o la morte o
danneggiare l’apparecchio. In caso di dubbi sull’installazione o sull’utilizzo di questo
prodotto, consultare un elettricista competente.
Assicurarsi che l’alimentazione principale sia spenta prima di effettuare interventi.
EST: HOIATUS! Elektritooted võivad põhjustada surma, raskeid vigastusi või
varakahjustusi. Kui teil on toote paigaldamisel või kasutamisel kahtlusi, küsige nõu
asjatundlikult elektrikult. Enne töö alustamist veenduge, et elektrivool oleks välja lülitatud.
SLK: UPOZORNENIE - Elektrické výrobky môžu spôsobiť smrť, vážne zranenie alebo
škodu na majetku. Ak máte akékoľvek pochybnosti o inštalácii tohto výrobku, poraďte sa
s kvalifikovaným elektrikárom. Pred začatím práce skontrolujte, že je hlavný zdroj
Tel: +353 1 7099000
Fax: +353 1 7099060
Email: [email protected]
Website: www.robus.com
L.E.D lighting & Electrical Distribution Group UC
IRE: Nangor Road, Dublin 12, D12 E7VP, Ireland
UK: Bracknell Enterprise & Innovation Hub, Ocean
House, 12th Floor, The Ring, Bracknell,
Berkshire RG12 1AX, UK

Other Robus Light Fixture manuals

Robus RVA192CCT26730 User manual

Robus

Robus RVA192CCT26730 User manual

Robus GOLF SLIM User manual

Robus

Robus GOLF SLIM User manual

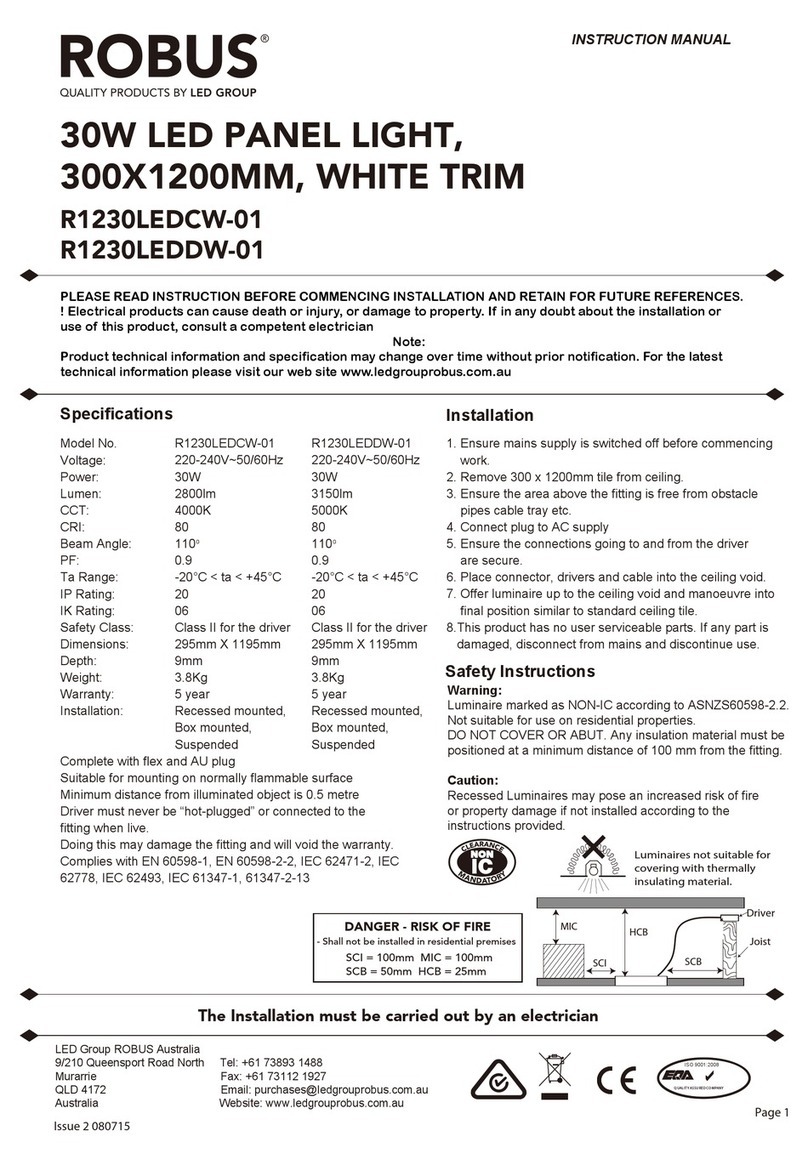
Robus R1230LEDCW-01 User manual

Robus

Robus R1230LEDCW-01 User manual

Popular Light Fixture manuals by other brands

MaxLite PhotonMax Series operating instructions

MaxLite

MaxLite PhotonMax Series operating instructions

DTS SCENA LED 200 MZ FC user manual

DTS

DTS SCENA LED 200 MZ FC user manual

Lightolier 603MR specification

Lightolier

Lightolier 603MR specification

Code 3 MEGAFLEX Series Installation and operation instruction

Code 3

Code 3 MEGAFLEX Series Installation and operation instruction

Cooper Lighting Metalux P410 Series Specifications

Cooper Lighting

Cooper Lighting Metalux P410 Series Specifications

Philips SmartBright Dual Select Waterproof Mounting instruction

Philips

Philips SmartBright Dual Select Waterproof Mounting instruction

e-conolight E-KCN Series installation instructions

e-conolight

e-conolight E-KCN Series installation instructions

F&V R300 Lumic quick start guide

F&V

F&V R300 Lumic quick start guide

BSL FLASH RGB 400 user guide

BSL

BSL FLASH RGB 400 user guide

Marq gamutpar h7 user guide

Marq

Marq gamutpar h7 user guide

Philips C3 Series specification

Philips

Philips C3 Series specification

Philips EG1-3 specification

Philips

Philips EG1-3 specification

PR Lighting XR440 BWS user manual

PR Lighting

PR Lighting XR440 BWS user manual

Vimar Eikon 20394 manual

Vimar

Vimar Eikon 20394 manual

Jesco Sleek Plus S902 installation instructions

Jesco

Jesco Sleek Plus S902 installation instructions

red lighting Classe B 300 user manual

red lighting

red lighting Classe B 300 user manual

Triarch 29462 Assembly instructions

Triarch

Triarch 29462 Assembly instructions

IKEA SOLVINDEN manual

IKEA

IKEA SOLVINDEN manual

manuals.online logo
manuals.online logoBrands
  • About & Mission
  • Contact us
  • Privacy Policy
  • Terms and Conditions

Copyright 2025 Manuals.Online. All Rights Reserved.