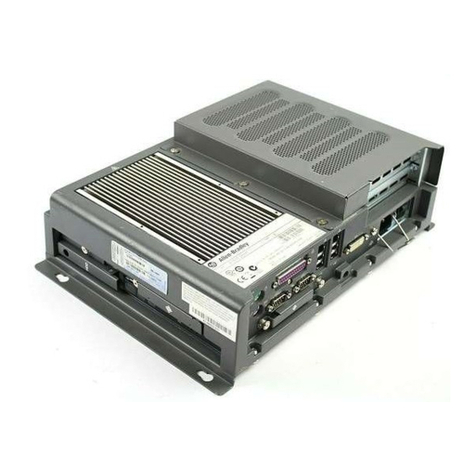
Rockwell Automation Allen-Bradley VersaView 6300B User manual

User Manual Original Instructions
6300B Wall Mount PCs
Catalog Numbers 6300B-PBCx and 6300B-PBDx

2Rockwell Automation Publication 6300B-UM002B-EN-P - January 2023
6300B Wall Mount Box PC User Manual
Important User Information
Read this document and the documents listed in the additional resources section about installation, configuration, and operation of this equipment before
you install, configure, operate, or maintain this product. Users are required to familiarize themselves with installation and wiring instructions in addition to
requirements of all applicable codes, laws, and standards.
Activities including installation, adjustments, putting into service, use, assembly, disassembly, and maintenance are required to be carried out by suitably
trained personnel in accordance with applicable code of practice.
If this equipment is used in a manner not specified by the manufacturer, the protection provided by the equipment may be impaired.
In no event will Rockwell Automation, Inc. be responsible or liable for indirect or consequential damages resulting from the use or application of this
equipment.
The examples and diagrams in this manual are included solely for illustrative purposes. Because of the many variables and requirements associated with
any particular installation, Rockwell Automation, Inc. cannot assume responsibility or liability for actual use based on the examples and diagrams.
No patent liability is assumed by Rockwell Automation, Inc. with respect to use of information, circuits, equipment, or softwaredescribed in this manual.
Reproduction of the contents of this manual, in whole or in part, without written permission of Rockwell Automation, Inc., isprohibited.
Throughout this manual, when necessary, we use notes to make you aware of safety considerations.
These labels may also be on or inside the equipment to provide specific precautions.
The following icon may appear in the text of this document.
WARNING: Identifies information about practices or circumstances that can cause an explosion in a hazardous environment,
which may lead to personal injury or death, property damage, or economic loss.
ATTENTION: |Oª¬ ½?Identifies information about practices or circumstances that can lead to personal injury or death,
property damage, or economic loss. Attentions help you identify a hazard, avoid a hazard, and recognize the consequence.
IMPORTANT Identifies information that is critical for successful application and understanding of the product.
SHOCK HAZARD: Labels may be on or inside the equipment, for example, a drive or motor, to alert people that dangerous
voltage may be present.
BURN HAZARD: Labels may be on or inside the equipment, for example, a drive or motor, to alert people that surfaces may
reach dangerous temperatures.
ARC FLASH HAZARD: Labels may be on or inside the equipment, for example, a motor control center, to alert people to
potential Arc Flash. Arc Flash will cause severe injury or death. Wear proper Personal Protective Equipment (PPE). Follow ALL
Regulatory requirements for safe work practices and for Personal Protective Equipment (PPE).
Identifies information that is useful and can help to make a process easier to do or easier to understand.

Rockwell Automation Publication 6300B-UM002B-EN-P - January 2023 3
Table of Contents
Preface . . . . . . . . . . . . . . . . . . . . . . . . . . . . . . . . . . . . . . . . . . . . . . . . . . .5
Summary of Changes. . . . . . . . . . . . . . . . . . . . . . . . . . . . . . . . . . . . . . . . . . . . . . . . . . . . . . . 5
About This Publication . . . . . . . . . . . . . . . . . . . . . . . . . . . . . . . . . . . . . . . . . . . . . . . . . . . . . . 5
Download Firmware . . . . . . . . . . . . . . . . . . . . . . . . . . . . . . . . . . . . . . . . . . . . . . . . . . . . . . . . 5
Catalog Numbers . . . . . . . . . . . . . . . . . . . . . . . . . . . . . . . . . . . . . . . . . . . . . . . . . . . . . . . . . . 5
Chapter 1
Overview Features. . . . . . . . . . . . . . . . . . . . . . . . . . . . . . . . . . . . . . . . . . . . . . . . . . . . . . . . . . . . . . . . . . 7
Approximate Dimensions. . . . . . . . . . . . . . . . . . . . . . . . . . . . . . . . . . . . . . . . . . . . . . . . . . . . 8
Peripheral Connections . . . . . . . . . . . . . . . . . . . . . . . . . . . . . . . . . . . . . . . . . . . . . . . . . . . . . 9
Chapter 2
Installation Unpack the Computer . . . . . . . . . . . . . . . . . . . . . . . . . . . . . . . . . . . . . . . . . . . . . . . . . . . . . 11
Prepare for Installation . . . . . . . . . . . . . . . . . . . . . . . . . . . . . . . . . . . . . . . . . . . . . . . . . . . . 11
Environment and Enclosure Information. . . . . . . . . . . . . . . . . . . . . . . . . . . . . . . . . . 11
UL/cUL Mark Compliance. . . . . . . . . . . . . . . . . . . . . . . . . . . . . . . . . . . . . . . . . . . . . . . 11
European Union Directive Compliance. . . . . . . . . . . . . . . . . . . . . . . . . . . . . . . . . . . . 12
Installation Requirements . . . . . . . . . . . . . . . . . . . . . . . . . . . . . . . . . . . . . . . . . . . . . . . . . . 12
Site Requirements. . . . . . . . . . . . . . . . . . . . . . . . . . . . . . . . . . . . . . . . . . . . . . . . . . . . . 12
Mounting Requirements . . . . . . . . . . . . . . . . . . . . . . . . . . . . . . . . . . . . . . . . . . . . . . . . 12
DC Power Supply Guidelines: Cat. No. 6300B-PBCx Only . . . . . . . . . . . . . . . . . . . . . 13
Power Consumption . . . . . . . . . . . . . . . . . . . . . . . . . . . . . . . . . . . . . . . . . . . . . . . . . . . 13
Required Tools. . . . . . . . . . . . . . . . . . . . . . . . . . . . . . . . . . . . . . . . . . . . . . . . . . . . . . . . 14
Mount . . . . . . . . . . . . . . . . . . . . . . . . . . . . . . . . . . . . . . . . . . . . . . . . . . . . . . . . . . . . . . . . . . . 14
Grounding and Bonding . . . . . . . . . . . . . . . . . . . . . . . . . . . . . . . . . . . . . . . . . . . . . . . . . . . . 15
Install the Ground Wire. . . . . . . . . . . . . . . . . . . . . . . . . . . . . . . . . . . . . . . . . . . . . . . . . . . . . 15
Connect Power . . . . . . . . . . . . . . . . . . . . . . . . . . . . . . . . . . . . . . . . . . . . . . . . . . . . . . . . . . . 15
Connect DC Power (6300B-PBCx) . . . . . . . . . . . . . . . . . . . . . . . . . . . . . . . . . . . . . . . . 16
Connect AC Power (6300B-PBDx) . . . . . . . . . . . . . . . . . . . . . . . . . . . . . . . . . . . . . . . . 17
Chapter 3
Operate Operating Guidelines . . . . . . . . . . . . . . . . . . . . . . . . . . . . . . . . . . . . . . . . . . . . . . . . . . . . . . 19
Manual Start . . . . . . . . . . . . . . . . . . . . . . . . . . . . . . . . . . . . . . . . . . . . . . . . . . . . . . . . . . . . . 19
Reset Buttons and LED Status Indicators . . . . . . . . . . . . . . . . . . . . . . . . . . . . . . . . . . . . . 20
Restart (preferred method) . . . . . . . . . . . . . . . . . . . . . . . . . . . . . . . . . . . . . . . . . . . . . . . . . 21
System Reset. . . . . . . . . . . . . . . . . . . . . . . . . . . . . . . . . . . . . . . . . . . . . . . . . . . . . . . . . . . . . 21
Shut Down . . . . . . . . . . . . . . . . . . . . . . . . . . . . . . . . . . . . . . . . . . . . . . . . . . . . . . . . . . . . . . . 21
Chapter 4
System Settings Use the Setup Utility. . . . . . . . . . . . . . . . . . . . . . . . . . . . . . . . . . . . . . . . . . . . . . . . . . . . . . . 23
About the Setup Utility . . . . . . . . . . . . . . . . . . . . . . . . . . . . . . . . . . . . . . . . . . . . . . . . . 23
View and Modify Settings. . . . . . . . . . . . . . . . . . . . . . . . . . . . . . . . . . . . . . . . . . . . . . . 23

4Rockwell Automation Publication 6300B-UM002B-EN-P - January 2023
Table of Contents
Chapter 5
Change Settings in BIOS
Firmware
About Secure Boot . . . . . . . . . . . . . . . . . . . . . . . . . . . . . . . . . . . . . . . . . . . . . . . . . . . . . . . . 25
Disable Secure Boot . . . . . . . . . . . . . . . . . . . . . . . . . . . . . . . . . . . . . . . . . . . . . . . . . . . . . . . 25
Enable ThinManager. . . . . . . . . . . . . . . . . . . . . . . . . . . . . . . . . . . . . . . . . . . . . . . . . . . . . . . 26
Chapter 6
Maintenance and Service Maintenance Precautions . . . . . . . . . . . . . . . . . . . . . . . . . . . . . . . . . . . . . . . . . . . . . . . . . . 29
Voltage Precautions . . . . . . . . . . . . . . . . . . . . . . . . . . . . . . . . . . . . . . . . . . . . . . . . . . . 29
Electrostatic Discharge Precautions . . . . . . . . . . . . . . . . . . . . . . . . . . . . . . . . . . . . . 29
Prepare for Maintenance and Service . . . . . . . . . . . . . . . . . . . . . . . . . . . . . . . . . . . . . . . . 30
Clean. . . . . . . . . . . . . . . . . . . . . . . . . . . . . . . . . . . . . . . . . . . . . . . . . . . . . . . . . . . . . . . . . . . . 30
Clean Exterior Surfaces . . . . . . . . . . . . . . . . . . . . . . . . . . . . . . . . . . . . . . . . . . . . . . . . 30
Clean External Filters (6300B-PBDx only). . . . . . . . . . . . . . . . . . . . . . . . . . . . . . . . . . 31
Remove/Reinstall the Cover . . . . . . . . . . . . . . . . . . . . . . . . . . . . . . . . . . . . . . . . . . . . . . . . 32
Remove the Cover. . . . . . . . . . . . . . . . . . . . . . . . . . . . . . . . . . . . . . . . . . . . . . . . . . . . . 32
Reinstall the Cover . . . . . . . . . . . . . . . . . . . . . . . . . . . . . . . . . . . . . . . . . . . . . . . . . . . . 32
Replace the Battery . . . . . . . . . . . . . . . . . . . . . . . . . . . . . . . . . . . . . . . . . . . . . . . . . . . . . . . 33
Post-configuration . . . . . . . . . . . . . . . . . . . . . . . . . . . . . . . . . . . . . . . . . . . . . . . . . . . . . . . . 33
Chapter 7
Troubleshoot Thermal Alarms. . . . . . . . . . . . . . . . . . . . . . . . . . . . . . . . . . . . . . . . . . . . . . . . . . . . . . . . . . . 35
Isolate Issue . . . . . . . . . . . . . . . . . . . . . . . . . . . . . . . . . . . . . . . . . . . . . . . . . . . . . . . . . . . . . 35
Reset to System Defaults. . . . . . . . . . . . . . . . . . . . . . . . . . . . . . . . . . . . . . . . . . . . . . . . . . . 36
Ship/Transport . . . . . . . . . . . . . . . . . . . . . . . . . . . . . . . . . . . . . . . . . . . . . . . . . . . . . . . . . . . 36
Disposal . . . . . . . . . . . . . . . . . . . . . . . . . . . . . . . . . . . . . . . . . . . . . . . . . . . . . . . . . . . . . . . . . 36
Additional Resources . . . . . . . . . . . . . . . . . . . . . . . . . . . . . . . . . . . . . . . . . . . . . . . . . . . . . . 37

Rockwell Automation Publication 6300B-UM002B-EN-P - January 2023 5
Preface
Summary of Changes This publication contains the following new or updated information. This list includes
substantive updates only and is not intended to reflect all changes.
About This Publication This manual is a user guide for your 6300B wall mount box PC.
A general knowledge of automation technology is needed to understand and follow the
instructions in this publication.
Knowledge of personal computers and Microsoft Windows® operating systems (OS) is required
to understand and follow the instructions in this publication.
Download Firmware Download firmware, associated files (such as AOP, EDS, and DTM), and access product release
notes from the Product Compatibility and Download Center at rok.auto/pcdc.
Catalog Numbers This publication is applicable to these 6300B wall mount box PCs. For your catalog number,
see the product label on the side of your computer.
Topic Page
Removed “VersaView” branded term Throughout
Renamed Chapter 1 to “Overview” 7
Renamed Chapter 4 to “System Settings” 23
Added new chapter, Chapter 5, Change Settings in BIOS Firmware 25
Added Chapter 6, Maintenance and Service, to include the contents of Chapter 5, Clean the Wall
Mount PC and Chapter 7, Replace Components 29
6300B wall mount box PC with one expansion slot 6300B-PBCx
6300B wall mount box PC with up to three expansion slots 6300B-PBDx

6Rockwell Automation Publication 6300B-UM002B-EN-P - January 2023
Notes:

Rockwell Automation Publication 6300B-UM002B-EN-P - January 2023 7
Chapter 1
Overview
The 6300B wall mount box PCs with Intel Core i3 and i7 processors are available in designs
with or without fans. Fan-cooled units perform well in challenging environments with elevated
temperatures. All wall mount PCs can be paired with FactoryTalk® View SE software to provide
the optimal human machine interface (HMI) experience within the Rockwell Automation®
Connected Enterprise.
Features The following features are available for your wall mount box PC.
6300B-PBCx
Front View
6300B-PBDx
Front View
Table 1 - Wall Mount Box PC Features
Features Cat. No. 6300B-PBCx Cat. No. 6300B-PBDx
Operating System (OS) Microsoft Windows 10 IoT Enterprise 2019 LTSC OS
Storage up to 1 TB 2.5-in. SSD SATA III
(mSATA interface) (1)
(1) Two wall mount box PCs, Cat. Nos. 6300B-PBCDNB-7BNBNNNNNNNNN-NN1S and
6300B-PBDAFK-7BNENNNNNNNNN-NN1S, are available with no storage drive and no Windows operating system.
up to 1 TB 2.5-in. SSD SATA III
(M.2 2280 interface)
Peripheral Connections
• 4 x Ethernet (RJ45), 3 x USB 3.0 (Type A)
• 2 x USB 2.0 (Type A), 1 x RS-232 (DB9M)
• 1 x DVI-D (full HD) ports
• 4 x Ethernet (RJ45)
• 4 x USB 3.0 (Type A)
•1xRS-232(DB9M)
• 1 x DVI-D (full HD) ports
Expansion Slots One PCIe x4 expansion slot Up to three PCIe expansion slots
(1 x PCIe x16 + 1 x PCIe x4 + 1 x PCIe x1)
Fan Design Fanless design for
24V DC SELV input power Fan cooled design for
100/230V AC input power

8Rockwell Automation Publication 6300B-UM002B-EN-P - January 2023
Chapter 1 Overview
Approximate Dimensions The following figure shows the dimensions of your 6300B wall mount box PC.
Table 2 - Approximate Dimensions [mm (in.)]
Dimension Cat. No. 6300B-PBCx Cat. No. 6300B-PBDx
A324 (12.75) 362 (14.25)
B338.4 (13.32) 377 (14.84)
C246 (9.69) 232 (9.13)
D78 (3.07) 51 (2.00)
E110 (4.33) 150 (5.90)
F58 (2.28) 31 (1.22)
G7.2 (0.28) 7.5 (0.30)
H68 (2.68) 41 (1.61)
I69.8 (2.75) 122 (4.80)
J75.8 (2.98) 128 (5.04)
J
E
G
A
B
C
D
E
F
Ø 10
(0.39)
Ø 5
(0.20)
6
(0.24)
Ø 5
(0.20)
Method 1 (x 4)
Method 2 (x 4)
G
H
H
I
Top View Side View

Rockwell Automation Publication 6300B-UM002B-EN-P - January 2023 9
Chapter 1 Overview
Peripheral Connections Table 3 and Table 4 show the I/O ports and slots for peripheral connections to your 6300B wall
mount box PC.
The I/O ports shown are possible configurations and may vary from the
configuration of your actual product.
Table 3 - I/O Ports and Slots: Cat. No. 6300B-PBCx
Note No. Description Note No. Description
1 Ground screw 6 3 x USB 3.0 port, Type A
2 DC input power connection 7 DVI-D port, full HD
3 Serial port, RS-232 (DB9M) 8 PCIe x4 expansion slot
4 4 x Ethernet LAN port, RJ45 9 CFast card slot
5 2 x USB 2.0 port, Type A
Table 4 - I/O Ports and Slots: Cat. No. 6300B-PBDx
Note No. Description Note No. Description
1 Ground screw 6 Serial port, RS-232 (DB9M)
2 AC input power connection 7 CFast card slot
3 DVI-D port, full HD 8 2 x SSD drive slot (optional)
4 4 x Ethernet LAN port, RJ45 9 3 x PCIe expansion slot
5 4 x USB 3.0 port, Type A
94
5
6 7
3
8
2
1
9
4
5
67
3
8
2
1
4
4

10 Rockwell Automation Publication 6300B-UM002B-EN-P - January 2023
Chapter 1 Overview
Notes:

Rockwell Automation Publication 6300B-UM002B-EN-P - January 2023 11
Chapter 2
Installation
Follow these guidelines and procedures to help you plan, mount, and power your 6300B wall
mount box PC.
Unpack the Computer Before you unpack your 6300B wall mount box PC, inspect the shipping carton for damage. If
damage is visible, immediately contact the shipper and request assistance. Otherwise,
proceed with unpacking.
Keep the original packing material in case you must return or transport your 6300B wall mount
box PC to another location.
Your 6300B wall mount box PC ships with the following items.
Prepare for Installation Read and follow these precautions before you install your 6300B wall mount box PC.
Environment and Enclosure Information
UL/cUL Mark Compliance
Equipment with the UL/cUL mark complies with the requirements of UL 61010-1,
UL 61010-2-201, CSA C22.2 No. 61010-1, and CSA C22.2 No. 61010-2-201. A copy of the certificate
of compliance is available at rok.auto/certifications.
Item Description
Hardware • 6300B-PBCx models: DC power connector assembly kit
• 6300B-PBDX models: A grounded, 3-prong IEC60320-C13 power cord
Document 6300B Wall Mount Box PC Installation Instructions, publication 6300B-IN002
ATTENTION: This equipment is intended for use in a Pollution Degree 2
industrial environment, in overvoltage Category II applications (as defined in
IEC 60664-1), at altitudes up to 2000 m (6561 ft) without derating.
This equipment is considered Group 1, Class A industrial equipment according
to IEC/EN 61326-1. Without appropriate precautions, there can be potential
difficulties with electromagnetic compatibility in other environments due to
conducted as well as radiated disturbance.
This equipment is considered open equipment, which means it must be
mounted in an enclosure where the equipment can be operated from the front
panel.
The enclosure in which this equipment is installed must be accessed only with
a key or tool, and only by trained and authorized personnel.
In addition to this publication, see the following:
Industrial Automation Wiring and Grounding Guidelines, publication 1770-4.1,
for more installation requirements
UL 50, CSA C22.2 No. 94.1, and IEC 60529, as applicable, for explanations of the
degrees of protection provided by enclosures

12 Rockwell Automation Publication 6300B-UM002B-EN-P - January 2023
Chapter 2 Installation
European Union Directive Compliance
This computer meets the European Union Directive requirements when installed within the
European Union or EEA regions and have the CE marking. A copy of the declaration of the
conformity is available at rok.auto/certifications.
Connect peripheral cables to the appropriate I/O ports on the computer. To comply with EN
61326-1, see Peripheral Connections on page 9 for the required cable types.
Installation Requirements Follow these requirements to make sure that your computer provides service with excellent
reliability.
Site Requirements
When choosing the installation site, consider the following:
• The site must have sufficient power.
• The site must be an industrial or control room environment which uses some form of
power isolation from the public, low-voltage mains.
• The site must be indoors.
• The site must not expose your 6300B wall mount box PC to direct sunlight.
• The surrounding air temperature range 6300B wall mount box PC can operate in is:
- 0…50 °C (32…122 °F) for 6300B-PBCx wall mount box PCs with the Intel Core i3
processor
- 0…45 °C (32…113 °F) for 6300B-PBCx wall mount box PCs with the Intel Core i7
processor
- 0…50 °C (32…122 °F) for 6300B-PBDx wall mount box PCs with the Intel Core i3 and
Intel Core i7 processors
• The surrounding air temperature must not exceed the maximum temperature for your
6300B wall mount box PC, especially when mounted in an enclosure.
• The 6300B wall mount box PC can be stored in a surrounding air temperature range of
-10…+60 °C (14…140 °F).
• The humidity of the ambient air must not exceed 80% noncondensing.
Mounting Requirements
Follow these requirements to mount your 6300B wall mount box PC.
• Choose a suitable mounting height.
• To help prevent overheating and to provide access to the I/O ports for cable
connections, mount with the I/O ports facing down.
• You must provide a minimum clearance around the perimeter of your 6300B wall mount
box PC (see Approximate Dimensions on page 8). This clearance accommodates for air
circulation necessary for cooling.
ATTENTION: This equipment is intended to operate in an industrial or control room
environment, which uses some form of power isolation from the public low-voltage
mains. Obtain permission from the local power authority before you connect any
computer configuration that draws more than 75 W of AC power directly from the
public mains.
All I/O cables must be used only indoors.
IMPORTANT The vertical position can be tilted up to 20° forward or backward
from the upright position. However, any tilt angle reduces the
maximum operating temperature by 5 °C (41 °F).

Rockwell Automation Publication 6300B-UM002B-EN-P - January 2023 13
Chapter 2 Installation
Figure 1 - Mounting Requirements
DC Power Supply Guidelines: Cat. No. 6300B-PBCx Only
Follow these guidelines to select a DC power supply for your 6300B-PCBx.
• Your 6300B-PCBx wall mount box PC must be powered with a voltage of
24V DC (18…32V DC SELV input voltage range).
• The nominal output power must be 25% larger than the drained power.
• The output voltage rise time has to be less than 100 ms.
• Consider the working temperature and the thermal derating of the power supply.
• The inrush current can be represented by the figure at right, where the peak current is
10 A and the pulse width time is 400 µs.
Figure 2 - Inrush Current
Power Consumption
The following table shows the power consumption in watts of various components in your
6300B wall mount box PC.
WARNING: Do not exceed 120 W for the total system configuration. Power consumption
greater than 120 W can overpower the external and internal power supplies, which can
lead to component damage or, in extreme cases, electrical fires.
Minimum
Clearance:
7 cm (2.75 in.)
Minimum Clearance:
10 cm (3.94 in.)
Vertical Position
° 0 preferred
° 20 maximum
° 20 maximum
Minimum
Clearance:
7 cm (2.75 in.)
Minimum Clearance:
10 cm (3.94 in.)
Minimum
Clearance:
7 cm (2.75 in.)
Minimum Clearance:
10 cm (3.94 in.)
Minimum
Clearance:
7 cm (2.75 in.)
Minimum Clearance:
10 cm (3.94 in.)
I/O Ports
Facing Down
I/O Ports
Facing Down
Top View Side View
Current
Peak Current
Inrush Current Magnitude
Steady-state
Current Value
Time
Pulse Width

14 Rockwell Automation Publication 6300B-UM002B-EN-P - January 2023
Chapter 2 Installation
Required Tools
The following tools and hardware are needed for wall mount installations.
Mount Follow the instructions below to mount your 6300B wall mount PC to a mounting surface.
1. Determine the placement of your 6300B wall mount box PC.
See Approximate Dimensions on page 8 and Mounting Requirements on page 12 to
assist you.
2. Level, measure, then mark the top of the selected holes (method 1) or keyhole slots
(method 2) of the attached brackets.
3. Set your 6300B wall mount box PC aside.
4. Drill holes in your mounting surface to accommodate for the four M4x20 stainless steel
screws (not supplied).
5. Partially tighten the four M4x20 stainless steel screws into the mounting surface,
leaving a gap equivalent to the bracket thickness.
6. Lift and align the top set of mounting holes of the brackets on your 6300B wall mount
box PC with the top two screws.
Table 5 - Power Consumption (W)
Component Description Power (W) Component Description Power (W)
Motherboard — 10.5 USB ports 2.0 Type A, each port 2.5
Processor Intel Core i3-7100E 45.8 3.0 Type A, each port 4.5
Intel Core i7-7820EQ 58.8 Memory card CFast SATA 1.3
SSD mSATA2 2.0 Ethernet 10/100/1000 Mbps 1.3
2.5-in. SATA MLC 5.2
RAM
4 GB 3.9
Serial port RS-232 DB9M 1.3 8 GB 4.6
Expansion slot PCI half-size or PCIe x4 6.5(1)
(1) 5W is the maximum that the card can use.
16 GB 5.9
32 GB 8
Table 6 - Required Tools
For Mounting For Connecting Power For Maintenance
• Drill and drill bit
•Level
•Ruler
•Pencil
•Smallscrewdriver
• Cutting pliers
• #2 Phillips screwdriver
• Stainless steel screws — 4 quantity
• Safety glasses
• Multi-purpose electricians tool
(wire stripper, cutter, and crimper)
• DC Power Supply (for Cat. No.
6300B-PBCx only)
• 2.5 mm Phillips screwdriver
• Lithium CR2032 3v RTC battery
Ø 10
(0.39)
Ø 5
(0.20)
Ø 5
(0.20)
Method 1 (x 4)
Method 2 (x 4)

Rockwell Automation Publication 6300B-UM002B-EN-P - January 2023 15
Chapter 2 Installation
7. Align the bottom two screws.
8. Slide your 6300B wall mount box PC downward until all four M4x20 stainless steel
screws are at the top of each bracket slot.
9. Fully tighten the four M4x20 stainless steel screws against the mounting surface.
Grounding and Bonding Whenever two connected pieces of equipment are far apart, it is possible that their ground
connections could be at different potential levels.
To overcome possible grounding problems, the following bonding methods are recommended:
Method 1: Connect the data cable shields to the equipotential bonding rail on both sides before
you connect the cable to the interfaces.
Method 2: Use an equipotential bonding cable (16 mm2or 6 AWG) to connect the grounds
between this 6300B wall mount box PC and a connected monitor.
Install the Ground Wire 1. Turn off the main power switch or breaker.
2. Remove the supplied nut, eyelet terminal, and washers from the ground screw.
3. For earth ground, fasten a 2.5 mm2(14 AWG) or larger external wire to the eyelet
terminal.
4. Use a ground wire with an insulation color that is approved by local inspection
authority.
5. Install the ground wire to the ground screw in the following sequence.
6. Tighten the nut to the ground screw.
Connect Power
Sequence No. Description
1 Toothed washer
2 Eyelet terminal
3Washer
4Lockwasher
5Nut
12345
ATTENTION: When you connect power to the computer for the first time, these
actions occur:
• The default UEFI setting automatically starts the computer after it is plugged into a
power source.
• For 6300B wall mount box PCs with a Microsoft Windows operating system (OS), you
must read and accept an End User Setup procedure.
Do not disconnect power from the system until after the Windows Setup
procedure is completed. If power is disconnected during this procedure, it can
result in a corrupted system image.
ATTENTION: For 6300B wall mount box PCs with Windows OS:
• Supply the computer with its own disconnect. Use an uninterruptible power source
(UPS) to help protect against unexpected power failure or power surges.
• Always shut down the Windows OS before you disconnect power to the computer to
minimize performance degradation and operating system failures.

16 Rockwell Automation Publication 6300B-UM002B-EN-P - January 2023
Chapter 2 Installation
Connect DC Power (6300B-PBCx)
All DC powered models require a safety extra low voltage (SELV) (a) power supply per UL.
The power supply is internally protected against reverse polarity.
To minimize ground loop currents and noise, Allen-Bradley® recommends that DC powered
models use only one grounded connection. For the ground connection on these model, see
Table 3 on page 9.
Follow these steps to connect the computer to a DC power source.
Install the Factory-supplied DC Power Connector Assembly
Figure 3 - DC Power Connector Assembly Kit
The DC power connector assembly kit provides strain relief for the DC power wires by reducing
their movement. To assemble and attach the connector assembly, refer to Figure 3 and Table 7
to perform the following steps.
1. Remove the DC terminal block from the computer chassis.
For the terminal block location, see Table 3 on page 9.
2. Open the power connector assembly kit that ships with the computer (A of Figure 3).
3. Insert the cable tie through the slots of the appropriate connector half (B of Figure 3).
4. Strip the end of each DC power wire to the length in Table 7.
(a) Where SELV is as defined in IEC 61010-2-201.
Table 7 - DC Power Connector Assembly
Note No. Description 6300P-PBCx
1 DC+ (24V DC nominal) recommended power wire size 2.5 mm2(14 AWG)
2 DC- (0V DC) recommended power wire size
3 Stripped wire length 7 mm (0.275)
4 Torque range to secure DC power wires 0.5...0.6 N•m (0.37...0.4 ft•lb)
5 Torque value to reinstall DC terminal block to computer 0.3 N•m (0.22 ft•lb)
IMPORTANT DC power wires must be of stranded copper and sized according to
Table 7.
A B C
D FE
1
2
3
3
4
4
5 (M3)
5 (M3)

Rockwell Automation Publication 6300B-UM002B-EN-P - January 2023 17
Chapter 2 Installation
5. Insert each stripped end into the DC terminal block as shown in Table 7 on page 16.
6. Tighten the screws on top of the terminal block to secure the DC power wires to the
torque value in Table 7 on page 16.
7. Slide the connector half with the attached tie onto the end of the DC terminal block (C of
Figure 3 on page 16).
8. Tighten the cable tie so it is snug against the terminal wires.
9. Use cutting pliers to cut the excess part of the cable tie (D of Figure 3 on page 16).
10. Install the white label supplied with the kit (E of Figure 3 on page 16).
11. Align and install the other connector clamp half to complete the assembly
(F of Figure 3 on page 16).
12. Reconnect the DC terminal block with the connector assembly to the computer chassis.
13. Torque the DC terminal block flange screws to the values in Table 7 on page 16.
14. Turn on the main power switch or breaker.
The power on self test (POST) initiates.
Connect AC Power (6300B-PBDx)
Operate the computer in an industrial or control room environment, which uses some form of
power isolation from the public, low voltage mains.
To connect AC power, perform the following steps.
1. Connect the appropriate end of the power cord to the
AC power input port.
2. Connect the other end of the power cord to an
AC power source with an input voltage of 110…230V AC,
50/60 Hz.
3. Flip the power switch for the power input port.
The power on self test (POST) initiates.
IMPORTANT The DC terminal block in the photos is only for illustrative purposes.
Your DC terminal block can differ in size, shape, and color to what is
shown in the photos.
The white label can be used for identification or other information.
When installed correctly, both clamp tabs snap into place.
AC Power Input Port

18 Rockwell Automation Publication 6300B-UM002B-EN-P - January 2023
Chapter 2 Installation
Notes:

Rockwell Automation Publication 6300B-UM002B-EN-P - January 2023 19
Chapter 3
Operate
Operating Guidelines Follow these operating guidelines for your 6300B wall mount box PC.
• When mounted in an enclosure, keep the enclosure door closed during operation so
dust and other airborne contamination do not infiltrate your 6300B wall mount box PC.
Open the enclosure door only for routine maintenance.
• For Microsoft Windows® operating systems (OS): always use the proper power down
procedures as required, such as the Shut Down command in the Windows OS.
• Do not apply power again until shutdown is complete.
Manual Start Follow these steps to manually start your 6300B wall mount box PC.
1. Make sure that all necessary peripheral devices are connected to the corresponding
I/O ports.
2. Make sure any connected components with separate power supplies (such as an
external display) are powered on first.
3. Apply power to your 6300B wall mount box PC depending upon your model:
- For AC powered models: Flip the power switch located on the bottom of the chassis.
- DC powered models: Apply power to the main power switch or breaker.
Once power is applied, various light-emitting diode (LED) status indicators illuminate to
display the state of your 6300B wall mount box PC. See Table 8 on page 20 for details of
these LED status indicators.
An external display, keyboard, and mouse are required to perform the steps within
this chapter.
IMPORTANT The following steps apply when power has already been connected.
See Connect Power on page 15 for instructions on applying power for the
first time.

20 Rockwell Automation Publication 6300B-UM002B-EN-P - January 2023
Chapter 3 Operate
Reset Buttons and LED
Status Indicators
Your 6300B wall mount box PC features reset buttons and LED status indicators located on the
front of the chassis. Table 8 details the function of each.
Table 8 - Reset Buttons and LED Status Indicators
Note No. Description Color Function
Reset Buttons
1 System Reset —
Forces an internal reset, as if power was lost temporarily then
returned.
IMPORTANT: A system reset can cause data loss and possible
corruption to the OS. Use this button only if there are no better
options (like keyboard or mouse commands) or if the resumed DC
power does not restart the computer.
2 Watchdog Reset — Turns off the watchdog LED (item 3).
LED Status Indicators
3 Power Supply
No color The computer is not powered.
Green The computer is on and powered by the main power supply.
Flashing Green The computer is on and powered by a UPS.
Yellow If a UPS is connected, verify that the UPS connection is secure or
that the UPS battery is not faulty.
4Thermal Alarm /
Battery Fault
Red The computer has exceeded its operating temperature. For more
information, see Thermal Alarms on page 35.
Flashing red The real-time clock (RTC) battery is lower than 2.5V. Replace the
RTC battery before it goes lower and risks loss of date and time.
5 Watchdog Red The watchdog timer has expired.
6MassStorageYellow
When lit, access to a mass storage device (SSD or CFast) is
occurring through a SATA channel.
7On/Off/
Standby/UPS
No color Your 6300B wall mount box PC is powered off or the CPU is not
initiating.
Green • Your 6300B wall mount box PC is powered on.
• The system is in a low-power state, and current session
information is being stored in the RAM.
Yellow Your 6300B wall mount box PC is safe to power off; the OS has been
shut down successfully.
Flashing green Your 6300B wall mount box PC is powered on, but a UPS is
powering the system while main power is not present.
8 Data Speed
No color 10 Mbps
Green 100 Mbps
Yellow 1000 Mbps (1 Gbps)
9DataLink
No color No data link is present.
Green Data link is established.
Flashing green Data link is established and there is data transfer.
3
12 8
9
7
5
4
128
9
36
7
65
4
6300B-PBCx
Front View
6300B-PBDx
Front View
Other manuals for Allen-Bradley VersaView 6300B
3
This manual suits for next models
2
Table of contents
Other Rockwell Automation Desktop manuals

Rockwell Automation
Rockwell Automation VersaView 5400 User manual

Rockwell Automation
Rockwell Automation 6181P User manual

Rockwell Automation
Rockwell Automation Allen-Bradley VersaView 6180W-12KPXPH User manual

Rockwell Automation
Rockwell Automation Allen-Bradley H Series User manual

Rockwell Automation
Rockwell Automation Allen-Bradley 6181X-12A2SW71DC, Allen-Bradley 6181X-00N2SW71DC, Allen-Bradley 6181X-12A2SWX1DC, Allen-Bradley... User manual

Rockwell Automation
Rockwell Automation Allen-Bradley 6181P-2PXP User manual