14 15
Tip # 1 - Iron shirts like a pro
Start with the collar, working from the outer
edges into the middle. Iron the shoulder
next, followed by the cus and sleeves. Place
the collar at the narrow end of the board so
that one front panel of the shirt is extended
flat. Iron the front panel from shoulder to shirt
tail. Rotate to iron the back of the shirt. Rotate
and complete the remaining front panel.
Tip # 2 - Tips for T-shirts
Straighten seams on t-shirts before
hanging out to dry. To avoid damage to
printed graphics and logos turn the t-shirt
inside out and iron the reverse side of the
print. Never iron areas of your t-shirt where
perspiration marks are visible as the heat of
the iron will permanently fix the stain.
Tip # 3 - Hung out to dry
When washing is complete, remove shirts
from the machine immediately, shake them
out and hang them on coat hangers to air
dry – this will keep wrinkles to a minimum.
Tip # 4 - Selecting the right temperature
If you are unsure of the correct setting for a
particular garment, test a small area such as
a seam or inside hem before ironing a visible
area. Start with a low temperature and slowly
increase the heat to find the best setting.
Tip # 5 - Don’t be afraid to iron silk
Don’t be afraid to iron silk. Although delicate
in appearance, silk is the strongest and most
resilient of all natural fibres. To achieve the
best results, set to a low cotton setting and
use regular shots of steam. Always use a
pressing cloth to avoid shine marks.
Tip # 6 - Ironing the seam
Always press seams in the same direction
they were made. When a garment is
produced, the fibres will naturally settle in
the direction they were initially pressed, so
it’s best not to iron against the grain.
Tip # 7 - Sort types of fabric
Sort articles to be ironed according to the type
of fabric. This will reduce the need to adjust
the temperature constantly. Start with articles
requiring lower temperatures and work your
way through to items requiring higher settings.
Tip # 8 - Summer frocks and frills
Steam is the key when ironing delicate
summer fabrics such as muslin, cotton
and linen. Don’t press down with the iron,
simply hover above the garment and steam
it using a vertical shot of steam. Ruing,
netting, tulle or intricate hand detailing is
also best ironed using this method.
Tip # 9 - Pressing your winter woollies
Steam is crucial when pressing your winter
woollies. Woollen garments can be hung
and steamed using the vertical shot of steam
feature. After steaming, brush the garment
with your hand to plump up woolen fibres.
If ironing the garment flat it is best to use
a pressing cloth. Don’t be afraid to apply
pressure – steam and hold.
Tip # 10 - Table settings to impress
To avoid unwanted creases always iron
your table cloth after taking it out of the
cupboard. A dinner party is a special
occasion, so treat the table cloth as you
would your own outfit. For best results, lay
towels across your table and iron the table
cloth over the towels. This will save you
time and ensure a beautifully presented
table setting.
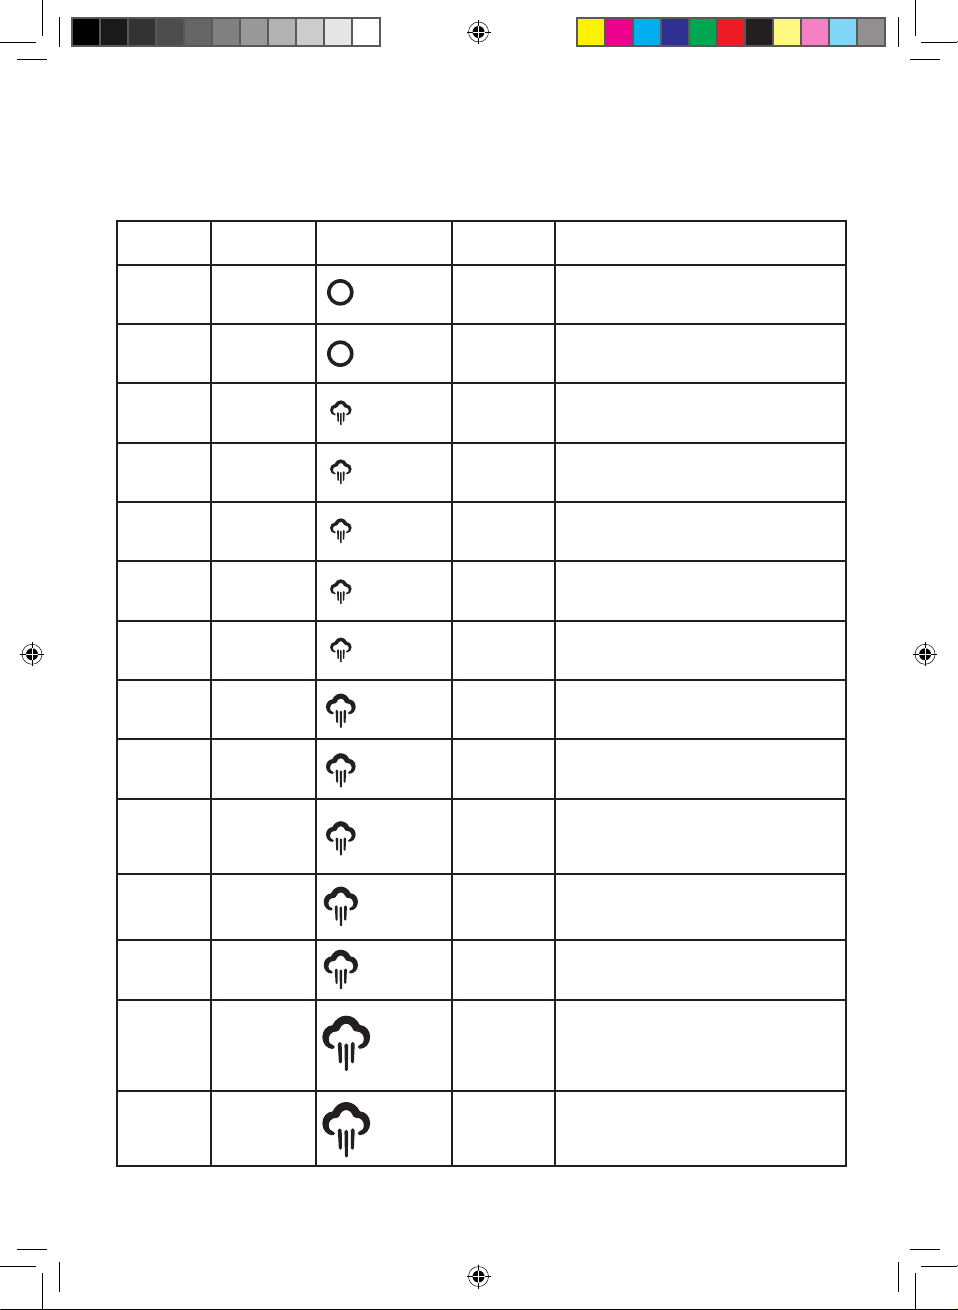
Ironing Tips TricksTroubleshooting Guide
Problem Possible Reason Solution
Water is spitting
from the soleplate.
The temperature of the
soleplate is set below
the Silk setting.
Turn the soleplate temperature up
to Silk or above and wait for the
soleplate to reach the selected
temperature. Before using the steam
generator on a garment direct a
shot of steam into the air to release
any remaining
The unit has been left
overnight and water
residue has built up in
the steam hose.
The unit has been
moved or shaken
during use.
Ensure the unit is placed on stable
base and is not moved or shaken.
Ensure the soleplate temperature is
turned up to Silk or above and wait
for the soleplate to reach the selected
temperature. Before using the steam
generator on a garment direct a shot
of steam into the air to release any
remaining condensation.
The Calc Clean
indicator light
illuminated.
The unit needs to
be descaled.
Wait for the unit to cool down and
then following the Care and Cleaning
instructions on page 9. Once you
have completed the descaling
process and refilled the tank, press
and hold the Power button for 3
seconds to switch o the Calc Clean
indicator light. The power light will
illuminate and the unit will begin
heating as normal.
The Calc Clean
indicator light is
still on after the
unit has been
descaled.
The Calc Clean function
has not been reset.
When you have completed the
descaling process and refilled the
tank, press and hold the Power button
for 3 seconds to switch o the Calc
Clean indicator light. The power light
will illuminate and the unit will begin
heating as normal.
All the lights on
the control panel
are flashing
This may be a result
of that the unit has
not been descaled
properly.
This could be an indication that the steam
generator has not been decalcified on a
regular basis as recommended by the
Calc Clean indicator. Decalcify the unit
immediately. If the lights on the control
panel continue to flash after you have
properly decalcified the unit please
call Customer Service.
Pro Glide Steam Generator_UK_AW.indd 14-15 27/06/2014 15:13