manuals.online logo
Brands
  1. Home
  2. •
  3. Brands
  4. •
  5. Roland
  6. •
  7. Recording Equipment
  8. •
  9. Roland TD-6 User manual

Roland TD-6 User manual

Other manuals for TD-6

1

Other Roland Recording Equipment manuals

Roland BR-1180 Operating and maintenance manual

Roland

Roland BR-1180 Operating and maintenance manual

Roland MV-8800 Production Studio User manual

Roland

Roland MV-8800 Production Studio User manual

Roland DiscLab CDX-1 Instruction and safety manual

Roland

Roland DiscLab CDX-1 Instruction and safety manual

Roland MC-50 mkII User manual

Roland

Roland MC-50 mkII User manual

Roland DM-80F User manual

Roland

Roland DM-80F User manual

Roland Compu Rhythm CR-68 User manual

Roland

Roland Compu Rhythm CR-68 User manual

Roland V-Guitar System VG-99 Setup guide

Roland

Roland V-Guitar System VG-99 Setup guide

Roland R-8 mkII User manual

Roland

Roland R-8 mkII User manual

Roland V-Studio VS-20 User manual

Roland

Roland V-Studio VS-20 User manual

Roland U-220 User manual

Roland

Roland U-220 User manual

Roland CSQ-100 User manual

Roland

Roland CSQ-100 User manual

Roland MT-100 User manual

Roland

Roland MT-100 User manual

Roland SBX-80 User manual

Roland

Roland SBX-80 User manual

Roland MV-8800 Production Studio Instruction manual

Roland

Roland MV-8800 Production Studio Instruction manual

Roland TurboStart VS-880-S1 User manual

Roland

Roland TurboStart VS-880-S1 User manual

Roland VS-2000 Manual

Roland

Roland VS-2000 Manual

Roland MSQ-100 User manual

Roland

Roland MSQ-100 User manual

Roland DSD-2 User manual

Roland

Roland DSD-2 User manual

Roland SC-7 User manual

Roland

Roland SC-7 User manual

Roland TR-08 User manual

Roland

Roland TR-08 User manual

Roland Planet-P  MKS-10 User manual

Roland

Roland Planet-P MKS-10 User manual

Roland VS-2000 User manual

Roland

Roland VS-2000 User manual

Roland Boss GT-6 User manual

Roland

Roland Boss GT-6 User manual

Roland RSS AR-3000R User manual

Roland

Roland RSS AR-3000R User manual

Popular Recording Equipment manuals by other brands

ThermoFisher Scientific Dionex DRS 600 Installation checklist

ThermoFisher Scientific

ThermoFisher Scientific Dionex DRS 600 Installation checklist

Shure ANIUSB-Matrix user guide

Shure

Shure ANIUSB-Matrix user guide

Nady Audio HE-1 user guide

Nady Audio

Nady Audio HE-1 user guide

AUDAC APM 01 User manual & installation guide

AUDAC

AUDAC APM 01 User manual & installation guide

Teac GF-350 owner's manual

Teac

Teac GF-350 owner's manual

Fractal Audio MFC-101 MARK III owner's manual

Fractal Audio

Fractal Audio MFC-101 MARK III owner's manual

bmcm USB-OI16 manual

bmcm

bmcm USB-OI16 manual

HHB BurnIT CDR-830 Service manual

HHB

HHB BurnIT CDR-830 Service manual

GE VersaMax IC200CPUE05 manual

GE

GE VersaMax IC200CPUE05 manual

IntesisBox MH-RC-MBS-1 user manual

IntesisBox

IntesisBox MH-RC-MBS-1 user manual

Attero Tech unD4l user manual

Attero Tech

Attero Tech unD4l user manual

Sennheiser UI 765 instruction manual

Sennheiser

Sennheiser UI 765 instruction manual

Sony RCD-W1 Operating Instructions  (primary... Service manual

Sony

Sony RCD-W1 Operating Instructions (primary... Service manual

8x8 Inc Valcom V-2001A manual

8x8 Inc

8x8 Inc Valcom V-2001A manual

Waves SUB Align user guide

Waves

Waves SUB Align user guide

Mitsubishi Electric MAC-334IF-E installation manual

Mitsubishi Electric

Mitsubishi Electric MAC-334IF-E installation manual

Robotics Technologies microBus-Cam II installation manual

Robotics Technologies

Robotics Technologies microBus-Cam II installation manual

Seca 460 quick start guide

Seca

Seca 460 quick start guide

manuals.online logo
manuals.online logoBrands
  • About & Mission
  • Contact us
  • Privacy Policy
  • Terms and Conditions

Copyright 2025 Manuals.Online. All Rights Reserved.

®ÂØÒňή
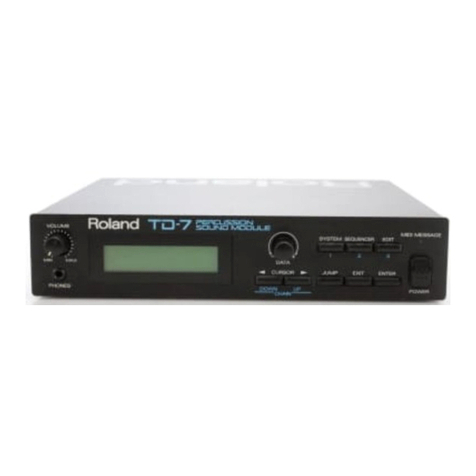
TD-6
Total Percussion
Sound Module
TurboStart
TBS141 © 2001 Roland Corporation U.S., 5100 S. Eastern Ave., Los Angeles CA 90040 Faxback # 20174 Page 1
It’s a Fact…
The TD-6 is the latest percussion sound module from
Roland. Incorporating great drum and percussion
sounds and ease-of-use, this module gives you the
power to sound and play your best. Features include:
• 1,024 high-quality drum sounds.
• 64-voice polyphony.
• 262 backing instruments and 99 drum kits.
• 12,000 note 6-part sequencer.
• 9 trigger inputs for Roland’s PD,KD and CY
series pads and triggers.
• Ambience and EQ effects
• Backlit display
Listening to the Demo Songs
There are four demo songs that demonstrate the
abilities of the TD-6. Use the following procedure to
play the demo songs:
1. Press SONG and KIT together.
2. Use the INC/+ or DEC/- to select one of the four
songs.
3. Press PLAY.
4. Press STOP to stop the demo song, then press
EXIT to return to the main menu.
Adjusting the LCD’s Contrast
You may want to adjust the screen contrast to make
the screen easier to see in under lighting conditions:
1. Hold down SHIFT and press EDIT/SETUP until
“Utility” shows in the screen.
2. Press ENTER until “LCD CONTRAST” shows in
the screen.
3. Press INC/+ or DEC/- to adjust the value from
1-16. Press EXIT twice to return to the main
menu.
Choosing a Drum Kit
Use the following steps to select different drum kits:
1. Press KIT until it’s lit.
2. Press INC/+ or DEC/- to select the desired kit.
Note: Hold down INC/+ and press DEC/- to scroll
through the different kits quickly. Hold down SHIFT
and press the INC/+ or DEC/- to move through the
list in increments of ten.
Changing an Instrument Within a Kit
You can change the instruments in the currently
selected kit. Use the following procedure:
1. If necessary, press KIT so it’s lit.
2. Press EDIT/SETUP.
3. Press ENTER.
4. Strike the pad/kick/or crash to hear the
instrument you want to change.
5. Press the INC/+ or DEC/- buttons to select the
desired instrument.
Note: If no pads are being used, hold down SHIFT
and press KIT and the selected instrument will sound.
Then use INC/+ or DEC/- to continue to select
different instruments
6. Press EXIT twice when you’re finished.
Playing a Song
There are 150 preset songs in the TD-6. Use the
following procedure to select and play the songs:
1. Press SONG repeatedly until it’s lit.
2. Use the INC/+ or DEC/- buttons to select one of
the songs.
3. Press PLAY.
4. Press STOP when finished.
5. Repeat Steps 2-4 to hear other songs.
6. To adjust the tempo, hold down SHIFT and
press CLICK/TEMPO while the song’s playing.
Using the Metronome Feature
You can play along with the built-in metronome to
help keep your timing accurate. Use the following
procedure to adjust the metronome volume:
1. Press CLICK/TEMPO. The metronome starts
playing.
1. Press EDIT/SETUP.
2. Adjust the CLICK LEVEL (volume) using the
INC/+ or DEC/- buttons.
3. To stop the metronome, press CLICK/TEMPO
again.
®ÂØÒňή
TD-6
Total Percussion
Sound Module
TurboStart
TBS141 © 2001 Roland Corporation U.S., 5100 S. Eastern Ave., Los Angeles CA 90040 Faxback # 20174 Page 2
Use the following procedure to adjust the metronome
tempo:
1. To adjust the tempo (BPM), hold down SHIFT
and press CLICK/TEMPO.
2. Use the INC/+ or DEC/- buttons to select the
desired BPM.
3. Press EXIT twice when you’re finished.
Use the following procedure to change the
metronome sound:
1. Press EDIT while the metronome’s playing.
Note: The CLICK/TEMPO button should be lit.
2. Press the RIGHT ARROW (!) button three
times.
3. Use the INC/+ or DEC/- buttons to select the
desired sound. Press EXIT when you’re finished.
Changing the Ambience Settings
You can select and make changes to the nine
different ambience types available in the TD-6. Use
the following procedure:
1. If necessary, press KIT until it’s lit.
2. Press EDIT/SETUP.
3. Press the RIGHT ARROW (!) once until
“AMBIENCE” shows in the screen.
Note: To hear the changes you make to the
ambience sounds, strike a pad or hold SHIFT and
PRESS kit.
4. Press ENTER once, and then use the INC/+ or
DEC/- buttons to turn the ambience on or off.
5. Press the RIGHT ARROW (!) once again and
use the INC/+ or DEC/- buttons to change the
AMBIENCE SEND LEVEL .
6. Press the RIGHT ARROW (!) once again and
use the INC/+ or DEC/- buttons to change the
ambience STUDIO TYPE.
7. Press the RIGHT ARROW (!) once again and
use the INC/+ or DEC/- buttons to select the
ambience WALL TYPE.
8. Press the RIGHT ARROW (!) once again and
use the INC/+ or DEC/- buttons to select the
ambience ROOM SIZE.
9. Press the RIGHT ARROW (!) once again and
use the INC/+ or DEC/- buttons to select the total
AMBIENCE LEVEL (volume).
10. Press EXIT twice when you’re finished.