manuals.online logo
Brands
  1. Home
  2. •
  3. Brands
  4. •
  5. Roland
  6. •
  7. Synthesizer
  8. •
  9. Roland JUNO-Gi User manual

Roland JUNO-Gi User manual

1
®ÂØÒňήWorkshop
Splits, Layers, Favorites, and More
© 2011 Roland Corporation U.S.
All rights reserved. No part of this publication may be reproduced in any form without the
written permission of Roland Corporation U.S.
JUNOGiWS02
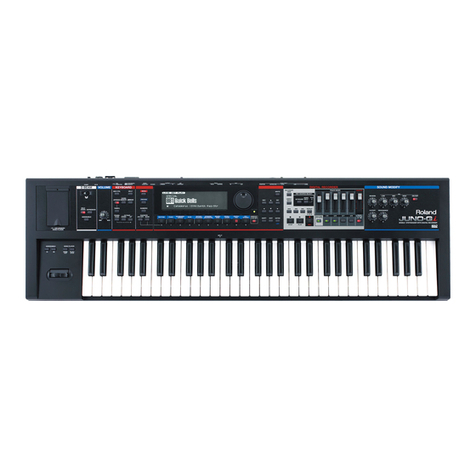
JUNO-Gi Mobile Synthesizer
and Digital Recorder
2
About the JUNO-Gi Workshop Booklets
The Roland JUNO-Gi Mobile Synthesizer with Digital Recorder is an
affordable, portable, perfect instrument for performers and songwriters.
It’s got a top-of-the-line sound engine and over 1300 exciting new sounds.
The onboard digital recorder allows you to record and develop your songs,
with dedicated faders and acclaimed BOSS GT-class effects. With USB MIDI
capabilities and its instant MIDI Controller mode, the JUNO-Gi also fits nicely
into any computer-based recording system. Finally, the JUNO-Gi sports a
versatile USB song player for playing backing tracks onstage.
Each JUNO-Gi Workshop Series booklet focuses on one JUNO-Gi topic, and is
intended as a companion to the JUNO-Gi Owner’s Manual.
This booklet requires JUNO-Gi Operating System v1.01 or higher. You can
download the latest JUNO-Gi O.S. for free from www.RolandUS.com.
About This Booklet
Designed as a flexible onstage keyboard, the JUNO-Gi’s live sets are great for
splitting the keyboard and for layering tones. Favorites are also an important
feature for playing live, and it’s important to know how to transpose the
JUNO-Gi keyboard. This booklet gets you ready to gig with the JUNO-Gi.
Understanding the Symbols in This Booklet
Throughout this booklet, you’ll come across information that deserves
special attention—that’s the reason it’s labeled with one of the following
symbols.
A note is something that adds information about the topic at hand.
A tip offers suggestions for using the feature being discussed.
Warnings contain important information that can help you avoid
possible damage to your equipment, your data, or yourself.
Splits and Layers
One of the things that make live sets so powerful onstage instrument is their
ability to play four tones at once, in a variety of combinations. (We explained
what tones are on page 5 of the Meet the JUNO-Gi Workshop booklet.)
You can
• stack tones on top of each other—so they play together in a “layer.”
• play a tone from its own area of the keyboard—so that the keyboard
is “split” into different “zones.” Most keyboards allow you to split a
keyboard in two, but the JUNO-Gi lets you create a four-way split. This
puts as many as four distinct sounds beneath your fingertips onstage
without even having to change live sets.
Of course, you can also create live sets that combine layers and splits, layering
some tones, and keeping others by themselves in their own keyboard zones.
Here are some—but not nearly all—of the possibilities to get you thinking.
Two-tone whole keyboard layer
Two-zone keyboard split
Two-zone layered split
Four-zone split
Three-zone split with one layer
Four-tone whole keyboard layer
The JUNO-Gi’s SPLIT button allows you to set up a simple, quick two-way
split. We’ll show you how to do this, and then explain how to create more
complex layered and split live sets.
3
5 Select a new tone for either hand by highlighting any of Lower 1’s
or Upper 1’s settings, pressing the desired tone category button
beneath the screen, and then choosing the tone you want.
6 Lower 1 and Upper 1 also have onscreen level knobs you can adjust
to set the volume balance between the tones. Highlight a knob and
use the Value dial or DEC and INC to set it as desired.
The JUNO-Gi actually offers quite a few settings for each tone. We’ll
discuss some of these in the next section of this booklet.
7 To turn off a quick split, press the lit SPLIT button so it’s no longer lit.
Creating Detailed Layers and Splits
The LAYER-SPLIT Screen
The most basic aspect of creating a layer or split is turning on the tones you
want to use, and turning off any you don’t need. This takes place on the
LAYER/SPLIT screen.
As in the last section, we’ll start with Preset 001 88KeyGrand, though
we’ll need to re-select it to get back to its original settings. To do this,
press the PIANO button beneath the display.
Basic Tone Setup
1 While holding down the SHIFT button, press
the SPLIT button to display the LAYER/SPLIT
screen.
Note that Split is unchecked onscreen, and the SPLIT button isn’t lit,
either. Those two indicators have to do with quick splits—we’re moving
beyond them now.
+
Creating a Quick Split
The key to setting up a simple quick split on the JUNO-Gi is the SPLIT button,
and the Split checkbox on the LAYER/SPLIT screen. Here’s how they work.
In this tutorial, we’ll start off with Preset 001 88KeyGrand. This is a
single-tone live set. To select it, press the PIANO button beneath the
display.
1 Press the SPLIT button so it lights and the LAYER-SPLIT
screen appears.
In this screen, the Split checkbox is checked to show that the
keyboard is now split. As you can see onscreen—and hear when you
play the keyboard—Lower 1 now plays a strings tone, and Upper 1
plays a piano tone.
The split takes place at Middle C, or “C4,” on the keyboard, so the
Lower 1 tone begins at the B just below it, and the Upper 1 tone plays
from Middle C on up. Upper 1’s first key is called the “split” point.
2 You can change the split point by holding down the lit SPLIT button.
3 While continuing to hold the button down, press the key on the
keyboard at which you want Upper 1’s tone to start playing. The
JUNO-Gi shows you the split point you’ve selected.
4 Press SPLIT again to close the SPLIT POINT window.
4
Creating a Complex Split
Once you’ve got your tones selected, it’s time to dig into the live set
parameters.
1 Press the MENU button.
The Top Menu screen appears.
2 With LiveSet Edit selected—as shown above—press the ENTER
button to display the LIVE SET EDIT 1 screen.
There are three groups of LIVE SET EDIT screens. These are the screens
that contain all of the many settings the JUNO-Gi offers for creating
and customizing live sets.
A discussion of the many live set parameters is way beyond the scope
of this book. We’re just concerned with a few of them here—see page
36 of the Owner’s Manual to learn about the rest of them.
As you can see, Upper 1 is turned on and its tone is 88KeyGrand 1.
2 Let’s turn on Upper 2 by highlighting its checkbox and then turning
the Value dial clockwise or pressing INC so a checkmark appears.
We’ve now got two active tones in this live set. Of course, both Upper
1 and 2 are using the same tone so far.
3 With the checkbox still selected, press the desired tone category
button beneath the display, and then turn the Value dial or use DEC
and/or INC to select the tone you want for Upper 2.
4 Repeat Steps 2 and 3 for Lower 1 and/or 2 if you’d like to add them
to your live set.
By default, all of the tones play across the entire keyboard, so all of
your active tones are now layered together. You can use each one’s
onscreen volume knob to set its level relative to the other tones.
If you like what you’ve got now, remember to save it, as described in
“Saving a Live Set” on page 35 of the Owner’s Manual.
5
5 Hold down SHIFT, and play the tone’s highest key. Here, we’ve set
Upper 1 to play from C6 to C7, the top of the JUNO-Gi keyboard.
At the right of the screen,
the JUNO-Gi shows you each
tone’s keyboard zone so you
can see what you’re doing.
6 Repeat Steps 4-6 for all of your tones, as desired.
If you’d like any tones to be layered with each other, set their K.L. and
K.U. parameters to the same values.
Here, we’ve divided the keyboard into four separate zones for a four-
way split.
The JUNO-Gi keyboard can play notes from C2—the C two octaves
below Middle C—to C7, the C three octaves above Middle C. The default
K.L. and K.U. values, however, are C– and G9, respectively, way beyond
the reach of the JUNO-Gi’s keyboard. This extended range of notes
can be played from a larger connected MIDI controller or from a DAW.
The F.L. (for “Fade Lower”) and F. U. (for “Fade Upper”) settings allow
tones below and above their zones, respectively, to fade to silence as
you move further outside the zone. This provides a way to crossfade
between zones. If you want each zone to remain completely separate,
though, set its F.L. and F.U. values to 0.
All of the LIVE SET EDIT screens share a common table layout, with
each row of settings corresponding to the tone shown at the left
edge of the screen.
The settings for
Upper 2
The live set’s tones. Each active tone is highlighted
—in this screenshot, Lower 2 is turned off.
• U1—is Upper 1 • U2—is Upper 2
• L1—is Lower 1 • L2—is Lower 2
Setting Up Keyboard Zones
1 Press 5 (KEYBORD) to display the screen on which you can set up your
keyboard zones.
On this screen, you set the zone from which you want each tone to
play. You set the lowest key and the highest key for each tone.
2 For the first tone you want to set up, highlight its K.L.—for “Key
Lower”—value.
3 Hold down the SHIFT button, and press the lowest key from which
you want to play the tone.
4 Highlight the tone’s K.U. value.
6
Since you’ll want to select a Favorite bank before registering a Favorite, we’ll
explain how to do this first.
To select a Favorite bank:
1 While holding down the FAVORITE BANK button, press one of the 10
numbered buttons to beneath the display to select the corresponding
bank—when you do this, the JUNO-Gi shows “Favorite Bank Change”
to provide visual confirmation of what you’ve done.
You need to turn on and light the FAVORITE ON/OFF button to recall a
Favorite, but, as you can see, changing Favorite banks can be done at
any time, whether the button’s lit or not. This helps you quietly get
ready to use Favorites onstage.
Registering a Live Set as a Favorite
1 Select the Live set you want register as a Favorite.
2 If you’d like to change Favorite banks, or if you’d like to confirm the
Favorite bank that’s selected, hold down the FAVORITE BANK button
and press the number button for the desired bank—the JUNO-Gi
confirms the bank selection onscreen.
3 Release the BANK button.
4 While holding down the FAVORITE ON/OFF button, press the button
to which you want to register the live set within the current bank—
the JUNO-Gi displays a confirmation of the registration.
The FAVORITE ON/OFF button remains lit to show that Favorites are
currently turned on, and the numbered button you pressed in Step 4
lights to show that a Favorite’s been registered to it.
Here we’ve registered a Favorite to the 1 button.
Shifting Zone Octaves
You can shift a tone’s octave so the notes you want to hear are the ones that
play from the tone’s keyboard zone.
1 Press 3 (PITCH) to display the pitch settings for the live set’s tones.
2 Set the Octave value as desired for each tone.
If you’re now done with setting up your complex split, save it as
described in “Saving a Live Set” on page 35 of the Owner’s Manual.
Favorites
While its category buttons make live-set selection on the JUNO-Gi pretty
fast, the Favorite feature makes the process even quicker. When a live set is
designated, or “registered,” as a Favorite, it’s assigned its own 0-9 numbered
button underneath the display—simply press the button to select or “recall”
the live set for use.
Using Favorites
Favorite Banks
You can register up to 100 Favorites,
organized into “banks,” each of
which holds 10 Favorite live sets. (In
“Prepping for Performance” below,
we’ll discuss how useful Favorite
banks can be.)
7
Recalling a Favorite
1 Press the FAVORITE ON/OFF button to light it if it isn’t already lit.
2 If necessary, change banks to the one containing the Favorite live set
you want to recall.
3 Press the Favorite’s number button to recall it.
Favorites Strategies
Prepping for Performance
Favorite banks are a great way to arrange the live sets you’ll need onstage at
a gig. Here are some thoughts to consider.
• You can have a different bank for each gig, or even for each set—Grab a
bank before you start playing, and the live sets you’ll need are laid out
across the buttons for you.
• A live set can be registered as a Favorite as many times as you like—so you
can register a live set you like to use in any bank where it’ll be needed.
• You can arrange Favorites in the order you’ll be using them—and use a
connected foot switch to move up and down through the Favorite bank
to select live sets as you need them.
To learn more about the hands-free selection of Favorites through
the use of a foot switch, see page 7 of the Realtime Control in the
JUNO-Gi Workshop booklet.
Recalling Favorites Onstage
Really, all you need to do to recall Favorite sets onstage is to remember to
press the FAVORITE ON/OFF button before you begin playing, and select the
bank that contains the Favorites you’ll need.
The End
We hope you’ve found this workshop helpful. Keep an eye out for
other JUNO-Gi Workshop booklets available for downloading at
www.RolandUS.com.

Other manuals for JUNO-Gi

9

Other Roland Synthesizer manuals

Roland Lucina AX-09 Assembly instructions

Roland

Roland Lucina AX-09 Assembly instructions

Roland JUNO-DS User manual

Roland

Roland JUNO-DS User manual

Roland SH-1 Operating and maintenance manual

Roland

Roland SH-1 Operating and maintenance manual

Roland Vocoder Plus VP-330 Operating and maintenance manual

Roland

Roland Vocoder Plus VP-330 Operating and maintenance manual

Roland JX-3P User manual

Roland

Roland JX-3P User manual

Roland Sound Canvas SC-155 User manual

Roland

Roland Sound Canvas SC-155 User manual

Roland TB-303 User manual

Roland

Roland TB-303 User manual

Roland JV-880 Operating and maintenance manual

Roland

Roland JV-880 Operating and maintenance manual

Roland Orchestra M-OC1 User manual

Roland

Roland Orchestra M-OC1 User manual

Roland Jupiter-50 Instructions and recipes

Roland

Roland Jupiter-50 Instructions and recipes

Roland SH-09 User manual

Roland

Roland SH-09 User manual

Roland SH-101 Operating and maintenance manual

Roland

Roland SH-101 Operating and maintenance manual

Roland E-09 Operating and maintenance manual

Roland

Roland E-09 Operating and maintenance manual

Roland V-Synth Operating and maintenance manual

Roland

Roland V-Synth Operating and maintenance manual

Roland SH-101 User manual

Roland

Roland SH-101 User manual

Roland SH-201 Operating and maintenance manual

Roland

Roland SH-201 Operating and maintenance manual

Roland JUNO-106 Operating and maintenance manual

Roland

Roland JUNO-106 Operating and maintenance manual

Roland XV-2020 User manual

Roland

Roland XV-2020 User manual

Roland FANTOM Series User manual

Roland

Roland FANTOM Series User manual

Roland Sound Canvas SC-50 User manual

Roland

Roland Sound Canvas SC-50 User manual

Roland JV-50 User manual

Roland

Roland JV-50 User manual

Roland System-8 User manual

Roland

Roland System-8 User manual

Roland HP -6 User manual

Roland

Roland HP -6 User manual

Roland JUNO 60 User manual

Roland

Roland JUNO 60 User manual

Popular Synthesizer manuals by other brands

neutral labs ELMYRA 2 Build guide

neutral labs

neutral labs ELMYRA 2 Build guide

Midas DM12 quick start guide

Midas

Midas DM12 quick start guide

Yamaha S08 Voice Editor Data list

Yamaha

Yamaha S08 Voice Editor Data list

Korg Poly-800 owner's manual

Korg

Korg Poly-800 owner's manual

Alesis Fusion supplementary guide

Alesis

Alesis Fusion supplementary guide

Akai MPK mini MK3 Service manual

Akai

Akai MPK mini MK3 Service manual

Yamaha FB-01/U owner's manual

Yamaha

Yamaha FB-01/U owner's manual

Electro-Harmonix SYNTH9 quick start guide

Electro-Harmonix

Electro-Harmonix SYNTH9 quick start guide

Blonder tongue Clearview NTSC16 quick guide

Blonder tongue

Blonder tongue Clearview NTSC16 quick guide

Korg SYNTHE-BASS owner's manual

Korg

Korg SYNTHE-BASS owner's manual

Yamaha DX100 owner's manual

Yamaha

Yamaha DX100 owner's manual

Casio CTK-711EX user guide

Casio

Casio CTK-711EX user guide

Korg M3 Replacement guide

Korg

Korg M3 Replacement guide

Oberheim Matrix-12 owner's manual

Oberheim

Oberheim Matrix-12 owner's manual

HP 3325A Calibration guide

HP

HP 3325A Calibration guide

Yamaha JOGR JOGRR CS50 instruction manual

Yamaha

Yamaha JOGR JOGRR CS50 instruction manual

Casio VZ-1 manual

Casio

Casio VZ-1 manual

Octave Kitten CALIBRATION PROCEDURE

Octave

Octave Kitten CALIBRATION PROCEDURE

manuals.online logo
manuals.online logoBrands
  • About & Mission
  • Contact us
  • Privacy Policy
  • Terms and Conditions

Copyright 2025 Manuals.Online. All Rights Reserved.