Rollei CarDVR-70 User manual


Installation
For the power capacity in the battery, refer to the following icons:
Full Middle Low
Charge Battery
1. Directly connect the car charger to the DVR for charging, even if it is switched off.
2. For USB charging, connect the USB data cable to the PC with the other end to the DVR,
even if it is switched off.
Installation and Removal of SD Card
1. In the direction as indicated, insert the TF card into the slot until it is held firmly.
2. To take the TF card out, slightly press the TF card to eject it out.
Note:
1. Observe the direction to insert the TF card; if the direction is reverse, the device and the
TF card may be damaged.
USB output
AV output
REC Key/ OK Key
Mode Key
IR
On/Off Key/ Fill light
Sna
p
shoot
HDMI output
Reset hole
Lens
TF card slot
Speaker
Up Key/FB/Volume+
Down

2. When the TF card is inserted into the device, the machine will set the TF card as preset
storage unit and the data in the original TF card will be unreadable.
3. If the TF card is incompatible with the device, please insert the card again or replace it
for retry.
4. Always use a high-speed TF card.
Use Guidelines
DVR On/Off
1. Hold the On/Off key for around 1s to switch on the device.
2. Hold the On/Off key for around 3 s to switch off the device.
Switch Working Modes
Press the Mode key to switch video/image. means video mode,
while means image mode. Press the Mode key twice to enter the playback mode.
How to Enter System Setup Option
Hold the Mode key, then press the OK key/REC key to enter the System Setupoption. In
such case, the bar of System Setupis of blue background.
1. Date/Time: You may set date/time.
2. Auto Switch-off: You may set the automatic switch-off time.
3. Key tone: You may switch on/off key tone.
4. Language: You may set the desired language menu.
5. TV mode: NTSC/PAL available.
6. Light source frequency: 50Hz/60Hz.
7. Default: Factory settings.
8. Version: F/W version number.
How to Take Videos and Set Video Options
1. Take Videos
When the DVR enters the video mode and the icon occurs on the left upper corner
of the screen, press the REC key/OK key to start recording; in recording videos, the icon
on the left upper corner of the screen will flash. Press the REC key/OK key to stop
and then the icon on the left upper corner of the screen will disappear.
2. Select Fill Light
In video mode, press the On/Off key shortly to switch daylight and night. If night mode is
chosen, the fill light will be activated.
3. Set Video Options
Press the Mode key to enter the setup of video options.
Resolution: 720P/480P

Loop recording: Off/5 min./10 min./15 min.
Motion Detection: On/Off.
Record Audio: On/Off.
Date Stamp: On/Off.
G-sensor: On/Off
Take and Set Photos
1. Press the On/Off key to enter the video mode; press the Mode key to enter the image
mode indicated with the icon on the left upper corner of the screen.
2. Align the DVR against the object, press the Up/Down key to change the digital focus; in
such case, hold the DVR firmly not to shock it.
3. Press the Shooting key, when the DVR gives a sound of Click, the shooting is
completed.
4. Self-Timer Function
In the image mode, press and hold the Mode key and choose the desired shooting mode,
press the Up key to choose Single, 2s, 5s, 10s and Sequence.
5. Hold the Mode key to enter the setup of the photos shot
Capture mode: Single/2S Timer/5S Timer/10S Timer/Sequence
Resolution: 12M/8M/5M/3M
Image quality: Super Fine/Fine/Normal
Sharpness: Strong/Normal/Soft
White balance: Auto/Daylight/Cloudy/Tungsten/Fluorescent
Color: Normal/Black & White/Sepia
ISO: Auto/100/200/400
Exposure: -2.0 - +2.0
Face Detection: Off/Face Detection/Smile Detection
Anti-Shaking: On/Off
Quick Review: Off/2s/5s.
Date Stamp: Off/Date/(Date/Time)
Tip:
1. In any of the modes of video, image and playback, you may press the Mode key to
switch such modes circularly.
2. In image mode, press the On/Off key to activate the fill light.
Playback Mode
1. When the DVR completes the startup procedure and enters the video mode, press the
Mode key twice to enter the 6-menu browse state.
2. Choose the desired photo or video and press the Up/Down key to browse it. In such
case, press the OK key to enter the single-image mode or operate the video. If the icon
appears on the left upper corner of the menu, the file is a video, press the OK key to
play or pause playing it; in playing, press the Up/Down key to turn up/down the volume

and hold the same for fast forward and fast backward. If the icon appears on the
left upper corner of the menu, the file is a photo.
3. Delete
In playback mode, hold the Mode key to have the options of Delete and Format; press the
Down key to move to the option to be deleted, press the OK key to have Deleteand
Delete Alloptions, then press the OK key to enter the desired option and again to
confirm.
Mode of Videoing while Charging
Connect the car charger to the USB port of the device, switch it off to enter such mode.
Data Backup
USB Backup Mode
Connect the DVR and PC with the USB cable, then the device will automatically power on
and the icon will appear, choose Memoryand press the OK key to confirm;
switch on the PC, then one mobile disc will appear on My Computeron the desktop and
you may find the desired file in the Mobile Disc/DCIM folder.
Remarks:
1. PC operation system: Windows 2000/XP/Vista/Windows 7/Windows 8, MAC OSX
10.3.6 or above.
2. Choose Camera, then the DVR may be used as a camera.
3. Choose PICBRIDGE to connect the printer to print pictures.
4.RemovetheUSBcabletoturnofftheDVR.
Connect to TV
1. Use the HDMI connection line to connect the DVR to a TV for playback.
2. Use a TV cable to connect the DVR to a TV for videoing, shooting and browsing
pictures and videos.
Tip: Without driver installed, the mobile disc may be used when the DVR is switched on.
Remarks: When this device freezes due to improper operation, press the Reset button to
restart and restore it.
Technical Specifications
LCD size 1.5,4:3,TFTLCD
Lens 120A+ class high-resolution super wide angle
Language for options German, English (default), French, Spanish, Italian, Portuguese,
Polish, Russian, Dutch, Greek, Hungarian, Czech, Danish, Swedish,
Norwegian, and Finnish
Video size 720P/480P
Video format AVI

Photo resolution 3M (12M, 8M and 5M Interpolated)
Photo format JPG
Memory card Support 8GB-32GB/Class 6-10 MicroSD card
Microphone/Speaker Inbuilt
Shooting mode Single/2S Timer/5S Timer/10S Timer/Sequence
Light source
frequency
50Hz/60Hz
TV output NTSC/PAL
USB port USB2.0
Power supply port 5 V 500 MA
Battery Built-in, 3.7V, 350 mAh
Operation system Windows 2000/XP/Vista/Windows 7, Windows 8, MAC OSX 10.3.6
or above
Note: We reserve the right to change the design and specs of this product without further
notice.

Installation
Der Ladezustand des Akkus kann ber folgende Symbole abgelesen werden:
geladen halbvoll niedrig
Akku laden
1. Das Kfz-Ladegert an das DVR-Gert anschlieen. Dazu muss dieses nicht
eingeschaltet sein.
2. Zum Laden ber USB den Rechner per USB-Kabel mit dem DVR-Gert verbinden.
Dazu muss dieses nicht eingeschaltet sein.
Einlegen und Entfernen der SD-Karte:
1. Die SD-Karte in der vorgegebenen Richtung in den Steckplatz schieben, bis sie
einrastet.
2. Zum Entfernen der SD-Karte diese einmal kurz drcken, so dass sie herausspringt.
Achtung:
USB-Ausgang
A
V-Aus
g
an
g
OK/REC-Taste
(Videoaufnahme)
Modus-Taste
IR
Ein-/Aus-Taste Flllicht
HDMI-Ausgang
Reset-ffnung
Objektiv
SD-Kartensteckplatz
Lautsprecher
Nach-oben-Taste/Schnellrc
klauf/Lautstrke+
Nach-unten-Taste/Schnellvo
rlauf/Lautstrke

1. Beim Einschieben unbedingt auf die Richtung achten. Falsches Einlegen kann sowohl
das Gert als auch die Karte beschdigen.
2. Das Gert erkennt die eingelegte SD-Karte als voreingestellte Speichereinheit. Die
Daten auf der ursprnglichen SD-Karte sind nicht lesbar.
3. Falls die SD-Karte nicht erkannt wird, die Karte noch einmal einlegen oder
auswechseln.
4. Nur High-Speed-SD-Karten verwenden.
Bedienanleitung
DVR ein/aus
1. Zum Einschalten die Ein-/Aus-Taste ca. 2 Sekunden gedrckt halten.
2. Zum Ausschalten die Ein-/Aus-Taste ca. 3 Sekunden gedrckt halten.
Betriebsmoduswechsel
Durch Drcken der Modus-Taste kann zwischen den Betriebsmodi Video/Foto gewechselt
werden. steht frVideo, frFoto.
Drcken Sie die Modus-Taste zwei Mal, um in den Wiedergabemodus zu gelangen.
Eingabe der Systemeinstellungen
Durch gleichzeitiges Drcken der Modus- und der OK-/REC-Taste werden die
Systemeinstellungen aufgerufen. Der Balken der Systemeinstellungen ist dann blau
hinterlegt.
1. Datum/Uhrzeit: Sie knnen das Datum und die Uhrzeit einstellen.
2. Automatische Abschaltung: Sie knnen den Zeitpunkt fr die automatische Abschaltung
einstellen.
3. Tastenton: Sie knnen den Tastenton ein- und ausschalten.
4. Sprache: Sie knnen die gewnschte Sprache whlen.
5. TV-Modus: Auswahl NTSC/PAL
6. Lichtquellenfrequenz: 50 Hz/60 Hz (Stromfrequenz)
7. Standard: Werkseinstellungen
8. Version: Software-Releasenummer
Videoaufnahme und Videoeinstellungen
1. Videoaufnahme
Wenn sich das DVR-Gert im Video-Modus befindet (das Symbol erscheint oben
links auf dem Bildschirm), durch Drcken der REC-Taste/OK-Taste die Aufnahme starten.
Whrend der Aufnahme blinkt oben links auf dem Bildschirm das Symbol .Durch
erneutes Drcken der REC-Taste/OK-Taste wird die Aufnahme beendet. Das Symbol
wird dann nicht mehr angezeigt.
2. Flllicht auswhlen
Im Video-Modus durch kurzes Drcken der Ein-/Aus-Taste zwischen Tageslicht und Nacht
wechseln. Im Nacht-Modus wird das Flllicht automatisch aktiviert.

3. Videooptionen einstellen
Drcken Sie die Modus-Taste, um die Videooptionen aufzurufen.
Auflsung: 720P/480P
Videozyklus: 5 Min./10 Min./15 Min.
Bewegungserkennung: ein/aus
Videoton: ein/aus
Datumsstempel: ein/aus
G-sensor: ein/aus
Fotografieren und Fotoeinstellungen
1. Mit der Ein-/Aus-Taste den Video-Modus aufrufen. Mit der Modus-Taste den
Foto-Modus auswhlen (das Symbol erscheint oben links auf dem Bildschirm).
2. Das DVR-Gert auf das Objekt ausrichten, mit der Nach-oben-Taste/Nach-unten-Taste
den digitalen Fokus einstellen und dabei das Gert ruhig halten.
3. Den Auslser drcken. Wenn ein Klickgerusch zu hren ist, ist die Aufnahme
abgeschlossen.
4. Selbstauslser
Im Foto-Modus die Modus-Taste gedrckt halten und mit der Nach-oben-Taste die
gewnschte Option auswhlen: Einzelaufnahmen, 2 Sek., 5 Sek. und Serienaufnahme.
5. Halten Sie die Modus-Taste gedrckt, um die Einstellungen zur Fotoaufnahme
aufzurufen.
Aufnahme-Modus: Einzelaufnahme / Selbstauslser (2 Sek./5 Sek./ 10 Sek.) /
Serienaufnahme
Auflsung: 12M/8M/5M/3M
Bildqualitt: optimal/gut
Bildschrfe: scharf/normal/weich
Weiabgleich: automatisch/Tageslicht/Wolken/Kunstlicht/Fluoreszenzlicht
Farbe: Standard/Schwarzwei/Braun
ISO: Automatisch/100/200/400
Belichtungsausgleich: 2.0 bis +2.0
Gesichtserkennung: Standard/Lcheln
Verwackelschutz: ein/aus
Schnellvorschau: aus/2 Sek./5 Sek.
Datumsstempel: Datum/(Datum/Uhrzeit)
Tipp:
1. Aus dem Video-, Foto- oder Wiedergabe-Modus knnen Sie durch wiederholtes
Drcken der Modus-Taste in einen anderen Modus wechseln.
2. Im Foto-Modus knnen Sie durch Drcken der Ein-/Aus-Taste das Flllicht aktivieren.
Wiedergabe-Modus

1. Wenn das DVR-Gert eingeschaltet ist und sich im Video-Modus befindet, die
Modus-Taste zwei Mal drcken, um die Men-Suchfunktion aufzurufen.
2. Mit der Nach-oben-Taste/Nach-unten-Taste ein Foto oder Video markieren. Dann mit
der OK-Taste besttigen, um den Einzelbild-Modus aufzurufen oder das Video
abzuspielen. Erscheint das Symbol oben links im Men, handelt es sich um eine
Video-Datei. Mit der OK-Taste kann das Video abgespielt werden bzw. die Wiedergabe
unterbrochen werden. Mit der Nach-unten-Taste/Nach-oben-Taste kann die Lautstrke
whrend der Wiedergabe nach unten/oben reguliert werden. Durch Gedrckthalten dieser
Tasten wird der Schnellrcklauf bzw. -vorlauf aktiviert. Erscheint das Symbol oben
links im Men, handelt es sich um eine Bild-Datei.
3. Lschen
Im Wiedergabe-Modus die Modus-Taste gedrckt halten, um zwischen Lschen und
Format whlen zu knnen. Mit der Nach-unten-Taste die zu lschende Option auswhlen
und mit der OK-Taste besttigen. Sie haben dann die Auswahl zwischen Lschenund
Alle lschen. Mit der OK-Taste die Auswahl erneut besttigen.
Aufnahme-Modus whrend des Ladens
Das Kfz-Ladegert an den USB-Port des Gerts anschlieen, dann dieses ausschalten,
um den Modus zu starten.
Datensicherung
USB-Sicherungsmodus
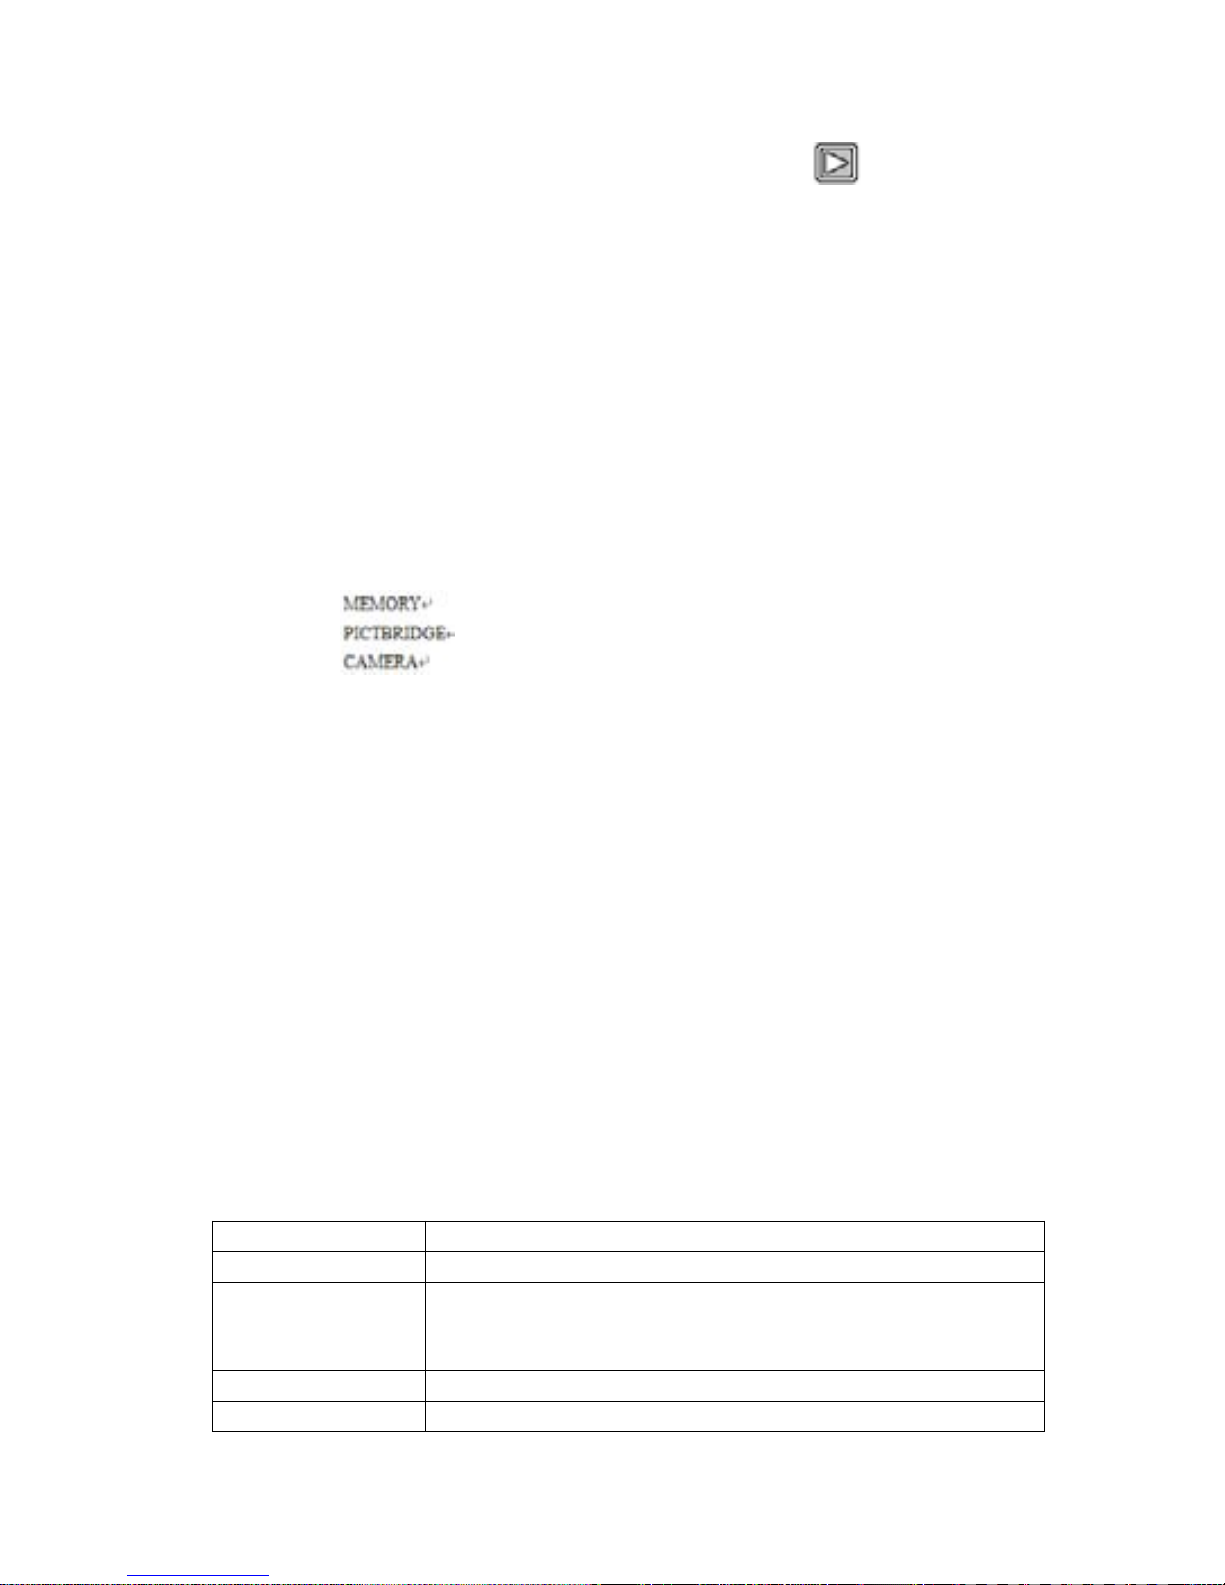
DVR-Gert und Rechner per USB-Kabel verbinden. Das Gert schaltet sich automatisch
ein und das Symbol erscheint. Memory(Speicher) auswhlen und mit
OK-Taste besttigen. Den Rechner einschalten. Unter Arbeitsplatzwird ein mobiles
Laufwerk angezeigt. Sie knnen dann Dateien in dem Ordner mobiles Laufwerk/DCIM
suchen.
Hinweise:
1. PC-Betriebssystem: Windows 2000/XP/Vista/Windows 7/Windows 8, MAC OSX 10.3.6
oder hher.
2. Camerawhlen, wenn das DVR-Gert als Fotoapparat benutzt wird.
3. ber PICBRIDGE kann ein Drucker zum Ausdrucken von Fotos angeschlossen
werden.
4. Beim Entfernen des USB-Kabels wird das DVR-Gert ausgeschaltet.
Anschluss an Fernsehgert
1. Zur Wiedergabe das DVR-Gert mit einem HDMI-Kabel an den Fernseher anschlieen.
2. Das DVR-Gert mit einem TV-Kabel an den Fernseher anschlieen, um Fotos und
Videos aufzunehmen und zu durchsuchen.
Tipp: Das mobile Laufwerk kann ohne installierte Treiber bei eingeschaltetem DVR-Gert
genutzt werden.
Hinweise: Strzt das Gert aufgrund von Bedienungsfehlern ab, mit der Reset-Taste neu
starten.

Technische Daten:
LCD-Gre 1,5 Zoll, 4:3, TFT LCD
Objektiv 120, hochauflsendes A+ Super-Weitwinkel
Sprachen Deutsch, Englisch (Standard), Franzsisch, Spanisch, Italienisch,
Portugiesisch, Polnisch, Russisch, Niederlndisch, Griechisch,
Ungarisch, Tschechisch, Dnisch, Schwedisch, Norwegisch und
Finnisch
Videoauflsung 720P/480P
Videoformat AVI
Fotoauflsung 3M (12M, 8M und 5M interpoliert)
Fotoformat JPG
SD-Speicherkarte SD
Mikro/Lautsprecher eingebaut
Aufnahme-Modus Einzelaufnahme/Selbstauslser
(2 Sek./5 Sek./10 Sek.)/Serienaufnahme
Lichtquellenfrequenz 50Hz/60Hz
TV-Ausgang NTSC/PAL
USB-Schnittstelle USB2.0
Netzanschluss 5V 500 MA
Akku eingebaut, 3,7 V, 350 mAh
PC-Betriebssystem Windows 2000/XP/Vista/Windows 7/Windows 8, MAC OSX 10.3.6
oder hher.
Achtung: Wir behalten uns vor, Design und technische Daten des Produkts ohne
Ankndigung zu ndern.

Instalacin
En cuanto a la capacidad de potencia de la batera, consulte los siguientes iconos:
Lleno Medio Bajo
Cargadebatera
1. Conecte directamente el cargador de coche al DVR para su carga, incluso si est
apagado.
2. Para la carga por USB, conecte el cable de datos USB al PC y con el otro extremo al
DVR, incluso si estapagado.
Instalacin y extraccindetarjetaSD:
1. Inserte la tarjeta SD en la ranura conforme a la direccin indicada hasta que no se
mueva.
2. Para sacar la tarjeta SD, presinela ligeramente para extraerla.
Nota:
Salida USB
Salida AV
Botn REC/BotnOK
Botn de modo
IR
Botn de encendido/apagado
Luz de relleno
Salida HDMI
Orificio de reset
Lente
Ranura de tarjeta SD
Altavoz
Botndearriba/FB/Volumen+
Botn de abajo / FF / Volumen -

1. Observe la direccin para insertar la tarjeta SD; si la orientacineserrnea, se pueden
daar el dispositivo y la tarjeta SD.
2. Cuando se inserte la tarjeta SD en el dispositivo, la mquina establecerla tarjeta SD
como almacenamiento predeterminado y los datos en la tarjeta SD original no se podrn
leer.
3. Si la tarjeta SD es incompatible con el dispositivo, inserte la tarjeta de nuevo o
sustityala.
4. Use siempre una tarjeta SD de alta velocidad.
Pautas de uso
Encendido/Apagado de DVR
1. Mantenga presionado unos 2 s el botn de encendido/apagado para encender el
dispositivo.
2. Mantenga presionado unos 3 s el botn de encendido/apagado para apagar el
dispositivo.
Cambio entre modos operativos
Presione el botn de modo para cambiar entre vdeo/imagen. significa vdeo
mientras simboliza el modo de imagen. Presione el botn de modo para entrar en el
modo de reproduccin.
Cmo entrar en la opcin de configuracin del sistema
Mantenga presionado el botn de modo, presione el botn OK / botn REC para entrar en
la opcin "Configuracin del sistema". En tal caso, la barra de "Configuracin del sistema"
mostrarun fondo azul.
1. Fecha/Hora: puede fijar la fecha/hora.
2. Apagado automtico: puede fijar el tiempo de apagado automtico.
3. Tono de botones: puede encender/apagar el tono de los botones.
4. Idioma: puede fijar el menen el idioma deseado.
5. Modo TV: NTSC/PAL disponibles
6. Frecuencia de fuente de luz: 50 Hz / 60 Hz (frecuencia actual)
7. Predeterminada: configuracindefbrica
8. Versin: nmero de versin de software
Cmo grabar vdeos y fijar las opciones de vdeo
1. Grabar vdeos
Cuando el DVR esten modo de vdeo y aparezca el icono en la esquina superior
izquierda de la pantalla, presione el botnREC/botn OK para iniciar la grabacin;
durante la grabacin del vdeo, el icono de la esquina superior izquierda de la

pantalla parpadear. Presione el botnREC/botn OK para detener la grabacin, y el
icono de la esquina superior izquierda desaparecer.
2. Seleccionar luz de relleno
En el modo de vdeo, presione el botn de encendido/apagado brevemente para cambiar
entre luz diurna y nocturna. Si se elige el modo nocturno, se activarla luz de relleno.
3. Fijar opciones de vdeo
Presione el botn de modo para entrar en la configuracin de las opciones de vdeo.
Resolucin: 720 P / 480 P
Vdeo cclico: 5 min / 10 min / 15 min
Deteccin de movimiento: encendido/apagado
Sonido de vdeo: encendido/apagado
Marca de fecha: encendido/apagado
G-sensor: encendido/apagado
Captura de fotos
1. Presione el botn de encendido/apagado para entrar en el modo de vdeo; presione el
botn de modo para acceder al modo de imagen indicado con el icono en la
esquina superior izquierda de la pantalla.
2. Alinee el DVR frente al objeto, presione el botn de arriba/abajo para cambiar el foco
digital; en tal caso, mantenga firme el DVR para no golpearlo.
3. Presione el botn de disparo, cuando el DVR haga un clic, la captura se habr
completado.
4. Funcin de temporizador automtico
En el modo de imagen, mantenga presionado el botn de modo y elija el modo de captura
que desee. Presione el botn de arriba para elegir entre "nico", "2 s", "5 s" y "Continuo".
5. Mantenga presionado el botn de modo para entrar en la configuracindelacaptura
fotogrfica
Modo de disparo: nico / disparador automtico (2 s / 5 s / 10 s) / continuo
Resolucin: 12 M / 8 M / 5 M / 3 M
Calidad de imagen: ptima/excelente
Nitidez: alta/estndar/baja
Balance de blancos: automtico / luz diurna / nubes / tungsteno / fluorescente
Color: estndar / blanco y negro / marrn
ISO: automtico / 100 / 200 / 400
Compensacindeexposicin: -2,0 - +2,0
Identificacin facial: estndar/sonrisa
Antivibracin manual: encendido/apagado
Vista previa rpida: apagado / 2 s / 5 s
Marca de fecha: fecha / (fecha/hora)
Consejo:
1. En cualquiera de los modos de vdeo, imagen y reproduccin, puede presionar el botn
de modo para ir cambiando entre estos.

2. En el modo de imagen, presione el botn de encendido/apagado para activar la luz de
relleno.
Modo de reproduccin
1. Cuando el DVR complete el procedimiento de arranque y entre en el modo de vdeo,
presione dos veces el botn de modo para entrar en los 6 mens.
2. Elija la foto o vdeo que quiera y presione el botn de arriba/abajo para navegar por l.
En tal caso, presione el botn OK para entrar en el modo de imagen nica u operar el
vdeo. Si el icono aparece en la esquina superior izquierda del men,elarchivoes
un vdeo. Presione el botn OK para reproducirlo o pausarlo. Durante la reproduccin,
presione el botn de arriba/abajo para subir/bajar el volumen y mantngalos presionados
para adelantarlo o rebobinarlo. Si el icono aparece en la esquina superior izquierda
del men, el archivo es una foto.
3. Eliminacin
En el modo de reproduccin, mantenga presionado el botn de modo para ver las
opciones de eliminar y formato. Presione el botn de abajo para pasar a la opcinde
eliminar. Presione el botn OK para escoger las opciones de "Eliminar" y "Eliminar todo";
presione el botn OK para seleccionar la opcin deseada y presinelo de nuevo para
confirmar.
Modo de vdeo durante la carga
Conecte el cargador de coche al puerto USB del dispositivo; apguelo para pasar a este
modo.
Copia de seguridad de datos
Modo de copia de seguridad por USB
Conecte el DVR y el PC con el cable USB; el dispositivo se encenderautomticamente y
aparecerel icono . Elija "Memoria" y presione el botn OK para confirmar.
Encienda el PC, y entonces aparecerun disco extrableen"MiPC"enelescritorioy
podrbuscar el archivo deseado en la carpeta DCIM del disco extrable.
Observaciones:
1. Sistema operativo de PC: Windows 2000/XP/Vista/Windows 7/Windows 8, MAC OSX
10.3.6 o superior.
2. Elija "Cmara", y entonces podrusar el DVR como cmara.
3. Elija PICBRIDGE para conectar el perifrico con el que imprimir imgenes.
4. Retire el cable USB para apagar el DVR.
ConexinaTV
1. Use el cable HDMI para conectar el DVR a un TV para la reproduccin de archivos.

2. Use un cable de TV para conectar el DVR a un TV para ver, capturar y navegar por las
imgenes y vdeos.
Consejo: sin el controlador instalado, el disco extrablesepodrusar si el DVR est
encendido.
Observaciones: si el dispositivo se cierra por un manejo indebido, presione el botnde
reset para reiniciarlo y restaurarlo.
Especificaciones tcnicas
TamaodeLCD 1,5",4:3,LCDTFT
Lente 120, alta resolucin de clase A+ con sper gran angular
Idiomas disponibles alemn, ingls (predeterminado), francs, espaol, italiano,
portugus, polaco, ruso, neerlands, griego, hngaro, checo, dans,
sueco, noruego y fins
Tamaodevdeo 720 P / 480 P
Formato de vdeo AVI
Resolucin
fotogrfica
3 M (12 M, 8 M y 5 M interpolada)
Formato fotogrfico JPG
Tarjeta de memoria
SD
SD
Micrfono/Altavoz integrados
Modo de disparo nico / disparador automtico (2 s / 5 s / 10 s) / continuo
Frecuencia de fuente
de luz
50Hz/60Hz
Salida de TV NTSC/PAL
Puerto USB USB 2.0
Entrada de
alimentacinelctrica
5V 500 MA
Batera integrada, 3,7 V, 350 mAh
Sistema operativo de
PC
Windows 2000/XP/Vista/Windows 7/Windows 8, MAC OSX 10.3.6 o
superior.
Nota: nos reservamos el derecho de modificar el diseo y las especificaciones del
presente producto sin ms aviso.

Instalao
Para a capacidade da bateria, consulte os cones que se seguem:
Cheia Mdia Baixa
Carregar bateria
1. Ligue diretamente o carregador do carro DVR para carregar, mesmo que esteja
desligada.
2. Para carregamento por USB, ligue o cabo de dados USB ao PC com a outra
extremidade ligada DVR, mesmo que esteja desligada.
Instalao e remoodocartoSD:
1. Na dire"%o indicada, introduza o cart%o SD na ranhura atencaixar firmemente.
2. Para retirar o cart%o SD, prima levemente o cart%o SD para o ejetar.
Nota:
1. Observe a dire"%o de introdu"%odocart%oSD;seadire"%o for invertida, o dispositivo
eocart%o SD poder%o ser danificados.
Sada USB
Sada
AV
Tecla REC/tecla OK
Tecla de modo
IR
Tecla ligado/desligado
Luz de
p
reenchimento
Sada HDMI
Orifcio de reposi"%o
Objetiva
Ranhura para cart&es SD
Altifalante
Tecla para cima/FB/volume +
Tecla para baixo/FF/volume -

2. Quando o cart%o SD for introduzido no dispositivo; a mquina configurarocart%oSD
como unidade de armazenamento predefinida e os dados originais ficar%o ilegveis.
3. Caso o cart%o SD seja incompatvel com o dispositivo, introduza o cart%o novamente
ou substitua-o.
4. Utilize sempre um cart%o SD de alta velocidade.
Diretrizes de utilizao
Ligar/Desligar (On/Off) DVR
1. Mantenha premida a tecla Ligar/Desligar (On/Off) durante cerca de 2 segundos para
ligar o dispositivo.
2. Mantenha premida a tecla Ligar/Desligar (On/Off) durante cerca de 3 segundos para
desligar o dispositivo.
Alternar modos de funcionamento
Prima a tecla Modo para alternar entre vdeo/imagem. corresponde ao modo de
vdeo enquanto ao modo de imagem. Prima duas vezes a tecla Modo para entrar
no modo de reprodu"%o.
Entrar na opo de configuraodosistema
Enquanto prime a tecla Modo, prima a tecla OK/REC para entrar na op"%oConfigura"%o
do sistema'. Nesse caso, a barra da Configura"%odosistema'terum fundo azul.
1. Data/hora: poderdefinir a data/hora.
2. Desligar automtico: poderdefinir a hora de desligar automtico.
3. Tom das teclas: poderligar/desligar o tom das teclas.
4. Idioma: poderdefinir o idioma do menu desejado.
5. Modo de TV: NTSC/PAL disponvel.
6. Frequ(ncia da fonte luminosa: 50 Hz/60 Hz (frequ(ncia de corrente).
7. Predefini"%o: defini"&es de fbrica.
8. Vers%o: nmero da vers%odesoftware
Gravar vdeos e configurar as opes de vdeo
1. Gravar vdeos
Quando a DVR entrar no modo de vdeo e o cone aparecer no canto superior
esquerdo do ecr%, prima a tecla REC/OK para iniciar a grava"%o; durante a grava"%ode
vdeos, o cone no canto superior esquerdo do ecr%piscar. Prima a tecla REC/OK
para parar e, seguidamente, o cone no canto superior esquerdo do ecr%
desaparecer.
2. Selecionar luz de preenchimento

No modo de vdeo, prima a tecla Ligar/Desligar (On/Off) brevemente para alternar
rapidamente entre luz diurna e noturna. Caso selecione o modo noturno, a luz de
preenchimento serativada.
3. Configurar as op"&es de vdeo
Prima a tecla Modo para entrar nas op"&es de configura"%odeVdeo.
Resolu"%o: 720 P /480 P
Vdeo cclico: 5 min/10min/15min.
Dete"%o de movimento: Ligar/Desligar (On/Off)
Som de vdeo: Ligar/Desligar (On/Off)
Selo da data: Ligar/Desligar (On/Off)
G-sensor: Ligar/Desligar (On/Off)
Tirar e configurar fotos
1. Prima a tecla Ligar/Desligar (On/Off) para entrar no modo vdeo; prima a tecla Modo
para entrar no modo imagem indicado com o cone no canto superior esquerdo do
ecr%.
2. Alinhe a DVR com o objeto, prima a tecla para cima/para baixo para mudar o foco
digital, nesse caso, mantenha a DVR firmemente segura para n%o tremer.
3. Prima a tecla de captura; quando a DVR emitir um estalido, a captura estarconcluda.
4. Fun"%o temporizador automtico
No modo Imagem, mantenha premida a tecla Modo e selecione o modo de captura
pretendido; prima a tecla para cima para selecionar entre Normal, 2 s, 5 s, e Contnua'.
5. Prima a tecla Modo para entrar nas op"&es de configura"%o das fotos capturadas.
Modo de captura: Normal/Temporizador automtico (2 s/5 s/10 s)/Contnuo
Resolu"%o: 12 M/8 M/5 M/3 M
Qualidade da imagem: *tima/Excelente
Nitidez: Forte/Padr%o/Suave
Equilbrio de brancos: Automtico/Luz do dia/Nublado/Tungstnio/Fluorescente
Cor: Padr%o/Preto e branco/Castanho
ISO: Automtico/100/200/400
Compensa"%o de exposi"%o: -2.0 - +2.0
Dete"%o de rostos: Padr%o/Sorriso
Anti choque manual: Ligar/Desligar (On/Off)
Pr-visualiza"%orpida: Off (Desligado)/2 s/5 s
Selo da data: Data/(Data/Hora)
Sugestes:
1. Em qualquer dos modos de vdeo, imagem e reprodu"%o, poderpremir a tecla Modo
para alternar entre modos de forma circular.
2. No modo de imagem, prima a tecla Ligar/Desligar (On/Off) para ativar a luz de
preenchimento.
Modo de reproduo

1. Quando a DVR concluir o procedimento inicial e entrar no modo de vdeo, prima a tecla
de Modo duas vezes para entrar no estado de navega"%o de 6 menus.
2. Selecione a foto ou vdeo desejado e prima a tecla para cima/para baixo para navegar.
Neste caso, prima a tecla OK para entrar no modo de imagem nica ou para reproduzir
vdeo. Caso surja o cone no canto superior esquerdo do menu, o ficheiro um
vdeo. Prima a tecla OK para o reproduzir ou para interromper a reprodu"%o; durante a
reprodu"%o prima a tecla para cima/para baixo para aumentar ou diminuir o volume e
mantenha-a premida para avan"ar ou retroceder rapidamente. Se surgir o cone no
canto superior esquerdo do menu, o ficheiro uma foto.
3. Eliminar
No modo de reprodu"%o, mantenha premida a tecla de Modo para aceder sop"&es
Eliminar'eFormatar'; prima a tecla para baixo para aceder op"%oEliminar',primaa
tecla OK para aceder sop"&es Eliminar'eEliminar tudo', seguidamente, prima a tecla
OK para entrar na op"%o desejada e novamente para confirmar.
Modo de vdeo durante o carregamento
Ligue o carregador do carro porta USB do dispositivo e desligue-o para entrar no modo
em quest%o.
Cpia de segurana de dados
Modo de cpia de seguranaUSB
Ligue a DVR e o PC com o cabo USB. O dispositivo ligar-se-automaticamente e o cone
surgir. A seguir, selecione Memria'eprimaateclaOKparaconfirmar.
Ligue o PC e surgirum disco mvel em Meu computador'no ambiente de trabalho
onde poderencontrar o disco mvel/ficheiro DCIM pretendido.
Remarks:
1. Notas:
1. Sistema operativo do PC: Windows 2000/XP/Vista/Windows 7/Windows 8, MAC OSX
10.3.6 ou superior.
2. Selecione C+mara'para usar a DVR como c+mara.
3. Selecione PICBRIDGE para ligar impressora e imprimir as fotos.
4. Remova o cabo USB para desligar a DVR.
Ligue TV
1. Utilize o cabo HDMI para ligar a DVR a uma TV para reprodu"%o.
2. Use um cabo TV para ligar a DVR a uma TV para visualizar vdeos, capturar imagem e
percorrer fotos e vdeos.
Sugest%o: sem o controlador instalado, o disco mvel poderser usado quando a DVR
for ligada.
Other manuals for CarDVR-70
1
Table of contents
Languages:
Other Rollei Dashcam manuals

Rollei
Rollei cardvr 100 User manual

Rollei
Rollei CARDVR-318 User manual

Rollei
Rollei CarDVR-200 WiFi User manual

Rollei
Rollei CarDVR-310 User manual

Rollei
Rollei CARDVR-308 User manual

Rollei
Rollei M1 Motorrad Louis User manual

Rollei
Rollei DashCam-408 User manual

Rollei
Rollei Dashcam-402 User manual

Rollei
Rollei CarDVR-210 User manual

Rollei
Rollei CarDVR-70 User manual