Rompa 19007 User manual

LED Spotlight
2. Product Code
19007
3. Colour
Black
4. Brief Description
This lightweight and compact LED spotlight is perfect for highlighting smaller areas with
colour. For use as an uplighter, wall mounted or suspended from a ceiling.
5. Contents
•1 x LED Spotlight
•1 x power cable
6. Snoezelen® Stimulations
•Sight
7. Best Use
1
.
Product Name

•Fix firmly in place –ideally to a ceiling, but this may also be to a floor or wall.
•Use under close supervision at all times –although the LED spotlight casing has
smooth mouldings, it presents a potential trip hazard if positioned unsafely.
8. Compatible ROMPA® Products
13007 –ROMPA® Colour Frame (Red)
13008 –ROMPA® Colour Frame (Yellow)
13009 –ROMPA® Colour Frame (Blue)
14053 –Light Diffraction Panels
19912 –Reflective Foil
9. Starting Up
•Choose an appropriate and safe location for the product
•Install safely and securely
•Use cross-shaped hand knobs on the side to adjust bracket angle as required
•Charge the unit for 6-8 hours on the first charge before use
•Plug in power cord
•Turn off power switch and turn off other switch to charge
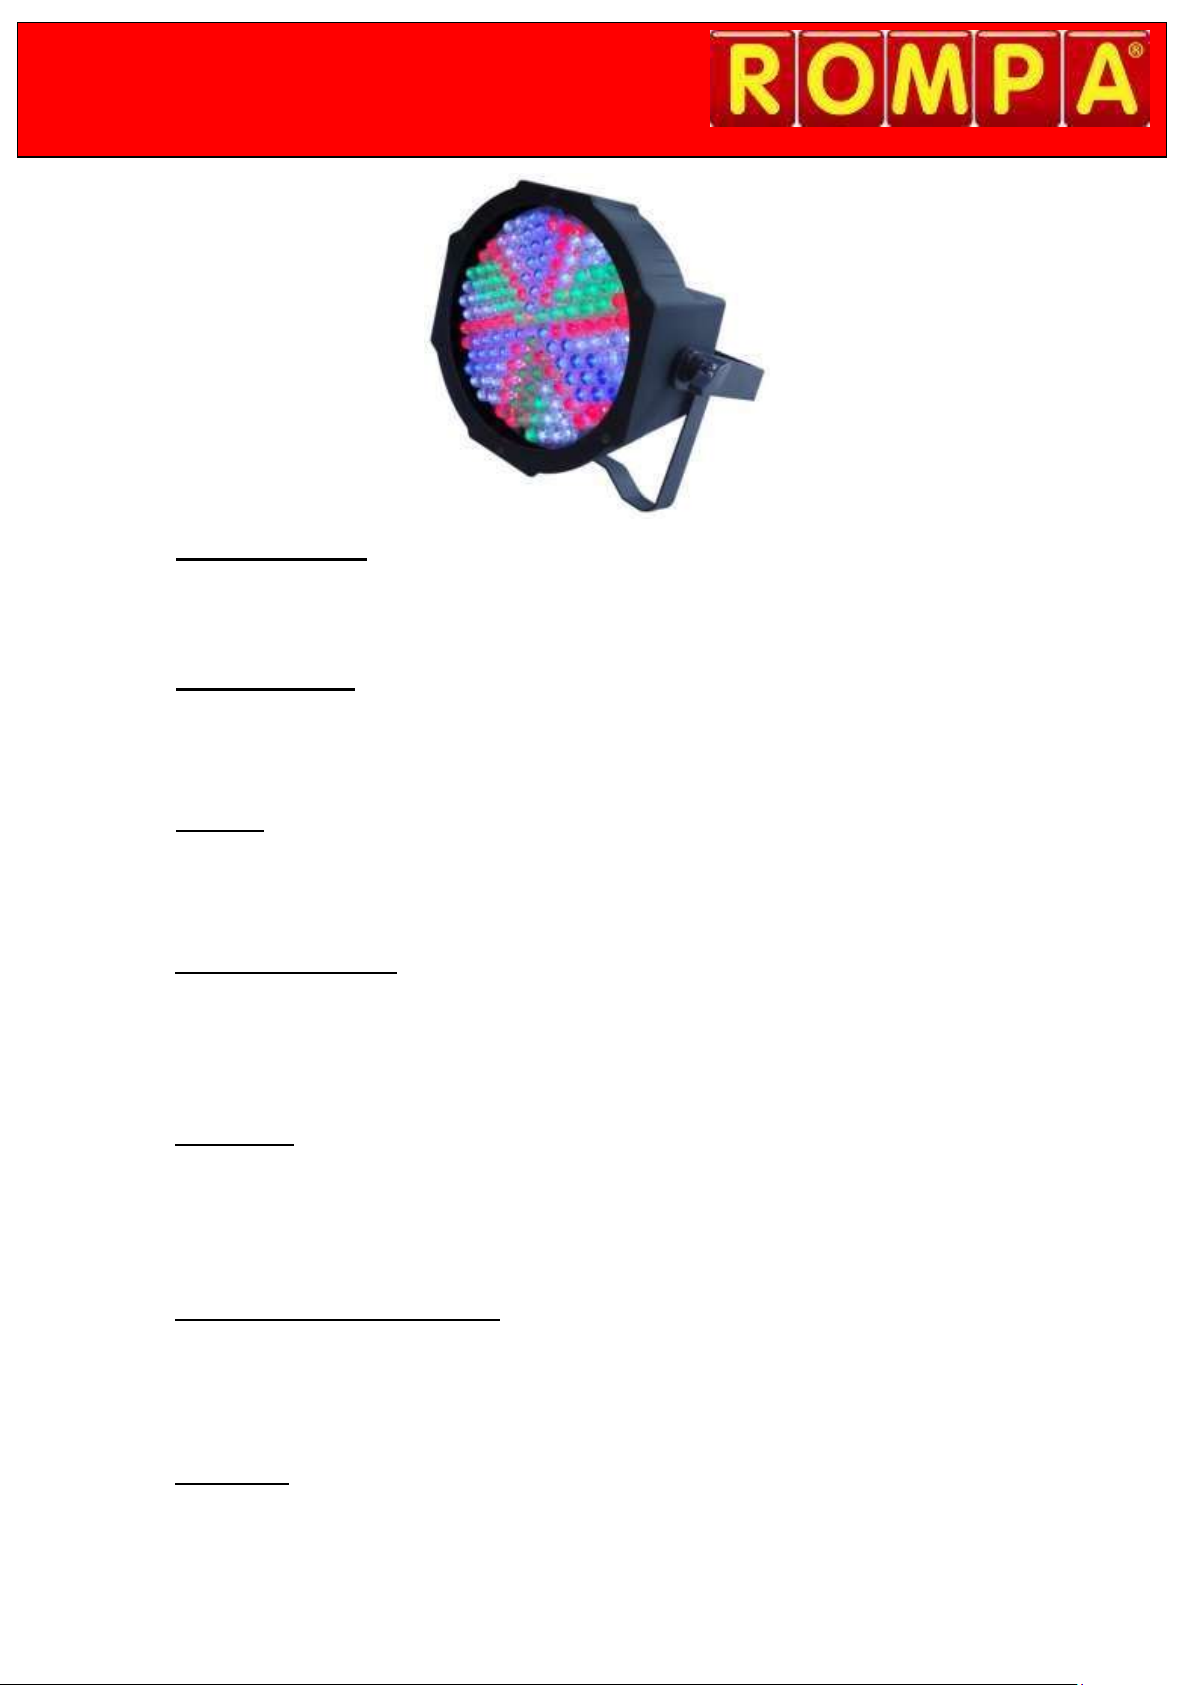
10. Detailed Description
This is a lightweight and compact DMX - intelligent and battery powered LED par light. It
can be used in four ways. Colours can be changed via sound activation whilst another
setting displays colour in a static way. Auto Mode automatically chases through different
patterns and DMX control mode allows control of the lighting using a standard DMX 512
controller (not included). This spotlight is not especially suited to use with mirror balls.
11. Safety
Always supervise the use of this product.
•Do not use in the unlikely event of product failure/malfunction/damage.
•Please check the item carefully for any damage that may have occurred during
shipping. If the carton appears damaged, carefully check the shipping carton for
damage and be sure all accessories necessary to operate the unit have arrived intact.
In case of any difficulties, please contact ROMPA®.
•Ensure the local power outlet matches that of the required voltage for your unit.
•Do not attempt to operate this unit if the power cord is frayed or broken or attempt
to remove or break off the ground prong from the electrical cord. This prong is used
to reduce the risk of electrical shock and fire in case of an internal short.

•Do not remove the cover under any conditions. There are no serviceable parts inside
this unit.
•Never operate this unit when its cover is removed.
•Never plug this unit into a dimmer pack.
•For use in dry indoor environments only - do not expose to rain, moisture or liquid.
•Repairs should be carried out by a suitably qualified electrician.
•Once this product is eventually exhausted, please dispose of it appropriately.
12. Technical Specification
Power Supply: AC110V-250V
Frequency: 50-60Hz
Power consumption: 25W
Light source:
144pcs 10mm high brightness led’s (R36, G36, B36, A36)
Lamp life:
6-10 thousand hours
LED angle:
30 (+/- 5) degree
Colour:
16.7 million colours
Control channels:
7chs
Control mode:
DMX512, master/slave, auto, sound active
Operation menu:
4 digit digital LED display
Size:
approx 24 x 24 x 23cm
Net Weight:
2.4kg
Gross Weight:
2.8kg
Fuse:
5 Amp in UK plug, F5AL250V next to POWER IN socket on unit
13. Installation
•Always mount this unit safely e.g. make sure cables do not represent a trip hazard.
•Always be sure to mount this unit in an area that will allow proper ventilation. Allow
about 15cm (6”) between the device and a wall.
•Installation should be carried out by a qualified person.
•There are two sockets on the rear panel of the lighting. One is for power and the
other is for a signal.
•The appliance should be situated away from heat sources such as radiators, heat
registers, stoves or other appliances (including amplifiers) that product heat.
•Power supply cords should be routed so that they are not likely to be walked on or
pinched by items placed upon or against them, paying particular attention to the
point that they exit from the unit.
•Disconnect from main power before making any type of connection.

•Before plugging your unit in, be sure the source voltage in your area matches the
required voltage for your light is workable in 100-220V/50~60Hz. Because line voltage
may vary you should be sure your unit voltage matches the wall outlet voltage before
attempting to operate your unit.
•Do not block the air opening of the product or drop/insert anything into this opening.
Do not place near fabrics or combustible materials.
DMX Mode:
This information is not likely to be applicable, but is included in case the end user has
multiple DMX products. DMX Mode allows you to link several DMX products together in a
“daisy chain” using plugs and connectors. Operating though a DMX controller gives the
user freedom to create programmes tailored to individual needs. This function also allows
you to use your fixtures as pattern of changing lights.
•This function enables control of individual fixtures’ traits with a DMX controller.
•The LED spotlight uses 4/7 DMX channels to operate. Please see DMX channel and
Functions” for the DMX traits.
•To run your fixture in DMX mode, plug in the fixture via the XLR connections to any
standard DMX controller. Set your desired DMX address following the setup
specifications that come with your DMX controller.
•The light will automatically recognize a DMX signal once the DMX connection is done.
DMX Linking:
To ensure proper DMX data transmission, when using several DMX fixtures try to use the
shortest cable path possible. The order in which fixtures are connected in a DMX line
does not influence the DMX addressing. For example; a fixture assigned a DMX address of
1 may be placed anywhere in a DMX line, at the beginning, at the end, or anywhere in the
middle. When a fixture is assigned a DMX address of 1, the DMX controller knows to send
DATA assigned to address 1 to that unit, no matter where it is located in the DMX chain.
DMX channels:
7CH Mode
Value
Description
CH1
0
No action
1-255
RGBA dimmer
CH2
0
No action
1-255
RED dimmer
CH3
0
No action
1-255
GREEN dimmer
CH4
0
No action

1-255
BLUE dimmer
CH5
0
No action
1-255
AMBER dimmer
CH6
0-50
strobe
51-100
Color jump
101-150
Color dimmer
151-200
Color change
201-255
Sound activated
CH7
0
No action
1-255
Speed from slow to fast (corresponding CH6)
Touch Buttons
There are four touch buttons under the LED Alpha-numerical display: Menu, Down, Up,
Enter. Normally, the LED will display the current DMX address code of the fixture. At this
time, presses Menu to choose the function you want to set up. Press and hold up or
down to fast scrolling within the menu options. When an options flashing the LED display,
press Enter to confirm and Menu to exit.
Menu Down Up Enter
After initialization, the unit is ready for setting and working. Please see the following table
for setting information
Description
D001
001—512
Iron
ON—OFF
P000
Color jump(00—255)
L000
Color dimmer,(00—255)
E000
Color change,(00—255)
Sound
Sound activated
R000
Red(000—255)
G000
Green(000—255)
B000
Blue(000—255)
A000
Amber(000—255)
F000
Strobe(000—255)
14. Care and Maintenance
•Clean with a dry cloth, ensuring the fans are free from dust.
•Unplug after use.

15. Troubleshooting
In the unlikely event of product failure, please check the following:
Problem: No light
•Check that the product is plugged in
•Check the product has been charged
•Check the fuses
Further copies of these instructions can be downloaded at www.rompa.com
We hope you find our instructions invaluable. If you have any suggestions for improving
them further your comments will be greatly received –please contact us at
LED Spotlight 19007, June 2015
Copyright ROMPA® Ltd
Table of contents
Other Rompa Dj Equipment manuals