manuals.online logo
Brands
  1. Home
  2. •
  3. Brands
  4. •
  5. Roper Rhodes
  6. •
  7. Plumbing Product
  8. •
  9. Roper Rhodes STREAM Series Parts list manual

Roper Rhodes STREAM Series Parts list manual

Customer Services, Roper Rhodes Ltd, Brassmill Lane Trading Estate, Bath, BA1 3JF
TEL: 01225 303 900 |FAX:01225 448 877
Email: [email protected] |Web: www.roperrhodes.co.uk
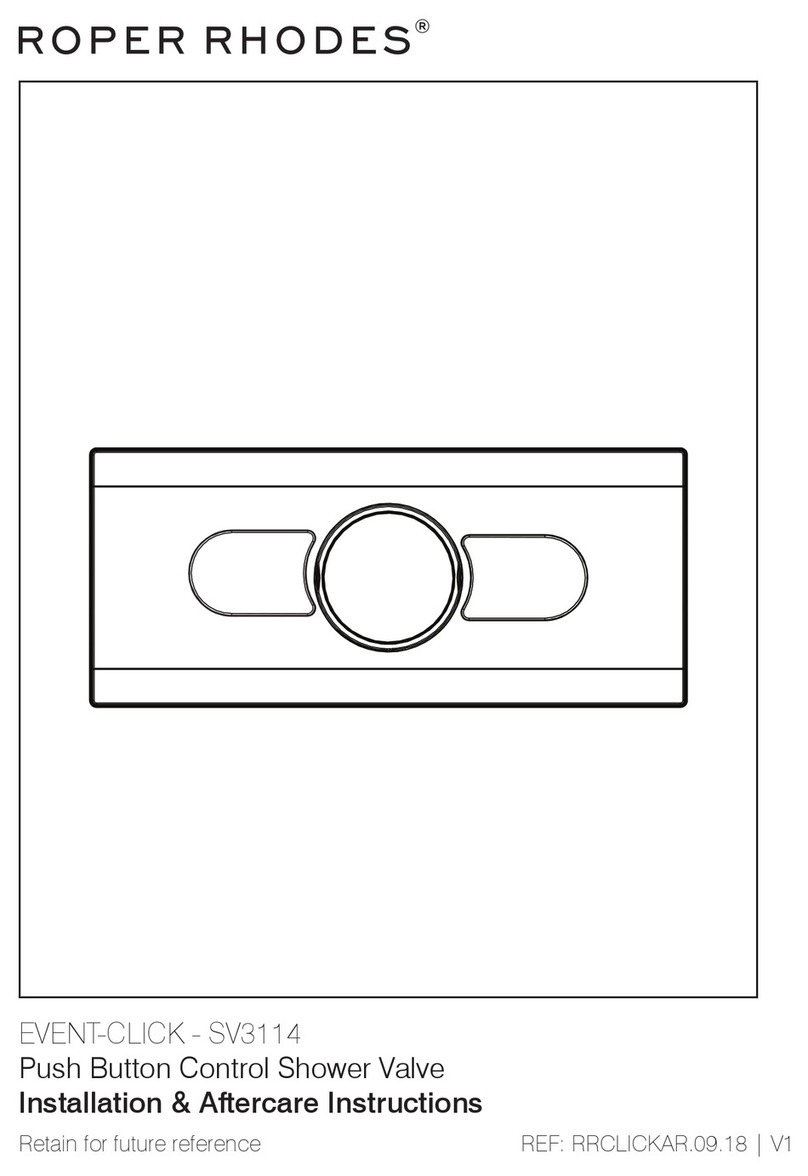
BASIN MIXER & MINI MIXER (with & without pop-up waste)
Installation & aftercare instructions
Please retain for future reference
REF: NH.RR.T08 | 04.08 V1.00
FLOW & TEMPERATURE LIMITER
This mixer is fitted with a special cartridge that allows you to limit both the flow rate (should water pressure be too strong) & the
hot water temperature (should temperature be dangerously high). The opportunity to limit the temperature is particularly useful
if unsupervised young children are using this fitting.
Fittings are supplied with both limiters in the fully open position. Should you wish to limit either flow rate or temperature it is first
necessary to remove the handle. This is done by loosening the handle grub screw using a allen key. Access the grub screw by
removing the rubber bung in the handle. Adjustments to the flow limiter can now be made. See diagram for reference. To adjust
the temperature limiter it is necessary to first unscrew the domed cover cap beneath the handle then the brass cartridge retaining
nut (30mm spanner required). To make adjustments to the temperature limiter lift the purple cover on the cartridge and reposition
it in the required limiting position. See diagram for reference.
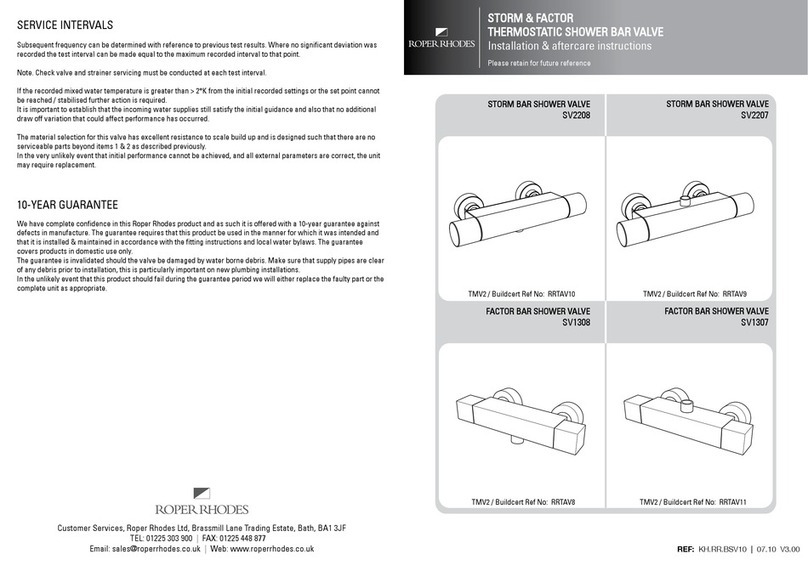
AFTERCARE INSTRUCTIONS
Whilst this item has a high quality durable finish, it should nevertheless be treated with care. Surfaces should be cleaned using only
a soft damp cloth and clean water & dried using a soft cotton cloth. Bath cleaning products, even non-scratch ones could damage
the finished surface.
10-YEAR GUARANTEE
We have complete confidence in this Roper Rhodes product and as such it is offered with a 10-year guarantee against defects in
manufacture. The guarantee requires that this product be used in the manner for which it was intended and that it is installed &
maintained in accordance with the fitting instructions and local water bylaws. The guarantee covers products in domestic use only.
The guarantee is invalidated should the mixer be damaged by water borne debris. Make sure that supply pipes are clear of any
debris prior to installation, this is particularly important on new plumbing installations. In the unlikely event that this product
should fail during the guarantee period we will either replace the faulty part or the complete unit as appropriate.
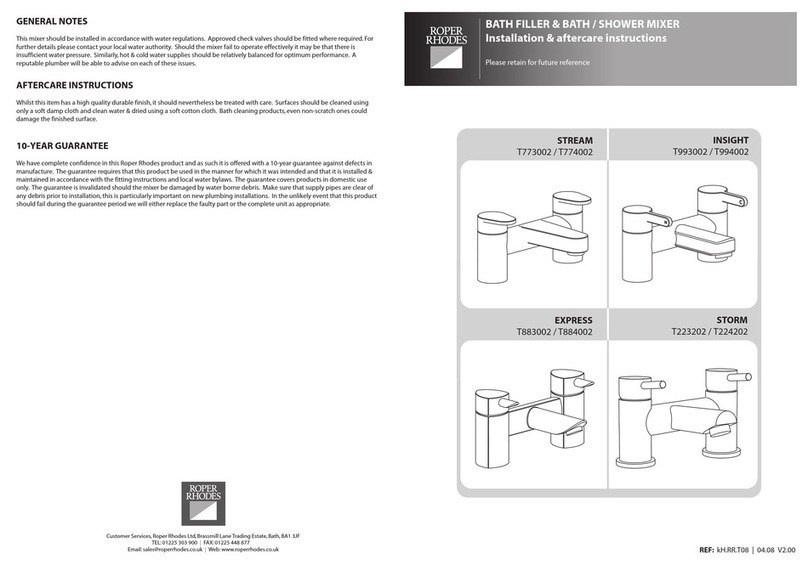
STREAM
T771002 / T771202
T776002 / T776202
INSIGHT
T991002 / T991202
T996002 / T996202
EXPRESS
T881002 / T881202
T886002 / T886202
Closed
Open
0
1
2
3
4
5
6
Temperature limiter adjustment Flow limiter adjustment
0
1
2
3
Limiter position 0 1 2 3 4 5 6
Flow reduction 0% 5% 12% 25%
Temperature reduction 0% 3% 10% 20% 30% 40% 50%
INSTALLATION PROCEDURE
1. Prior to installation flush out the pipe work to
remove debris & then ensure that the water supply
is turned off.
2. Refer to diagram & check that all components
are present.
3. Fit the flexible tail hoses to the basin mixer body
using an appropriate spanner, making sure that you
do not over tighten.
4. Screw the threaded bar into it's location inside
the mixer body using of a flat head screwdriver to
tighten.
5. Fit the mixer body to the basin using the
supplied rubber washer, metal bracket and fixing
nut in the order indicated in the drawing. DO NOT
over-tighten as this may damage the basin.
Remember to install the O-ring between the mixer
body & the basin.
6. For all models without a pop-up waste
continue to step 7. For models with a pop-up
waste see Fitting pop-up waste instructions
opposite before continuing.
7. Connect the water supply to the flexible hoses.
Hot supply should always be connected to the left
hose (Flexible hose 1 in the diagram).
8. Fully open the mixer on both hot & cold sides &
allow water to run for approximately one minute to
further flush the system.
9. Check all connections to ensure there are no
leaks.
Threaded bar
Rubber washer
Metal Bracket
Fixing nut
Flexible hose 1
Flexible hose 2
Pop-up waste lever
(if supplied)
Basin mixer
(Stream model shown)
Rubber O-ring
Handle rod
Extension rod
Waste top
Rubber seal 1
Rubber seal 2
Pivot connector
Cover cap
Waste body
Handle grip
(different shape
supplied with
Express)
Pivot rod
Waste plug
MIN
25mm
RT TT
FITTING POP-UP WASTE
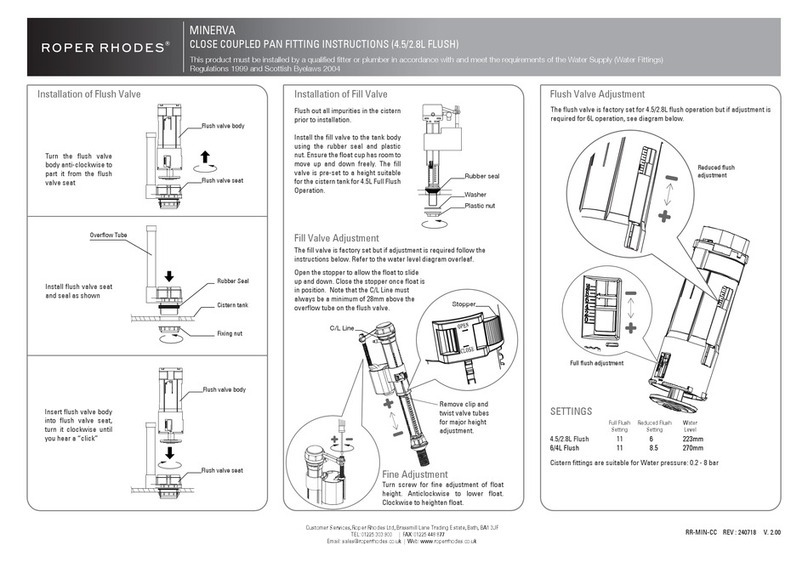
Insert the handle rod through the hole on the back of the basin mixer, then screw the extension rod onto the handle rod.
Fit the waste top and waste body components to the basin ensuring that Rubber seal 1 is above the basin and rubber seal 2 is below.
Slide the pivot connector onto the extension rod in the position shown in the diagram.
Place the cover cap behind the ball on the pivot rod and then insert the end of the pivot rod into the cylindrical part of the pivot
connector (do not tighten the screws on the connector block at this stage).
Insert the pivot rod through the side of the waste body so it locates through the loop on the base of the waste plug. NOTE the
position of the loop may require adjusting. Turn anti-clockwise to extend until it is long enough for the pivot
rod to be inserted through whilst sat inside the waste top.
Screw on the cover cap to lock the pivot rod in position then tighten the
screws on the pivot connector.
Test the mechanism action and make adjustments to the rod / pivot
connector positions as necessary to create a smooth action.
GENERAL NOTES
This mixer should be installed in accordance with water regulations.
Approved check valves should be fitted where required. For further
details please contact your local water authority. Should the mixer
fail to operate effectively it may be that there is insufficient water
pressure. Similarly, hot & cold water supplies should be relatively
balanced for optimum performance. A reputable plumber will be
able to advise on each of these issues.
This manual suits for next models

14

Other Roper Rhodes Plumbing Product manuals

Roper Rhodes WESSEX T663202 Parts list manual

Roper Rhodes

Roper Rhodes WESSEX T663202 Parts list manual

Roper Rhodes Minerva Toilet Seat User manual

Roper Rhodes

Roper Rhodes Minerva Toilet Seat User manual

Roper Rhodes ENVY 1200 User manual

Roper Rhodes

Roper Rhodes ENVY 1200 User manual

Roper Rhodes MINERVA User manual

Roper Rhodes

Roper Rhodes MINERVA User manual

Roper Rhodes STREAM T774002 Parts list manual

Roper Rhodes

Roper Rhodes STREAM T774002 Parts list manual

Roper Rhodes TR9005 User manual

Roper Rhodes

Roper Rhodes TR9005 User manual

Roper Rhodes Wessex T661002 Parts list manual

Roper Rhodes

Roper Rhodes Wessex T661002 Parts list manual

Roper Rhodes WASTE20 Parts list manual

Roper Rhodes

Roper Rhodes WASTE20 Parts list manual

Roper Rhodes SV2207 Parts list manual

Roper Rhodes

Roper Rhodes SV2207 Parts list manual

Roper Rhodes Event-Click SV3114 Parts list manual

Roper Rhodes

Roper Rhodes Event-Click SV3114 Parts list manual

Roper Rhodes HAM450B User manual

Roper Rhodes

Roper Rhodes HAM450B User manual

Popular Plumbing Product manuals by other brands

Grohe StartEdge Series manual

Grohe

Grohe StartEdge Series manual

Delabie TEMPOFIX WC manual

Delabie

Delabie TEMPOFIX WC manual

Vetus NLP Series installation instructions

Vetus

Vetus NLP Series installation instructions

Culligan S-W100-C manual

Culligan

Culligan S-W100-C manual

FitStar TAIFUN DUO user manual

FitStar

FitStar TAIFUN DUO user manual

American Standard Arch 4101.115 installation instructions

American Standard

American Standard Arch 4101.115 installation instructions

Invacare 3750 Owner's operator and maintenance manual

Invacare

Invacare 3750 Owner's operator and maintenance manual

Hans Grohe AXOR Citterio M 34435000 Assembly instruction

Hans Grohe

Hans Grohe AXOR Citterio M 34435000 Assembly instruction

KWC 802 106 Installation and service instructions

KWC

KWC 802 106 Installation and service instructions

Gessi P. CINGOLO 17257 manual

Gessi

Gessi P. CINGOLO 17257 manual

Heritage Bathrooms Glastonbury TGRC04 manual

Heritage Bathrooms

Heritage Bathrooms Glastonbury TGRC04 manual

ABI INTERIORS 15756 manual

ABI INTERIORS

ABI INTERIORS 15756 manual

PEERLESS 3651 Series Step By Step Illustrated Instructions

PEERLESS

PEERLESS 3651 Series Step By Step Illustrated Instructions

Hans Grohe Talis S 32841 Series Instructions for use/assembly instructions

Hans Grohe

Hans Grohe Talis S 32841 Series Instructions for use/assembly instructions

DURAVIT Vero Air 760418 Mounting instructions

DURAVIT

DURAVIT Vero Air 760418 Mounting instructions

KWC MULTI-LINE Z.534.543.000 Specification sheet

KWC

KWC MULTI-LINE Z.534.543.000 Specification sheet

Schier GB2 installation guide

Schier

Schier GB2 installation guide

Grohe Eurosmart 32 925 manual

Grohe

Grohe Eurosmart 32 925 manual

manuals.online logo
manuals.online logoBrands
  • About & Mission
  • Contact us
  • Privacy Policy
  • Terms and Conditions

Copyright 2025 Manuals.Online. All Rights Reserved.