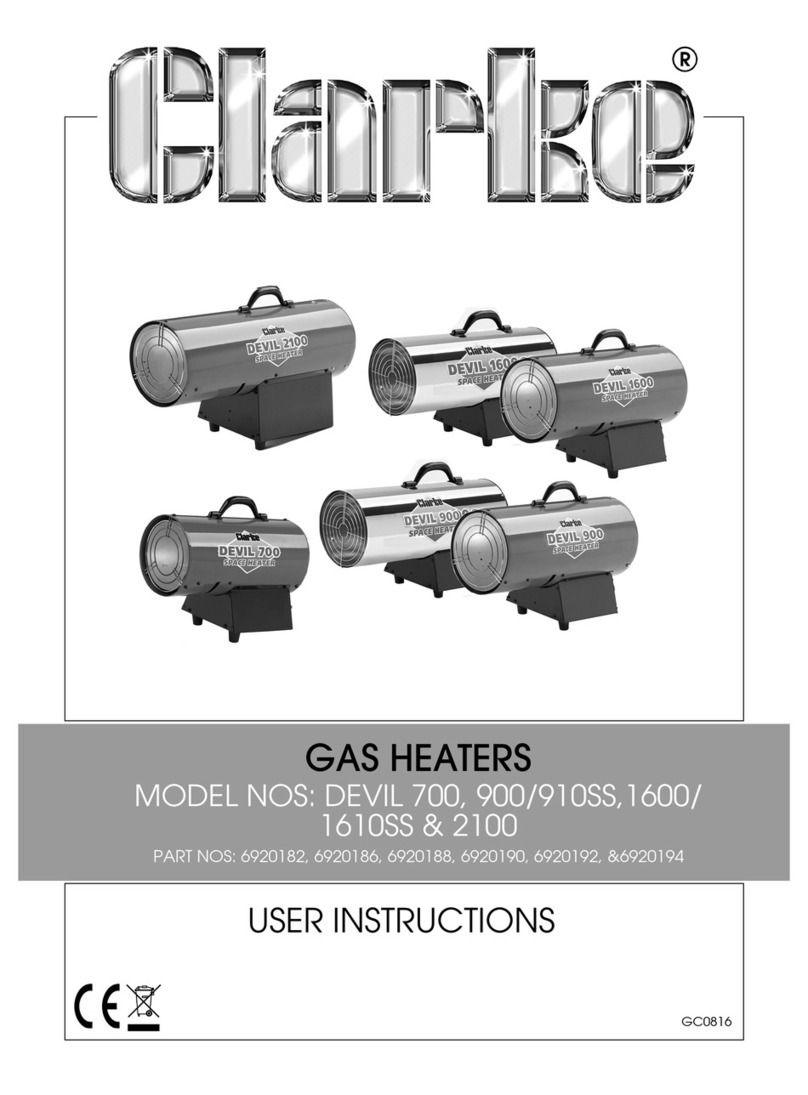
Rothenberger Industrial 035984 User manual

INDUSTRIAL
GB
F
I
D
Gebrauchsanweisung
Instructions for use
Mode d’emploi
Istruzioni per l’uso
0359
Art.-Nr. 035984,85,86,87
www.rothenbergerindustrial.com
Version AT – DE – CH:
Gas G30 / G31
KAT. I3B/P (50)
50 mbar
G 1/4”

TECHNISCHE DATEN FÜR GASHEIZSTRAHLER 035984, 035985, 035986 &
035987
Gasart Butan G30, 50 mbar
Propan G31, 50 mbar
Gaskategorie, Betriebsdruck I3B/P (50), 50 mbar
Brennerdüse: 0,9 mm
Nennleistung 2,50– 4,20 kW
(0,2– 0,34 kg/h)
TEILEBEZEICHNUNG
2
D
EINFÜHRUNG
Lesen Sie die Gebrauchsanweisung, bevor Sie das Gerät in Betrieb nehmen.
1. Halterung
2. Befestigungsschraube
3. Flaschenventil
4. Fixierschraube
5. Beilagscheibe und Sicherungsring
6. Flügelmutter
7. Regleranschluss
8. 50 mbar Konstantdruckregler
9. Schlauch
10. Geräteventil
11. Piezozündung (nur 035985 & 035987)
12. Flaschenanschluss
13. Geräteanschluss
1
1
7
89
10
13 13
9
7
89
10
9
2
12 12 2
565
6
3
3
4
11

3
D
Dieses Gerät darf nur als Heizstrahler verwendet werden. DIESES GERÄT IST NICHT FÜR
DIE VERWENDUNG IN WOHNRÄUMEN GEEIGNET. DIESES GERÄT DARF NUR IM FREIEN
VERWENDET WERDEN. Das Gerät muss gemäß den geltenden Gesetzen installiert werden.
VERWENDUNGSZWECK
SICHERHEITSHINWEISE
• Im Fall eines Lecks (Gasgeruch), schließen Sie das Flaschenventil und halten Sie das Gerät
fern von Zündquellen. Suchen Sie und beheben Sie das Leck, bevor Sie das Gerät in
Betrieb nehmen. Suchen Sie nie ein Leck mit eine Flamme sondern benutzen Sie hierzu
Seifenlauge.
• Das Gerät darf nur an einem gut belüfteten Ort verwendet werden.
• Das Gerät darf nicht in Kellern oder unter Erdgleiche verwendet werden.
• Falls das Gerät über längerer Zeit nicht benützt wird ist das Gerät von der Gasflasche
zu trennen und an einem kühlen, trocken Ort, außerhalb der Reichweite von Kindern zu
lagern.
• DIESES GERÄT DARF NUR IM FREIEN VERWENDET WERDEN.
• Bei Nichtgebrauch ist das Gerät durch schließen des Flaschenventils von der Gasflasche
zu trennen.
• Um Beschädigungen zu vermeiden dürfen Schläuche nicht verdreht werden. Der
Verbindungsschlauch darf nicht verdreht am Gerät angeschlossen werden.
• Das Gerät darf nur fern von Wänden, entflammbaren Materialen und Zündquellen aufgestellt
werden.
• Das Gerät darf nur mit einem Schlauch und Regler, wie in dieser Gebrauchsanleitung
beschrieben, betrieben werden.
• Überprüfen Sie den Schlauch regelmäßig auf Beschädigungen. Ersetzen Sie beschädigte
Schläuche.
• Während des Betriebes wird dieses Gerät sehr heiß. Berühren Sie keine heißen Geräteteile.
Lassen Sie das Gerät vollständig auskühlen, bevor Sie es transportieren, abmontieren
oder lagern.
• Während des Gebrauchs darf das Gerät nicht bewegt werden. Lassen Sie das Gerät
vollständig abkühlen, bevor Sie es transportieren.
• Versuchen Sie nie ein Gerät, das an einer Gasflasche angeschlossen ist, durch Teile des
Gerätes selbst zu heben oder zu transportieren. Verwenden Sie hierzu nur den Handgriff
der Gasflasche.
• Versuchen Sie nie, das Gerät im Bereich des Injektors anzuzünden.
• Entfernen Sie nie das Sicherheitsgitter und zerlegen oder modifizieren Sie das Gerät nicht.
• Kinder vom Gerät fernhalten.
• Lassen Sie das Gerät nie unbeaufsichtigt. Gerät bei gebrochener oder beschädigter
Keramik nicht in Betrieb nehmen.
BESTIMMUNGSLÄNDER ÖSTERREICH, DEUTSCHLAND, SCHWEIZ
LIEFERUMFANG
1. Gasheizstrahler, 50 mbar mit G 1/4” Schlauchverbindung mit Linksgewinde
2. Gasdruckregler (50 mbar Niedrigdruck, Leistung 1,5 kg/h),
Art. Nr. 035921 (CH: 035921Z)
3. Gasschlauch 400 mm, mit G 1/4” Linksgewinde x G 1/4” Linksgewinde
4. Halterung mit Flügelmutter, Schraube, Beilagscheibe und Sicherungsring
5. Befestigungsschraube
6. Piezozündung mit Mutter und Kabel (nur 035985 & 035987)
Nur für den Gebrauch im
Freien Achtung, heiße Teile

4
D
DRUCKREGLER UND VERBINDUNGSSCHLAUCH
Benutzen Sie nur den mitgelieferten Schlauch und Schlauchanschluss. Kontaktieren Sie unseren
Kundendienst oder Ihren regionalen Gashändler, falls Sie Austausch benötigen. Der Gebrauch
nicht-zugelassener oder veränderter Teile ist gefährlich und kann schwere Verletzungen zur
Folge haben. Es wird empfohlen, den Regler nach max. fünf Jahren auszutauschen. Der
Verbindungsschlauch muss der einschlägigen regionalen Gesetzgebung entsprechen. Der
Schlauch darf eine maximale Länge von 0,5 m nicht überschreiten, aufweisen, wenn das Gerät,
wie in dieser Bedienungsanleitung beschrieben, an einer Gasflasche montiert wird. Abgenutzte
oder beschädigte Schläuche müssen ausgetauscht werden. Vergewissern Sie sich, dass der
Schlauch nicht eingeklemmt oder geknickt ist und keine anderen Teile des Gerätes als die
Verbindung berührt.
MONTAGE DER HALTERUNG AM GERÄT
Verbinden Sie das Gerät mit der Halterung mit Hilfe des mitgelieferten Befestigungsmaterials
(Flügelmutter, Beilagscheibe, Sicherungsring und Schraube). Sehen Sie auch das Foto auf
Seite 2 dieser Bedienungsanleitung.
MONTAGE DER PIEZOZÜNDUNG (NUR ART. NR. 035987)
- Schieben Sie die Piezozündung in das Loch
an der Piezohalterung und befestigen Sie
diese mit der dafür vorgesehene Mutter.
- Verbinden Sie die Piezozündung mit der
Zündungsnadel unter Verwendung des
mitgelieferten Kabels.
4
MONTAGE

5
D
5
MONTIEREN DES GERÄTES UND ANSCHLUSS AN EINER GASFLASCHE
Das Gerät darf nur an 5 kg und 11 kg-Gasflaschen angeschlossen werden.
- Schieben Sie die Halterung über den Flaschenhals.
- Fixieren Sie das Gerät samt Halterung am Flaschenhals, indem Sie die Befestigungsschraube
fest zudrehen, damit diese am Flaschenhals anschlägt.
- Vergewissern Sie sich, dass das Flaschenventil und das Geräteventil geschlossen sind.
- Überprüfen Sie den Zustand des Schlauches und des Reglers jedes Mal vor Gebrauch des
Gerätes. Verwenden Sie keinen Schlauch oder Regler, der Beschädigungen oder
Abnützungserscheinungen aufweist.
- Verbinden Sie den Druckregler mit der Gasflasche.
- Verbinden Sie den Gasschlauch mit dem Druckregler und mit dem Gerät. Vergewissern Sie
sich, dass der Schlauch nicht verdreht oder angespannt ist und keine Teile der Gerät
berührt, die heiß werden können.
- Öffnen Sie das Flaschenventil. Vergewissern Sie sich, dass alle Verbindungen dicht sind.
Falls notwendig, verwenden Sie hierzu ein Lecksuchspray oder eine Seifenlauge. Eventuell
sind die Verbindungen nachzuziehen. Verwenden Sie das Gerät nicht, wenn Sie vermuten,
dass das System undicht ist.
AUSWECHSELN DER GASFLASCHE
- Die Gasflasche darf nur im Freien und fern von allen Zündquellen und anderen Personen
gewechselt werden.
- Schließen Sie das Flaschenventil und das Geräteventil.
- Falls das Gerät in Betrieb war, lassen Sie es vollständig abkühlen.
- Schrauben Sie den Gasregler ab und entfernen Sie diesen.
- Schrauben Sie die Befestigungsschraube ab und entfernen Sie die Halterung und das Gerät
vom Flaschenhals.
- Gehen Sie wie im Abschnitt ‘Montieren des Gerätes und Anschluss an einer Gasflasche’
vor.
Gehen Sie wie folgt vor, um das Gerät anzuzünden und die Flamme einzustellen:
- Stellen Sie das Gerät und die Gasflasche im Freien auf eine feste, ebene Fläche, fern von
entflammbaren Materialien auf.
- Öffnen Sie die Flaschenventil, indem Sie den Hahn gegen den Uhrzeigersinn drehen.
- Halten Sie den Ventilknopf gedrückt und drehen Sie diesen auf die höchste Stufe.
- Modelle 035985 & 035987: Drücken Sie die Piezozündung.
- Modelle 035985 & 035987: Zünden Sie das Gerät an, indem Sie eine Flamme zum Keramik,
möglichst weit vom Bereich des Injektors entfernt, halten.
- Halten Sie den Ventilknopf ca. 20 Sekunden gedrückt. Falls die Flamme ausgeht, wiederholen
Sie die oben beschriebene Schritte.
- Sobald die Flamme sich stabilisiert, kann sie durch Drehen des Knopfes wie gewünscht
reguliert werden.
- Um das Gerät auszuschalten, stellen Sie die Flamme ab indem Sie zunächst das
Flaschenventil und anschließend das Geräteventil schließen.
55
VERWENDUNG
WARTUNG UND REINIGUNG

6
D
REINIGUNG
- Das Gerät muss vor der Lagerung vollständig gereinigt werden, insbesondere wenn das
Gerät längere Zeit nicht benützt wird.
- Lassen Sie das Gerät vollständig auskühlen, bevor Sie es lagern.
- Verwenden Sie für die Reinigung Wasser und eine milde Seife.
- Falls der Brenner oder eines der Rohre verstopft sind, verwenden Sie Druckluft um die Ursache
der Verstopfung zu beseitigen.
- Lagern Sie das Gerät an einem trockenen und staubfreien Ort. Wenn möglich in der
Originalverpackung aufbewahren.
FEHLERBEHEBUNG
Fehler Ursache Fehlerbehebung
Nicht alle nötigen
Gashähne offen
Gasflasche leer
Druckregler defekt
Injektor blockiert
Gasflasche fast leer
Druckregler defekt
Injektor blockiert
Ventil fehlerhaft
Druckregler defekt
Öffnen Sie das Flaschenventil
und das Geräteventil
Tauschen Sie die Gasflasche
aus
Tauschen Sie den Druckregler
aus
Reinigen Sie den Injektor oder
ersetzen Sie diesen
Tauschen Sie die Gasflasche
aus
Tauschen Sie den Druckregler
aus
Reinigen Sie den Injektor oder
ersetzen Sie diesen
Lassen Sie das Gerät von
einem Fachmann reparieren
Tauschen Sie den Druckregler
aus
Das Gerät lässt sich nicht
anzünden
Flamme sehr schwach,
instabil, gelb...
Gas tritt aus einem Ventil
aus

7
D
7777
RECYCLING
Nicht mehr gebrauchsfähige Geräte zum Recyceln bei einer Wertstoffsammelstelle abgeben.
Nicht mit dem Hausmüll entsorgen. Weitere Informationen erhalten Sie bei der dafür zuständigen
Behörde. Entsorgen Sie die Verpackung in Übereinstimmung mit dem Materialtyp sowie den
örtlichen, in Ihrem Gebiet geltenden Vorschriften.
EG-Konformitätserklärung
Hiermit erklären wir,
WALTER WERKZEUGE SALZBURG GmbH, Gewerbeparkstrasse 9, 5081 Anif, Austria
dass das nachfolgend bezeichnete Gerät aufgrund seiner Konzipierung und Bauart
sowie in der von uns in Verkehr gebrachten Ausführung, den einschlägigen, grundlegenden
Sicherheits- und Gesundheitsanforderungen der EG-Richtlinien entspricht.
Diese Erklärung bezieht sich nur auf das Gerät in dem Zustand, in dem es in Verkehr
gebracht wurde. Vom Endbenutzer nachträglich angebrachte Teile und/oder nachträglich vor-
genommene Eingriffe bleiben unberücksichtigt.
Produktbezeichnung / Funktion:
Typen- / Modellbezeichnung:
Seriennummer/Chargennummer:
Handelsbezeichnung:
Einschlägige EG-Richtlinien: Gasgeräterichtlinie 90/396/EEC
Angewandte harmonisierte
Normen:
Anif, 01-08-2010
Oliver Hahn Mag. Bart Duquène
Leiter-Einkauf Produktmanager
und Bevollmächtigter der
Technischen Dokumentation
Technische Dokumentation verfügbar bei:
WALTER WERKZEUGE SALZBURG GmbH,
Gewerbeparkstrasse 9, 5081 Anif, Austria
Dies ist die Originalversion der EG-Konformitätserklärung.
EN461:1999 +A1:2004
035984, 85, 86, 87
Gasheizstrahler
90-388 – 2010-08
Rothenberger Industrial Gasheizstrahler

888

INDUSTRIAL
GB
F
I
D
Gebrauchsanweisung
Instructions for use
Mode d’emploi
Istruzioni per l'uso
0359
Art.-Nr. 035984,85,86,87
www.rothenbergerindustrial.com
Version AT – DE – CH:
Gas G30 / G31
CAT. I3B/P (50)
50 mbar
G 1/4"

TECHNICAL SPECIFICATIONS FOR THE GAS SPACE HEATERS 035984,
035985, 035986 & 035987
Type of gas Butane G30, 50 mbar
Propane G31, 50 mbar
Gas category, feed pressare I3B/P (50), 50 mbar
Injector 0.9 mm
Total heat input 2.50– 4.20 kW
(0.2– 0.34 kg/h)
FEATURES
10
INTRODUCTION
Read the instructions before use.
1. Mounting bracket
2. Mounting screw
3. Cylinder valve
4. Fixing screw
5. Washer and spring washer
6. Wing nut
7. Regulator connector
8. 50 mbar constant pressure regulator
9. Hose
10. Gas tap
11. Piezo ignition button (035985 & 035987 only)
12. Cylinder connector
13. Appliance connector
1
1
7
89
10
13 13
9
7
89
10
9
2
12 12 2
565
6
3
3
4
11
GB

11
This appliance may only be used for space heating. THIS APPLIANCE IS NOT FOR DOMESTIC
USE. THIS APPLIANCE MUST ONLY BE USED OUTDOORS. This appliance must be installed
in accordance with such regulations as are in force.
SCOPE OF USE
SAFETY INSTRUCTIONS
• In the event of a gas leak (smell of gas) close the cylinder valve and keep the appliance
well away from sources of ignition. Locate the source and repair the leak before operating
the appliance. Never use a flame to locate the source of a leak; use a soapy solution instead.
• Use only in a well ventilated area.
• The appliance shall not be used in basements or below ground level.
• If the appliance is not to be used for a period of time disconnect it from the cylinder and
store it in a cool, dry place out of the reach of children.
• THIS APPLIANCE MAY ONLY BE USED OUTDOORS.
• Isolate the appliance from the cylinder by closing the cylinder valve when the appliance
is not in use.
• To prevent the risk of damage avoid twisting the flexible tubes and hoses. The hose may
not be twisted when connected.
• Position the appliance well away from walls, inflammable materials and sources of ignition.
• This appliance must be used with a hose and regulator as described in this manual.
• Check the hose regularly for signs of damage. Replace damaged hoses.
• The appliance becomes very hot when in use. Do not touch any part of the appliance
that is hot. Allow the appliance to cool down completely before transport, disassembly
or storage.
• Never move the appliance when it is in use. Allow it to cool down completely before
transport.
• Never attempt the move or lift the appliance and gas cylinder assembly by lifting parts
of the appliance. Always use the gas cylinder’s handle.
• Never ignite the appliance by applying a flame to an area close to the injector.
• Never remove the safety grill or dismantle and/or modify the appliance.
• Keep children well away from the appliance.
• Never leave the appliance unattended.
• Never use the appliance if the ceramic element is damaged or broken.
COUNTRIES OF DESTINATION: AUSTRIA, GERMANY, SWITZERLAND
PACK CONTENTS
1. Space heater, 50 mbar with 1/4" BSP screw thread connection (left)
2. Gas pressure regulator, (50 mbar pressure reduction, 1.5 kg/h capacity),
art. no. 035921 (CH: 035921Z)
3. Gas hose, 400 mm, with 1/4" BSP screw thread connectors (left)
4. Mounting bracket with wing nut, screw, washer and spring washer
5. Mounting screw
6. Piezo ignition with nut and wire (035985 & 035987 only)
Only for outdoor use Caution, hot parts
GB

12
REGULATOR AND HOSE
Use only the hose and hose connector provided. If a replacement is necessary, please
contact either our Customer Service Department or your local gas dealer. The use of
unauthorised or modified parts can create unsafe conditions and could result in serious injury
to the user. It is recommended that the regulator is changed within 5 years of the date of
manufacture. The hose used must conform to the relevant standard for the country of use.
The length of the hose must be max. 0.5 metres when the appliance is fitted to a gas
cylinder as described in this manual. Worn or damaged hoses must be replaced. Ensure that
the hose is not obstructed, kinked, or in contact with any part of the appliance other than at
its connection.
ATTACHING THE MOUNTING BRACKET TO THE APPLIANCE
Attach the appliance to the mounting bracket using the wing nut, washer, spring washer and
screw provided for this purpose. Refer also to the photo on page 10 of this manual.
ATTACHING THE PIEZO IGNITION DEVICE (ART. NO. 035987 ONLY)
- Insert the Piezo ignition device into the
Piezo ignition bracket and secure it using the
nut provided.
- Connect the Piezo ignition device to the
ignition needle using the wire supplied.
12
ASSEMBLY
GB

1313
FITTING AND CONNECTING THE APPLIANCE TO A GAS CYLINDER
The appliance may only be fitted to 5kg and 11kg gas cylinders.
- Place the mounting bracket on to the collar of the gas cylinder.
- Tighten the mounting screw so that so that it engages with the collar of the gas cylinder
and so that the appliance and the mounting bracket are securely fixed on the gas cylinder.
- Make sure that the gas cylinder valve and the appliance valve are closed.
- Check the condition of the hose and the pressure regulator each time you use the appliance.
Do not use a hose or regulator that show any sign of damage or deterioration.
- Connect the pressure regulator to the gas cylinder.
- Connect the gas hose to the pressure regulator and to the appliance connector. Make sure
that the hose is routed in such a way so that it is not twisted or subject to strain and so
that it can not come into contact with any parts of the appliance that may become hot.
- Open the gas cylinder valve. Check that all connections are air-tight. If necessary use a leak
detector spray or a soapy solution. If necessary, tighten the connections. Do not use the
appliance if you suspect that the system may be leaky.
CHANGING THE GAS CYLINDER
- The gas cylinder may only be changed outdoors, well away from sources of ignition and
other persons.
- Close the gas cylinder valve and the gas appliance valve.
- If the appliance has been in operation allow it to cool down completely.
- Unscrew and remove the gas regulator.
- Unscrew the mounting screw and remove the mounting bracket and the appliance from
the gas cylinder’s collar.
- Proceed as described in the ‘Fitting and connecting the appliance to a gas cylinder’
section.
Proceed as follows to light the appliance and adjust the flame:
- Place the appliance and gas cylinder assembly outdoors on a level and stable surface, well
away from any inflammable materials.
- Open the gas cylinder valve by turning the knob anti-clockwise.
- Push and hold the appliance’s knob and turn it to the highest setting.
- Models 035985 & 035987: Push the Piezo ignition button.
- Models 035984 & 035986: Light the appliance by applying a gas lighter to the section of
the ceramic grille furthest away from the valve.
- Hold the appliance’s knob depressed for approximately 20 seconds. If the flow of gas stops,
repeat the steps above.
- Once the flame is established the flame can be adjusted as required by turning the valve.
- To switch off the appliance extinguish the flame by closing the cylinder valve and subsequently
close the appliance valve.
1313
USING THE APPLIANCE
MAINTENANCE AND CLEANING
GB

14
CLEANING
- The appliance must be thoroughly cleaned before it is put away, especially if the appliance
is not to be used for a longer period.
- Allow the appliance to cool down completely before cleaning.
- Clean the appliance with water and a mild detergent.
- If the burner or any of the tubes are clogged, use compressed air to remove the cause of
obstruction.
- Store the appliance in a dry place and away from dust. If possible put it back in its original
packaging.
TROUBLESHOOTING
PROBLEM CAUSE CORRECTIVE ACTION
Not all necessary
valves are open
Gas cylinder empty
Pressure regulator
defective
Injector blocked or
clogged
Gas cylinder almost
empty
Pressure regulator
defective
Injector blocked or
clogged
Faulty valve
Pressure regulator
defective
Open the gas cylinder valve
and the appliance valve
Replace the gas cylinder
Replace the pressure regulator
Clean or replace the injector
Replace the gas cylinder
Replace the pressure regulator
Clean or replace the injector
Have the appliance repaired by
a competent person
Replace the pressure regulator
The appliance does not
ignite
Flame very weak, unsteady,
yellow...
Gas leaks from a valve
GB

1515151515
RECYCLING
Worn out appliances must be recycled at a suitable recycling facility. Do not dispose of with
the household waste. Contact your local authority for more information. Dispose of packaging
according to type and in accordance with local regulations.
GB
EC-Declaration of Conformity
We,
WALTER WERKZEUGE SALZBURG GmbH, Gewerbeparkstrasse 9, 5081 Anif, Austria
declare that the design and construction of the following appliance, in the form supplied by
us, comply with the basic health and safety requirements of the appropriate EC directives.
This declaration covers the appliance only in the condition in which it was supplied by us.
It does not cover parts subsequently fitted by the user or modifications made after purchase.
Product description / function:
Type / model identifier:
Serial number / Lot number:
Trade name:
Appropriate EC directives: Gas Appliances Directive 90/396/EEC
Applicable harmonised
standards:
Anif, 01-08-2010
Oliver Hahn Mag. Bart Duquène
Purchasing Manager Product Manager
and person responsible for
technical documentation
Technical documentation is available from:
WALTER WERKZEUGE SALZBURG GmbH
Gewerbeparkstrasse 9, 5081 Anif-Austria
This is a translation of the CE declaration of conformity.
EN461:1999 +A1:2004
035984, 85, 86, 87
Gas space heaters
90-388 – 2010-08
Rothenberger Industrial Gas space heaters

16161616

INDUSTRIAL
GB
F
I
D
Gebrauchsanweisung
Instructions for use
Mode d’emploi
Istruzioni per l’uso
0359
Réf. 035984,85,86,87
www.rothenbergerindustrial.com
Version AT – DE – CH :
Gaz G30 / G31
CAT. I3B/P (50)
50 mbars
G 1/4”

SPÉCIFICATIONS TECHNIQUES POUR LES CHAUFFAGES À GAZ 035984,
035985, 035986 & 035987
Type de gaz Butane G30, 50 mbars
Propane G31, 50 mbars
Catégorie de gaz, pression d’alimentation I3B/P (50), 50 mbars
Injecteur 0,9 mm
Débit calorifique total 2,50– 4,20 kW
(0,2– 0,34 kg/h)
COMPOSITION
18
INTRODUCTION
Lisez les instructions avant usage.
1. Support de montage
2. Vis de montage
3. Robinet de la bouteille
4. Vis de blocage
5. Rondelle et rondelle élastique
6. Ecrou papillon
7. Raccord du détendeur
8. Détendeur réglable en continu 50 mbars
9. Tuyau
10. Robinet de gaz
11. Bouton d’allumage Piezo (035985 & 035987 uniquement)
12. Raccord de la bouteille
13. Raccord de l’appareil
1
1
7
89
10
13 13
9
7
89
10
9
2
12 12 2
565
6
3
3
4
11
F

19
Cet appareil doit être utilisé pour le chauffage uniquement. CET APPAREIL N’EST PAS DESTINÉ
À UN USAGE DOMESTIQUE. CET APPAREIL NE DOIT ÊTRE UTILISÉ QU’EN PLEIN AIR.
Cet appareil doit être installé conformément aux règlementations en vigueur.
ETENDUE D’UTILISATION
CONSIGNES DE SÉCURITÉ
• En cas de fuite de gaz (odeur), fermez le robinet de la bouteille et tenez l’appareil éloigné
de toute source d’inflammation. Repérez la source de la fuite et éliminez la fuite avant d’utiliser
l’appareil. Ne recherchez jamais une fuite avec une flamme ; utilisez plutôt une solution
savonneuse.
• Utilisez cet appareil uniquement dans un endroit bien aéré.
• Cet appareil ne doit pas être utilisé en sous-sol ou sous le niveau du sol.
• Si vous n’utilisez pas cet appareil pendant une période prolongée, séparez-le de la
bouteille et rangez-le dans un endroit frais et sec hors de portée des enfants.
• CET APPAREIL NE DOIT ÊTRE UTILISÉ QU’EN PLEIN AIR.
• Quand vous n’utilisez pas l’appareil, isolez-le de la bouteille en fermant le robinet de la
bouteille.
• Afin d’éviter tout risque d’endommagement, ne tordez pas les tubes souples et les tuyaux.
Le tuyau ne doit pas être tordu quand il est raccordé.
• N’installez pas l’appareil à proximité d’un mur, de matières inflammables ou de sources
d’inflammation.
• Cet appareil doit être utilisé avec un tuyau et un détendeur conformes à ceux décrits dans
ce manuel.
• Contrôlez le tuyau régulièrement pour pouvoir détecter tout signe de détérioration.
Remplacez les tuyaux détériorés.
• Cet appareil devient très chaud au cours de l’utilisation. Ne touchez pas les parties de
l’appareil qui sont chaudes. Laissez l’appareil refroidir complètement avant de le transporter,
de le démonter ou de l’entreposer.
• Ne déplacez jamais l’appareil pendant qu’il fonctionne. Laissez-le refroidir complètement
avant de le transporter.
• N’essayez jamais de déplacer ou de soulever l’ensemble appareil/bouteille de gaz en
soulevant un des composants de l’appareil. Utilisez toujours la poignée de la bouteille de
gaz.
• N’allumez jamais l’appareil en appliquant une flamme dans une zone proche de l’injecteur.
• Ne retirez jamais la grille de protection et ne démontez et/ou ne modifiez jamais l’appareil.
• Tenez les enfants éloignés de l’appareil.
• Ne laissez jamais l’appareil sans surveillance.
• N’utilisez jamais l’appareil si l’élément en céramique est détérioré ou cassé.
PAYS AUXQUELS CET APPAREIL EST DESTINE : AUTRICHE, ALLEMAGNE, SUISSE
CONTENU DE LA LIVRAISON
1. Chauffage, 50 mbars avec raccordement par vis filetée (à gauche) 1/4” BSP
2. Détendeur-régulateur de gaz, (réduction de la pression à 50 mbars, capacité 1,5
kg/h), réf. 035921 (CH: 035921Z)
3. Tuyau de gaz, 400 mm, avec raccords à vis filetée (à gauche) 1/4” BSP
4. Support de montage avec écrou papillon, vis, rondelle et rondelle élastique
5. Vis de montage
6. Allumage Piezo avec écrou et câble (035985 & 035987 uniquement)
Pour usage en plein air
uniquement Attention, parties chaudes
F

20
DÉTENDEUR ET TUYAU
Utilisez uniquement le tuyau et le raccord de tuyau fournis. Si un remplacement est nécessaire,
veuillez contacter notre service après-vente ou votre fournisseur de gaz local. L’utilisation
d’éléments non autorisés ou modifiés peut créer des conditions dangereuses dont la
conséquence peut être des blessures graves pour l’utilisateur. Il est recommandé de
remplacer le détendeur tous les 5 ans à partir de la date de fabrication. Le tuyau utilisé doit
être conforme aux normes en vigueur dans le pays d’utilisation. La longueur du tuyau doit
être de 0,5 mètre max. quand l’appareil est fixé à la bouteille de gaz comme décrit dans le
présent manuel. Les tuyaux usés ou détériorés doivent être remplacés. Assurez-vous que
le tuyau n’est pas obstrué, tordu ou en contact avec un élément de l’appareil autre que celui
servant au raccordement.
FIXER LE SUPPORT DE MONTAGE À L’APPAREIL.
Fixez l’appareil au support de montage en utilisant l’écrou papillon, la rondelle, la rondelle
élastique et la vis fournis à cet effet. Reportez-vous aussi à la photo de la page 18 du présent
manuel.
FIXER LE DISPOSITIF D’ALLUMAGE PIEZO (RÉF. 035987 UNIQUEMENT)
- Introduisez le dispositif d’allumage Piezo
dans le support de l’allumage Piezo et fixez-
le bien en utilisant l’écrou fourni.
- Branchez le dispositif d’allumage Piezo à
l’aiguille de l’allumage en utilisant le câble
fourni.
20
MONTAGE
F
Other manuals for 035984
1
This manual suits for next models
3
Table of contents
Languages:
Other Rothenberger Industrial Gas Heater manuals
Popular Gas Heater manuals by other brands

Desa
Desa ROPANE CONSTRUCTION HEATERS owner's manual

Desa
Desa BCLP375 owner's manual

Robur
Robur Line F1 Series User, installation and service manual

Superior
Superior BGE18NV Installation and operation instructions

Dru
Dru Room-sealed atmospheric gas-fired heating... user manual

klover
klover TKR 35 user guide

Hargrove
Hargrove Timberland Glow Operation and installation guide

Kinder
Kinder Cameo BF Installation and maintenance instructions

Qlima
Qlima GH 438 B-2 Directions for use

Desa
Desa 125-R owner's manual

Gasmate
Gasmate AH100 Series instructions

Brant Radiant Heaters
Brant Radiant Heaters QTD Series User instruction