Registration Form to the Company, along with a copy of the dealer's invoice. It is in
your best interest to insure that this has been done.
arranty does not cover the following:
1. cleaning, transporting, mailing and service call charges.
2. Normal wear items.
3. Depreciation or damage caused by normal wear, accidents, improper
maintenance, improper protection or improper use.
4. The use of non original spare parts and accessories.
Your Authorised Company Dealer has genuine parts in stock. Only these approved
replacement parts should be used. This limited warranty covers defective material and
workmanship. The cost of normal maintenance or repairs for accidents or improper use,
and related labour will be borne by the owner.
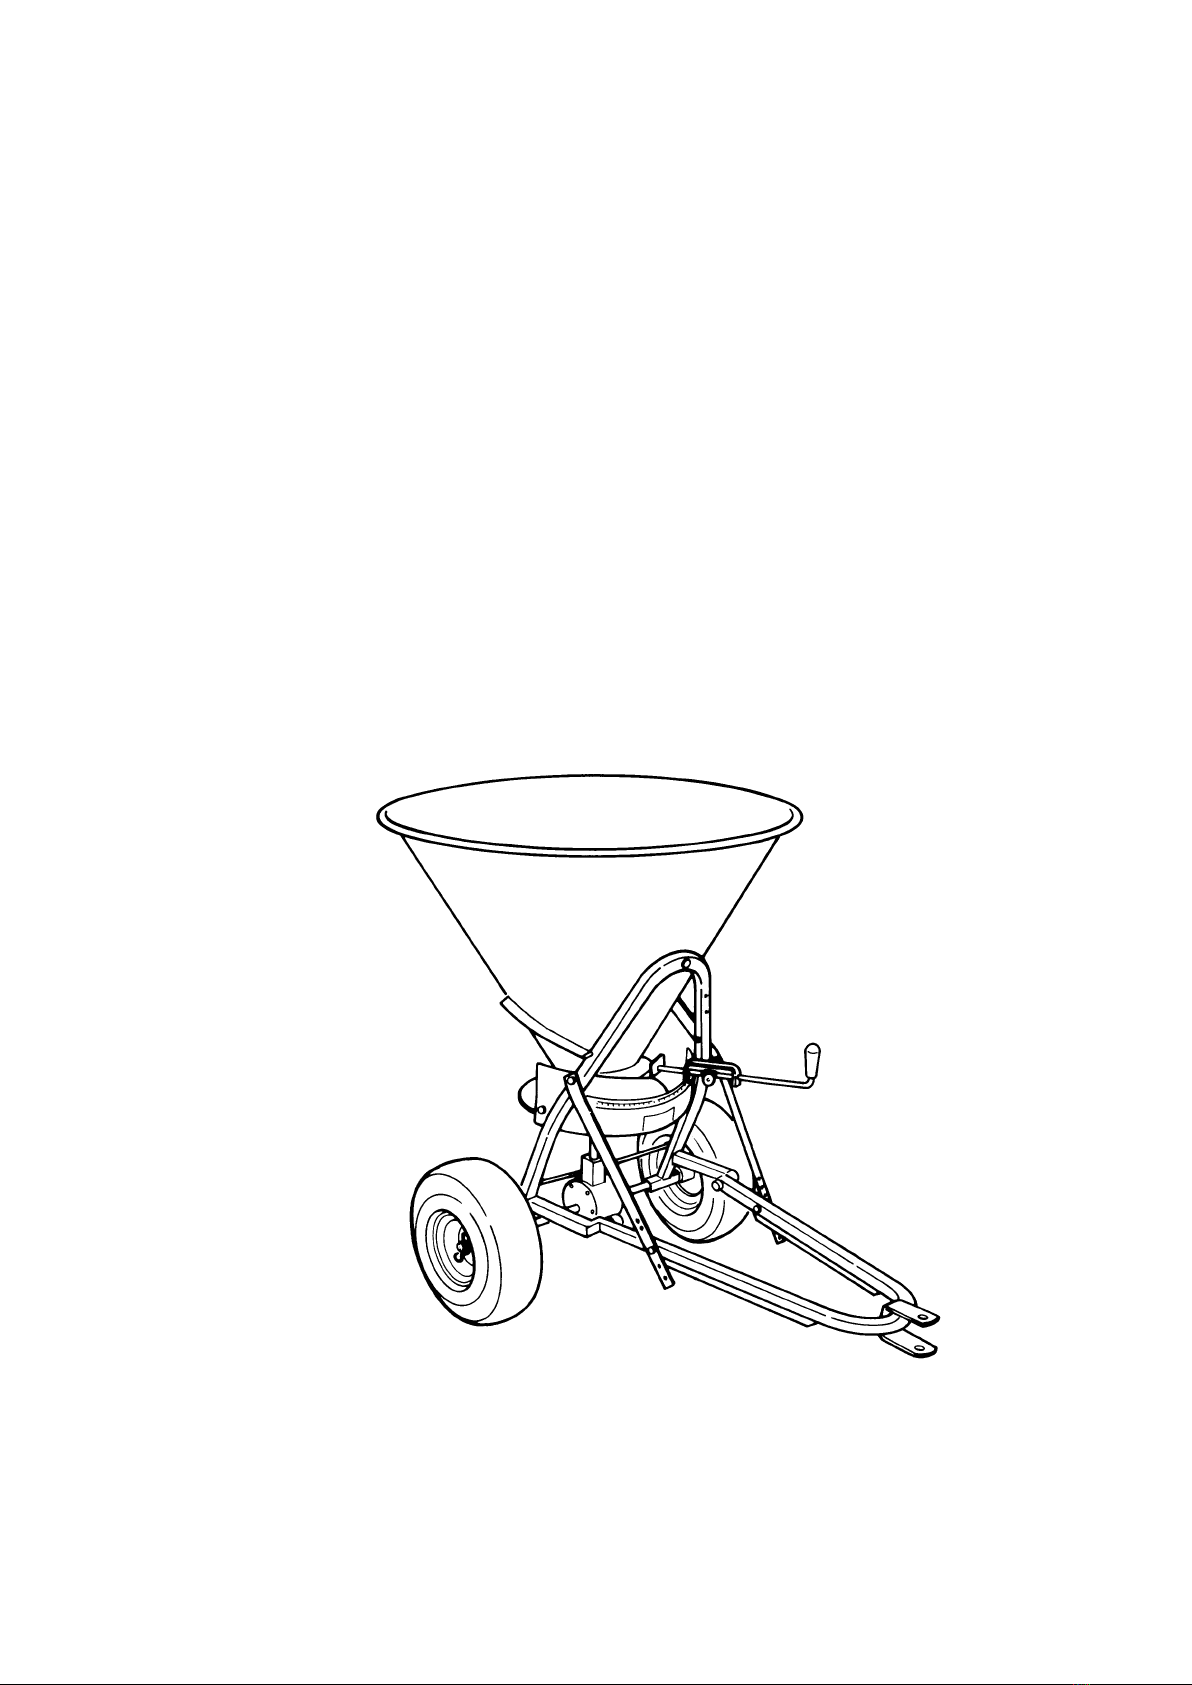
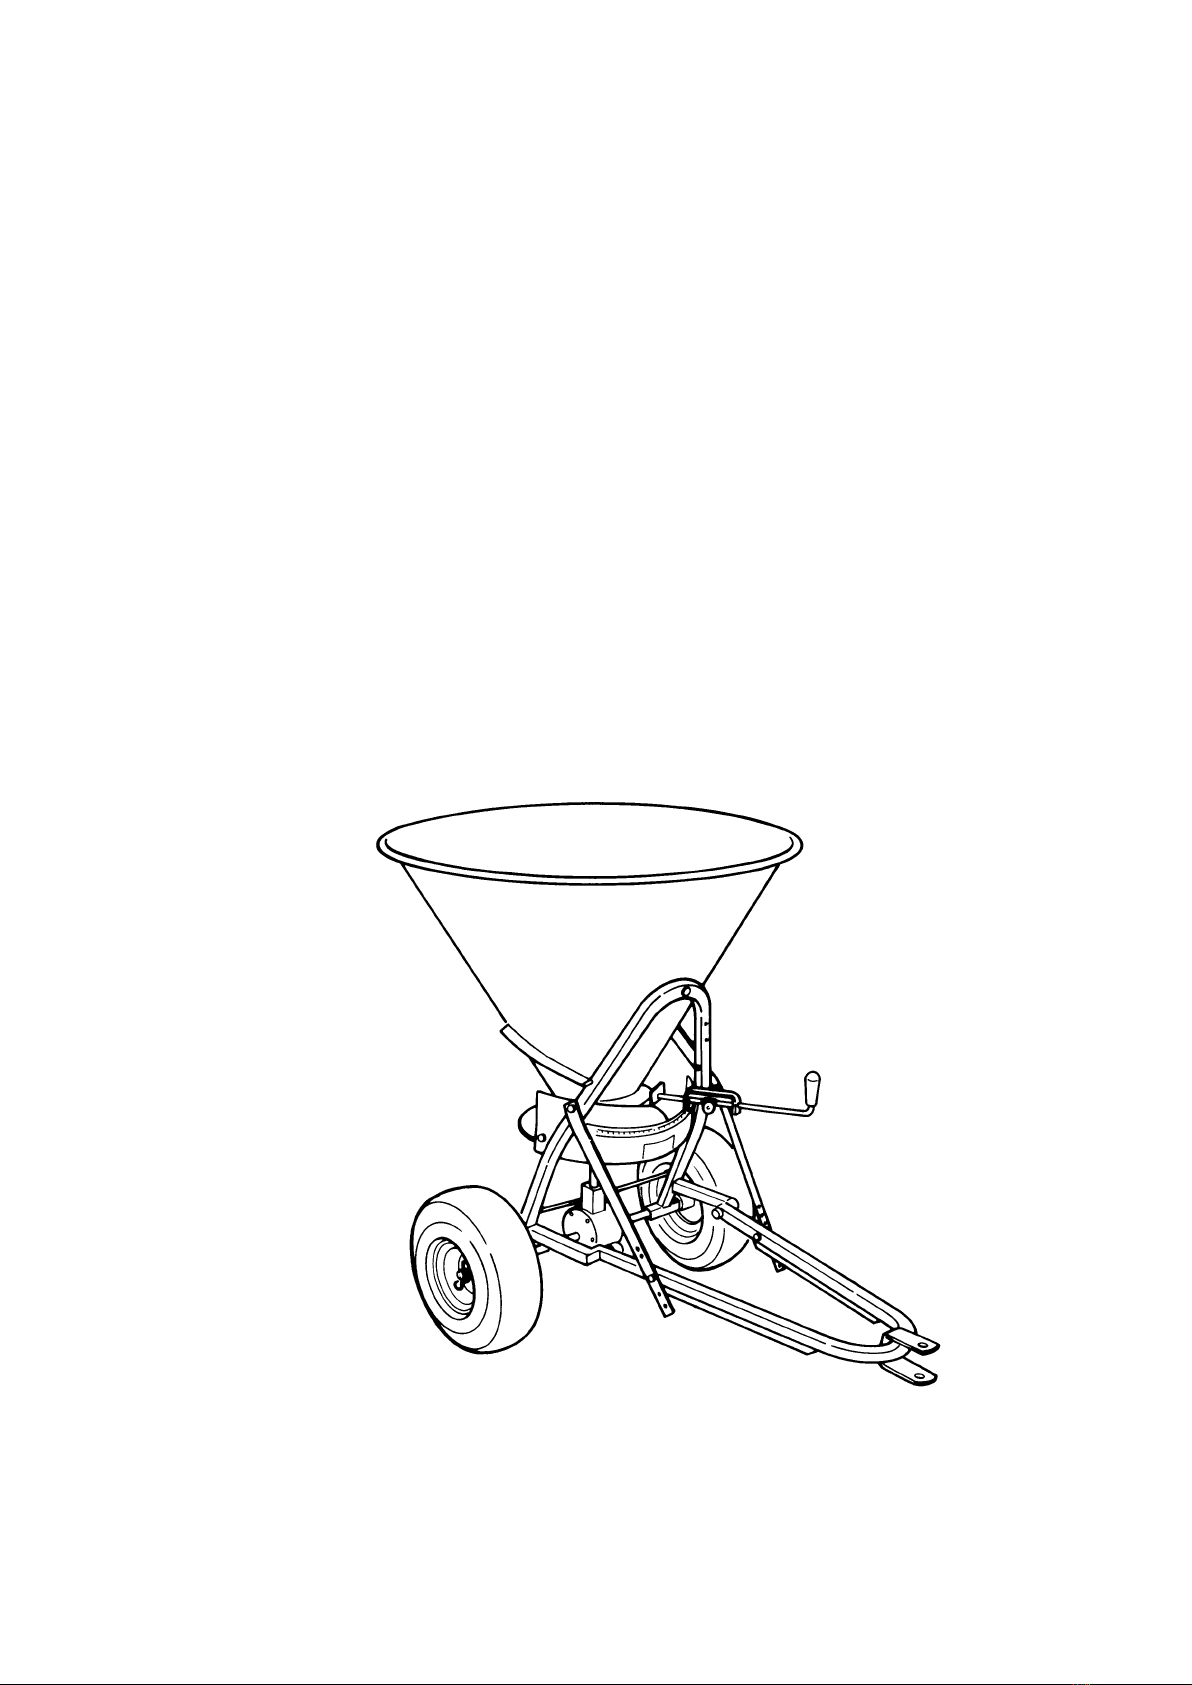
1.03 - Assembly Instructions
All hardware needed for assembly will be found in the box or on the machine.
NOTE: assembly ill be easier if all parts are loosely assembled before tightening
the hard are.
1. Locate the hopper (see #2, fig. 2), the mobile shutter (#48), the threaded
bushing (#7) and the nut (#47). Slide the threaded bushing (#7) through the
bottom hole of the hopper (#2) and fasten the mobile shutter (#48) to it with the
nut (#47).
2. Fasten the guard (#14) onto the frame (#11) using the M8x16 bolts (#16), M8
washers (#9) and M8 hex nuts (#10).
3. Slide the spinner disc (#46) and the hopper assembly over the outgoing shaft
(#44) and use the M8x40 carriage bolt (#8), M8 washer (#9) and M8 hex nut
(#10) to fasten the hopper to the frame (#11). Pin the spinner disc to the shaft
with the cotter pin (#43).
4. Attach the stirrer (#4) to the outgoing shaft (#44) with the M6x30 bolt (#5) and
M6 nylon insert nut (#6).
5. Place the distributor (#3) inside the hopper (#2) and fasten with the two M8x20
carriage bolts (#50), M8 washers (#9) and M8 hex nuts (#10) that connect the
sides of the frame (#11) to the hopper.
6. Slide the flow control assembly (#19) into the slot of the mobile shutter (#48) and
fasten to the guard (#14) with the adjustment knob (#20) and M8 washer (#14).
7. The wheel hubs are offset and are mounted on the shaft (#28) with the long end
(that with the hole) to the inside. Slide one of the wheels over the left side,
followed by the washer (#31) and secure it in place with the "R" clip pin (#45).
Slide on the right wheel, then hold it in place with the bolt (#26) sliding through
the hole in the hub and the hole in the shaft. Secure it in place with the nut (#6).
8. The tongue (#51) is attached to the frame with two plates, one right (#17) and
one left (#18). Attach the upper end of the plate to the hole in the square tubing
of the frame (#11) which attaches to the hopper (#2) using the 8x40 mm. bolts
B
ABY
-H
OP
O
PERATOR
’
S
M
ANUAL
G
ENERAL
I
NFORMATION
6 R
OTOMEC