Rotor Riot HD1 User manual

Rotor Riot HD1 RTF Quick Liftoff Guide
Version 1.1

Content
Read Me First
Controller Map
DJI FPV Goggles
HD1 RTF Components & Axis Layout
Propeller Installation
Preflight Checklist
Liftoff

Read Me First
1- Read all the instructions as many times necessary until you understand all the steps. If you have
2- If this is your first time flying a drone, we strongly encourage you to start with a more straightforward
operating air unit such as the DJI Mavic. Keep in mind that this is an advanced product intended for
professional use. A mistake by your part can incur in bodily damage. This product is not a toy!
3- In this manual, you will find summarized product information of the three main components that make up
the HD1 RTF. For in-depth instructions details for the Remote Control, FPV Goggles, and Air Unit (FPV
transmitter device installed on drone), please contact our customer support or visit www.dji.com.
Controller Air Unit FPV Goggles

Left Stick
Up and Down = Throttle/power output to motors
Left to Right = Yaw movement/rotation on center Z-Axis
Power Button
To power up the controller, press the button
down for 2 seconds until the battery level
LED's cycle and the red Status LED is
turned on.To power off, do the same.
Status LED
red light = controller ON with no link with air unit and/or left
stick throttle position not in proper arming down position
Battery Level LED’s
SD Switch Three (3) positions
Top position = Currently not used
Middle position = Currently not used
Bottom position = Currently not used
Record Button
Remeber to insert and format
micro sd card before liftoff
SA Switch Three (3) positions
Top position (All the way away from you) = Dis-armed
Middle position = Dis-armed
Bottom Position (All the way towards you) = Armed
Left Dial
Currently not used
Right Dial
Currently not used
SB Switch Three (3) positions
Top position = Currently not used
Middle position = Currently not used
Bottom position = Currently not used
Back Button
Currently not used
SC Switch Three (3) positions
Top position = Currently not used
Middle position = Currently not used
Bottom position = Flip Over After Crash
Right Stick
Up and Down = Pitch forward and back on Y-axiz
Left to Right = Roll left and right on X-axis
*Important- Throttle needs to be down before arming.
green light = controller ON with good link with air unit and
left stick throttle position in proper arming down position
C Button
Currently not used
Controller Map
Controller information provided is only for HD1 RTF & tunned air unit. Please practice safe
operating procedures. Always do an initial arming test with the props uninstalled from the air unit.
Please charge the Remote Controller by accessing the USB-C port
on the bottom of the controller. Charging time may vary depending on
the power output of the USB charger that you use. We recommend
using an USB adapter Quick Charge 3.0 charger.

DJI FPV Goggles
You can power your FPV Goggles with the
provided power cable (XT-60 connector to
barrel type connection). Do not connect
any power higher than 17.6 volts.
Antennas
Please install them before
connecting the battery.
Channel Display
Channel
Adjustment
Buttons
USB-C Port
microSD Card Slot
Interpupillary Distance IPD Slider
Record Button
Remeber to insert and format
micro sd card before liftoff
Back Button
Use it when navigating the
goggles heads up display menu.
5D Button
Press down to start the pop up
heads up display menu. Up, down,
left & right to navigate the menu.
Linking Button
Your Air Unit, Controller, and FPV Goggles were
linked, tested, and tuned before shipment.
There should be no need to press this.
Power Port
Audio Port

X-axis
Y-axis
Z-axis
HD1 RTF Components & Axis Layout
#2 Motor CCW rotation
#3 Motor CCW rotation
#1 Motor CW rotation
#4 Motor CW rotation
microSD card slot
Use to record at highest viedo quality posible.
Linking Button & Status Indicator
Your Air Unit, Controller, and FPV Goggles were
linked, tested, and tuned before shipment.
There should be no need to press this.
Power Port XT60 Male Connector
Flight Controller &
Electronic Speed Controllers
Camera
Antennas
Camera Mount
Loosen the screws to
adjust the camera angle.
Z-axis - Yaw movement / rotation on center Z-axis
Controllable via Left Stick movement from Left Right
Y-axis - Pitch forward and back on Y-axis
Controllable via Right Stick movement from up to down
X-axis - Roll left and right on X-axis
Controllable via Right Stick movement from left to right
Charge your drone batteries before flying and be mindful of
your battery voltage even when the air unit is sitting still and
plugged the system is draining energy. Do not deplete the
energy in the battery to avoid irreversible damage.

Propeller Installation Before your first liftoff, please practice the arming/disarming procedure with the
drone on the ground and the props completely removed from the drone to get
acquainted with all the buttons in the FPV Goggles and Remote Controller.
#3 Motor CCW rotation
#4 Motor CW rotation #2 Motor CCW rotation
#1 Motor CW rotation
Propellers Identification Number
This number is used to identify the size and pitch of the
prop. You can also use this number as a reference to
differentiate rotation between clockwise(CW) and
counter-clockwise(CCW) props.
Lock-Nut
Always use lock-nuts and tighten with the proper size
socket. Do not use thread lock. Never use a metal
vise grip to hold the motor bell housing; this will
scrape the paint and might bend the metal surface.

Preflight Checklist
Depending on the type of flight you are doing, it might be necessary by law to follow a preflight checklist and document
the flight in a log report. We encourage you to get acquainted with your local laws. Even if the flying that you are doing is
for fun, we recommend you follow the following documentation procedure to ensure safety and joyful experience.
Location Preflight Checklist
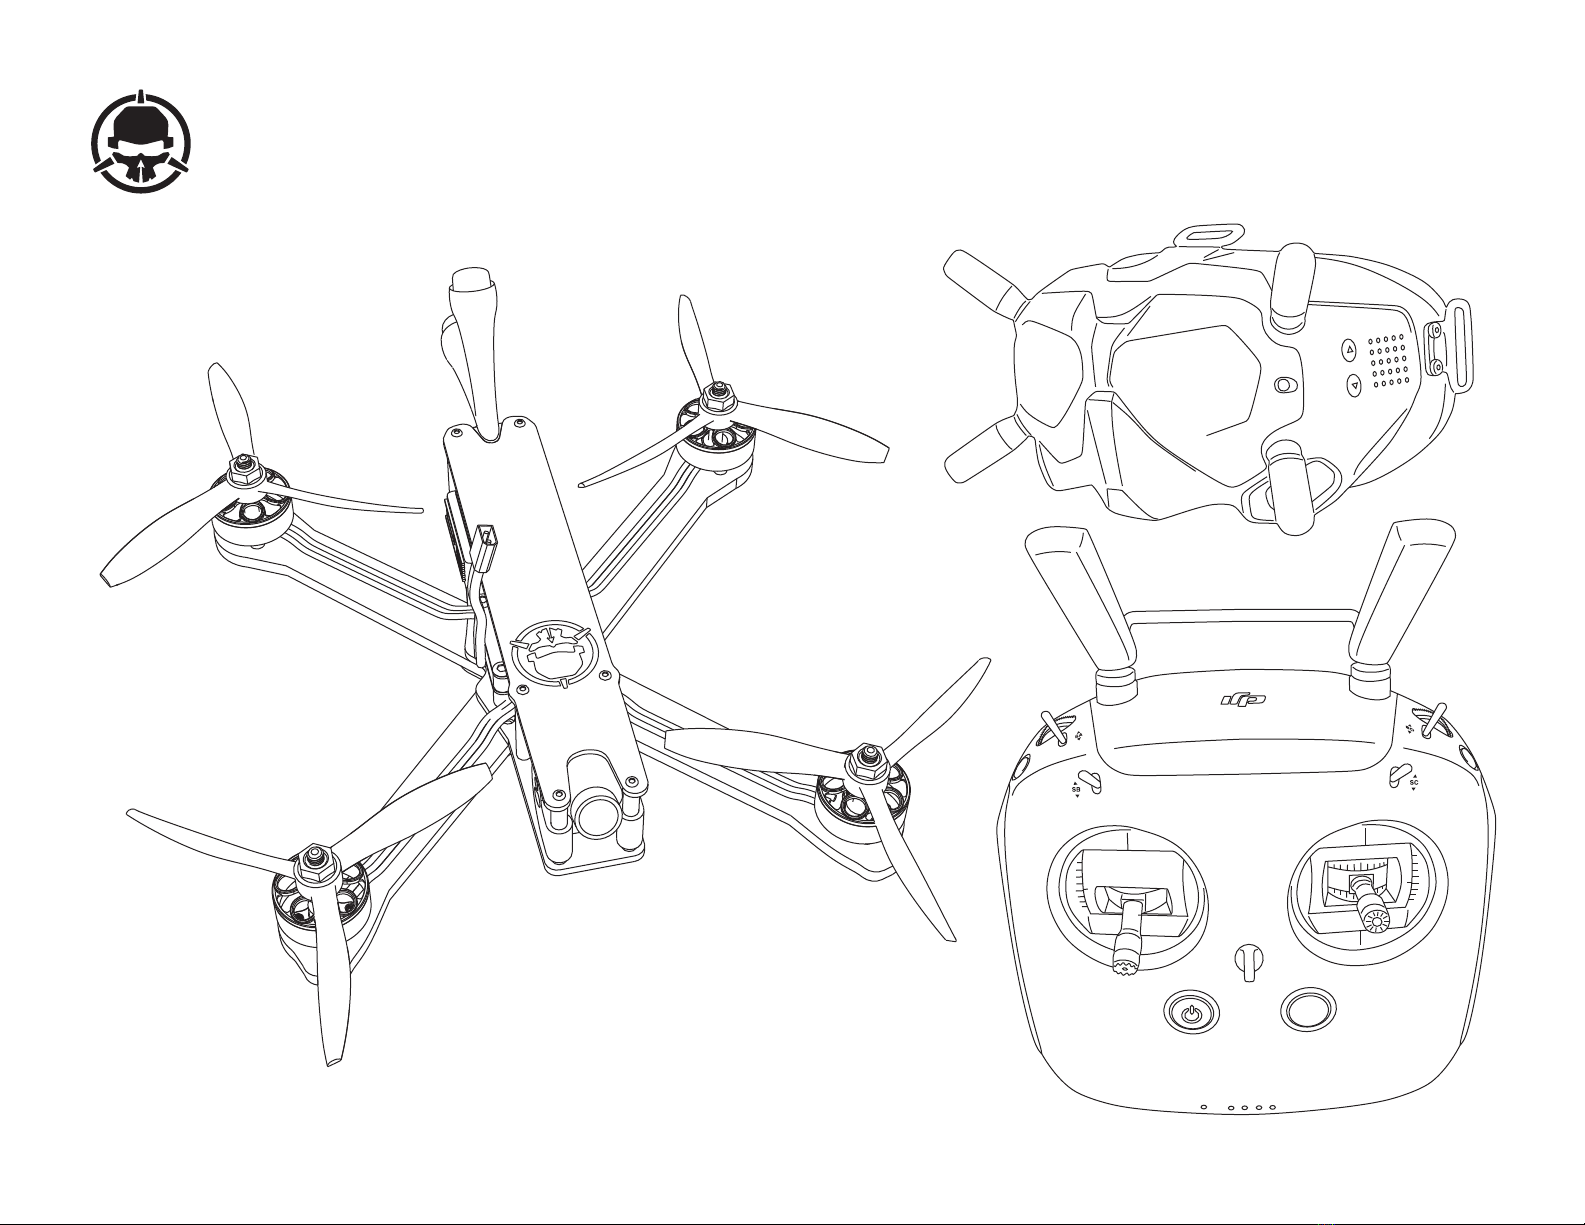
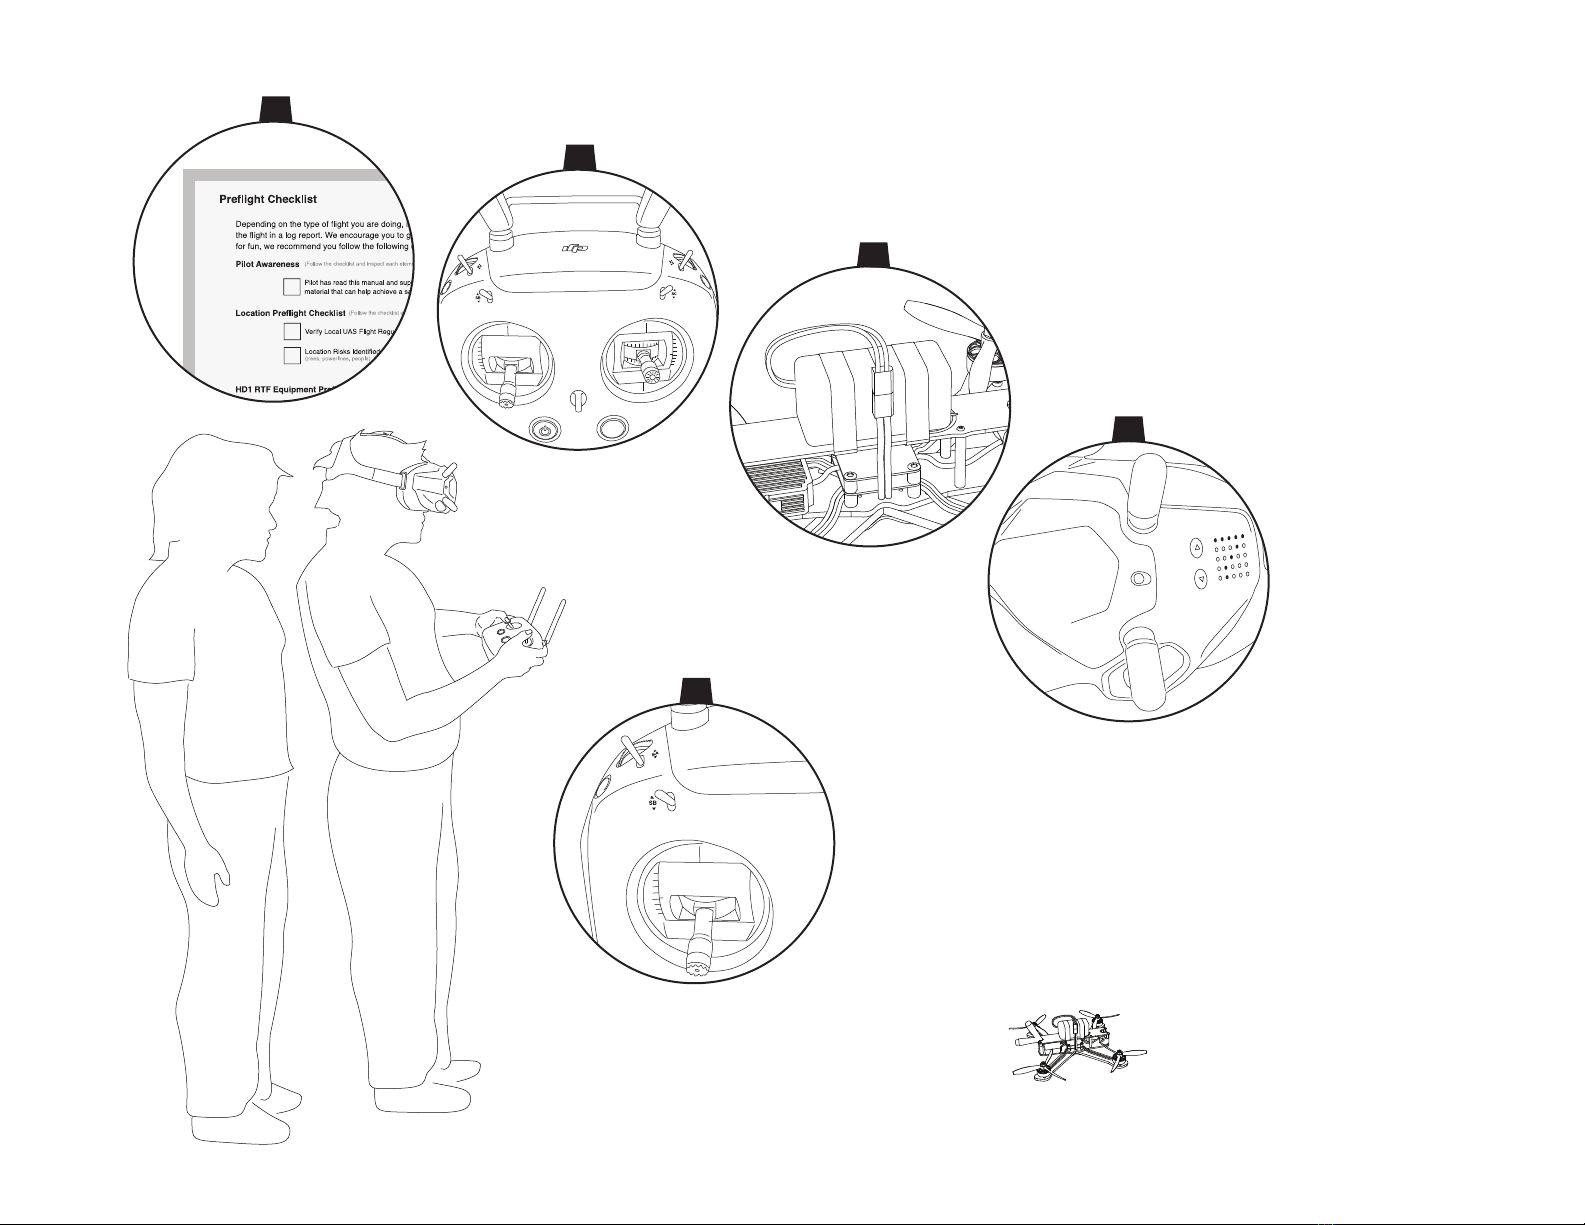
HD1 RTF Equipment Preflight Checklist
(Follow the checklist and inspect each element, go to next step only when all is OK.)
Verify Local UAS Flight Regulations
Location Risks Identified
(trees, powerlines, people, etc.)
Determine Safe Flight Route
(Follow the checklist and inspect each element, take off only when all is OK and conditions are safe.)
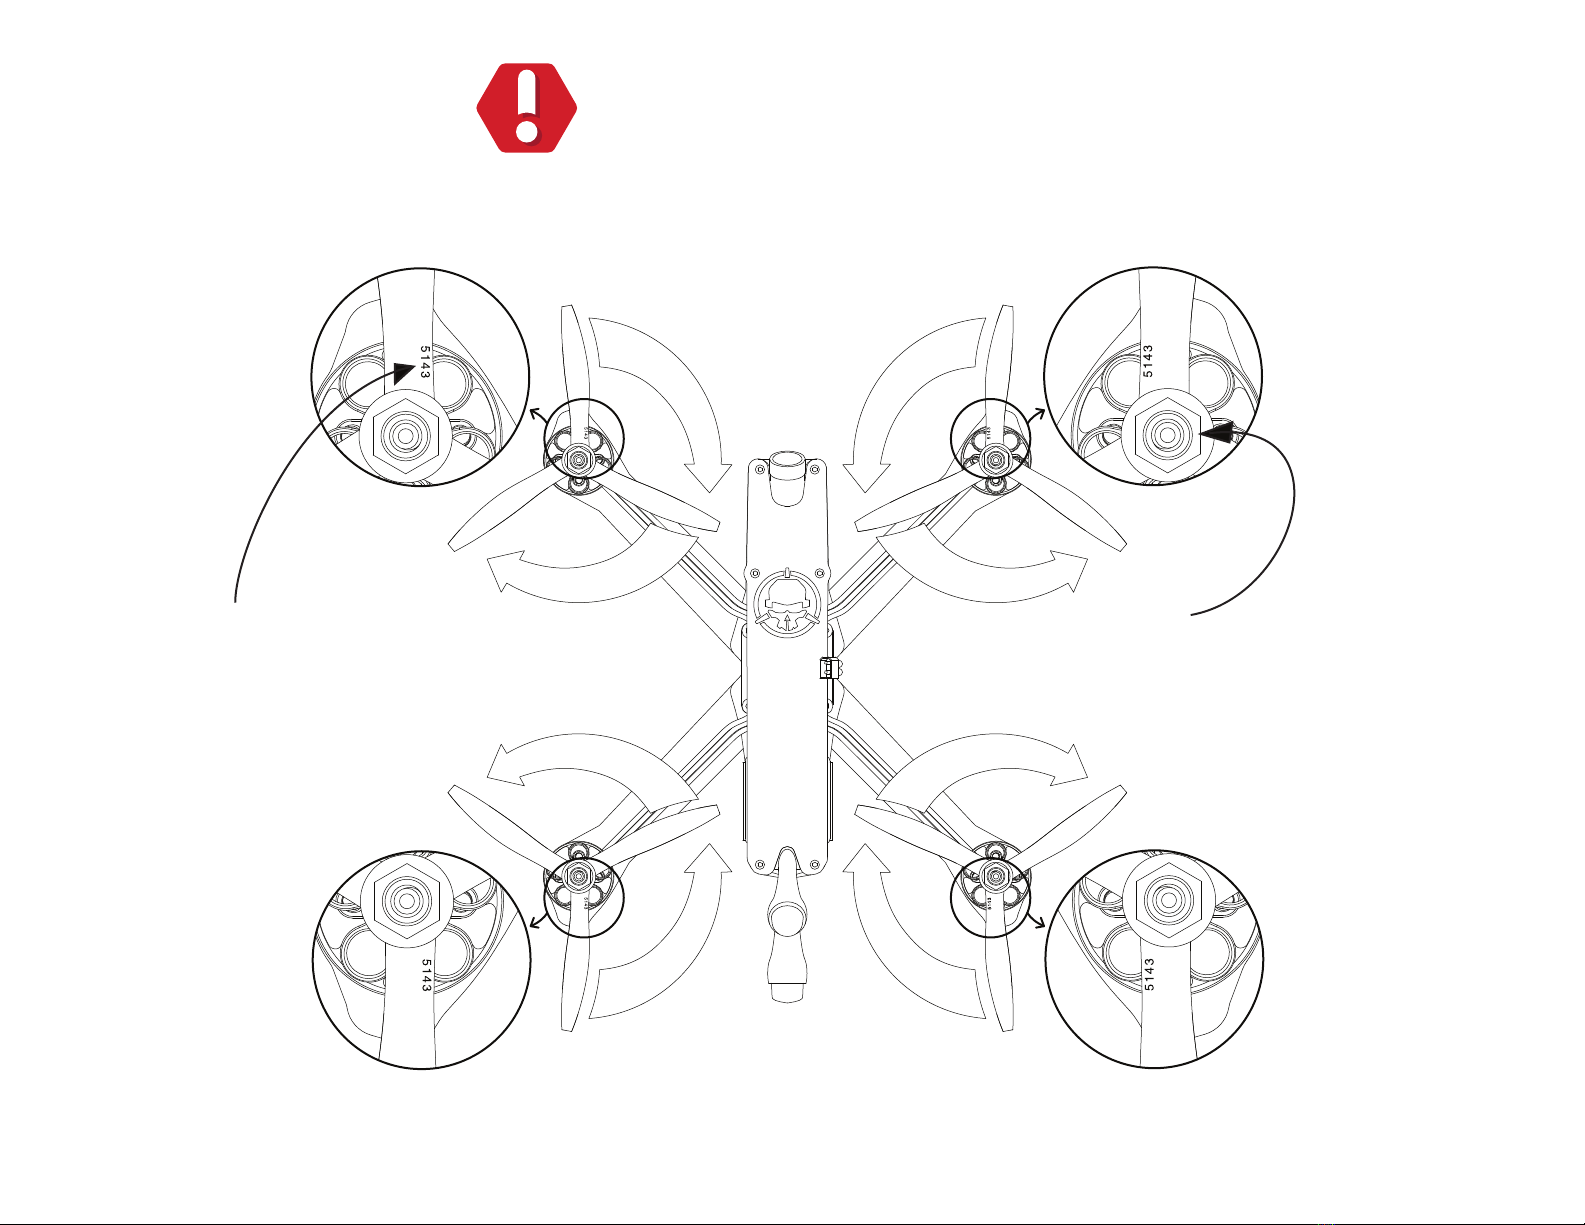
Prop Configuration OK and Tight
Batteries Charged and Securely Strapped
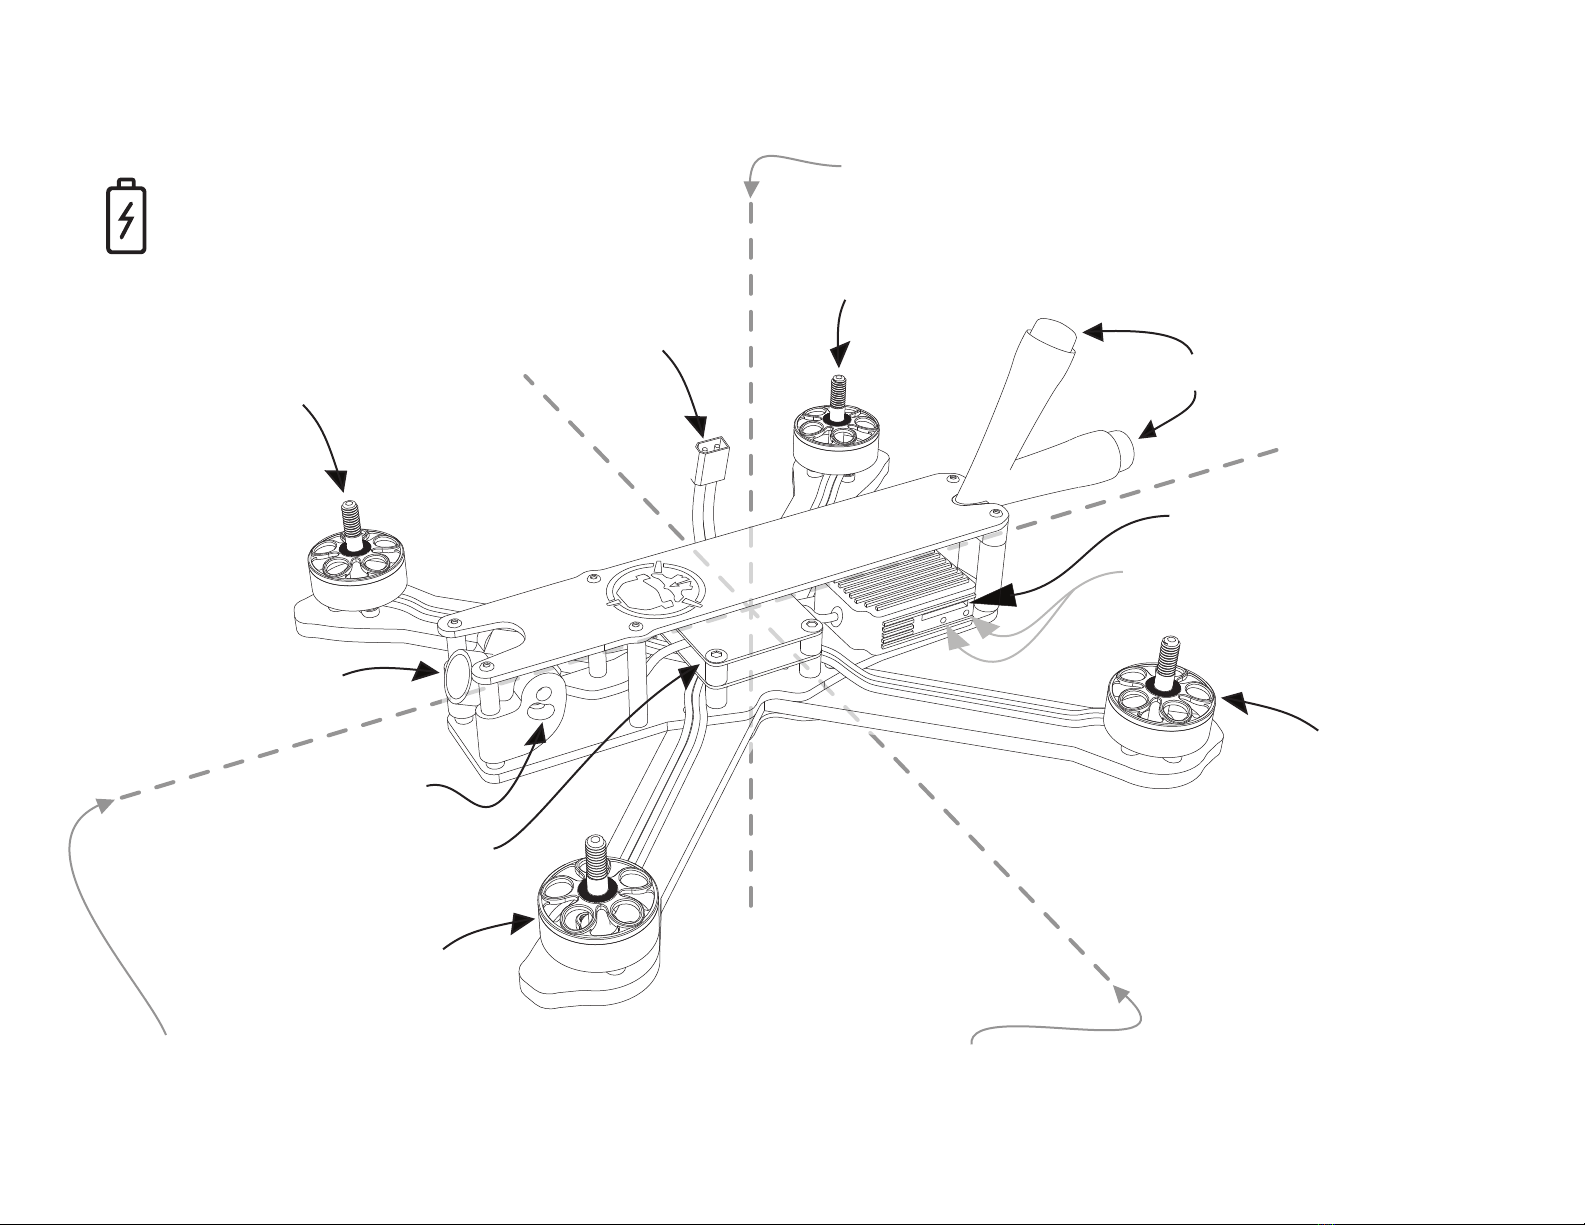
Air Unit Hardware OK
(frame, antennas, motors, etc, working OK)
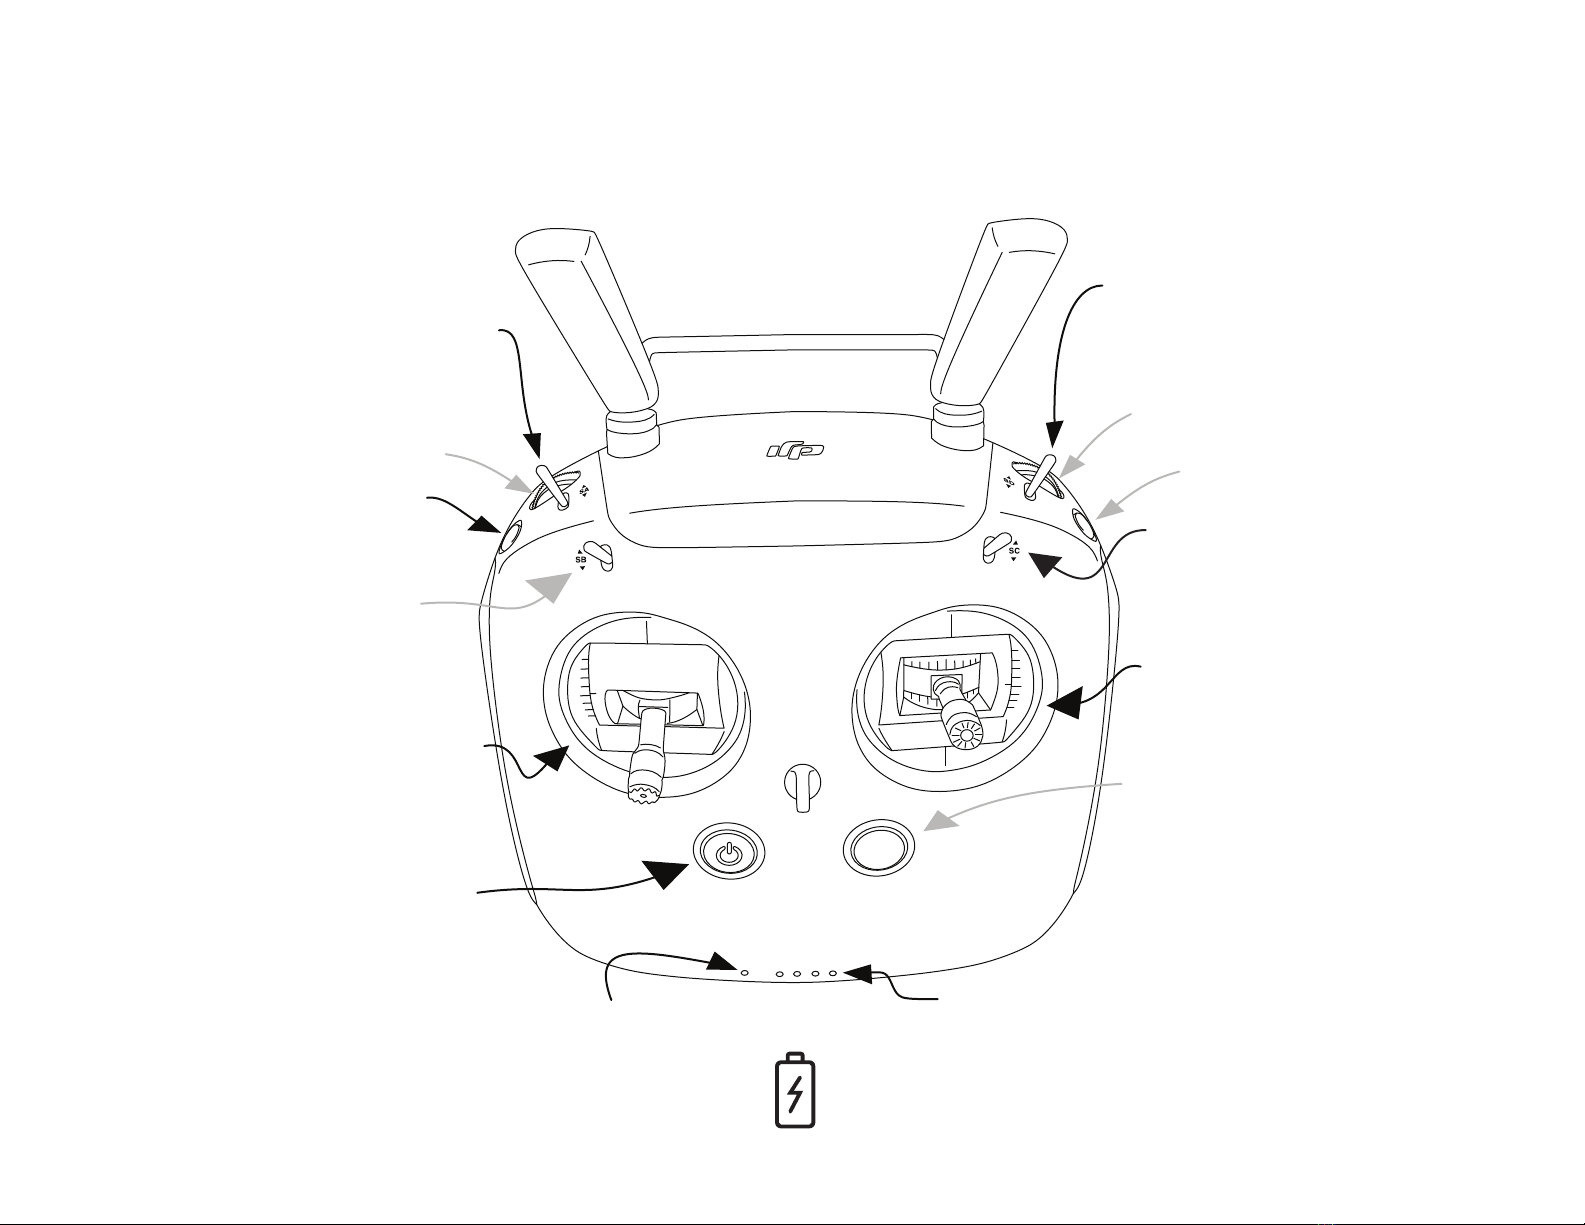
Controller Hardware OK
(sticks, buttons, antennas, working OK)
FPV Goggles Hardware OK
(screen, buttons, antennas, working OK)
Controller Sticks & Switch Positions
(throttle down, switch in dis-arm position with desired flight mode selected)
FPV Video Signal
(free of external interference)
FPV Goggles Video Recording
(verify memory before liftoff)
Air Unit Video Recording
(verify memory before liftoff)
Power ON
(Air Unit, Controller and Goggles)
Assign a Spotter
(must be able to maintain a line of sight with the drone at all time)
You understand and agree that using a drone is a high-risk activity. To the extent permitted by law, you expressly and voluntarily assume the risk of
death or other personal injury sustained while participating in such activity. Whether or not caused by the negligence or any other fault of Rotor Riot
including but not limited to equipment malfunction from whatever cause, or any other failure of Rotor Riot. Additionally, you agree to indemnify, defend,
release and hold Rotor Riot harmless from any third party claims arising from such high-risk activities or use of any other Rotor Riot Product.
Pilot Awareness (Follow the checklist and inspect each element, go to next step only when all is OK.)
The pilot has read and understood the information
provided in this manual and additional
product-specific supporting material.
Pilot Understands that Using a Drone is a High-Risk Activity

Liftoff Step 1 - Go through the Preflight Checklist found on this document on page X.
1
3
2
4
5
Step 2 - Verify SA, SB, SC, and SD three-way position switches
are in UP position. Left Throttle Stick must be in the down
position. Press Power Button to power up the controller.
Step 3 - Announce loudly your intentions of powering up your drone (If you
are flying with friends, they will appreciate this). Strap and connect the
Air Unit battery. Verify that battery cable does not interfere with the
propellers. Place the Air Unit on the ground on a flat area. Do not
take off from sand, water, loose dirt, wet grass, moving objects,
and metal surfaces. Do not do a hand launch!
Step 4 - Power ON FPV Goggles and
cycle to the desired video channel.
Step 5 Liftoff Sequence - Choose the desired flight mode with SB switch, loudly
announce to bystanders that you will take off. Verify that throttle is in the down
position and arm your drone by toggling SA switch to the down position. If you
followed the preflight checklist and takeoff procedures, the motors should idle.
Gently add throttle and start your planned flight route.
Other manuals for HD1
1
Table of contents