Royalcraft Faro 450L User manual

Product size: L 143*W67.5*H60.5 cm
The intended use of this product is for domestic use only.
Important, please retain for future reference.
Read carefully.
.royalcraft.co.uk
/

Produced in China for A. Mir & Co., Ltd.
© A. Mir & Co., Ltd. 2 / 9
www.royalcraft.co.uk
Before you start
Warnings
IMPORTANT, RETAIN FOR FUTURE REFERENCE
READ CAREFULLY
See enclosed instructions for assembly, safety and care
information.
Failure to follow the warnings could result in serious injury.
Handle heavy parts with care.
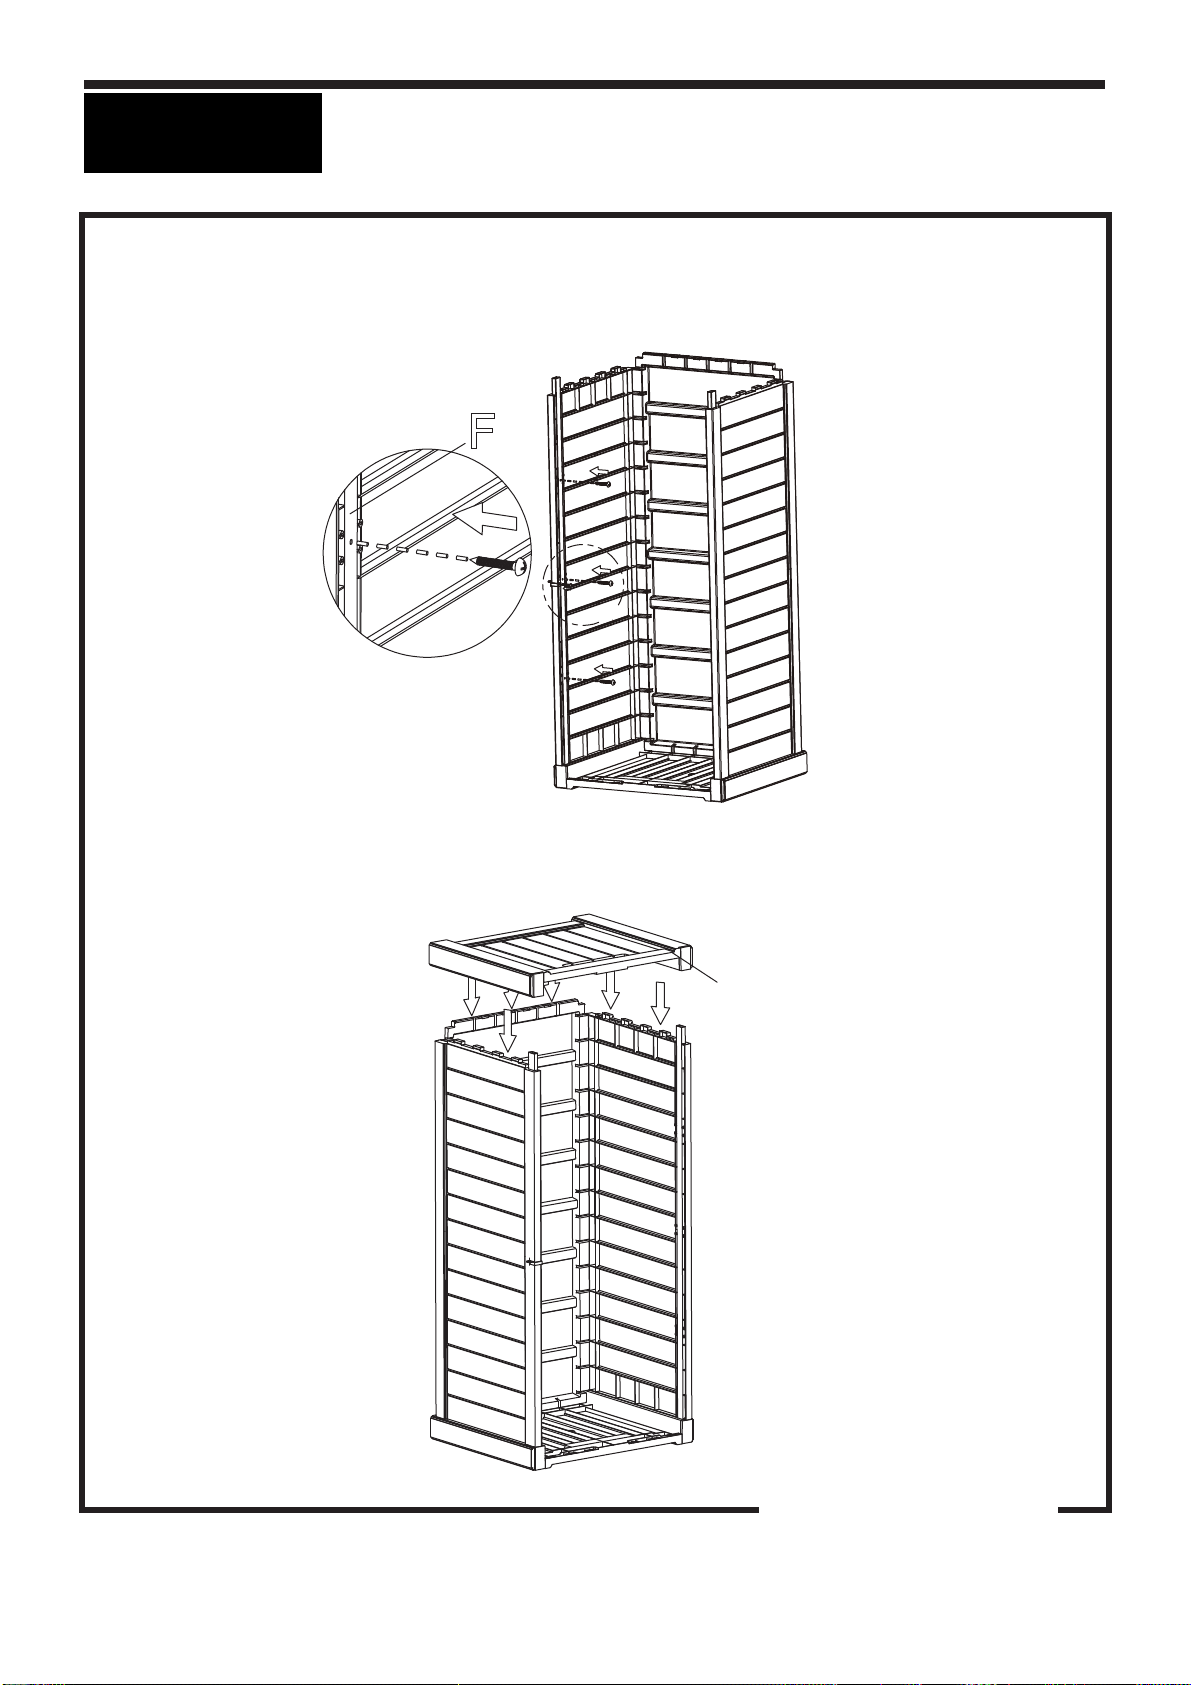
Ensure that this product is fully assembled as illustrated before
use.
This product should only be used on firm, level ground.
Keep small parts out of reach of children.
Do not stand or climb onto this product.
This product is intended for domestic use only.
Furniture can be dangerous if incorrectly used. No liability will be
accepted for damage or injury caused by incorrect use of this
product.
Dos
When you are ready to start, make sure that you have the right
tools, plenty of space and a clean, dry area for assembly.
Remove all packaging and banding and place the components
carefully on suitable surfaces to prevent damaging or scratching
them. Check the pack and make sure you have all of the parts
listed.
Check all screws and bolts are tightened and inspect regularly.
This product is suitable for all year outdoor use, but we
recommend that a furniture cover be used to add additional
protection to your product when not in use.
During severe weather conditions and in the winter months we
recommend moving your furniture inside into a cool, dry place.
Before storage, ensure that the product is clean and dry.
To clean, wipe down with a sponge and warm soapy water and
wipe with a clean, dry cloth.
Always close the door to avoid any animals and insects climbing
Into the box.
Don’ts
Do not use scourers, abrasives, washing powders, chemical
cleaners or any other substances containing abrasives since these
substances can damage the product.
Do not place very hot or very cold items on the top surface
unless adequately thick table-mats are used to prevent such
items from coming into contact with the top.
Do not strike the products with hard or pointed items.
Do not use power tools to construct this product.
Do not use this product if parts are missing, damaged or worn.
Do not stand or climb onto the product and do not use it as a
ladder, as this could lead to it unbalancing and overturning.
Never drag furniture when moving it,always lift it.
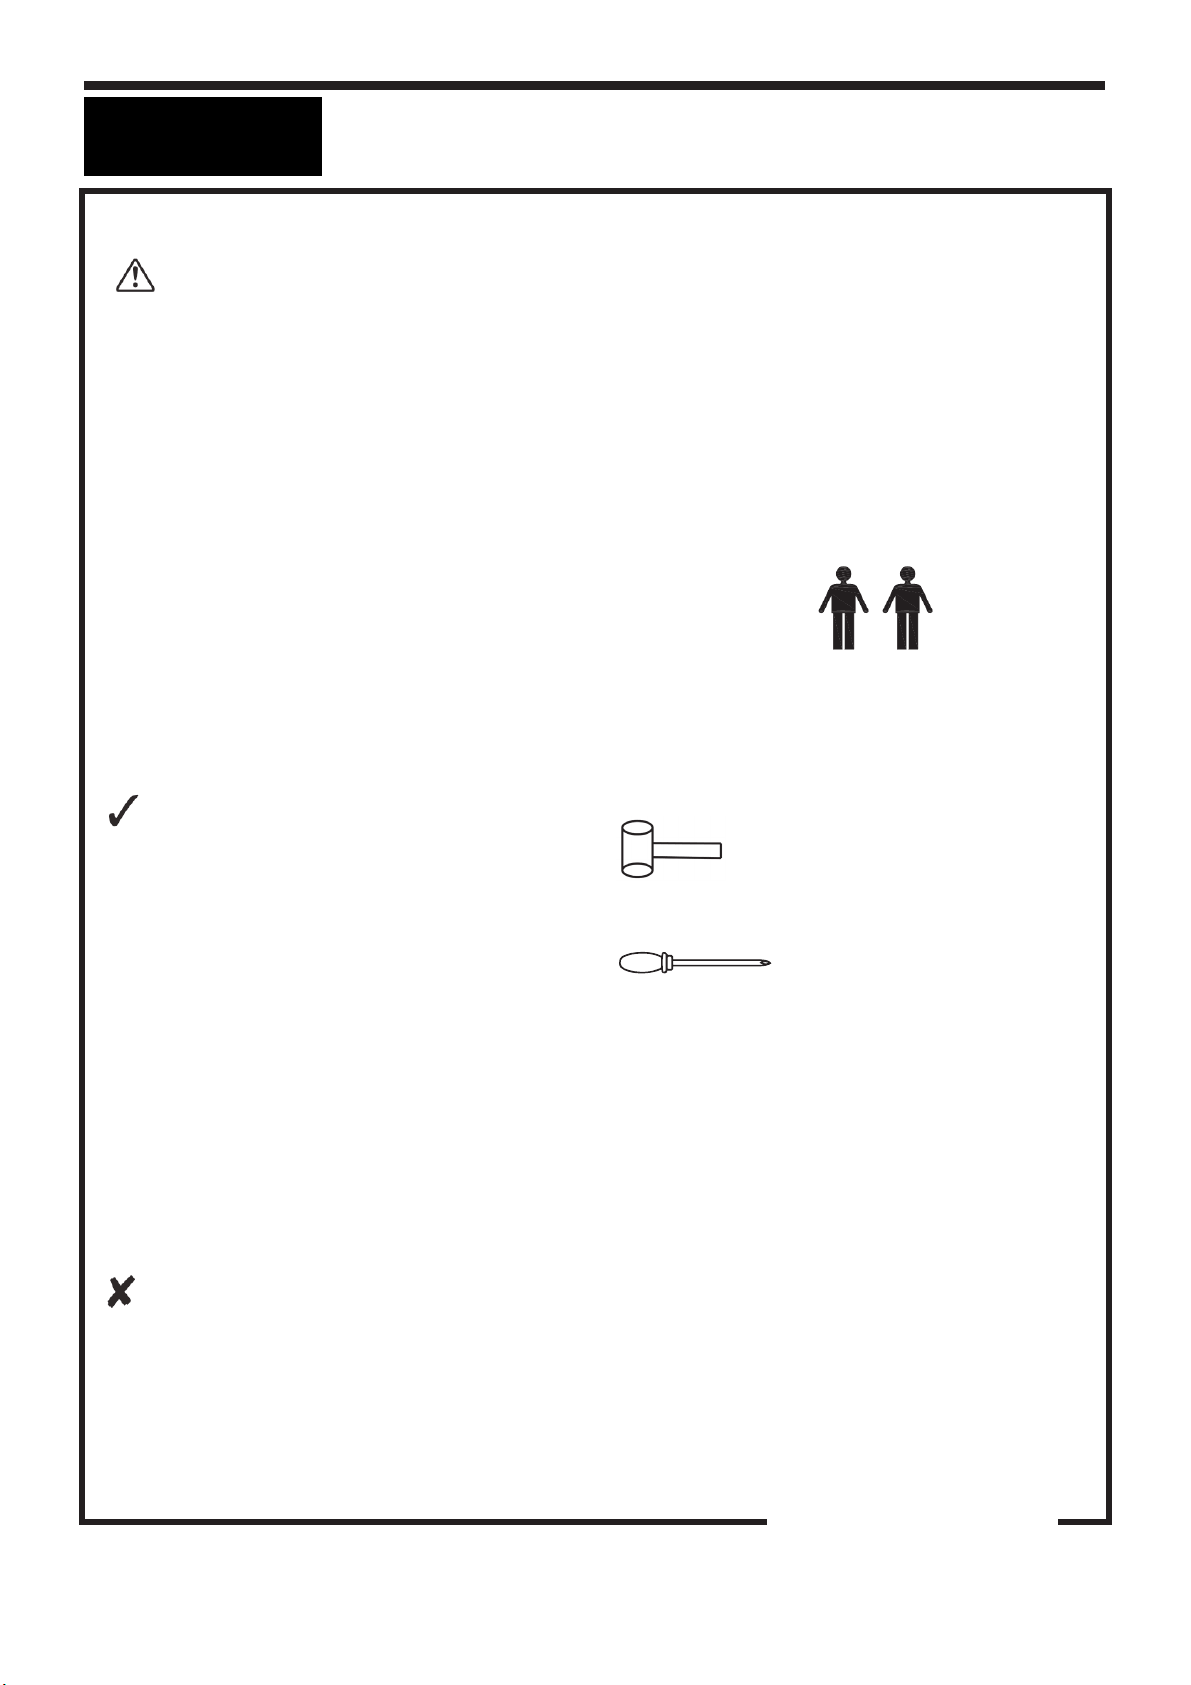
Number of people required for assembly
Two people
Time to assemble
30 Minutes
Tools required
(Rubber Hammer, not provided)
(Screw Driver, not provided)
Faro 450L Storage Box - Grey
Assembly Instructions

Produced in China for A. Mir & Co., Ltd.
© A. Mir & Co., Ltd. 3 / 9
www.royalcraft.co.uk
Components, fixtures & fittings (not actual size)
Parts List
Part
No. Diagram Qty. Part
No. Diagram Qty.
A Front or Back
Panel
2 PCS J
Lid
1 PC
B
Bottom Panel
1 PC C
Side Panel
2 PCS
E
Hinge
3 PCS F
Reinforced Bar
2 PCS
G1
Lock Part on Front
Panel
1 PC G2
Lock Part on Lid
1 PC
H
Gas Lift
2 PCS ST
Self-Tapping Screw
27 PCS
mm
10
20
30
40
50
60
70
80
90
100
110
120
130
140
150
160
170
180
190
200
210
220
0
Faro 450L Storage Box - Grey
Assembly Instructions

Produced in China for A. Mir & Co., Ltd.
© A. Mir & Co., Ltd. 4 / 9
www.royalcraft.co.uk
L
Foot Cap
2 PCS R
Foot Cap
2 PCS
Step by step assembly instructions
Step One
Attach the Foot Caps (L) and Foot Caps (R) to the Side Panels (C).
Step Two
Attach Side Panel (A) to the Bottom Panel (B).
LR
A
B
Faro 450L Storage Box - Grey
Assembly Instructions

Produced in China for A. Mir & Co., Ltd.
© A. Mir & Co., Ltd. 5 / 9
www.royalcraft.co.uk
Step Three
Attach Another Side Panel (A) to the Bottom Panel (B).
Step Four
Attach partly-assembled components to the Side Panel (C).
A
B
C
Faro 450L Storage Box - Grey
Assembly Instructions

Produced in China for A. Mir & Co., Ltd.
© A. Mir & Co., Ltd. 6 / 9
www.royalcraft.co.uk
Step Five
Attach Reinforced Bar (F) to the Front or Black Panel (A).
Step Six
The Lock Part (G1) can be attached to any Front or Back Panel (A). The Panel is equipped
with Lock Part (G1) will be called Front Panel. Then another panel will be called Back Panel.
Attach Lock Part (G1) to the Front Panel (A) using Self-Tapping Screw (ST).
F
A
A
G1
ST
Faro 450L Storage Box - Grey
Assembly Instructions

Produced in China for A. Mir & Co., Ltd.
© A. Mir & Co., Ltd. 7 / 9
www.royalcraft.co.uk
Step Seven
Fix the Reinforced Bar (F) using Self-Tapping Screws (ST).
Step Eight
Attach another Side Panel (C) to the partly-assembled components.
F
C
Faro 450L Storage Box - Grey
Assembly Instructions

Produced in China for A. Mir & Co., Ltd.
© A. Mir & Co., Ltd. 8 / 9
www.royalcraft.co.uk
Step Nine
Attach Lock Part (G2) to the Li
Attach Hinges (E) to the Lid (K).
d (K) using Self-Tapping Screws (ST).
Step Ten
Attach the Lid (K) to the Back Panel (A) using Hinges (E) and Self-Tapping Screws (ST).
K
ST
ST
K
A
G2
E
Faro 450L Storage Box - Grey
Assembly Instructions

Produced in China for A. Mir & Co., Ltd.
© A. Mir & Co., Ltd. 9 / 9
www.royalcraft.co.uk
Step Eleven
Attach the Gas Lifts (H) to the Side Panels (C) and Lid (K) using
Self-Tapping Screws (ST).
Place the Storage Box at the intended place you will use.
Your Storage Box is now ready for use.
PLEASE KEEP THESE INSTRUCTIONS FOR FUTURE REFERENCE
H
Faro 450L Storage Box - Grey
Assembly Instructions
Table of contents