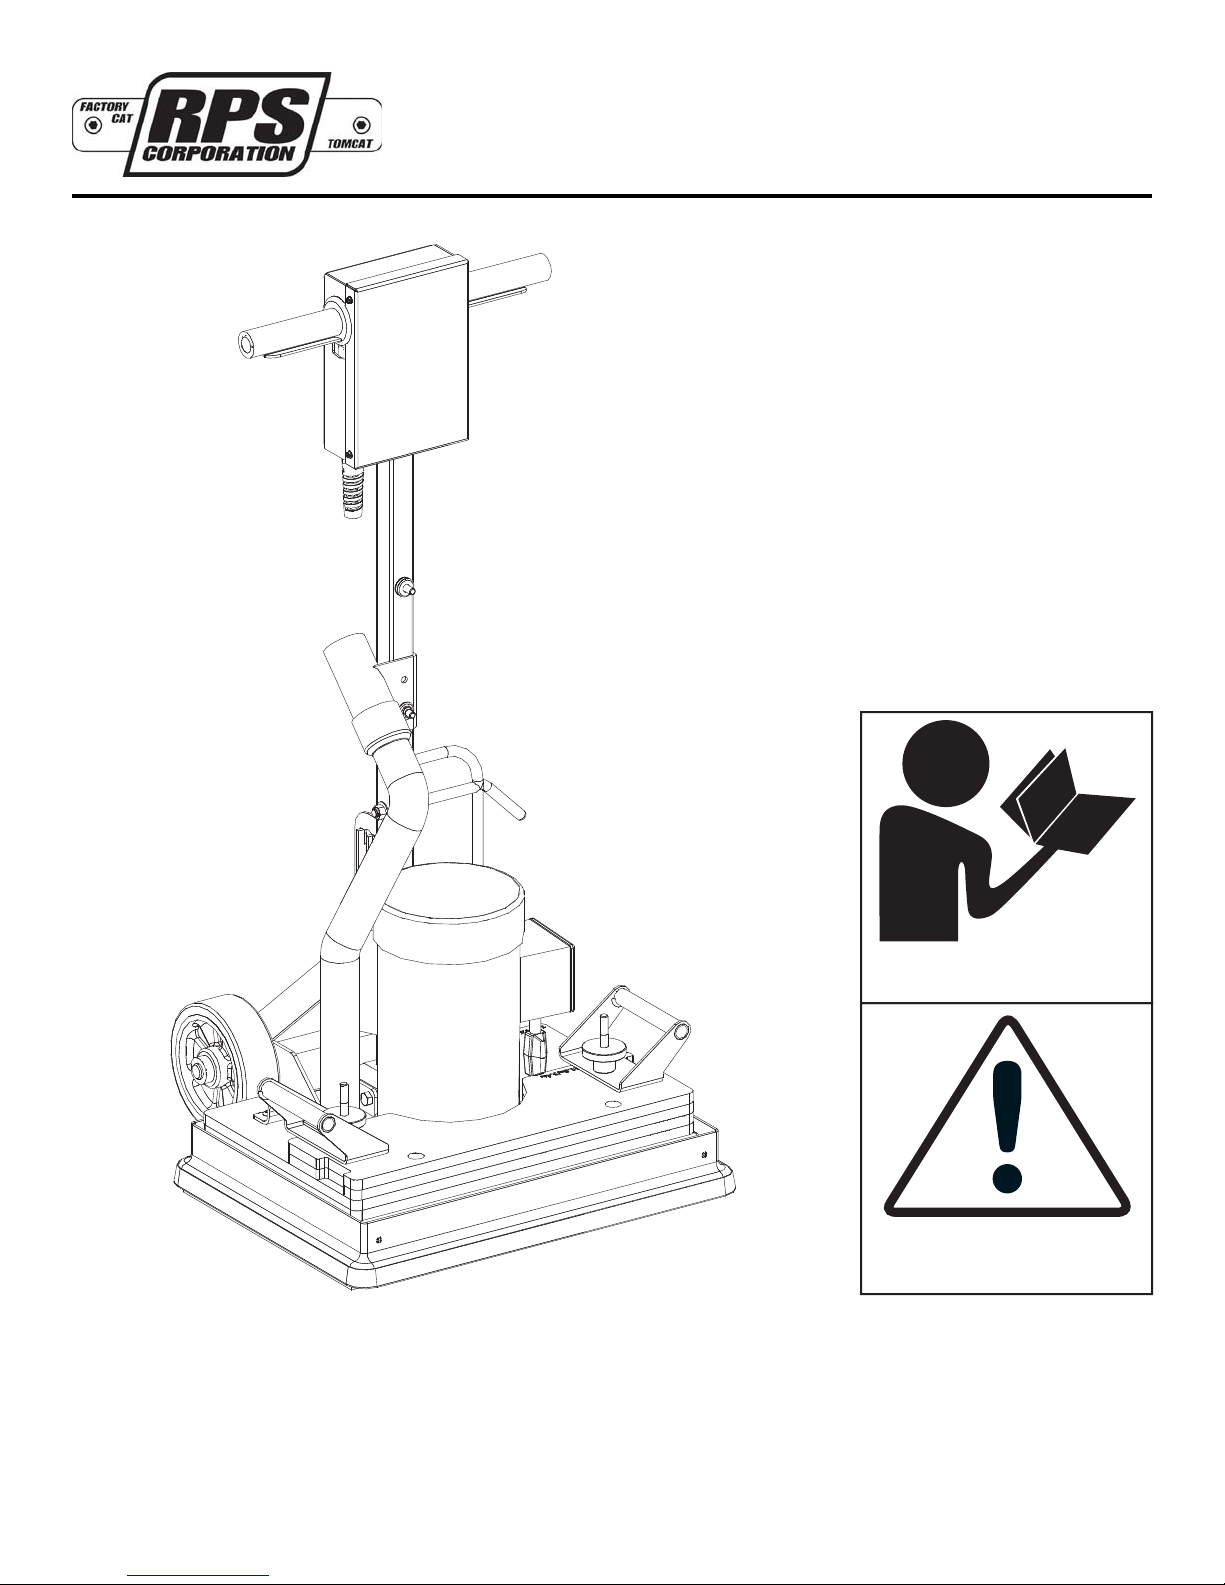
RPS edge stick st/hd User manual

EDGE
Operating Instructions (EN)
& Parts Manual
MODELS
:
2
0'' ED
G
E Stick ST / H
D
2
8'' ED
G
E Stick ST / H
D
www.rpscorporat
i
on.com
www.factorycat.com VERSION 13.053
0
www.tomcatequip.co
m
E
D
G
E
S
TI
CK
-O
P-E
N
©
2013 RPS Corporatio
n
R
ead these Instructions be
f
ore
u
s
i
ng t
h
e mac
hi
ne
.
R
ead these
S
afety Messages
before using the machine.

- 2 -
E
DGESTIC
K
-OP-E
N
I
NTRODUCTIO
N
This manual is furnished with each new machine. This manual will allow the Operator to
g
et the best performance out of
your RPS manufactured Scrubber-Drier, Sweeper, Burnisher, or Orbital Scrubber. Read this manual thorou
g
hly before
operat
i
n
g
or serv
i
c
i
n
g
t
h
e mac
hi
ne
.
This machine will provide excellent performance, but the best results will be obtained at the most minimum costs if
:
s4HEMACHINEISREGULARLYMAINTAINEDPERTHEMACHINE0REVENTATIVE-AINTENANCEINSTRUCTIONSPROVIDED
s4HEMACHINEISOPERATEDWITHREASONABLECAREANDCAUTION
s4HEMACHINEISMAINTAINEDWITHMANUFACTURERSUPPLIEDPARTS
AB
O
UT THI
S
MANUAL
TABLE
O
F
CO
NTENT
S
:
T
e
ll
s you w
h
ere to
l
oo
k
i
n t
h
e manua
l.
S
AFETY ME
SS
A
G
E
S
: Section contains important information re
g
ardin
g
hazard or unsafe practices of the machine. Le
v
-
els of hazards are identified that could result in product or personal injury, or severe injury resultin
g
in death.
O
PERATI
O
N
CO
NTR
O
L
S
/
MA
C
HINE
CO
MP
O
NENT
S
:
Shows
y
ou the different machine controls and features.
MA
C
HINE
S
ET
UP
:
Tells you how to setup machine from un-cratin
g
to installin
g
Pads
.
MA
C
HINE
O
PERATI
ON
: Section is to familiarize the o
p
erator with the o
p
eration and function of the machine
.
MAINTENAN
CE
:
This section contains preventative maintenance to keep the machine and it’s components in
g
ood wor
k
-
in
g
condition. They are listed in this
g
eneral order
:
s
3
CRUB0AD
S
s
3
ERVICE
3
CHEDUL
E
s-ACHINE4ROUBLE3HOOTIN
G
TR
OU
BLE
S
H
OO
TIN
G
: A list of common problems that ma
y
occur.
MA
C
HINE
S
PE
CS
: Tells
y
ou Machine Specifications for the various parts of the machine
.
MA
C
HINE IN
S
TALL F
O
RM: Should be filled out u
p
on machine installation and faxed to 1-866-632-6961 or on-line at
www.r
p
scor
p
oration.com.
W
ARRANTY P
O
LI
CY
: Tells you covera
g
e, exclusions and limitations to warranty.
PART
S:
Exploded views of the machine with part breakdowns
.
N
O
T
E
: The serial number of your machine is located on the back of the handlebars
.
AS OUR POLICY IS ONE OF CONSTANT IMPROVEMENT - ALL INFORMATION AND
S
PE
C
IFI
C
AT I
O
N
S
ARE
S
UBJE
C
T T
O
C
HAN
G
E WITH
O
UT N
O
TI
C
E
.
SERIAL NUMBER
E

ED
G
E
S
TI
C
K-
O
P-EN
-
3
-
TABLE
O
F
CO
NTENT
S
Intr
oduc
t
ion
2
About Th
i
s Manual
2
Table of Content
s
3
Safety Messa
g
es 4
O
p
eration Controls
6
Machine Setu
p
7
Installin
g
EDGE pads
:
7
Pre-Cleaning Checklist
:
7
Operating - Scrubbing
:
7
Machine O
p
eration 7
Maintenance
8
Dail
y
Maintenance
:
8
Weekl
y
Maintenance:
8
M
onthl
y
maintenance
:
8
Y
ear
ly
M
a
i
ntenance:
8
S
torin
g
Machine
:
8
PM
R
ecor
d
s
9
Battery
C
harging
/
ED
G
E
C
ordless
O
nly
11
External Battery
C
har
g
in
g:
11
Battery Maintenance
G
uide
/
ED
G
E
C
ordless
Onl
y
1
2
S
afet
y:
12
Inspection and
C
leanin
g:
1
2
S
tora
g
e
:
1
2
Waterin
g:
1
2
M
o
t
o
r In
fo
rm
a
ti
on
13
AC Diagra
m
14
Trouble-shootin
g
1
5
Machine Specs
16
C
ommon Wear Part
s
17
E
D
G
E Pads and
S
creens
:
17
E
DGE Diamonds For Polishing Marble/Terrazzo:
17
E
DGE Isolator Replacement Kits
:
18
Soa
p
Choices
19
Machine Install / Warranty Registratio
n
2
1
S
tandard Warranty Polic
y
2
2
PART
S
S
E
C
TI
O
N
:
H
a
n
d
l
eba
r V
e
r
s
i
o
n
s
24
Scrubdeck Assembl
y
25
Scrubdeck Weights
26
W
ater
T
an
k
an
d
H
an
dl
e
b
a
r
27
I
so
l
ate
d
H
an
dl
e
b
ars
28

- 4 -
E
DGESTIC
K
-OP-E
N
SAFETY MESSAGES
You will see four kinds of safet
y
reminders in this manual:
WARNING
WARNING indicates a potentiall
y
hazardous situation
which, if not avoided, could result in death or serious
i
n
j
ury.
CAUTION
C
AUTION indicates a potentiall
y
hazardous situation
w
hich, if not avoided, could result in minor or moderate
injury or dama
g
e to this machine or nearby objects. CAU
-
T
ION also can be used to alert a
g
ainst unsafe practices.
NOTICE
N
O
TI
C
E indicates information considered im
p
ortant, but
not hazard-related. This sa
f
ety message may be related
to property damage or warranty warnings
.
Your safety, and that of others, is very important.
O
perating this machine safely is an important responsibility
.
D
O
N
O
T
O
PERATE THI
S
MA
C
HINE
U
NLE
SS
:
s9OUARETRAINEDANDAUTHORIZEDTODOSO
s9OUHAVEREADANDUNDERSTOODTHIS
/P
ERATORS-ANUAL
WHEN
O
PERATIN
G
THI
S
MA
C
HINE
:
s2EMOVELOOSEOBJECTSFROMTHEmOORTHATCOULDBEPROJECTEDFROMTHEOSCILLATIN
G
0A
D
s+EEPYOURHANDSAND
F
EETAWAY
F
ROMTHEOSCILLATING0AD
s$ONOTO
P
ERATETHISMACHINEWHEREmAMMABLELI
Q
UIDSARE
P
RESEN
T
s5SECAUTIONWHENMANEUVERINGCLOSETOWALLS
BEF
O
RE LEAVIN
G
THE MA
C
HINE:
s
4
URNT
H
EMAC
HI
NE
O
F
F
an
d
unp
l
ug t
h
e power cor
d
BEF
O
RE
S
ERVI
C
IN
G
THE MA
C
HINE
:
s
5
NP
L
UGT
H
EPOWERCOR
D

ED
G
E
S
TI
CK
-
O
P-E
N
-
5 -
WARNING
Do not o
p
erate this machine around
f
uels, solvents,
mAMMABLEmOORlNISHESTHINNERSWOODDUSTORAN
Y
mAMMABLEMATERIALS#IGARETTELIGHTERSPILOTLIGHTS
e
lectrical sparks and all other sources of ignition
s
h
ou
ld
b
e ext
i
ngu
i
s
h
e
d
or avo
id
e
d
.
W
or
k
areas s
h
ou
ld
b
e we
ll
vent
il
ate
d.
WARNING
Always wear safety
g
o
gg
les when operatin
g
this ma
-
c
hine to avoid e
y
e injur
y
from debris projected from the
osc
ill
at
i
n
g
P
a
d.
WARNING
To avoid electrical shock, do not use this machine if it
has been rained on or spra
y
ed with water.
WARNING
To avoid electrical shock, unplug the power cord be
f
ore
a
dj
ust
i
ng t
h
e
H
an
dl
e
b
ar
h
e
i
g
h
t or rep
l
ac
i
ng t
h
e
P
a
d.
WARNING
Always turn o
ff
this machine and unplug the power
c
ord be
f
ore leaving it unattended. Do not allow u
n
-
trained
p
ersons to o
p
erate this machine
.
WARNING
Always wear a dust mask when operatin
g
this machine
to avoid inhalin
g
dust created by the oscillatin
g
Pad. In
-
h
a
li
n
g
d
ust create
d
b
y t
hi
s mac
hi
ne can cause ser
i
ous
resp
i
rator
y
i
n
j
ur
y
.
WARNING
T
o avo
id
e
l
ectr
i
ca
l
s
h
oc
k
,
d
o not
p
u
ll
on t
h
e
p
ower cor
d
t
o move the machine or unplu
g
the power cord from
th
e e
l
ectr
i
ca
l
out
l
et
.
WARNING
D
o not remove, paint over or destroy warnin
g
decals. I
f
w
arnin
g
decals become dama
g
ed, call 1-262-681-3583
f
or free re
p
lacements.
WARNING
T
o avo
id
e
l
ectr
i
ca
l
s
h
oc
k
,
d
o not operate t
hi
s mac
hi
ne
O
VERELECTRICALmOOROUTLETS
WARNING
D
ress safely. Keep hands, feet and loose clothing away
f
rom moving parts on this machine
.
WARNING
T
o avoid electrical shock, always keep the power cord
c
lear o
f
the oscillating Pad and in good condition. A
l
-
w
ays li
f
t the power cord over the machine
.
WARNING
.
EVERO
P
ERATETHISMACHINEUNDERTHEIN
m
UENCEO
F
a
lcohol or dru
g
s. Do not allow anyone under the a
g
e o
f
1
8 to o
p
erate this machine
.
WARNING
T
his machine wei
g
hs over 130 pounds. Do not attempt
t
o li
f
t this machine alone. Two persons are required to li
f
t
thi
s mac
hi
ne.
CAUTION
To avoid personal injury and
/
or damage to this ma
-
chine, the persons li
f
ting the machine should grasp the
li
f
ting bars on the base o
f
the machine with one hand,
and the handle with the other.
CAUTION
Always unplug the power cord and wrap the cord on
the cord wrap and handle be
f
ore attemptin
g
to li
f
t this
machine
.
CAUTION
A
lways raise and lock the handle into position be
f
ore
attempting to li
f
t this machine. Always leave the pad on
t
he machine be
f
ore transporting the machine to avoid
d
amage to the pad
f
ace.
CAUTION
T
ilt the machine onto its wheels and transport it slowly
and care
f
ully. Do not operate this machine i
f
any parts
h
ave been damaged or removed.
CAUTION
A
lterations to this machine ma
y
result in personal injur
y
o
r property
d
amage, an
d
WILL
vo
id
t
h
e warranty
.

-
6
-
E
DGESTIC
K
-OP-E
N
O
PERATI
O
N
CO
NTR
O
L
S
1.
HANDLEBAR
:
F
oam pa
dd
e
d
h
an
dl
e
b
ars prov
id
e
er
g
onomic suppor
t
2
.
SO
LUTI
O
N
CO
NTR
O
L LEVEL
(O
PTI
O
NAL
):
C
ontrols
SOLUTION
m
OW
(
Down = RELEA
S
E, Up =
O
FF
)
3.
MAIN P
O
WER
S
WIT
C
H
(O
PTI
O
NAL
):
Tu
rn
s
t
he
m
ac
hin
e
ON
a
n
d
N
O
F
F
4
.
P
O
WER
CO
RD
:
Hospital
g
rade 50
f
t cord
5.
H
O
UR METER
(O
PTI
O
NAL
):
S
ows the total amount of
ho
u
r
s
th
a
t th
e
m
ac
hin
e
h
as
bee
n
used
6.
HANDLEBAR TRI
GG
ER: Depressin
g
the tri
gg
er
activates the
S
crubdeck moto
r
7.
WATER
SO
LUTI
O
N TANK (
O
PTI
O
NAL): 5
Q
uart
solution tank
f
or allowing water dispersement on the
deck level
8.
S
WIVEL
CO
RD WRAP: Rotate the cord wrap to allow
f
or easy coiling and uncoiling o
f
the Power cord
9.
LIFT HANDLE
S
(
O
PTI
O
NAL)
:
Allows two persons to
li
f
t machin
e
10.
S
L
O
TTED WEI
G
HT PLATE
S
(
O
PTI
O
NAL):
12
.5 or
22.5 lb weight plates
f
or di
ff
erent Pad and application
u
sage
11.
DUST SKIRT (OPTIONAL)
:
S
kirt around outside of
S
crubdeck helps control dust and water during usag
e
1
2
3
4
5
6
7
8
9
10
11

M
I
C
RO
M
I
N
I
-
O
P-EN
-
7 -
M
A
C
HINE
S
ET
UP
I
N
S
TALLIN
G
ED
G
E PAD
S:
T
o
i
nsta
ll
or rep
l
ace a
P
a
d
:
NOTICE
Before installin
g
or replacin
g
any Pad, disconnect the
EDGE Scrubber from its power source.
1.
Lock handle
(A)
in the upright position
)
(SEE BELOW)
.
2.
4ILTMACHINEBACKUNTILTHEHANDLERESTSONTHE
m
OOR
(S
EE BEL
O
W
)
.
3.
R
emove ex
i
st
i
ng
P
a
d
an
d
rep
l
ace w
i
t
h
new
P
a
d
-
e
nsure proper 1/2''overhang on all edges of Grip Face
.
4
.
Press Pad firmly into place.
5
.
Return machine to upright position
.
NOTICE
NEVER place a
gg
ressive Pads (Maroon Prep, Dominator
HD Strip, etc.) directl
y
onto the Grip Face. Alwa
y
s use
Red or Blue Spacer pad to prevent Grip Face dama
g
e.
PRE-
C
LEANIN
G
C
HE
C
KLI
S
T
:
Read and understand the Safety Messa
g
es section on
Pages 3 and 4 before operating the machine.
6.
Check and make sure that there is electrical outlets
available for use or lar
g
e
g
au
g
e extension cords
.
7
.
C
heck the condition of the Pads or Brushes.
8
.
)FTH
E
R
E
I
S
DEB
RI
S
ONTH
E
mOOR
A
R
EA
TH
A
TI
S
AB
O
U
TTO
BE
s
crubbed - pre-sweep area
.
OPERATIN
G
- SCRUBBIN
G:
1.
Move machine to work location. Never transport or
s
tore the machine without a Pad to protect the grip
face.
2.
C
heck the Pad. If it has become reduced to a
t
hickness of less than
1
⁄
1
2
⁄
⁄
’’
, rep
l
ace t
h
e
P
a
d
.
P
a
d
w
ill
d
epend based o
ff
o
f
the application needs, contact
your Local
S
ervicing Dealer for correct Pads for your
a
pp
lication
.
3.
C
onnect machine cord to
p
ower source. When
s
crubbin
g
an area, move so that you are movin
g
awa
y
f
rom the power suppl
y
. This will help avoid
entang
l
ement w
i
t
h
t
h
e cor
d
as we
ll
as re
d
uce t
h
e nee
d
t
o move do a di
ff
erent
p
ower source.
4
.
A
d
j
ust the handlebars to a com
f
ortable position.
Lock the handlebar into position. The best operating
position is at arms len
g
th to help with control of
machine and to improve operator com
f
ort. Maintain
T
HEMACHINE
m
ATONTHE
m
OOR
F
OREASEO
F
O
P
ERATION
Raising or lowering the handlebar can cause the
machine to pull to the right or le
f
t, and uneven
pressure
/
wear on the pad surface. A neutral handlebar
position will provide a neutral operation and uni
f
orm
CONTACTOFTHE0ADTOTHEmOORSURFACE
5.
S
queegee the Handlebar trigger with both hands to
s
tart t
h
e mac
hi
ne.
R
e
l
ease t
h
e
H
an
dl
e
b
ar tr
i
gger to
s
top the machine.
NOTICE
Releasing the Handlebar trigger will immediately stop
t
h
e mac
hi
ne
.
A
M
A
C
HINE
O
PERATI
ON

-
8
-
E
DGESTIC
K
-OP-E
N
MAINTENAN
C
E
D
AILY MAINTENANCE
:
1
. Remove the clean Pads
/
Brushes. Never use soiled
Pads / Brushes when cleaning. Replace Pads
/
Brushes when they become packed with residue.
2. $RAINANDRINSE4ANKSTHOROU
G
HLYANDmUSHOUTSOLUTION
feed to Scrubdec
k
(
If applicable to your model
)
.
3
. Inspect Vacuum Hose for any objects obstructing the
A
IRmOW
4. Wipe down machine if needed. Use a non-abrasive,
non-solvent cleaner or a clean dam
p
cloth
.
5. Store in a clean area
.
WEEKLY MAINTENANCE
:
6
. Flip EDGE pads
.
7. $RAINANDRINSETANKSTHOROUGHLY4OTHOROUGHLYmUSH
out an
y
solution chemicals in solution line valves, re
fi
ll
S
olution Tank with a few gallons of warm, clean water
and run the machine until Tank is empt
y
.
M
O
NTHLY MAINTENAN
C
E
:
1.
C
heck
S
crubhead for wear.
2.
C
heck machine for water leaks and loose nuts and
bolts
.
YEARLY MAINTENAN
C
E
:
C
all
y
our local dealer for
y
earl
y
maintenance
.
S
T
O
RIN
G
MA
C
HINE:
1. "ESURETO
m
USHTHETANKSOUTCOMPLETEL
Y
4O
THOROUGHLY
m
USHOUTANYSOLUTIONCHEMICALSINSOLUTION
line and valves, refill
S
olution Tank with a few gallons
of warm clean water and run machine until Tank is
emp
t
y
.
2
. Tip
S
crubdeck to alleviate pressure on the
G
rip Face
or Pads
f
or extended periods o
f
time
.

ED
G
E
S
TI
CK
-
O
P-E
N
-
9
-
P
M RE
CO
RD
S
CUSTOMER INFORMATION
CUSTOME
R
EMAIL
ADDRES
S
PHON
E
CIT
Y
S TAT E
Z
I
P
CONTAC
T
CUSTOMER INFORMATION
CUS
T
O
ME
R
EMAIL
ADDRES
S
PHON
E
C
IT
Y
S
TAT
E
Z
IP
CO
D
E
CO
NTA
CT
MACHINE INFORMATION
MODEL #
:
SERIAL #
:
WORK ORDER#
:
H
OUR METER
:
I
SO
LAT
O
R H
O
UR METER
:
R
E-
C
HAR
G
E
CO
UNTER
:
DECK CONDITION
ED
G
E PAD
G
RIP FA
CE
GOOD
WO
RN NEED
S
R
EPLA
C
EMEN
T
S
PA
C
ER PA
D
GOOD
WO
RN NEED
S
R
EPLA
C
EMEN
T
CHECK OPERATION AND CONDITION OF: IN SPEC REPAIR PROBLEM
TRI
GG
ER KEY
S
WIT
C
H
(O
PTI
O
NAL
)
SO
LUTI
O
N
O
N
/O
FF LEVER (
O
PTI
O
NAL
)
SC
RUBDE
C
K M
O
T
O
R
IN
S
PE
C
T A
C
CO
RD (REPLA
C
E IF DAMA
G
ED
)
INSPECT EDGE OF ALUMINUM DECK
(
REPORT
IF DAMA
G
ED
)
VA
C
UUM M
O
T
O
R PERF
O
RMAN
C
E
(O
PTI
O
NAL
)
VISUALLY INSPECT IN SPEC REPAIR PROBLEM
VACUUM HOSES (OPTIONAL
)
SO
LUTI
O
N H
OS
E
S
(
O
PTI
O
NAL
)
DUST SKIRTS (OPTIONAL
)
MA
C
HINE WHEEL
S
MEASURE GAP AT 4 CORNERS FRONT RIGHT FRONT LEFT BACK RIGHT BACK LEFT
BETWEEN ALUMINUM AND STEEL DECK
S
VISUALLY INSPECT IN SPEC REPAIR PROBLEM
VA
C
UUM H
OS
E
S
(
O
PTI
O
NAL
)
SOLUTION HOSES (OPTIONAL
)
DU
S
T
S
KIRT
S
(
O
PTI
O
NAL
)
MACHINE WHEEL
S

-
1
0
-
E
DGESTIC
K
-OP-E
N
COMMENTS
S
ERVICING DISTRIBUTOR
TE
C
HNI
C
IAN’
S
NAM
E
DATE
S
I
G
NATUR
E
C
U
S
T
O
MER’
S
NAM
E
DATE
S
I
G
NATUR
E

ED
G
E
S
TI
CK
-
O
P-E
N
-
11
-
BATTERY CHARGING / EDGE CORDLESS ONL
Y
Charger Specifications
s
Output voltage of 24 Volt
s
s
Output current of 12 amps ma
x
s
Input voltage of 110 Volts/ 60 Hz
(
220V
/
50 Hz available
)
s
A
u
tom
a
ti
c
s
h
u
t off
c
ir
cu
it
sMade for Deep Cycle or AGM Batteries
DANGER
Explosive hydrogen gas forms when Batteries are
CHAR
G
IN
G
!NOPENmAMEORSPARKCANCAUSETHIS
G
AS
to explode. Serious personal injury or property dama
g
e
could occur. Only char
g
e the Batteries in this machine
i
n a we
ll
vent
il
ate
d
area
.
WARNING
Be
f
ore
y
ou service a Batter
y
, alwa
y
s wear
f
ace protec
-
tion, protective
g
loves and protective clothin
g
. Battery
acid or batter
y
explosion can cause serious injuries.
WARNING
The Batteries in this machine contain sul
f
uric acid,
which causes burns to skin. I
f
batter
y
acid contacts
clothin
g
or skin, rinse the e
ff
ected area with cold water
immediately. I
f
battery acid
g
ets on your
f
ace or in your
E
Y
ESmUSHTHEAREAIMMEDIATEL
Y
WITHCOLDWATERAND
seek medical attention
.
CAUTION
Always use the automatic battery charger provided by
the manufacturer of this machine to charge the Batte
r
-
ies of this machine. It is designed to charge the Batter
-
ies at the appropriate rate. If
y
ou must use a different
charger, disconnect the Batteries before charging to
avoid damage to the electronic speed controller.
EXTERNAL BATTERY
C
HAR
G
IN
G:
1
.
Transport machine to a well ventilated area for
charging
.
2
.
T
u
rn th
e
m
ac
hin
e
off.
3
.
C
heck the water in each batter
y
(
A
)
.
D
o not c
h
arge
the machine unless the water is slightly higher than
the plates. If needed, add enough distilled water to
j
ust slightly cover the plates. Be careful not to over fill.
"ATTERIESCANOVERmOWDURINGCHARGING2EPLACECAPS
b
efore charging
.
4.
First, plug the red 50
C
harger plug into the
machine’s Charger Port
(
B
)
. While the Charger plug
is connected, plug the charger power cord into a
g
roun
d
e
d
110
V
o
l
t stan
d
ar
d
wa
ll
out
l
et
(
C
)
.
5.
T
he Char
g
er will automatically be
g
in char
g
in
g
and
automatically shut off when fully charged
(
chec
k
Battery gauge
)
.
6.
A
fter the
C
harger has turned off - First, unplug the
Char
g
er from the wall outlet. Second, unplu
g
the red
5
0 Charger plug from the machine.
7
.
Recheck the cell level after charging. If needed, add
d
istilled water up to the correct level. Be certain to
replace the caps securely and to wipe off the top of the
Ba
tt
e
r
ies
w
i
t
h
a
clea
n
cl
ot
h
.
R LEVEL
S
H
O
ULD BE
W
AT E
A
B
O
VE PLATE
S
1
/8
''
A
A
B
B
C

- 12 -
E
DGESTIC
K
-OP-E
N
BATTERY MAINTENANCE GUIDE / EDGE CORDLESS ONLY
S
AFETY
:
DANGER
Explosive hydrogen gas forms when Batteries are
CHARGING!NOPENmAMEORSPARKCANCAUSETHISGAS
to explode. Serious personal injury or property damage
could occur. Only charge the Batteries in this machine
in
a
w
e
ll v
e
ntil
a
t
ed
a
r
ea.
WARNING
Before you service a Battery, always wear face protec
-
t
i
on, protect
i
ve
gl
oves an
d
protect
i
ve c
l
ot
hi
n
g
.
B
attery
ac
id
or
b
atter
y
exp
l
os
i
on can cause ser
i
ous
i
n
j
ur
i
es.
WARNING
The Batteries in this machine
p
roduce hazardous
volta
g
e which can cause electrical shock, burns and/
or electrocution. Alwa
y
s disconnect Batteries be
f
ore
s
ervicin
g
this machine
.
WARNING
The batteries in this machine contain sul
f
uric acid
,
which causes burns to skin. I
f
battery acid contacts
clothing or skin, rinse the e
ff
ected area with cold water
immediately. I
f
battery acid gets on your
f
ace or in your
EYES
m
USHTHEAREAIMMEDIATELYWITHCOLDWATERAND
s
eek medical attention
.
WARNING
Dress sa
f
ely. Do not wear rings or metal wrist watches
when servicin
g
this machine, as they can cause an
electrical short circuit which can cause serious burns.
I
N
S
PE
C
TI
O
N AND
C
LEANIN
G:
s
Keep Batteries clean and dr
y
from residue
s
C
heck that all vent caps are ti
g
h
t
s
Use a solution of bakin
g
soda and water to clean if
ac
i
d
r
es
i
due
on B
a
tt
e
ri
es
or
c
orro
s
ion on th
e
t
e
rmin
a
l
s
s
Protective spra
y
of petroleum jell
y
should be applied to
t
e
rmin
a
l
s
to r
educe
c
orro
s
io
n
STORA
G
E
:
s
Batteries should be fully char
g
ed prior to and durin
g
stora
ge
s
Never store dischar
g
ed Batteries
s
Store batteries in a cool, dr
y
place but never below
freezin
g
- Rechar
g
e in stora
g
e a minimum of every 30
da
y
s
s
Rechar
g
e Batteries before puttin
g
them back into
servic
e
WATERIN
G:
s
A
dd water
,
NEVER ACID
,
to cells
(
distilled wate
r
recommended
)
.
s
Do not over water
s
Before charging the Batteries, only add water if the
plates are exposed. Add just enou
g
h water to cover
t
he plates, then charge the Batteries. Once fully
char
g
ed, add water to the proper level as indicated
below.
s
For full charge plus series Batteries add water to the
m
a
xim
u
m w
a
t
e
r l
e
v
e
l in
d
i
ca
tor
(
A
)
.
s
Water watering, secure vent caps back on Batteries.
R LEVEL SHOULD BE
W
AT E
A
B
O
VE PLATE
S
1
/8
''
A
A

ED
G
E
S
TI
CK
-
O
P-E
N
-
13
-
M
O
T
O
R INF
O
RMATI
ON
There is a sticker with the above information on the motor of
y
our ED
G
E
S
tick machine unit. Below are explan
a
-
t
i
o
n
s
f
o
r th
e
u
nit
s
o
f m
easu
r
e
m
e
nt
.
FLA = Full Load Ampere Rat
i
n
g
Line current drawn by motor while operatin
g
under full load at supply volta
g
e indicated.
O
n dual volta
g
e motors, hi
g
her
volta
g
e amps are one-hal
f
lower volta
g
e amps
.
S
FA =
S
ervice Factor Am
ps
C
urrent drawn b
y
the motor when operated at service factor load. Unless motor is operated extensivel
y
at service factor
load (not recommended), use full load current when selectin
g
circuit protection
.
S
F =
S
ervice Facto
r
The service
f
actor shown on the motor nameplate indicates the amount o
f
continuous overload the motor can be sub
j
ect
-
ed to, under nameplate conditions, without dama
g
in
g
the motor. When the volta
g
e and frequency are at the same values
as s
h
own on t
h
e motor namep
l
ate, t
h
e motor may
b
e over
l
oa
d
e
d
up to t
h
e
h
orsepower
i
n
di
cate
d
b
y mu
l
t
i
p
l
y
i
ng t
h
e rate
d
horsepower by the service
f
actor. When operated at service
f
actor load, the motor may have an e
ffi
ciency, power
f
actor,
and speed slightly di
ff
erent
f
rom those shown on the nameplate.
A motor designed to operate at its nameplate horsepower rating has a service
f
actor o
f
1.0. This means the motor can
operate at 100% of its rated horsepower.
S
ome applications may require a motor to exceed the rated horsepower. In these
cases a motor with a service
f
actor o
f
1.15 can be speci
fi
ed. The service
f
actor is a multiplier that may be applied to the
rated power. A 1.15 service
f
actor motor can be operated 15% higher than the motor’s nameplate horsepower. The 30
HP motor with a 1.15 service
f
actor,
f
or example can be operated at 34.5 HP. It should be noted that any motor operating
continuously at a service
f
actor greater than 1 will have a reduced li
f
e expectancy compared to operating it at its rated
horsepower. In addition, per
f
ormance characteristics, such as
f
ull load RPM and
f
ull load current, will be a
ff
ected
.
EF = E
ffi
ciency Facto
r
A
C
motor efficiency is expressed as a percentage. It is an indication of how much input electrical energy is converted to
output mechanical energy. The nominal e
ffi
ciency o
f
this motor is 93.6%. The higher the percentage the more e
ffi
ciently
the motor converts the incoming electrical power to mechanical horsepower. A 30 HP motor with a 93.6% e
ffi
ciency would
consume less energy than a 30 HP motor with an e
ffi
ciency rating o
f
83%. This can mean a signi
fi
cant savings in energy
cost. Lower operating temperature, longer li
f
e, and lower noise levels are typical bene
fi
ts o
f
high e
ffi
ciency motors
.
FLPF = F
u
ll L
oad
P
o
w
e
r F
ac
t
or
The ratio of real or true power and the apparent power that is supplied [PF=P(watts)/S(va)
]
IEC34-1
IEC34-5
MODEL: M6K28FC3A
CAT. NO: 117536.00 DATE: G12B
TYPE: KF
ENCL: TEFC
DESIGN:l
HP/KW: 1 1/2 / 1.12 1 1/2 / 1.12
RPM:
VOLT:
FLA: 13.2/6.6 15.6/7.8-7.5
SFA: 14.8/17.4 18/9-8.4
SF:1.15
NP,BF1461412-1,122060009
READ WARNING LABEL ON MOTOR BEFORE
CONNECTING, INSTALLING OR SERVICING
FAILURE TO FOLLOW ALL SAFETY INFORMATION
CAN RESULT IN PERSONAL INJURY OR DEATH.
EFF:75.5 IP:
:41
:::
:
FL PF:99(0.99)
115/230 100/200-220
3450 2850
HZ: 60 50
CC:
CUST: PN:
DUTY:CONT
INS:F4
PH:1
CODE:H
FR:56CZ
THERMALLY PROTECTED
AMB:40 C
LOW VOLTAGE
CCW ROTATION FACING LEAD END AS SHOWN
INTERCHANGE LEADS T5 & T8 FOR CW
HIGH VOLTAGE
P1 P2 T3 TB T2 T4 T5 P1 P2 T3 TB T2 T4 T5
COOLING
CODE
INVERTER
SPD RANGE
PROT.
CODE
INV
TYPE
INV.
LOAD
L1
L2 L1 L2
LEESON ELECTRIC A REGAL-BELOIT COMPANY
GRAFTON, WISCONSIN MADE IN USA
E57948 LR33543
®
®

- 14 -
E
DGESTIC
K
-OP-E
N
AC DIAGRA
M
5
5
4
4
3
3
2
2
1
1
D D
C C
B B
A A
HOUR METER
8-262
CONNECTED
MOTOR
P1
P2
T3
T8
T2
T4
T5
HOUR METER
8-262
CONNECTED
MOTOR
P1
P2
T3
T8
T2
T4
T5
HIGH VOLTAGELOW VOLTAGE
LOW VOLTAGE
HIGH VOLTAGE
GND
L1 BLACK L2 WHITE
WHITEBLACK
BLACK
L1 BLACK
L2 WHITE
L2 WHITE
GND
L1 BLACK L2 WHITE
WHITEBLACK
BLACK
L1 BLACK
L2 WHITE
L2 WHITE
Title
Size Document Number Rev
Date: Sheet of
<Doc> 1.0
EDGE AC
11Tuesday, October 16, 2012
Title
Size Document Number Rev
Date: Sheet of
<Doc> 1.0
EDGE AC
11Tuesday, October 16, 2012
Title
Size Document Number Rev
Date: Sheet of
<Doc> 1.0
EDGE AC
11Tuesday, October 16, 2012
PLUG AC MALE
1 2
3
PLUG AC MALE
1 2
3
PLUG AC FEMALE
1 2
3
PLUG AC MALE
1 2
3
PLUG AC FEMALE
1 2
3
PLUG AC MALE
1 2
3
SWITCH, HANDLEBAR
1 2
SWITCH, HANDLEBAR
1 2

ED
G
E
S
TI
CK
-
O
P-E
N
-
1
5 -
T
R
OU
BLE-
S
H
OO
TIN
G
PROBLEM CAUSE SOLUTION
Machi
n
e
w
ill
not
s
t
a
rt
N
ot connecte
d
to
p
ower source
C
heck
p
ower source connection
Defective switch
C
ontact local servicing dealer
Runs erraticall
y
L
ow voltage from excessive length or
undersized extension cord
U
se 12 gauge extension cord - not longer
t
han 25 ft long
Defective handlebar switch
C
ontact local servicing dealer
Defective motor low volta
g
e
C
ontact local servicin
g
dealer
Fuse/circuit breaker trips
L
ow voltage
A
llow the motor to cool. The circuit breaker
i
s a red button on the side of the motor that
will
reset w
h
en presse
d
.
Eliminate extension cord
L
ocate power cor
d
c
l
oser to wor
k
s
i
te
H
ave AC volta
g
e checked by electrician
Machine
p
ulls hard to one side R
ubbe
r i
s
ol
a
tor
s
worn o
u
t
R
e
p
lace isolators
M
ac
hi
ne
i
s
l
ou
d
er t
h
an new
R
u
bb
er
i
so
l
ators worn out
R
ep
l
ace
i
so
l
ators
Eccentric worn ou
t
R
eplace eccentri
c

-
1
6
-
E
DGESTIC
K
-OP-E
N
MA
C
HINE
S
PE
CS
BODY CONSTRUCTION/DIMENSION
S
C
HA
SS
I
S
CO
N
S
TR
UC
TI
O
N:
1
⁄
1
8
⁄
⁄
'' GAUGE STEEL
(
3.2 mm
)
AXLE:
3
/4'' SOLID STEEL
(
2 cm
)
HANDLEBAR
: 12 GAUGE STEEL, ADJUSTABLE
FINISH: POWDER PAIN
T
REAR WHEELS: (2×) 6''
×
2'' NON-MARKING
[
(
2
×
)
15×5cm
]
WEI
G
HT: 20'' ST: 125 lbs (57 kg)
20'' HD: 165 lbs (75 kg)
28'' HD: 225 lbs (102 kg)
20'' HD ProPolish: 265 lbs (120 kg)
28'' D
C
: 238 lbs (108 kg)
3
2'' DC: 257 lbs (116 kg)
SC
R
U
BDE
C
K
S
Y
S
TE
M
PAD
S
IZE
:
20-ED
G
E: (1
×
) 20'
'
×
1
4
''
28-EDGE: (1
×
) 28'
'
×
1
4''
3
2-EDGE: (1
×
)
32'
'
×
1
4
''
SC
RUBDE
C
K M
O
T
O
R P
O
WER
:
(
1
×
)
1.5 hp
(
746 watts
)
SC
R
U
BDE
C
K M
O
T
O
R RPM:
S
T: 1725 r
p
m
HD
: 3450 rpm
D
C
: 2900 rpm
A
C
CU
RRENT DRAW
:
S
T: 7 am
p
s
(
110V/60 Hz
)
HD: 9 amps (110V/60Hz)
BATTERY SYSTEM (DC MACHINES ONLY)
()
S
Y
S
TEM V
O
LTA
G
E
:
24
V
o
l
t
s
STANDARD BATTERY AH RATING
:
(
2×
)
85 Ah
OPTIONAL BATTERY AH RATING:
(
2×
)
150 Ah
BATTERY RUN TIME
(
STANDARD
):
U
P TO 2.5 Hrs.
P
O
WER
S
Y
S
TE
M
V
O
LTA
G
E
:
A
LL A
C
U
NIT
S
: 11
0
V
/50
-
60
Hz
O
R
220V
/
50Hz
H
Z: D
C
U
NIT
S
: 24 Volt
s
CO
RD A
C
U
NIT
S
: 50' / 12
g
au
g
e SAFETY YELLOW W/
LI
G
HTED PLU
G
G
ENERA
L
PR
O
D
UC
TIVITY
:
20'' ST: U
p
to 1,600 s
q
.ft/hr
20'' HD: U
p
to 5,000 s
q
.ft/hr
28'' HD: Up to 7,000 sq.ft
/
hr
20
''
HD
P
RO
P
O
LI
S
H
: N
/
A
28'' DC: U
p
to 6,200 s
q
.ft/hr
3
2'' D
C
: U
p
to 6,500 s
q
.ft
/
hr
SO
UND LEVEL:
S
T: < 62 dB
A
HD
: < 73
dBA

ED
G
E
S
TI
CK
-
O
P-E
N
-
1
7 -
COMMON WEAR PART
S
ED
G
E PAD
S
AND
SC
REEN
S:
DESCRIPTION 28''×14''
SCRUBDECK
20''×14''
SCRUBDECK
13''×19''
White Pad EDGE-405
4
E
DGE-400
5
N
/
A
Red Pad ED
G
E-4
053
E
D
G
E-4
004
N/A
Blue Pad ED
G
E-4
052
E
D
G
E-4
003
N/A
G
reen Pad ED
G
E-4
051
E
D
G
E-4
002
N/A
Black Pad ED
G
E-4
050
E
D
G
E-4
001
N/A
White Driver Pa
d
ED
G
E-4
058
E
D
G
E-4
0
2
5
E
D
G
E-4
0
1
9
60
G
rit
S
and
S
cree
n
ED
G
E-4
059
E
D
G
E-4
0
2
6
E
D
G
E-4
0
2
0
80
G
rit
S
and
S
cree
n
ED
G
E-4
060
E
D
G
E-4
0
2
7
E
D
G
E-4
0
2
1
100
G
rit
S
and
S
cree
n
ED
G
E-4
061
E
D
G
E-4
0
2
8
E
D
G
E-4
0
2
2
1
2
0
G
rit
S
and
S
cree
n
ED
G
E-4
062
E
D
G
E-4
0
2
9
E
D
G
E-4
0
2
3
150
G
rit
S
and
S
cree
n
ED
G
E-4
063
E
D
G
E-4
030
E
D
G
E-4
0
2
4
20 Grit Sand Pa
p
e
r
N
/A
E
D
G
E-4
031
N/A
36 Grit Sand Pa
p
e
r
N
/A
E
D
G
E-4
032
N/A
6
0 Grit Sand Pa
p
e
r
N
/A
E
D
G
E-4
033
N/A
8
0 Grit Sand Pa
p
e
r
N
/A
E
D
G
E-4
034
N/A
1
00 Grit Sand Pa
p
e
r
N
/A
E
D
G
E-4
035
N/A
1
00 Grit Diamond Polishin
g
Pad N
/A
E
D
G
E-4
0
1
2
N/A
400 Grit Diamond Polishin
g
Pa
d
N
/A
E
D
G
E-4
0
1
3
N/A
8
00 Grit Diamond Polishin
g
Pa
d
N
/A
E
D
G
E-4
0
1
4
N/A
1
500 Grit Diamond Polishin
g
Pad N
/A
E
D
G
E-4
0
1
5
N/A
3000 Grit Diamond Polishin
g
Pad N
/A
E
D
G
E-4
0
1
6
N/A
6
000 Grit Diamond Polishin
g
Pad N
/A
E
D
G
E-4
0
7
0
N/A
Tile
/G
rout Renovator Pa
d
ED
G
E-4
0
4
8
E
D
G
E-4
0
1
8
N/A
Micro
fi
ber Pad N
/A
E
D
G
E-4
036
N/A
Ab
ra
d
er
Pl
at
e
N/
A
N
/
A
E
DGE-401
1
Dominator HD
S
trip Pad ED
G
E-405
5
E
D
G
E-400
6
N/A
Maroon E
CO
Prep Pad ED
G
E-405
6
E
D
G
E-400
7
N/A
Remover Burnishing Pad EDGE-405
7
E
DGE-400
8
N
/
A
Porko Burnishin
g
Pa
d
N
/A
E
D
G
E-4
0
1
7
N/A
V
elcro Pa
d
N
/A
300
-
4023
N/A
ED
G
E DIAM
O
ND
S
F
O
R P
O
LI
S
HIN
G
MARBLE
/
TERRAZZ
O:
DESCRIPTION PART NUMBER
3
0
G
rit Diamond
S
trip 300-30
G
RIT
4
50 Grit Diamond Strip 300-50GRIT
4
100
G
rit Diamond
S
tri
p
300-100
G
RIT
4
200 Grit Diamond Stri
p
300-200GRIT
4
4
00
G
rit Diamond
S
tri
p
300-400
G
RIT
4
800 Grit Diamond Stri
p
300-800GRIT
4
1500
G
rit Diamond
S
trip 300-1500
G
RIT
4
3
000 Grit Diamond Strip 300-3000GRIT
4

-
1
8
-
E
DGESTIC
K
-OP-E
N
ED
G
E I
SO
LAT
O
R REPLA
C
EMENT KIT
S:
DESCRIPTION PART NUMBER
Kit for 20" AC Stick Machine
s
E
DGE-721
7
Kit for 28" AC Stick Machine
s
E
DGE-722
1
Kit for 28" DC Stick Machine
s
E
DGE-721
8
Kit for 32" DC Stick Machine
s
E
DGE-721
9
Kit for 20" DC Machine
s
E
DGE-720
9
Kit for 24" DC Machine
s
E
DGE-720
9
Kit for 28" D
C
Machine
s
E
D
G
E-721
0
Kit for
3
2" D
C
Machine
s
E
D
G
E-721
6
B
racket Kit for D
C
Machines
E
D
G
E-722
0

ED
G
E
S
TI
CK
-
O
P-E
N
-
19
-
SO
AP
C
H
O
I
C
E
S
TRADITIONAL DRUMS / TOTES
WALL-MOUNTED SUPERCON
DEMO / RENTAL QUARTS
ONBOARD AUTO DISPENSING
!(&'%." %.!)%"! !',

-
2
0
-
E
DGESTIC
K
-OP-E
N
PowerCat
P.O. Box 503
Racine, WI 53404-0503
Phone: 414-745-9337
Fax: 262-632-1630
www.powercatsolutions.com
Distributed by:
PowerCat, LLC, 2008.
An environmentally cleaner that works! It is a solvent free
degreaser that works on oil, carbon, even rubber marks.
Incorporates the latest technology in “Green Cleaning”.
Safe on most surfaces not harmed by water alone.
Low scale formula to prevent alkali buildup in cleaning
equipment, while offer detergent to emulsify oil.
Ideal solvent fortified degreaser. This butyl based
detergent is penetrating, fast acting, and deep cleaning
with built-in corrosion inhibitors. It is our most effective
degreaser.
A high gloss detergent designed to dry to a bright shine.
It is ideal for use on finished surfaces, tile, epoxy, or
enamel. The special formula removes salt residue, scuff
marks and dirt, while leaving no residue behind. The result
is a clean, non-slip surface, ready for immediate use.
The Heavy Duty concentrate is a Super alkaline
detergent, formulated for heavy soil, grease, and thick
buildup. Popular in machine shops, auto and truck repair,
and other facilities with oil, hydraulic fluids and cutting oils.
Designed to quickly remove tire marks, oil stains and
buildup that has accumulated. This pretreat uses the
powerful cleaning of natural citrus extract and is intended
to be used directly on the floor at 100% concentrate.
Ideal for applications with Hard Water problems. It is safe
to use in pressure washers and automatic scrubbers. The
formulation enhances soil suspension, digests oil and
grease, while supporting extra water conditioner.
**Below Sold in bulk concentrate only. Not available as a SuperCon, PowerDose or SUDS product.
SUDS
Approved
707 Citrus Green
733 Low pH
755 High Power
757 Gloss
797 HD
FORMULAS
Onboard
Availability
727 Pretreat**
744 Tough Stuff**
SUDS
Approved
SUDS
Approved
SUDS
Approved
SUDS
Approved
Table of contents
Other RPS Floor Machine manuals