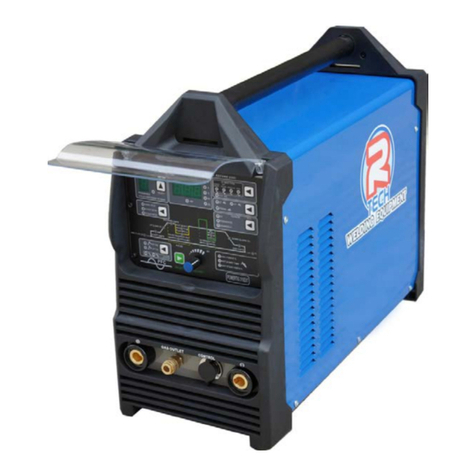
Rtech TIG401 TFT User manual

www.r-techwelding.co.uk
email: salesdept@r-techwelding.co.uk
Tel: 01452 733933 Fax 01452 733939
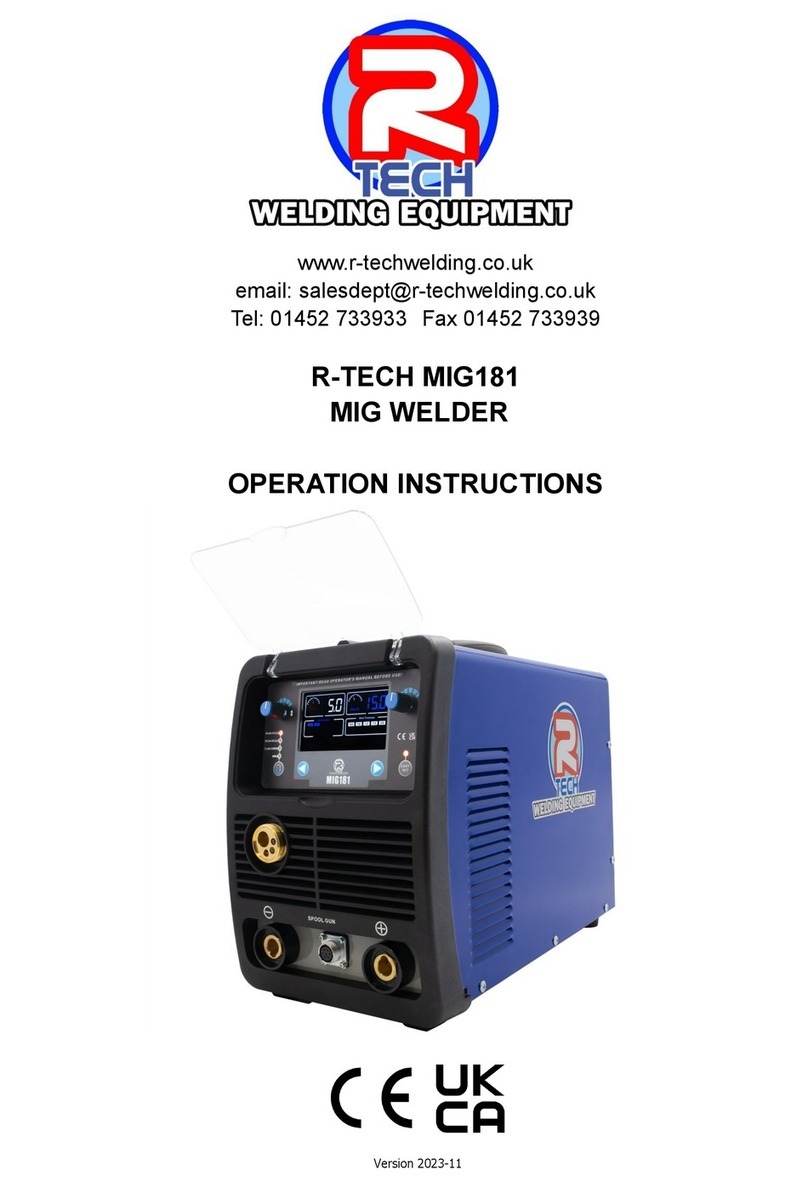
R-TECH TIG401 TFT
DIGITAL AC/DC TIG WELDER
OPERATION INSTRUCTIONS
Version 2023-12-V1

2

3
Index
Page
Introducon 4
Safety Precauons 6
Electrical Installaon 7
Technical Specicaons 8
Connecons 11
Controls & Sengs 14
AC TIG EASY SETUP 16
DC TIG EASY SETUP 21
DC TIG Manual Mode 26
AC TIG Manual Mode 36
AC Amplitude 46
Memory Storing 47
MMA STICK EASY SETUP 48
MMA STICK Manual Mode 49
Fan Control Menu 53
Water Cooler Control Menu 54
Fault Finding 55
Safety Informaon 56

4
Thank you for selecng the R-Tech TIG401-TFT Digital Inverter AC/DC Tig Welder.
The TIG401-TFT Digital has many benets over tradional TIG welders, including EASY SETUP, 20
memory stores, advanced AC waveforms, pulse welding, slope up/down, remote foot pedal
opon and an industrial 60% duty cycle.
We want you to take as much pride in operang our TIG401-TFT Digital as much pride as we
have in making this product for you. Please read all informaon in this manual before operaon
PLEASE EXAMINE CARTON AND EQUIPMENT FOR DAMAGE IMMEDIATELY
When this equipment is shipped, tle passes to the purchaser upon receipt from the courier. Con-
sequently all claims for material damaged in shipment must be made by purchaser against the
transportaon company used.
Please record your equipment idencaon below for future reference. This informaon can be found
on data plate at rear of machine.
Product: TIG401-TFT DIGITAL AC/DC TIG Welder
Serial No.
Date of Purchase
Where Purchased
Whenever you request replacement parts or informaon on this equipment please always supply
informaon you have recorded above
Pay parcular aenon to the safety instrucons we have provided you for your protecon The level of
seriousness to be applied to each secon is explained below
This statement appears where the informaon must be followed exactly to avoid serious per-
sonal injury.
CAUTION
This statement appears where the informaon must be following to avoid a minor personal inju-
ry or damage to this equipment.

5
Introducon
The R-Tech TIG401-TFT digital TIG welder is a member of our eld acclaimed family of welding machines.
Premium features include
Large 5.1" HD TFT Screen
60% Industrial duty cycle
Inverter power source - more ecient
Fan on demand and water cooler control - silent running and power saving
5 x AC Waveforms
Electronic HF for fast arc starng and low interference
EASY SETUP DC & AC TIG
Professional weld sengs built in
Over 300 AC/DC sengs from 1.0 to 6mm for all weld joint types. Lap, Bu, Tee, Corner, Edge
Simple to use easy navigaon - no complicated menus - all sengs on single screen.
MANUAL MODE DC & AC TIG
Full control of every weld parameter you could ever need
Pre-ow gas, start amps, slope up me, main amps, slope down me, end amps and post ow gas
5 AC Waveforms - Square, So Square, Triangular, Sine, Sine-T and Trapezoidal wave forms - Giving the
ulmate control of weld pool and bead
AC Frequency to 20-400Hz - Increased arc focus
3 Start modes - HF Fast start, LIFT and LIVE
2T, 4T, foot pedal & torch switch control modes
4TS trigger mode, Ideal for pipe welding, switch from start to main amps as required
DC Pulse up to 999Hz
AC Pulse up to 400Hz
AC Advanced pulse - Mixed AC/DC pulse, greatly increases penetraon up to 10Hz
Amplitude control in AC - Improvement of arc stability, quality and tungsten life and sharpness - more
focused arc (EN and EP amperage control in AC)
20 professional memory stores
Spot welding - Spot weld feature with sch funcon
Fast Tack welding - Tack weld feature with stch funcon
Welding Capability – Duty Cycle
The R-Tech TIG401-TFT Digital is rated at 400 Amps at 60% duty cycle on a ten minute basis. If the duty
cycle is exceeded a thermal protector will shut machine o unl the machine cools.

6
Safety Precauons
Read enre secon before starng installaon.
Warning!
Electric Shock can kill – Only qualied personnel should perform this installaon. Turn o input power at
the fuse box before working on this equipment. Do not touch electrically live parts. Always connect the
machine to an earthed mains supply as per naonal recommended standards.
Select suitable locaon
Place the welder where clean cooling air can freely circulate in and out of the front & rear louvre vents.
Dirt, dust or any foreign material that can be drawn through vents into welder must be kept to a mini-
mum. Failure to observe these precauons can result in excessive operang temperatures which can lead
to plant failure.
Grinding
Do not direct grinding parcles towards the welder.
An abundance of conducve material can cause plant failure.
Transport & unloading
Never underesmate the weight of equipment, never move or leave suspended in the air above people.
Use recommended liing/handling equipment at all mes.

7
Electrical installaon
WARNING ELECTRIC SHOCK CAN KILL
Electric Shock can kill – Only qualied personnel should perform this installaon. Turn o input power at
the fuse box before working on this equipment. Do not touch electrically live parts. Always connect the
machine to an earthed mains supply as per naonal recommended standards.
Machine grounding and High Frequency Interference Protecon
This welder must be grounded to earth. See naonal electrical codes for proper grounding methods.
The high frequency generator being similar to a radio transmier may cause interference to radio, TV and
other electronic equipment. These problems may be the result of radiated interference.
Proper grounding methods can reduce or eliminate this.
Radiated interference can develop in the following ways
1. Direct interference from welder power source
2. Direct interference from the welding leads
3. Direct interference radiated from feedback into power lines
4. Interference from re-radiaon by un-grounded metallic objects.
Keeping these contribung factors in mind, installing equipment as per following instrucons should
minimize problems.
1. Keep the welder input power lines as short as possible and enclose as much of them as possible in met-
al conduit or equivalent shielding. There should be a good electrical contact between this conduit and
ground (Earth).
2. Keep the work and electrode leads as short as possible. Tape the leads together where praccal.
3. Be sure the torch and earth leads rubber coverings are free from cuts and cracks that allow welding
power leakage
4. Keep earth lead connecon to work in good condion – Clean area on workbench where earth clamp is
situated on a regular basis.

8
Electrical installaon cont.
Input Connecons
Make sure the voltage, phase and frequency of input power is as specied on machine rang
plate located at rear of machine.
Have a qualied electrician provide suitable input power as per naonal electrical codes. Make
sure machine is earthed / grounded.
Make sure fuse or circuit breaker is correct rang for machine. Using fuses or circuit breakers
smaller than recommended will result in ‘nuisance’ shut o from welder inrush currents even if
welding at low amperages.
Failure to follow these instrucons can cause immediate failure within the welder and void ma-
chines warranty.
Turn the input power OFF at the mains switch & fuse box before working on this equipment. Have
a qualied electrician install & service this equipment.
Allow machine to sit for 5 minutes minimum to allow the power capacitors to discharge before
working inside this equipment. Do not touch electrically live parts
The TIG401-TFT DIGITAL Inverter Tig Welder requires a 240V 50/60Hz supply. It requires a 22A
Supply. It comes with a 2.5 metre mains cable aached.
Connect wires according to naonal coding.
Brown wire – Live
Blue wire – Neutral
Green/Yellow Wire – Earth (Ground)
Connecng to an Engine Driven Generator
If connecng this machine to an engine driven generator please ensure the following
Minimum Generator KVA Output – 12 KVA connuous Generator to be ed with AVR (automac
voltage regulaon) DO NOT USE ON A GENERATOR WITHOUT AVR
Connecng to a generator without the above minimum requirements will in- validate your war-
ranty.

9
Input 415V AC 50/60Hz 3- Phase Input amperage 22A
Gross weight 32 KG
Dimensions 438H x 232W x 550L (mm)
Insulaon IP21S
TIG Current range AC 10A - 400A
Current range DC 5A - 400A
No load voltage 95V
Duty cycle 60% @ 400A
Arc starng modes HF, Li and Live
Trigger modes Manual mode 2T,4T,4TS, REMOTE PEDAL,2T+F, 4T+F
Trigger modes EASY SETUP 2T,4T, REMOTE PEDAL, 2T+F, 4T+F
TIG Manual Pre-ow gas 0 - 60 seconds
Up-slope me 0 - 30 seconds
Start amps 5A DC, 10A AC to 400A
Down-slope me 0 - 60 seconds
End amps 5A DC, 10A AC to 400A
Post-ow gas me 0 - 60 seconds
DC Pulse amps 3 - 100%
DC Pulse width (me) 5 - 95%
DC Pulse Hz 0.1 - 999.9 Hz
AC Pulse amps 3 - 100%
AC Pulse width (me) 5 - 95%
AC Pulse frequency (standard) 0.1 - 500 Hz
AC Pulse frequency (advanced) 0.1 - 10 Hz
AC Balance (cleaning) 5 - 70 %
Spot weld me 0.1 - 10 seconds
Spot weld stch me 0 - 5 seconds
Tack weld me 10ms - 250ms
Tack weld sch me 10ms - 250ms
Memory sengs YES - 20
Technical specicaons

10
TIG EASY SETUP DC - Programs for Metal type Mild & stainless steel
Metal thickness programs 1, 1.2, 1.5, 2, 3, 4, 5, 6mm
Joint type programs Tee, Lap, Bu, Corner, Edge
Pulse level programs .05Hz, 1Hz, 2Hz, 50Hz & 200Hz
Pulse amps Stainless 65 %
Pulse Width Stainless 50 %
Pulse amps mild steel 75 %
Pulse width mild steel 50 %
Trigger types 2T,4T,REMOTE PEDAL, 2T+F, 4T+F
TIG EASY SETUP AC - Programs for Filler Type ALSI 4043A & ALMG 5356
Metal thickness programs 1, 1.2, 1.5, 2, 3, 4, 5, 6mm
Joint type programs Tee, Lap, Bu, Corner, Edge
Pulse level programs .05Hz, 1Hz, 2Hz, 50Hz & 200Hz
Pulse amps 75 %
Pulse Width 50 %
AC Frequency 100 Hz
AC balance 25 - 35 %
Trigger types 2T,4T,REMOTE PEDAL, 2T+F, 4T+F
MMA EASY DC - Programs for Rod type mild steel 6010, 6011, 6013, 7018
Rod type stainless steel 308, 309, 316
Rod diameter 2.4, 3.2, 4.0mm
Weld posion Flat, Overhead, Vercal, Horizontal
V.R.D Voltage O / On
MMA EASY AC - Programs for Rod type mild steel 6010, 6011, 6013, 7018
Rod diameter 2.4, 3.2, 4.0mm
Weld posion Flat, Overhead, Vercal, Horizontal
V.R.D Voltage O / On
Technical specicaons cont..

11
MMA Manual DC Amp range 10 - 315A
AC Amp Range 10 - 315A
Duty cycle MMA 35% @ 315A, 60% @ 250A
An sck YES
Hot start me 0 - 2 seconds
Hot start % 0 - 100%
Arc Force 0 - 100%
Cellulosic Rods YES
V.R.D Voltage reducon YES
Remote amp funcon YES
Fan on demand TIG & MMA ON
Mode1 - Temperature control
Mode2 - 1 minute mer on arc ignion
Water cooler control TIG OFF
ON
Mode1 - 1 minute mer on arc ignion
Technical specicaons cont.

12
Connecons
Front panel connecons
TIG mode - negave con-
nector for TIG torch
MMA mode - connect
earth to negave
Quick release gas
torch connector
7 pin socket for torch
switch or remote
foot pedal
TIG mode - connect
earth lead
MMA mode - connect
MMA lead
Rear panel connecons
Fuse holder for water cooler
240v output
240v output for water cooler On/O switch

13
Rear panel connecons cont..
Gas connector & Extra earth connecon
3/8 BSP male connector for gas input
Extra earth connecon, used if you experience
local interference (not normally used)
3
1 - On/O Switch
2 - Hot water in, t RED quick release ng from water cooled torch
3 - Cold water out, t BLUE quick release ng from water cooled torch
4 - Water reservoir, ll to maximum level with water/anfreeze mix.
Unit is self bleeding as long as reservoir is lled to the top level.
12
3
4
Water cooler connecons.

14
Front panel
HD 5” Digital Colour Screen
Easy to navigate menu system
EASY SET mode - 100’s of pre-programmed weld sengs AC,DC TIG & MMA
1
2
3
4
567 8
910
1 - SELECT buon - Press to cycle through welding modes
DC TIG, AC TIG, DC STICK, AC STICK
2 - EASY SET buon - press to enable / disable EASY SET mode
3 - Control knob - Turn to change seng in small amounts, press and turn to change in larger steps
4 - LED indicator for weld mode selected
5 - Le arrow buon - use to scroll le in menus
6 - SAVE / LOAD buon - For saving and loading manual mode memory sengs
7 - HOME buon - Press to switch between home and 2nd level menu’s
8 - Right arrow buon - use to scroll right in menus
9 - POWER LED - Shows machines is turned on when lit
10 - FAULT LED - Will light when machine senses problem and will show error in main display.

15
Controls and sengs
The TIG401-TFT features 6 main operang modes
AC TIG in EASY mode
AC TIG in Manual mode
DC TIG in EASY mode
DC TIG in Manual mode
MMA (STICK) in EASY mode
MMA (STICK) in Manual mode
AC & DC EASY MODE
R-Tech Easy mode takes the guesswork out of TIG welding. You normally had to enter all weld sengs
before beginning to weld on manual welders, we have done this for you.
You simply select the following from easy to understand screen.
Tungsten size
Material thickness
Filler rod material in AC
Material type in DC
Type of joint
Pulse O/On
Trigger / Pedal mode
The machine will set main amperage power , post ow gas me required and also advise on
recommended gas ow in LPM and ceramic cup size for torch.
TO ENTER EASY MODE - PRESS EASY BUTTON ON FRONT PANEL - EASY HOME SCREEN WILL SHOW

16
AC EASY MODE
6 easy steps are required to setup weld.
Press le / right arrows to select seng which will be highlighted in red circle and descripon shown in
boom of screen. Then use control knob to select value required.
In image below you can see TUNSGTEN SIZE is shown at boom of screen and circle is highlighted in RED
and showing 2.4mm size selected.
Once correct tungsten size has been selected, press right arrow to move to next seng.
MATERIAL THICKNESS
Then use control knob to select work thickness required.
1.0mm, 1.2mm, 1.5mm, 2.0mm, 3.0mm, 4.0mm

17
METAL TYPE (FILLER ROD TYPE USED)
Then use control knob to select ller rod used.
ALMG = 5356 Filler Rod, ALSI = 4043A Filler Rod
Once correct material work thickness has been selected, press right arrow to move to next seng.
JOINT TYPE
Select from 5 joint types as below.
Once correct material work thickness has been selected, press right arrow to move to next seng.

18
PULSE SETTING
This is where you select pulse o, or sengs as below by turning control knob
Pulse welding was designed mainly for stainless steel and other exoc materials to control heat input to
the metal and decrease heat deformaon.
It can be used on all materials including aluminium in AC.
Base amps is set to 75% in AC EASY mode. I.E if main amps is 80A, then base amps will be 60A
At 0.5Hz the machine will switch between main amps selected and base amps every half a second.
At 50Hz the machine will switch between main and base amps 50 mes a second.
Pulse can also be useful if you are unable to use a foot pedal and want to have more control over heat
input into weld if not welding at bench.
Pulse speed is a personal preference - as the pulse Hz increases you will noce the weld
noise is more higher pitched, this is normal.
Once correct pulse type has been selected, press right arrow to move to next seng.

19
REMOTE
This is where you select how machine is triggered to start and remote control of amperage if required.
2T - Press trigger to start weld, release to nish weld.
4T - Press and hold trigger to start weld at start amps, release trigger to go to
main amps. To nish weld - Press and hold trigger to go to end amps, release
and weld will stop.
PEDAL - Press foot pedal to start weld, fully depress pedal to get 100% of
amps shown in recommended sengs.
I.E If recommended seng was 120A, on a full depress of pedal you will get
120A, if pedal only pressed halfway you will get 60A
4T+F - Torch trigger latch operaon same as 4T but with amperage control by
slider / rotary knob on torch handle.
2T+F - Torch trigger operaon for on/o with amperage control by slider /
rotary knob on torch handle.
Once required remote seng is selected, press right arrow to move to OK
(You can also press the HOME buon)

20
RECOMMENDED SETTINGS
OK will now turn RED, RECOMMENDED SETTINGS will now be loaded for you.
Welding amps - shown in middle of display
Post ow gas me - not shown
The display will also show recommended
Gas ow in LPM (set this on regulator or gas ow meter)
Torch cup ceramic size (If not to hand, you can use a larger size)
You are now ready to weld! Press trigger or foot pedal to weld.
If you want to change any sengs, just simply use le / right arrows to highlight seng in red
and use control knob to change - then use arrows to move to OK to update.
AMPERAGE TRIM
You have 10A trim +/- of recommended amperage, simply turn knob to decrease / increase amperage.
This is to allow ne tuning to personal preferences like travel speed, weld bead appearance.
70 90
Table of contents
Other Rtech Welding System manuals

Rtech
Rtech MTS-450 User manual

Rtech
Rtech TIG160PDC User manual

Rtech
Rtech PROArc 175 User manual

Rtech
Rtech P100HF User manual

Rtech
Rtech TIG261 User manual

Rtech
Rtech PLASMA 60HF User manual

Rtech
Rtech PLASMA 40HF User manual

Rtech
Rtech TIG180PDC User manual

Rtech
Rtech C-MIG 315 User manual

Rtech
Rtech PLASMA 50HF User manual

Rtech
Rtech MIG181 User manual

Rtech
Rtech INV160 User manual

Rtech
Rtech TIG200DV-PD User manual

Rtech
Rtech TIG200DV User manual

Rtech
Rtech I-MIG160 MIG User manual

Rtech
Rtech MTS 255HF User manual

Rtech
Rtech MTS251TFT User manual

Rtech
Rtech TIG315 User manual

Rtech
Rtech TIG160PDC User manual
Rtech
Rtech Tig200 DC Digital User manual