Russell Hobbs RHCLRF17-EU User manual

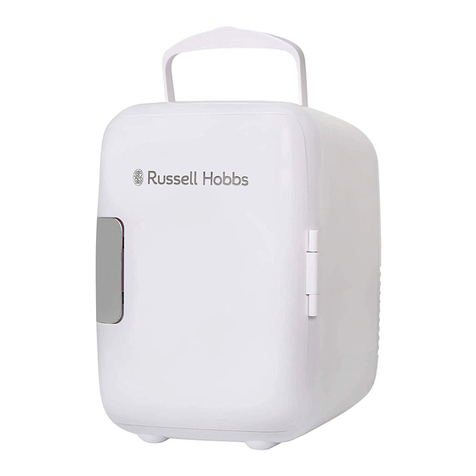
17L Table Top Cooler
Tischkühlschrank 17 l
Mini enfriador 17 l
Mini-refroidisseur 17 L
Refrigeratore da tavolo 17L
RHCLRF17-EU (B-EU)
PLEASE RETAIN FOR FUTURE REFERENCE
BITTE GUT AUFBEWAHREN
CONSERVAR PARA FUTURAS CONSULTAS
VEUILLEZ CONSERVER POUR RÉFÉRENCE ULTÉRIEURE
CONSERVARE PER RIFERIMENTO FUTURO
English - Page 2
Deutsche - Seite 17
Español - Página 32
Français –Page 47
Italiano - Pagina 62

Contents
Safety
Instructions
………………………………………
. 3-5
Features
& Spare Parts
………………………………………
. 6
Location
………………………………………
. 7
Installation
……………………………
.………… 8
Usage
Information
……………………………………….
9-10
Cleaning
& Maintenance
………………………………………
.11
Defrosting
………………………………………
.11
Troubleshooting
………………………………
.……… 12-13
Guarantee
………………………………………
.14
Technical
specification
…………………………
.…………… 15
Customer
Services
…………………………
.…………… 16
2

Before Using the Appliance
Safety Instructions
•This appliance is a Semi-conductor electric refrigerating appliance, which is a Category
10 other appliance, according to ErP 643/2009.
Warning: Keep ventilation openings of the appliance clear of obstruction.
•The appliance must not be placed or rested on the power cord.
•Do not use electrical appliances in the compartment of the appliance.
•If this appliance is to replace an appliance with a lock, the lock must be removed as a
safety measure before storing it or disposing of it. This is to protect children from
locking themselves inside the appliance.
•Old appliances must be disposed of properly. Entrust the disposal of the scrap
unit categorically to the competence of your local waste disposal service.
Contact your local authority or your dealer if you have any questions. Please ensure
that you do not damaged the scrapunit prior to being picked-up by the relevant
waste disposal service.
Important Note:
Please read this booklet before installing and switching on this appliance.
The manufacturer assumes no responsibility for incorrect installation and usage.
3

Safety Instructions
Warning:
•This appliance can be used by childrenaged from 8 years and above and persons with
reduced physical, sensoryor mental capabilitiesor lack of experience and knowledge if
they have been given supervision or instruction concerning use of the appliance in a
safe way and understand the hazards involved. Children should not play with the
appliance.
•Do not use adaptors, multiple receptaclesor extension leads.
•Do not plug in damaged plugs.
•Do not pull, twist or damage the power cable.
•Do not put the appliance or any other objects on the power cord.
•This appliance is designed for the use by adults, do not allow childrento play with the
appliance or letthem hang over the door.
•Do not plug-in or un-plug the appliance with wet hands to prevent electrical shock.
•Do not place explosive or flammable material in your cooler for your own safety.
•Bottles containing a high percentage of alcohol must be sealedwell and placed
horizontally in the appliance.
•Do not cover the body or the top of the appliance with lace. This affects the
performance of your appliance.
•Fix down the accessories in the appliance during transportation to prevent damage to
them.
Before SwitchingOn:
•There may be an odour when you first switch on the appliance, this is normal and
should disappear when the appliance starts to cool.
•Before using your appliance, add a teaspoon of bicarbonate of soda to warm water
and with a damp cloth wipe down all parts of the new appliance, then repeat the
processwith a clean damp cloth and dry.
•ENSURE THE APPLIANCE IS NOT CONNECTED TO THE POWER WHEN PERFORMING
THIS TASK
4

Safety Instructions
•Operating voltage for your appliance is 220-240Vat 50Hz.
•If you need help or are unsure how to install the unit, please contact Customer
Services or your retailer.
•Before plugging in the power supply, ensure that the voltage on the nameplate
corresponds to the working voltage of your electrical system in your home.
•Insert the plug into an efficient Ground (Earth) connection. If the socket hasno
Ground (Earth) contact or the plug does not match, we suggestyou call an authorised
electrician for assistance.
•We do not take responsibility for damages that occur due to Ungrounded (Un-
earthed) usage.
•Place your appliance in an area that is not exposed to direct sunlight.
•Your appliance should be placed at least 500 mm (50cms) away from stoves, ovens
and other heating cores.
•It should never be used outdoors or left in the rain.
•When your appliance is placed nextto achest freezer or freezer, there should be at
least 50 mm (5cms) betweenthem to prevent humidityon the outer surface.
•Do not place anything on your appliance and install the unit in a suitable place so that
there is at least 300 mm (30cms) clearance above the appliance.
•If placing your appliance nextto kitchen cabinets, leave 50 mm (5cms) betweenthem.
•The rear of the appliance should be at least 100 mm (10cms) away from the back wall.
•The appliance must be used in the vertical position and on a flat surface.
•To level the appliance use the adjustable feet on the front of the appliance.
•Do not place your appliance on a carpeted surface as this will prevent adequate
ventilation.
•Do not place hot food or containers in the appliance as this can cause damage your
appliance.
•Your appliance is only designed to be used in the home. If it is used for any other
purpose or it is not used correctly, then the manufacturer will accept no liability for any
damage that is caused.
5
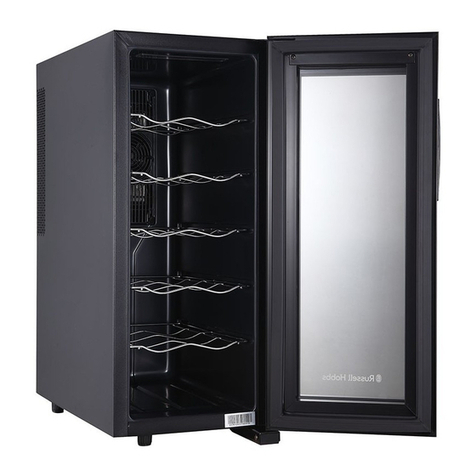
1. Temperature dial
2. Light
3. Fan
4. Removable wire shelf
5. Adjustable feet
6. Drip tray
7. Door hinge cover
8. Door shelf
9. Door seal
10. Door frame
Your Appliance and the Compartments
Partsmay vary accordingto the appliance model.
6
Unit & Spare Parts
For spare parts please contact customer services or your retailer.
Item Quantity
Shelf 1
Instruction Booklet 1

Where to put your appliance
This appliance should only be placed on a flat, solid surface.
Do not place your appliance on a carpeted surface as this will prevent
adequate ventilation.
Choose a dry and well-ventilated space. No less than 50mm (5cms) must be left
around the sides and 100mm (10cms) around the back of the appliance to allow
sufficient cooling.
Choose a location away from a heat source, e.g. direct sunlight, a radiator or
oven, etc.
The appliance should be positioned so that the plug is easily accessible.
7
(5cms)
(10cms)
(5cms)

Installation
•The unit should be kept away from direct sunlight.
•Remove all transport tapes and foam protection pieces. Clean the
interior of the appliance with a cloth dampened in lukewarm soap and
water. Wipe with clear water and wipe dry.
•When the appliance has been positioned, adjust the two front feet to
ensure the unit is stable. This is essential to ensure quiet running and
proper door opening /closing. See figure below.
•Plug in the cooler and adjust the temperature to the required level by
using the temperature adjustment dial as shown on page 5. Close the
door.
•Leave the appliance for a minimum of 3 hours for the correct
temperature to be reached before placing anything inside.
8

Usage Information
Thermostat Setting
Note:
The temperature of freshly stored items and how often the door is opened affects
the temperature in the compartment. If required, change the temperature setting.
•When you first switch on the appliance, to enable suitable cooling, the appliance
should work 24 hours continuously until it cools down to sufficient temperature.
•During this time do not open the door frequently or place a lot of items inside
the appliance.
•If the unit is switched off or unplugged, you must allow at least 5 minutes before
restarting or reconnecting the unit.
•Temperature selection - The temperature of the appliance is controlled manually by the
temperature adjustment dial.
•The appliance has a temperature range of 5°C to 15°C, such that ‘Low’ on the
temperature dial is around 5°C.
•Your appliance is designed to operate in the ambient temperature range stated in
the associated standards, according to the climate class stated on the information
label. We do not recommend operatingyour mini cooler out of the stated
temperatures, as the appliance may not operate to its optimum level. The
climate class for this product is SN/N, and will perform best between 10°C
and 32°C.
9

Usage Information
Shelves
•The wire shelf can be removed to allow for storage of larger items.
•Removing a shelf - Remove all of the items from the shelf that you want to remove. Lift
the shelf upwards and then gently pull the shelf away from the appliance.
•Replacing a shelf - Place the shelf back into a supporting guide slot and push it back as
far as it will go.
Important: Whilst the appliance can store larger items, you must make sure that they do
not prevent the door from shutting properly.
10

Cleaning and Maintenance
•Disconnect the appliance from the power supply before cleaning.
•Do not pour water directly over or on the appliance.
•The compartment should be cleaned periodically using a solution of bicarbonate of
soda and lukewarm water.
•Do not use abrasive products, detergents or soaps. After cleaning wipe down with a
damp clean cloth.
•Note: Reconnect to the power after you have dried your hands.
Do not use sharp metal tools as it may damage the appliance.
Do not use an electrical heater, this may cause an electric shock.
Defrosting
The cooler will defrost automatically if frost has started to build up.
Important Notes:
•If you do not use your appliance for a long period of time, e.g. when on summer
holidaysunplug it. Clean and leave the door open to prevent humidity and bad
odours.
11

Troubleshooting
12
Problem
Solution
The appliance doesn't work
Check
that the appliance is switched on.
Check
that there has not been a power cut.
Check
that the plug is not faulty.
Check
that the fuse has not blown.
Check
that the voltage is correct for the appliance.
The temperature inside the
appliance is not cold enough
Check
that the appliance is not overfilled.
Check
that the temperature is set to a suitable
temperature.
Check that the appliance is not placed in direct sunlight,
or
too near to a heating source.
Check
that the ambient temperature is within the
operation limits of the appliance.
Opening
the doors frequently will also reduce the
temperature within the
appliance.
Check that the door has not been left open
or c
heck that
the door gasket is clean and undamaged.
The temperature within the
appliance is too cold.
Increase
the working temperature
The inner surfaces of the
appliance are wet
Caused
by condensation -
dry the inside of the appliance.
The outer surfaces of the
appliance are wet
Caused
by condensation -
dry the outer of the appliance
carefully.
Unusual noises
Check that the appliance is on a flat, level surface and is
stable
. Try adjusting the feet if not level.
Check
the spacing's around the appliance
and ensure it is
not
touching other items.

Troubleshooting
13
Problem
Solution
Smell/odour
Check
that nothing
has leaked or any stagnant liquid is at
the bottom of the appliance. Clean if required.

Guarantee
This product is guaranteed for 12 months from the date of the original
purchase. If any defect arises due to faulty materials or workmanship you
must contact customer service or your retailer with the original proof of
purchase so a replacement or refund can be arranged.
Refund or replacement is at the discretion of manufacturer or retailer.
The following conditions apply:
•Customer service or your retailer will require a valid proof of purchase at
the point of replacement or refund.
•The product must be installed and used in accordance with the
instructions contained in this instruction guide and any other
instructions for use which has been supplied.
•It must be used for domestic purposes only and for its intended use.
•This guarantee does not cover wear and tear, damage, misuse or
consumable parts.
This does not affect your statutory rights.
Imported by
DESIGN & TRADE LIMITED
WIGAN
WN2 4AY
14

15
Technical Specification
Model number RHCLRF17-EU (B-EU)
Rated Voltage 230-240V/50Hz
Net capacity (litres) 17 litres
Dimensions (CMs): (H)35.0 x (W)38.5 x (D)41.5

Revision 1
This symbol is known as the 'Crossed-out wheelie bin Symbol'. When this symbol
is marked on a product/batteries, it means that the product/batteries should not
be disposed of with your general household waste. Only discard
electrical/electronic/battery items in separate collection schemes, which cater
for the recovery and recycling of materials contained within. Your co-operation
is vital to ensure the success of these schemes and for the protection of the
environment. For your nearest disposal facility contact you local council, or ask
your retailer for details.
We reserve the right, due to possible changes to design, to alter the instruction
manual without prior notice.
For Customer Services &
Spare Parts please email
europe@productcare.co.uk
or visit us at
www.productcare.co.uk
16

Inhaltsverzeichnis
Sicherheitshinweise
………………………………………
.18-20
Funktionen
und Ersatzteile
………………………………………
.21
Standort
………………………………………
.22
Installation
……………………………
.………… 23
Gerätefunktionen
……………………………………….
24-25
Reinigung
und Pflege
………………………………………
.26
Gerät
abtauen
………………………………………
.26
Fehlerbehebung
………………………………
.……… 27-28
Garantie
………………………………………
.29
Technische
Spezifikationen
…………………………
.…………… 30
Kundenservice
…………………………
.…………… 31
17

Bitte vor Gebrauch lesen
Sicherheitshinweise
•Bei diesem Gerät handelt es sich um einen Elektrokühlschrank mit Peltier-Element. Er
fällt laut Ökodesign-Richtlinie 2009/125/EG unter die Produktgruppe 10, sonstige
Geräte.
Warnhinweis: Lüftungsöffnungen des Gerätes nicht abdecken.
•Das Gerät darf nicht auf seinem Stromkabel liegen oder darauf abgestellt werden.
•Verwenden Sie in den Fächern des Gerätes keine elektrischen Geräte.
•Falls dieses Gerät ein Gerät mit Schloss ersetzt, muss das Schloss des Altgeräts vor dem
Wegstellen oder Entsorgen des Altgeräts zur Sicherheit entfernt werden. Das dient
dem Schutz von Kindern, die sich im Gerät einschließen könnten.
•Altgeräte sind ordnungsgemäß zu entsorgen. Überlassen Sie die Entsorgung eines
Altgerätes unbedingt dem zuständigen Wertstoffhof Ihrer Region. Bei Fragen wenden
Sie sich bitte an Ihre Gemeinde oder Ihren Händler. Bitte darauf achten, das Altgerät
vor der Abholung durch Ihre Wertstoffabfuhr nicht zu beschädigen.
Wichtiger Hinweis:
Bitte lesen Sie sich vor Installation und Einschalten Ihres Gerätes diese Broschüre durch.
Der Hersteller haftet nicht für eine nicht ordnungsgemäße Installation bzw. Nutzung.
18

Sicherheitshinweise
Warnhinweis:
•Dieses Produkt kann von Kindern ab 8 Jahren und von Personen mit physischen,
sensorischen oder geistigen Beeinträchtigungen von bzw. Personen mit mangelnder
Erfahrung und fehlender Kenntnis benutzt werden, wenn diese Personen beaufsichtigt
werden oder eingewiesen wurden, wie das Produkt sicher angewendet wird, und wenn sie
die möglichen Gefahrenquellen zu verstehen in der Lage sind. Lassen Sie Kinder nicht mit
dem Produkt spielen.
•Keine Adapter, Mehrfachstecker oder Verlängerungskabel verwenden.
•Keine beschädigten Stecker einstecken.
•Nicht am Stromkabel ziehen, es verdrehen oder beschädigen.
•Gerät oder andere Gegenstände nicht auf dem Stromkabel ablegen.
•Dieses Gerät darf von Erwachsenen bedient werden. Kinder sollten nicht mit dem Gerät
spielen oder sich auf/über die Tür lehnen dürfen.
•Das Gerät nicht mit nassen Händen am Strom anschließen oder vom Strom trennen.
Stromschlaggefahr.
•Legen Sie zur eigenen Sicherheit kein explosives oder brennbares Material in Ihren
Kühlschrank.
•Flaschen mit hohem Alkoholgehalt müssen gut verschlossen werden und waagerecht im
Gerät liegen.
•Gehäuse oder Oberteil des Gerätes nicht mit Schaumfolie abdecken. Die Geräteleistung
wäre dadurch beeinträchtigt.
•Um innenliegendes Zubehör nicht zu beschädigen, sollte es zum Transport fixiert werden.
Vor dem Einschalten:
•Beim ersten Einschalten können dem Gerät werkseitig Gerüche anhaften. Das ist
normal und sollte sich nach dem Kühlen geben.
•Vor Gebrauch: Geben Sie einen Teelöffel Natronpulver in warmes Wasser. Wischen
Sie damit das Neugerät mit einem feuchten Tuch komplett ab. Mit einem zweiten,
sauberen und feuchten Tuch wiederholen und nachtrocknen.
•BEI DIESEM VORGANG DARF DAS GERÄT NICHT AM STROM ANGESCHLOSSEN SEIN.
19

Sicherheitshinweise
•Die Betriebsspannung Ihres Gerätes liegt bei 220 –240 Vund 50 Hz.
•Falls Sie Hilfe benötigen oder Fragen zur Installation des Gerätes haben, wenden Sie sich
bitte an unseren Kundenservice oder Ihren Händler.
•Vor dem Einstecken in die Steckdose sollten Sie überprüfen, ob die Spannung auf dem
Typenschild der Spannung Ihres Stromkreises zu Hause entspricht.
•Stecken Sie den Stecker in eine sichere Masseverbindung (geerdet). Verfügt die Steckdose
nicht über einen Masseanschluss (Erde) oder passt der Stecker nicht, wenden Sie sich am
besten an einen autorisierten Elektriker.
•Wir haften nicht für Geräteschäden aufgrund von nicht geerdeten Steckdosen.
•Stellen Sie Ihr Gerät so auf, dass es keiner direkten Sonnenbestrahlung ausgesetzt ist.
•Ihr Gerät sollte mindestens 50 cm Abstand zu Öfen, Herden und sonstigen Wärmequellen
haben.
•Verwenden Sie das Gerät nicht draußen bzw. setzen Sie es keinem Regen aus.
•Steht Ihr Gerät neben einer Kühltruhe oder einem Gefrierschrank, ist ein Mindestabstand
von 5cm zwischen den Geräten einzuhalten, damit die Außenflächen nicht beschlagen.
•Stellen Sie keine Gegenstände auf dem Gerät ab. Installieren Sie das Gerät an einem
geeigneten Ort mit einem Mindestabstand von 30 cm über der Geräteoberseite.
•Falls das Gerät neben Küchenschränken steht, halten Sie einen Abstand von 5cm ein.
•Die Geräterückseite muss einen Mindestabstand von 10 cm zur rückwärtigen Wand haben.
•Das Gerät muss hochkant auf einem flachen Untergrund stehen.
•Mit den vorne einstellbaren Füßen können Sie das Gerät ausrichten.
•Stellen Sie das Gerät nicht auf einen Teppichboden, da die Belüftung dadurch beeinträchtigt
wäre.
•Warme Lebensmittel oder Behälter im Gerät können zu Schäden am Gerät führen.
•Ihr Gerät ist nur für den Hausgebrauch bestimmt. Bei Verwendung für einen anderen als den
bestimmungsgemäßen Zweck oder bei unsachgemäßem Gebrauch erlischt die
Herstellergarantie für entstandene Schäden.
20
This manual suits for next models
1
Table of contents
Languages:
Other Russell Hobbs Accessories manuals

Russell Hobbs
Russell Hobbs RH12WC3 User manual

Russell Hobbs
Russell Hobbs RH32DZWC1 User manual

Russell Hobbs
Russell Hobbs RH8WC2-SB User manual

Russell Hobbs
Russell Hobbs RHESB6001 User manual

Russell Hobbs
Russell Hobbs 14447 User manual

Russell Hobbs
Russell Hobbs RH4CLR1001 User manual

Russell Hobbs
Russell Hobbs RHESB8001 User manual

Russell Hobbs
Russell Hobbs RHBC48 User manual

Russell Hobbs
Russell Hobbs RH8WC2 User manual

Russell Hobbs
Russell Hobbs RHEK600 Installation instructions manual