Russell Hobbs RHESB6001 User manual

Electric Blanket
PLEASE RETAIN
FOR FUTURE REFERENCE
Model Number:
RHESB6001 - 60W
RHEDB6002 - 90W
RHEKB6003 - 2 x 60W
220-240V AC 50Hz

Page(s)
Safety Instructions and Electrical Safety
3 - 5
Securing your Electric Blanket
6
Feature
Diagram 7
Using
your Electric Blanket 8-10
Controls
8
Cleaning
and Care 11-13
Problem
Solving 14
Guarantee
and Customer Services 15
Connection
to the Mains Supply 16
Specification
17
Notes
18 -19
Disposable
Information 20
CONTENTS
Page 2

SAFETY INSTRUCTIONS
When using electrical appliances, basic safety precautions should always be observed,
including the following:
•Read all instructions.
•Check that your mains voltage corresponds with the rating on the appliance.
•To protect against electrical shock do not immerse cord, plug, or appliance in
water or other liquid. Do not operate with wet hands.
•Do not operate any appliance with a damaged cord or plug, or after the appliance
malfunctions or is dropped or damaged in any manner.
•The use of accessory attachments not recommended by the appliance
manufacturer may cause fire, electric shock or injury.
•This appliance must not be immersed when in use or plugged in
•To disconnect remove the plug from the mains outlet. Do not pull the plug out by
the cord.
•The blanket must not be used over or under a waterbed.
•Never use the appliance near a bath, shower or a swimming pool.
•Never place flammable objects or clothing on top of the appliance.
•Never use the appliance in a room with explosive gas such as petrol, or while
using any kinds of flammable glues, sprays or solvents.
•This appliance is not intended for commercial use
•This product is intended for household use only. Not intended for use in
hospitals.
•Do not use outdoors.
•This product is only intended for heating.
•If overheating should occur, the built-in overheating safety device will shut the
appliance off.
•The installation of a residual current device (safety switch) is recommended to
provide additional safety protection when using electrical appliances. It is
advisable that a safety switch with a rated residual operating current not
exceeding 30mA be installed in the electrical circuit. See your electrician for
professional advice.
•Tie this blanket securely to the bed.
•Use this blanket as an under blanket only. Not recommended for futons or similar
folding bedding systems.
•This blanket is not recommended to be used with an adjustable bed. If used on an
adjustable bed, check that the blanket or cord can not become caught or rucked.
Page 3

SAFETY INSTRUCTIONS
•Make sure that the heating area (wire element) on any side of the bed does not
hang over the edge of the mattress and that the following instructions are read
carefully before using the blanket.
•Do not use this blanket for infants, persons with no/limited mobility or heat
sensitivity conditions.
•Do not use with wired area tucked in.
•Do not tuck in.
•Do not insert pins.
•Use only for human use, not for pets
•Warning: It is hazardous for anyone other than a competent person to carry out
any service or repair operation which involves the removal of a cover which gives
protection against exposure to electrical parts.
•Warning: Children should not use this appliance. Close supervision is necessary
when any appliances are used near children.
•Warning: This appliance is not intended for use by persons (including children)
with reduced physical, sensory or mental capabilities, or lack of experience and
knowledge, unless they have been given supervision or instruction concerning use
of the appliance by a person responsible for their safety. Children should be
supervised to make sure that they do not play with the appliance.
•It is recommended that a qualified and registered person inspect your electric
blanket after each 3 years of use.
•This blanket must be kept in the fully spread condition at all times during use to
avoid overheating. It is imperative that the blanket is frequently inspected to
ensure that this condition is being maintained.
•Bed clothes should not be folded back when the blanket is switched on. Do not
leave heavy objects on the bed when the unit is switched on.
•Arrange the blanket so that it is not beneath pillows and / or bolsters.
•Long periods of use at the high setting can result in skin irritation or burns.
•Keep control unit away from an open window.
•Be sure that this blanket is used only on an alternating current supply circuit of the
correct voltage.
•The flexible power supply and switch must, as for as practicable, be kept outside
the bed.
•Switch off at the power outlet and remove the plug when this blanket is not in
actual use.
•Do not use if moist or wet.
•Do not use rucked or folded.
Page 4

SAFETY INSTRUCTIONS
•Do not switch the power on if the blanket is wet or in a folded state.
•Do not dry-clean this blanket. Cleaning liquids may have a deleterious effect on the
insulation or covering of the heating unit. It is recommended you follow
instructions for localized soiling or hand washing if soiling occurs.
•If any abnormality or defect in operation of this blanket is observed, discontinue its
use immediately and consult the manufacturer or a licensed electrician.
•Regularly inspect the supply cord, plug, controller and blanket for any damage. If
found damaged in any way, immediately cease use of the blanket and return to
store or authorized service agent for inspection.
•Avoid pressing creases into the appliance.
•Clean this blanket only as per instruction supplied with this blanket.
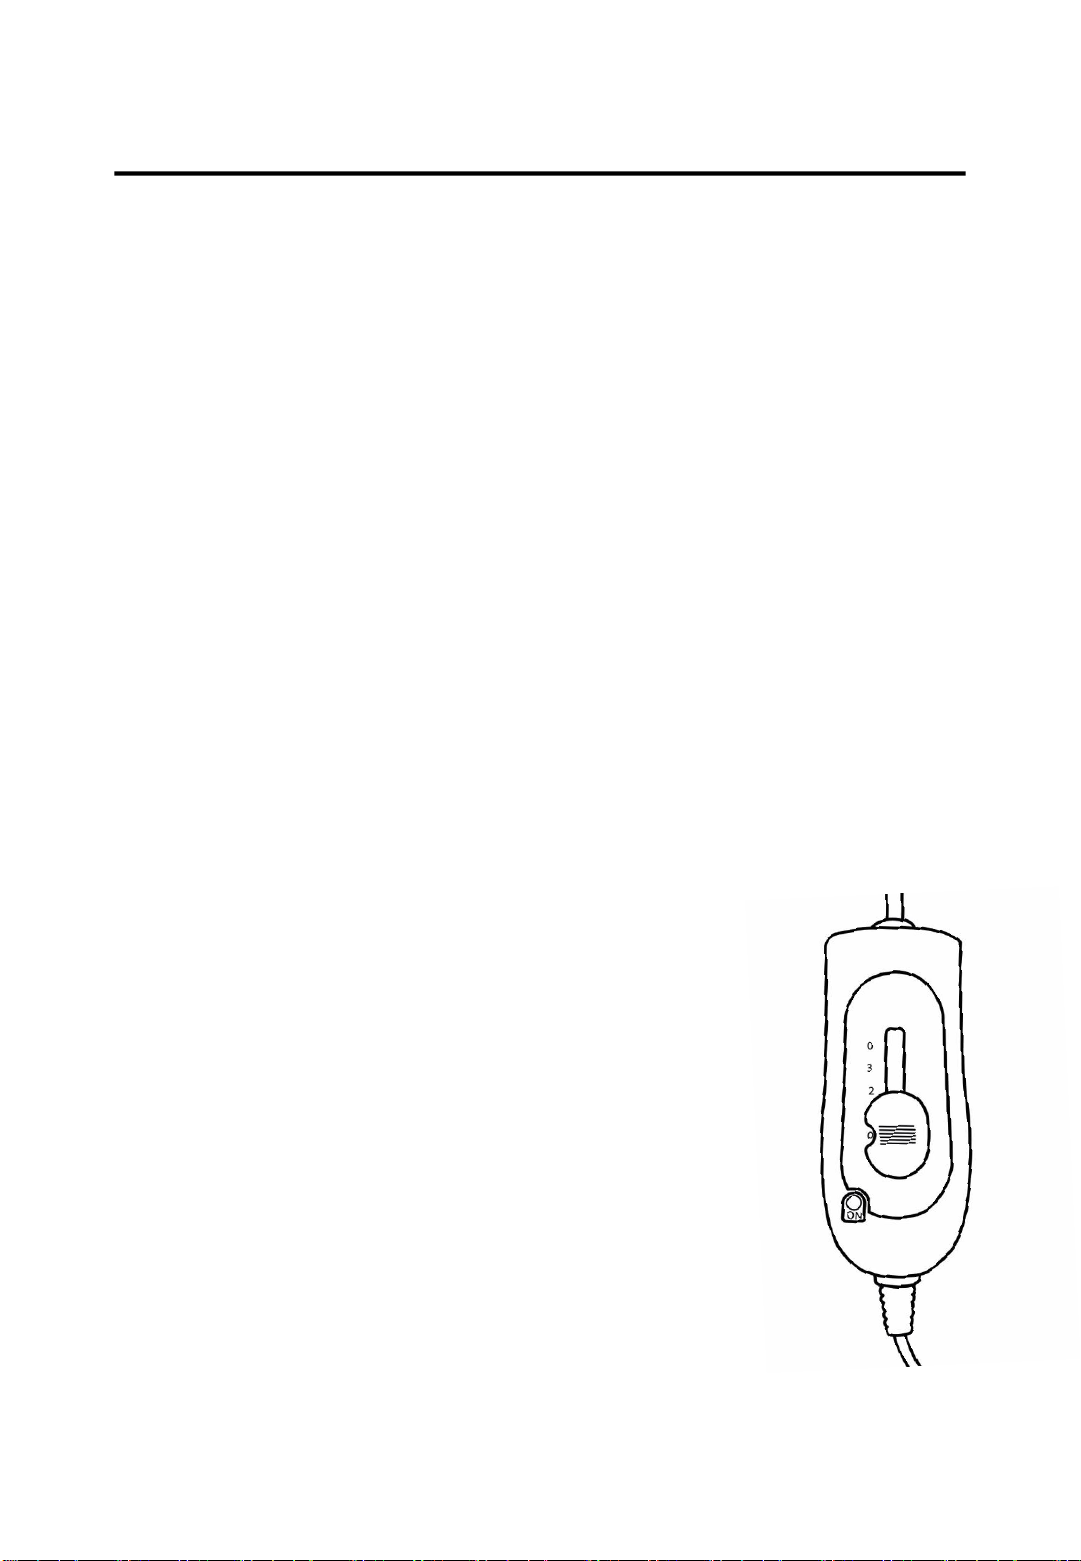
•The appliance is only to be used with the type of control unit marked on the
appliance.
•Avoid creasing the appliance by placing items on top of it during storage.
•When storing the appliance allow it to cool down before folding.
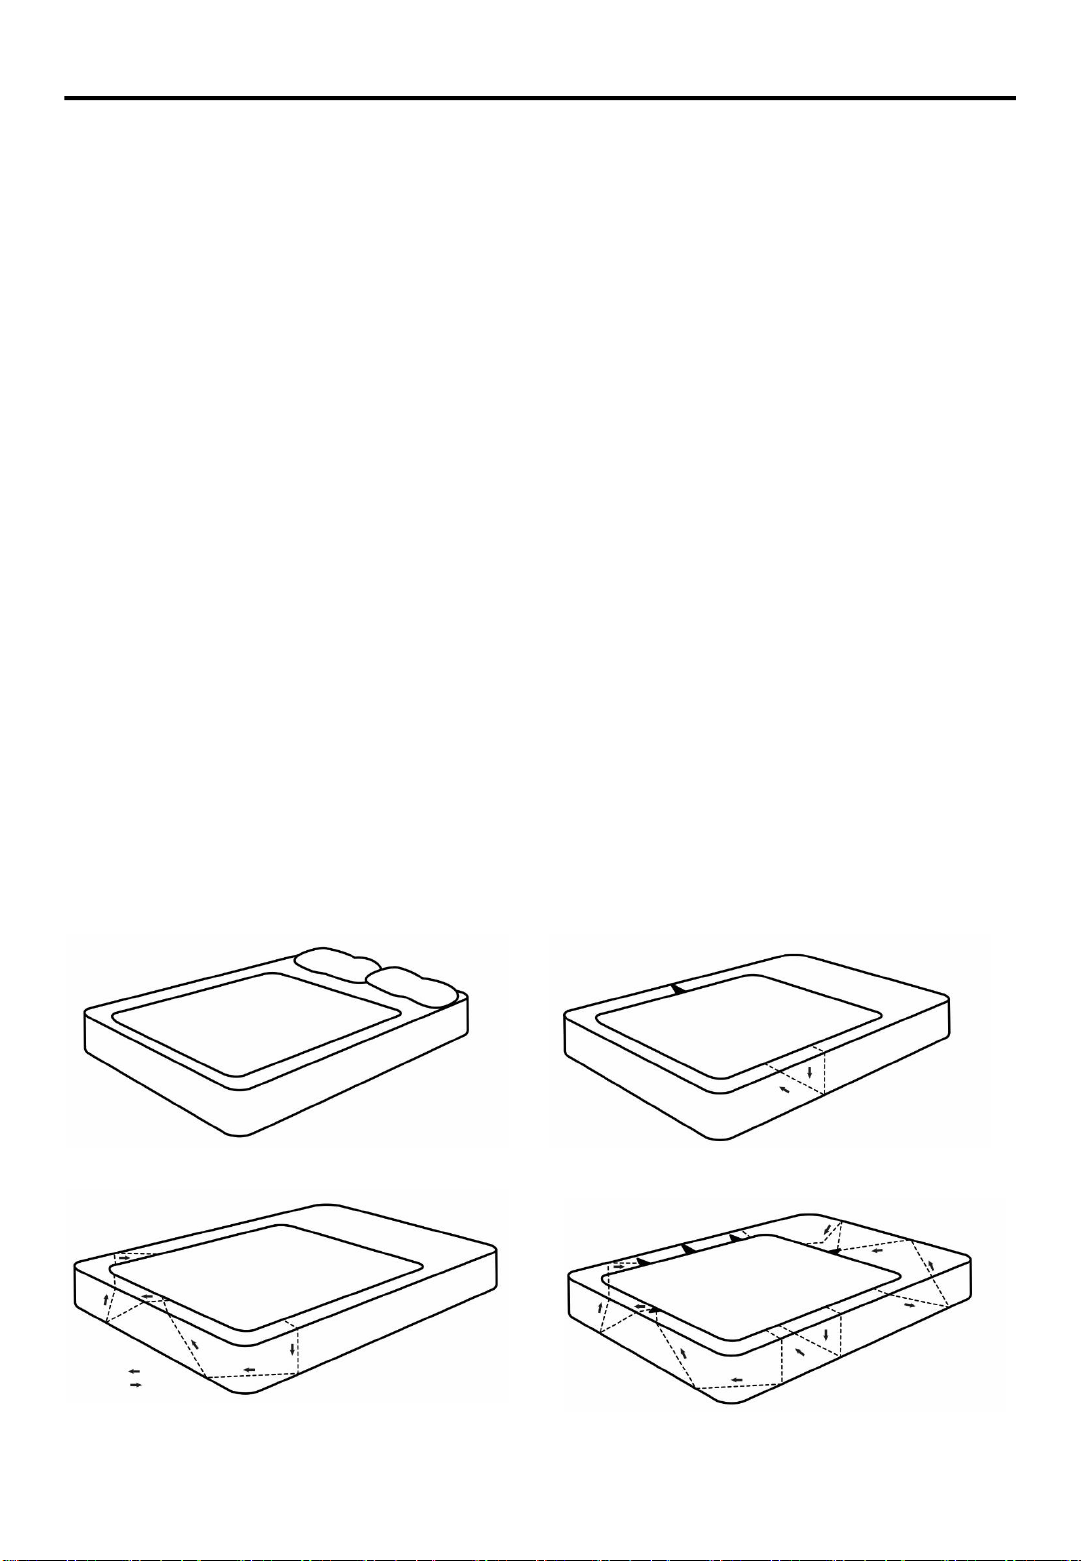
•When storing, fold neatly but not tightly (or roll) in the original packaging without
sharp bends in the heating element and store where no other objects will be
placed upon it.
•There are no customer serviceable parts inside, Have the blanket serviced by a
qualified service agent should the unit require access to internal components.
Electrical Safety
THIS APPLIANCE MUST BE PLUGGED INTO AN EARTHED SOCKET
•Before switching on, make sure that the voltage of your electricity supply is the
same as that indicated on the rating plate. This product is designed to operate on
220 –240V AC; 50Hz. Connection to any other power source may damage the unit.
•This product may be fitted with a non re-wireable plug. If it is necessary to change
the fuse in the plug, the fuse cover must be refitted. If the fuse cover becomes lost
or damaged, the plug must not be used until a suitable replacement is obtained.
•If the plug has to be changed because it is not suitable for your socket, or becomes
damaged in any way, it should be cut off and an appropriate plug fitted. This should
be carried out by a qualified electrician. The plug removed must be disposed of
safely, as insertion into a 13 Amp socket is likely to cause an electrical hazard.
Page 5

SECURING YOUR ELECTRIC BLANKET
Note:
•Use only as an under blanket and do not use above the occupant of the bed.
•This product can be used with any type of bedding including waterproof bed
protectors.
•Tie this blanket securely to the bed.
•Ensure the blanket is not folded, rucked or creased. When in use, do not cover
with pillows.
•Place the blanket on directly the mattress, leaving room for the pillow and with the
mains lead at the pillow end (you must ensure the control switch end is at the
head of the bed, with the connector facing upwards).
•To accommodate for left and right hand use, it is safe to reverse the blanket.
•Remove tags from tie tapes.
•Pass the middle tie tape under the middle of the mattress and through the middle
loop on the opposite side. Tie tightly (fig 1)
•Pass end tape under the corresponding bottom corner of the mattress and through
the end loop, down under the other bottom corner of the mattress and through
the bottom side loop (fig 2). Tie tape firmly.
•Repeat procedure for the tape at the top end.
•The blanket should now be firmly taped to mattress (fig 3).
Page 6
Fig 1
Fig 3
Fig 2

FEATURE DIAGRAM
For Customer Services & Spare Parts please call 0345 209 7461
Or visit us at https://mda.russellhobbs.com
1. Electric blanket
2. Detachable power cord
3. Controller
4. Ties (these are located on
the side of the blanket)
Page 7
1
2
3
4

USING YOUR ELECTRIC BLANKET
Page 8
Controls
Note: On initial use it is recommended that the blanket be set on
setting ‘3’ for 1-2 hours before sleeping on the bed and then set
to setting ‘1’ for continuous use. Preset on ‘3’ will assist in drying
out any moisture which has been accumulated in the mattress.
Note: You may notice an odour when using the blanket for the
first time, due to the insulation material. This is harmless and
will subside quickly.
The control has Braille markings, which allows for easy
temperature adjustment in the dark.
The settings are:
0 - OFF
1 - Gentle Heat
2 - Medium Heat
3 - Pre-heat - this setting is recommended
for Pre-heating the bed 1 to 2 hours before
use with standard bedding. DO NOT SLEEP
WITH YOUR BLANKET ON THIS SETTING.
There is an enclosed red light which illuminates when the blanket
is switched on.

USING YOUR ELECTRIC BLANKET
Page 9
1. Ensure the blanket is fitted to the bed correctly, see the
Securing your electric blanket section.
2. Plug the power lead into the closest socket, using an extension
lead, if needed, to ensure that the lead is not stretched.
3. Preheating the bed by sliding the heat setting on the control
switch to heat level 3, depending on the level of the heat
required. Allow approximately 1-2 hours for the blanket to
heat the bed thoroughly, although this time may vary
depending on the room temperature and type of bedding
used.
4. In cold weather, all electric blankets will take longer to heat
the bed to a comfortable temperature. Please allow for this.
All night use
•Blankets are perfectly safe to be used all night. However we
recommend using the heat setting 1.
•This setting will provide safe and comfortable heat to sleep on
all night.
Note: Setting 1 can be used to air the bed
Note: Always ensure that the slider switch is moved to the 0
(OFF) position when you get up the next day, or after airing the
bed.

USING YOUR ELECTRIC BLANKET
Page 10
Safety Protective Devices
The appliance is fitted with an over heat protection system
The system will remain dormant indefinitely as long as the
blanket is operating in the normal temperature range. If, for
any reason, the blanket is operated in an abnormal situation
or condition which would otherwise have induced a rapid
temperature rise high enough to constitute a hazard, the over
heat protection should intervene by cutting off the supply
current before the temperature reaches the point at which
damage may occur. In the event of the over heat protection
operating, the blanket will cease to function.
Note: No attempt should be made to repair the blanket or
have it repaired locally. The switch supplied must never be
replaced since the specialised components are not generally
available.

WARNING: Electrical Shock Hazard.
Note: Before cleaning, ensure the control is set to the ‘0’
Position (OFF) and remove the plug from the wall socket.
Note: Do not allow the controller to come in contact with any
wet solution.
Before you clean the appliance, disconnect the mains plug from
the wall socket.
Detach the control
•Lift the tab on the controller attached to the plastic
connector on the blanket, carefully pull the plug connector
away from the blanket. The controller MUST never be
immersed in water.
•The heating wires within the electric blanket are fully water-
proof.
•Roll up each of the tie tapes before cleaning or storing and
secure them to avoid tangling.
CLEANING AND CARE
Page 11
Disconnect
before
cleaning

CLEANING AND CARE
Page 12
Washing instructions
Only use the below instructions:
•Hand wash or spot clean
•Do not machine wash above 40°c
•Do not tumble dry
•Do not wring
•Do not bleach
•Do not dry clean
•Do not iron
•Do not immerse the controller, supply cord or plug in any
liquid.
Spot Cleaning
Sponge the affected area using a luke warm neutral detergent
or mild soapy solution. Follow this with a sponging using a clean
water solution. Remove any excess water by compressing the
wet area between absorbent towels.
Machine Washing
•Immerse the blanket only (do not allow the controller to
come in contact with any wet solution) in luke warm neutral
detergent or mild soapy solution for 15 minutes, ensure the
water temperature is lower than 40℃.
•Wash in the washing machine on the shortest cycle at low
temperature on a low spin washing and drying cycle.

CLEANING AND CARE
Page 13
•Rinse the blanket thoroughly in clean fresh water.
•Unfolded the blanket and allow to dry naturally.
Hand Washing
•Immerse the blanket only (do not allow the controller to
come in contact with any wet solution) in a luke warm
neutral detergent or mild soapy solution.
•Soak for five minutes, remove from the solution, and gently
squeeze the solution through the blanket.
•Rinse the blanket only (do not allow the controller to come
in contact with any wet solution) thoroughly in clean luke
warm water, gently squeeze and drain the excess water from
the blanket.
•Do not wring the blanket.
Drying
•Do not tumble dry
•Do not iron
•Do not use pegs to secure the blanket in position.
•Do not dry with a hair dryer or heater.
•Drape the blanket across a clothes line and drip dry.
Note: Ensure the controls are in a position that will not allow
dripping water to fall onto any part of the controller.
Storage
•When not in use, pack the blanket in its original packaging
for best protection and store in a cool, clean and dry
location. Avoid pressing sharp creases into the blanket.

PROBLEM SOLVING
Page 14
My appliance does not work when I turn it on:
1. Check that your appliance is plugged in and the power is
turned on at the mains socket.
2. Try another mains socket.
3. Check that the control has been set to the correct setting
and is not in the off position
4. If the appliance still doesn’t work, do not try to repair it
yourself.
If your appliance power is automatically cut off, follow the step
below:
1. Unplug your appliance from the mains socket and allow it to
completely cool down.
2. Inspect your appliance. If there are any signs of physical
damage (e.g. melting, or burning of the case), do not
attempt to use the appliance. Please leave all maintenance
work to qualified personnel.
3. Plug in the appliance and switch it on again. If it cuts off
again, move the appliance to a better ventilated location.

At Russell Hobbs, we take all our customer feedback seriously.
Feel free to contact our Customer Service Team, on 0345 209 7461,
who will be more than happy to assist you.
This product is guaranteed for 12 months from the date of the original
purchase. If any defect arises due to faulty materials or workmanship,
the faulty product must be returned to the place of purchase.
Refund or replacement is at the discretion of the retailer.
The following conditions apply:
• The product must be returned to the retailer with the original proof of
purchase.
• The product must be installed and used in accordance with the
instructions contained in this instruction guide and any other
instructions for use which are supplied.
• It must be used for domestic purposes only and for its intended use.
• This warranty does not cover wear and tear, damage, misuse or
consumable parts.
This does not affect your statutory rights.
Imported by
G2S LIMITED
WIGAN
WN2 4AY
GUARANTEE AND CUSTOMER
SERVICES
Page 15
For Customer Services & Spare Parts please call 0345 209 7461
Or visit us at https://mda.russellhobbs.com

CONNECTION TO THE MAINS
SUPPLY
Page 16
This appliance is designed to operate from a mains supply of
220-240V~50Hz.
Check that the voltage marked on the product corresponds
with your supply voltage.
How to change the fuse
1. Slot the end of a screwdriver into the recess in the fuse
holder of the plug.
2. Pull the fuse holder upwards until free of the plug and slide
the fuse out.
3. Replace the fuse and replace fuse holder, pushing down
until locked into place.
Important: Only ever use a 13 amp fuse.

SPECIFICATION
Page 17
Model number RHESB6001
Rated voltage 220V -240V ~ 50Hz
Power consumption 60W
Product dimensions (CMS) (W)70 x (L)150
Model number RHEDB6002
Rated voltage 220V -240V ~ 50Hz
Power consumption 90W
Product dimensions (CMS) (W)140 x (L)150
Model number RHEKB6003
Rated voltage 220V -240V ~ 50Hz
Power consumption 2 x 60W
Product dimensions (CMS) (W)150 x (L)200

NOTES
Page 18

NOTES
Page 19

Page 20
This symbol is known as the 'Crossed-out wheelie bin Symbol'. When
this symbol is marked on a product/batteries, it means that the
product/batteries should not be disposed of with your general
household waste. Only discard electrical/electronic/battery items in
separate collection schemes, which cater for the recovery and recycling
of materials contained within. Your co-operation is vital to make sure the
success of these schemes and for the protection of the environment. For
your nearest disposal facility, visit www.recycle-more.co.uk or ask in
store for details. We reserve the right due to possible changes to design
to alter the instruction manual without prior notice.
Revision 1
Model Number:
RHESB6001
RHEDB6002
RHEKB6003
For Customer Services & Spare
Parts please call 03452097461
Or visit us at
https://mda.russellhobbs.com
This manual suits for next models
2
Table of contents
Other Russell Hobbs Accessories manuals

Russell Hobbs
Russell Hobbs RH32DZWC1 User manual

Russell Hobbs
Russell Hobbs RHCLRF17-EU User manual

Russell Hobbs
Russell Hobbs RHEK600 Installation instructions manual

Russell Hobbs
Russell Hobbs RHBC48 User manual

Russell Hobbs
Russell Hobbs RH4CLR1001 User manual

Russell Hobbs
Russell Hobbs RH8WC2 User manual

Russell Hobbs
Russell Hobbs RH8WC2-SB User manual

Russell Hobbs
Russell Hobbs RH12WC3 User manual

Russell Hobbs
Russell Hobbs RHESB8001 User manual

Russell Hobbs
Russell Hobbs 14447 User manual