manuals.online logo
Brands
  1. Home
  2. •
  3. Brands
  4. •
  5. Russell Hobbs
  6. •
  7. Refrigerator
  8. •
  9. Russell Hobbs RHLF1 User manual

Russell Hobbs RHLF1 User manual

Other Russell Hobbs Refrigerator manuals
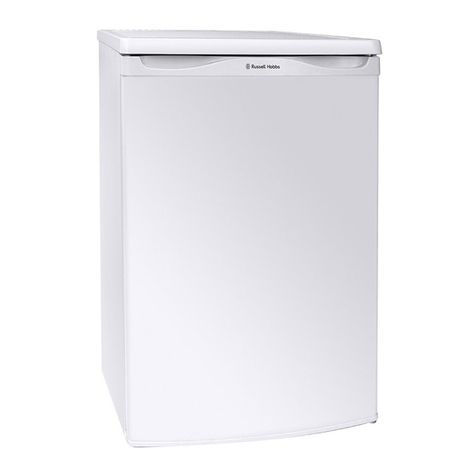
Russell Hobbs RHUCLF55-H User manual

Russell Hobbs

Russell Hobbs RHUCLF55-H User manual

Russell Hobbs RHBLF1 User manual

Russell Hobbs

Russell Hobbs RHBLF1 User manual

Russell Hobbs RHUCLF2W User manual

Russell Hobbs

Russell Hobbs RHUCLF2W User manual

Russell Hobbs RHBI55LF122-N User manual

Russell Hobbs

Russell Hobbs RHBI55LF122-N User manual

Russell Hobbs RH55FF176W User manual

Russell Hobbs

Russell Hobbs RH55FF176W User manual

Russell Hobbs RHTTF67B-LCK User manual

Russell Hobbs

Russell Hobbs RHTTF67B-LCK User manual

Russell Hobbs RH55FF171B User manual

Russell Hobbs

Russell Hobbs RH55FF171B User manual

Russell Hobbs RHUCLF1 User manual

Russell Hobbs

Russell Hobbs RHUCLF1 User manual

Russell Hobbs RH144TMFF54 User manual

Russell Hobbs

Russell Hobbs RH144TMFF54 User manual

Russell Hobbs RHBI55LF122 User manual

Russell Hobbs

Russell Hobbs RHBI55LF122 User manual

Russell Hobbs RHUCF55-H User manual

Russell Hobbs

Russell Hobbs RHUCF55-H User manual

Russell Hobbs RH50FF144 User manual

Russell Hobbs

Russell Hobbs RH50FF144 User manual

Russell Hobbs RHTTLF1 User manual

Russell Hobbs

Russell Hobbs RHTTLF1 User manual

Russell Hobbs RH14CLR4001B User manual

Russell Hobbs

Russell Hobbs RH14CLR4001B User manual

Russell Hobbs RHTTLDR2 User manual

Russell Hobbs

Russell Hobbs RHTTLDR2 User manual
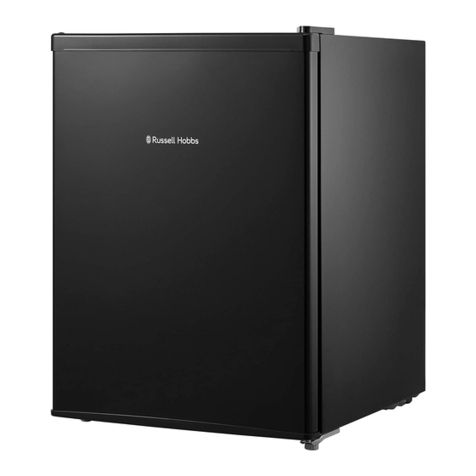
Russell Hobbs RH54FF170B User manual

Russell Hobbs

Russell Hobbs RH54FF170B User manual

Russell Hobbs RHBU60FRIDGE-N User manual

Russell Hobbs

Russell Hobbs RHBU60FRIDGE-N User manual

Russell Hobbs RH55UCLF4B User manual

Russell Hobbs

Russell Hobbs RH55UCLF4B User manual

Russell Hobbs RHTTLF1 User manual

Russell Hobbs

Russell Hobbs RHTTLF1 User manual
Russell Hobbs RHTTLF1R User manual

Russell Hobbs

Russell Hobbs RHTTLF1R User manual

Russell Hobbs RH90FF176B User manual

Russell Hobbs

Russell Hobbs RH90FF176B User manual

Russell Hobbs RH50FF145 User manual

Russell Hobbs

Russell Hobbs RH50FF145 User manual

Russell Hobbs RHBI55177LF2 User manual

Russell Hobbs

Russell Hobbs RHBI55177LF2 User manual

Russell Hobbs RH55FF171-ML User manual
Russell Hobbs

Russell Hobbs RH55FF171-ML User manual

Popular Refrigerator manuals by other brands

Frigidaire FRS26TS7DW2 Use & care manual

Frigidaire

Frigidaire FRS26TS7DW2 Use & care manual

Fisher Scientific 10ECEEFSA manual

Fisher Scientific

Fisher Scientific 10ECEEFSA manual

Summit FF22BDRSS user manual

Summit

Summit FF22BDRSS user manual

Frigidaire FFRU17B2QWE use & care

Frigidaire

Frigidaire FFRU17B2QWE use & care

Hotpoint ENBGH 19xxx FW operating instructions

Hotpoint

Hotpoint ENBGH 19xxx FW operating instructions

Hitachi R-SG28KPH instruction manual

Hitachi

Hitachi R-SG28KPH instruction manual

Dometic RMH 7390 L operating instructions

Dometic

Dometic RMH 7390 L operating instructions

AEG S71700TSW0 user manual

AEG

AEG S71700TSW0 user manual

Electrolux ENB3669 Instruction book

Electrolux

Electrolux ENB3669 Instruction book

Electrolux ERN 2930 Instruction book

Electrolux

Electrolux ERN 2930 Instruction book

Beko GNE 60520 X user manual

Beko

Beko GNE 60520 X user manual

Jenn-Air JUR248LBES00 Use & care guide

Jenn-Air

Jenn-Air JUR248LBES00 Use & care guide

Dometic RGE 4000 Installation and operating manual

Dometic

Dometic RGE 4000 Installation and operating manual

Dometic L-0191B Brochure & specs

Dometic

Dometic L-0191B Brochure & specs

LG LRBP1031W - 10 Cu. Ft. Cabinet Depth Bottom Freezer... owner's guide

LG

LG LRBP1031W - 10 Cu. Ft. Cabinet Depth Bottom Freezer... owner's guide

Daewoo RN-33 Series user manual

Daewoo

Daewoo RN-33 Series user manual

Haier RF-8888-174 Service manual

Haier

Haier RF-8888-174 Service manual

Blaupunkt 5CK2 Series user manual

Blaupunkt

Blaupunkt 5CK2 Series user manual

manuals.online logo
manuals.online logoBrands
  • About & Mission
  • Contact us
  • Privacy Policy
  • Terms and Conditions

Copyright 2025 Manuals.Online. All Rights Reserved.

For Customer Services & Spare Parts please call 0345 208 8750
Opening times: Monday - Friday 8am –8pm & Saturday 9am –1pm
or visit us at www.productcare.co.uk
Installation
•This appliance can be installed as a built in unit only. The clearances shown in
the below drawing must be followed.
•Avoid damaging the product during installation, positioning of the appliance
requires two people in order to avoid injuries or damage to the appliance.
•Your appliance should not be located in direct sunlight or exposed to
continuous heat or extremes of temperature (e.g. next to a radiator or boiler). If
this is not feasible, then you should install an insulation plate between the
appliance and the adjacent heat source.
•You should check whether there is an electrical socket available, which will be
accessible after your appliance is installed.
•Place the appliance flatly and firmly on a solid base.
•Be sure to leave enough space for the opening of the door, to avoid damage to
the appliance or personal injury
•The aperture size has to be a minimum of (H)1775 x (W)560 x (D)555mm. The
cabinet in which the appliance is housed in must have a ventilation recess of
(W)540 x (D)50mm.
•The wooden cabinet the appliance is to be housed in must not be enclosed. The
back wooden panel of the cabinet must either be removed completely or cut
out in accordance with the diagram on page 12. This is to allow sufficient air
circulation to cool down the condenser unit for energy efficiency.
•The accessories that are required for installation are detailed below:
2 x Large Screws 1 x Joint
cover
16 x Screws (flat head)
4 x Door guide
4 x Door guide cover
4 x Door guide
holder
4 x Door guide
holder cover
8 x Screws (round head)
Blanking covers
2 x hinge
cover
For Customer Services & Spare Parts please call 0345 208 8750
Opening times: Monday - Friday 8am –8pm & Saturday 9am –1pm
or visit us at www.productcare.co.uk
Installation
The aperture size has to be a minimum of (H)1775 x (W)560 x (D)555mm. The
cabinet in which the appliance is housed in must have a ventilation recess of
(W)540 x (D)50mm.
Installation
The cabinet in which the appliance is housed in must have a ventilation recess of
(W)540 x (D)50mm.
Carefully push the appliance into the housing, ensuring that the cabinet doors are
able to fully close.
For Customer Services & Spare Parts please call 0345 208 8750
Opening times: Monday - Friday 8am –8pm & Saturday 9am –1pm
or visit us at www.productcare.co.uk
Wooden back panel
cut out (if applicable)
For Customer Services & Spare Parts please call 0345 208 8750
Opening times: Monday - Friday 8am –8pm & Saturday 9am –1pm
or visit us at www.productcare.co.uk
Installation
Rollout the joint cover and on the side of the appliance without the hinges press it
between the appliance and the inside of the cabinet wall (start from the bottom
and work upwards).
Open the door and push the side of the appliance without the hinges against the
side of cabinet wall. Fix the appliance in two places, 4 round headed screws in the
top plinth at the top of the appliance and the 2 large screws in the foot at the
bottom of the appliance that does not hinge the freezer door.
For Customer Services & Spare Parts please call 0345 208 8750
Opening times: Monday - Friday 8am –8pm & Saturday 9am –1pm
or visit us at www.productcare.co.uk
Installation
Apply blanking covers by clipping them in to place at the top metal plinth at the
top of the appliance.
Apply a blanking cover by clipping it in to place on the foot at the bottom of the
appliance that does not hinge the freezer door.
Installation –Door attachment
1. There are 4 packs that will have parts A,B,C and D (see the below), please
separate the parts of each different pack
2. Open the cabinet door and the fridge door, mark on the back of the cabinet
door where the top of the fridge door reaches. Place the door guide (part A) on
the back of the cabinet door, in the location shown below and mark the position of
first hole and the last hole on the door guide. Fix the door guide into place with 2
flat headed screws.
3. Clip the door guide cover (part C) on the door guide (part A) hiding the screws.
For Customer Services & Spare Parts please call 0345 208 8750
Opening times: Monday - Friday 8am –8pm & Saturday 9am –1pm
or visit us at www.productcare.co.uk
A. Door guide
B. Door guide holder
C. Door guide cover
D. Door guide holder cover
A B
C
D
Installation –Door attachment
4. Open the appliance door and the cabinet door to 90°, insert the door guide
holder (part B) on to the door guide (part A). Push the appliance door and the
cabinet door together and mark 2 holes on the end of the appliance door as
indicated in below (these may be pre-drilled).
5. Pull the appliance door away from the cabinet door (leaving the door guide
holder (part B) still attached to the door guide (part A). Carefully drill 2 x 2mm Φ
pilot holes, 8mm from the outer edge of the door (these may be pre-drilled). Push
the appliance door and the cabinet door together, make sure the door guide
holder (part B) is still attached to the door guide (part A) and fix it with 2 flat
headed screws. If any adjustment that is needed then use the clearance space in
the screw slots of the door guide holder (part B) on to the door guide (part A).
6. Before clipping the door guide holder cover (part D) on to the door guide holder
(part B)you must check that the cabinet door closes correctly. If it does clip the
cover in place.
For Customer Services & Spare Parts please call 0345 208 8750
Opening times: Monday - Friday 8am –8pm & Saturday 9am –1pm
or visit us at www.productcare.co.uk
For Customer Services & Spare Parts please call 0345 208 8750
Opening times: Monday - Friday 8am –8pm & Saturday 9am –1pm
or visit us at www.productcare.co.uk
Installation –Door attachment
7. You will then have to repeat these steps at the bottom of the fridge door, please
ensure you follow the below diagram when locating the door guide (part A) on the
bottom of the fridge door.
8. Repeat all steps for the freezer door, once this is done the installation should
look like the below image.
Installation –Hinge cover
1. Loose the 2 screws from the middle hinge and adjust and fasten connecting
bracket so it flush with the kitchen cabinet. Fix it in place with 2 round headed
screws and screw the hinge back on to the appliance.
2. Slot on the hinge cover, the 2 clips on the back of the cover should slot into the
raised clip on the fastening connector
3. On the second fastening connecting bracket on the opposite side, you simply
just have to slot the hinge cover on to it via the clips.
For Customer Services & Spare Parts please call 0345 208 8750
Opening times: Monday - Friday 8am –8pm & Saturday 9am –1pm
or visit us at www.productcare.co.uk
Under side view of cover
Fastening connector