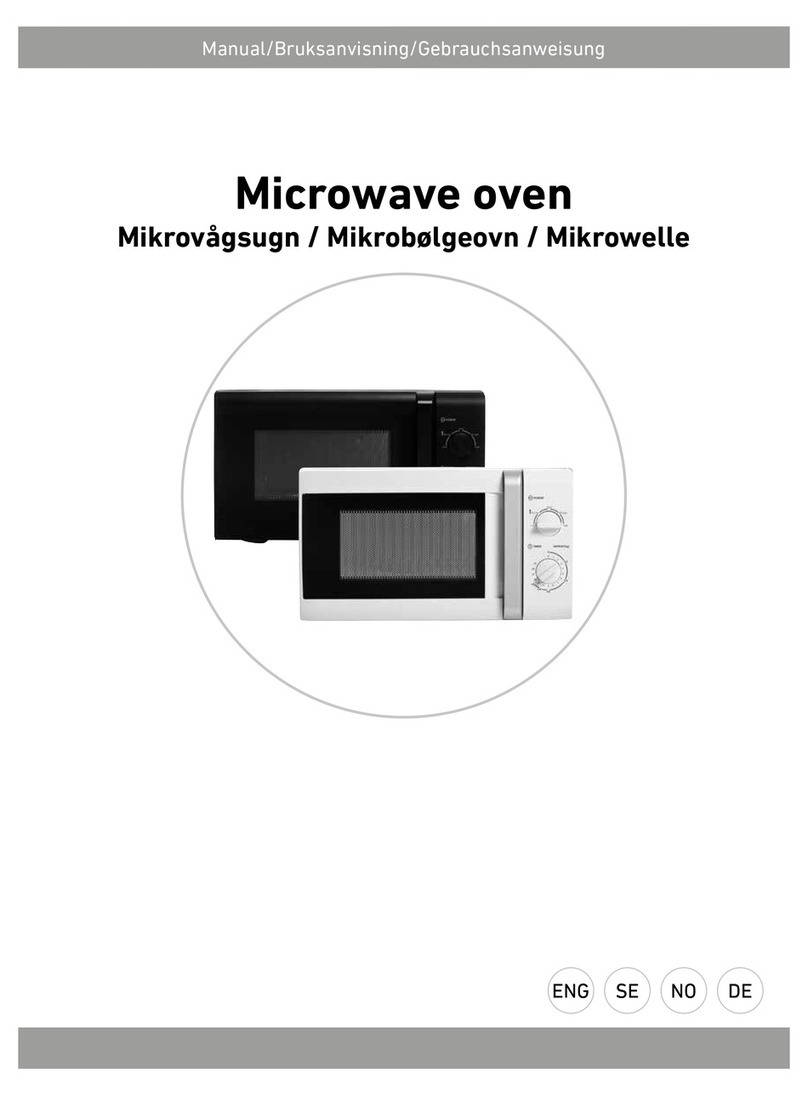
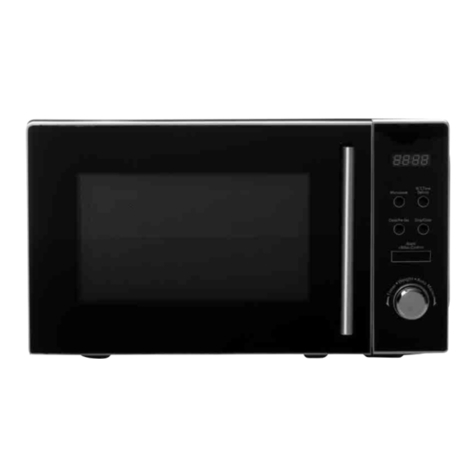
RUSTA 901011690101 User manual

Mikrovågsugn / Mikrobølgeovn / Mikrowelle
Microwave oven
Manual/Bruksanvisning/Gebrauchsanweisung
SE
ENG NO DE
Manual/Bruksanvisning/Gebrauchsanweisung
SE
ENG NO DE
Item no. 901011690101

2
ENG
Microwave oven
Read the user manual carefully to make sure that the product is assembled, used and
maintained correctly, as described in the instructions in this user manual. Keep the user
manual for future reference.
SAFETY INSTRUCTIONS
• Make sure the voltage in your home is corresponding to the one shown
on the rating label of the appliance. Make sure that the wall socket is
grounded.
TO REDUCE THE RISK OF FIRE IN THE OVEN CAVITY
- Do not overcook food.
- Remove wire twist-ties, paper or plastic bags before placing food in
the oven.
- Do not heat oil or fat for deep drying as the temperature of oil
cannot be controlled.
- After use, wipe the waveguide cover with a damp cloth, followed by
dry cloth to remove any food splashes and grease. Built-up grease
may overheat and begin to cause smoke or catch fire.
- If materials inside the oven should smoke or ignite, keep oven door
closed, turn oven o and disconnect the power supply immediately.
- When heating food in hard plastic or paper containers, keep an eye
on the oven due to the possibility of ignition.
TO REDUCE THE RISK OF EXPLOSION AND SUDDEN BOILING
- WARNING! Liquids and other foods must not be heated in sealed
container since they are liable to explode; Baby bottles fitted with
a screw cap and similar are considered to be sealed containers.
- Use a wide-mouthed container to cook liquid. Leave the cooked
liquid to cool down before removing out of the oven in order to avoid
possible hazards caused by delayed eruptive boiling of liquids.
Thank you for choosing to
purchase a product from Rusta!
Read through the entire manual
before installation and use!
WARNING!
If these instructions are not followed, an accident may
lead to serious personal injury or property damage.

3
l
- Potatoes, sausage and chestnut should be peeled or pierced before
cooking. Eggs in their shell and whole hard-boiled eggs should not
be heated in microwave ovens since they may explode, even after
microwave heating has ended.
- The contents of feeding bottles and baby food jars are to be stirred
or shaken and the temperature is to be checked before consump-
tion, in order to avoid burns.
• If the supply cord is damaged, it must be replaced by the manufacturer,
its service agent or a qualified technician in order to avoid a shock hazard.
• After cooking, a container is very hot. Use gloves to take out the food and
avoid steam burns by directing steam away from the face and hands.
• Slowly lift the furthest edge of dishes cover and microwave plastic wrap.
Carefully open popcorn and oven cooking bags away from the face.
TO PREVENT THE TURNTABLE FROM BREAKING
- Let the turntable cool down before cleaning.
- Do not place hot foods or utensils on the cold turntable.
- Do not place frozen foods or utensils on the hot turntable.
• Make sure the utensils do not touch the interior walls during cooking.
• Only use utensils that are suitable for use in microwave ovens.
• Do not store food or any other things inside the oven.
• Do not operate the oven when it is empty. This would do damage to
the oven.
• Children should only use the oven under adult supervision due to the
temperatures generated.
• Any accessories not recommended by the manufacturer may cause
personal and/or property injuries.
• Do not use outdoors.
• Save these instructions.
• WARNING! If the door or door seals are damaged or the oven is
malfunctioned, the oven must not be operated until it has been
repaired by a competent person.
• WARNING! It is hazardous for anyone other than a competent person
to carry out any service or repair operation that involves the removal
of a cover which gives protection against exposure to microwave energy.
• If smoke is emitted, switch o or unplug the appliance and keep the
door closed in order to stifle any flames.

4
ENG
• Microwave heating of beverages can result in delayed eruptive boiling;
therefore care must be taken when handling the container.
• Do not use harsh abrasive cleaners or sharp metal scrapers to clean
the oven door glass since it may scratch the surface, which can result
in the glass shattering.
• The lamp of microwave oven is not intended for other purposes.
• The appliance is not intended to be operated by means of an external
timer or separate remote-control system.
• This appliance is intended for household use only.
• The microwave oven is intended for heating food and beverages. Drying
of food or clothing and heating of warming pads, slippers, sponges, damp
cloth and other similar objects may lead to risk of injury, ignition or fire.
• This appliance can be used by children aged from 8 years and above
and persons with reduced physical, sensory or mental capabilities
or lack of experience and knowledge if they have been given super-
vision or instruction concerning use of the appliance in a safe way and
understand the hazards involved. Children shall not play with the
appliance. Cleaning and user maintenance shall not be made by
children unless they are older than 8 and supervised. Keep the
appliance and its cord out of reach of children less than 8 years.
• This appliance is not intended for use by persons (including children) with
reduced physical, sensory or mental capabilities, or lack of experience
and knowledge, unless they have been given supervision or instruction
concerning use of the appliance by a person responsible for their safety.
• Children should be supervised to ensure that they do not play with the
appliance.
• A steam cleaner is not to be used in or on the microwave oven or any
of its accessories.
• The door and the outer surface may get hot when the appliance is
operating.
• WARNING! Accessible parts may become hot during use. Children
should be kept away.
• During use the appliance becomes hot. Care should be taken to avoid
touching heating elements inside the oven.
• The surfaces are liable to get hot during use.
• Household use only

5
INSTALLATION
1. Take out all the packing. If there is a safe film over the oven, tear it o before use. Remove all
other packing material. Check carefully for damage. If any, immediately notify dealer or send to
the manufacturer’s service center.
2. Microwave ovens must be placed under dry and non-corrosiveness environments, kept away
from heat and humidity, such as gas burner or water tank.
3. To ensure sucient ventilation, the distance of the back of microwave to the wall should be at
least 10 cm, the side to the wall should be at least 5 cm, the free distance above the top surface
at least 20 cm. the distance of the microwave to the ground should be at least 85 cm.
4. The position of the oven shall be such that it is far from a TV, Radio or antenna. The distance
should be more than 5m.
5. The appliance must be positioned so that the plug is accessible, and must ensure a good
grounding in case leakage, ground loop can be formed to avoid electric shock.
6. The microwave oven must be operated with the door closed.
7. The microwave oven must not be placed in a cabinet. The microwave oven is intended to be used
freestanding.
8. As there is manufacturing residue and/or oil remained on the oven cavity and/or heat element,
there is usually a smell, odor or even a slight smoke when using the microwave oven for the first
times. This is normal and will not occur after several times use. Keep a door or window open to
ensure good ventilation.
9. When using the microwave oven for the first time, it is recommended to place a cup of water in
the turntable, setting at high power and operate for several times. Make sure that the cup you us
is safe to use in the microwave oven.
CLEANING
MICROWAVE OVEN CARE
• CAUTION! The oven should be cleaned after each use and any food deposits must be removed.
• WARNING! Unplug the power cord from the wall outlet before cleaning. Do not immerse the
appliance in water or other fluids when cleaning.
• Failure to maintain the oven in a clean condition could lead to deterioration of the surface that
could adversely aect the life of the appliance and possibly result in a hazardous situation.
• Never use hard detergent, gasoline, abrasive powder or a metal brush to clean any part of the
appliance.
• Do not operate the microwave oven without the waveguide cover. If the waveguide cover has been
damaged it must be replaced.
• When the microwave oven has been used for a longer period of time, there may be some odors.
Following 3 methods can get rid of them:
- Place several lemon slices in a cup, then heat with high power for 2–3 min.
- Place a cup of red tea in oven, then heat with high power for 1 minute.
- Put some orange peel into oven, and then heat them with high power for 1 minute.
TIPS FOR CLEANING
EXTERIOR
• Wipe the exterior with a dampened soft cloth.
DOOR
• Wipe the door and window with a dampened soft cloth. Wipe the door seals and adjacent parts
to remove any spill or spatter
• Wipe the control panel with a slightly dampened soft cloth.

6
ENG
INTERIOR WALLS
• Wipe clean the cavity with a dampened soft cloth.
• Wipe clean the waveguide cover to remove any food splashed.
TURNTABLE/ ROTATION RING/ ROTATION AXIS
• Wash with mild soap water. Rinse with clean water and allow drying thoroughly.
PRODUCT INSTRUCTION
1. DOOR LOCK – Microwave oven door must be properly closed in order for it to operate.
2. WINDOW – Allows user to see the cooking status.
3. ROTATING AXIS – The glass turntable sits on the axis; the motor
underneath it drives the turntable to rotate.
4. ROTATING RING – The glass turntable sits on its wheels;
it supports the turntable and helps it to balance when rotating.
5. TURNTABLE – The food sits on the turntable, its rotation during operation
helps to cook food evenly.
CAUTION! Place the rotating ring first.
CAUTION! Fit the turntable onto the rotating axis and make sure that
it is geared in properly.
6. CONTROL PANEL – See below details.
7. WAVEGUIDE COVER – Located next to the wall of control panel.
WARNING! – Never remove or use the microwave oven without the
waveguide cover. Replace if damaged.
OPERATION OF CONTROL PANEL
1. BEFORE COOKING
The LED flashes 3 times when plugged in to a power supply. Then it
flashes “:”, prompting you to input the cooking menu and time.
2. AUTO COOKING/ TIME.WEIGHT KNOB
You can increase or decrease cooking time, weight or select auto cooking
menu during operation by turning the knob.
3. PAUSE/CANCEL
At the initial or input stage: Press once to cancel input programs and
resume initial stage.
During cooking: Press once to stop oven operation, press twice to cancel cooking programs.
8
.PRODUCT INSTRUCTION………………………….............................
⑥
④
③
①
②
⑤⑦
Waveguide cover
1) Door lock
Microwave oven door must be properly closed in order for it to
operate.
2) Window
Allows user to see the cooking status.
3) Rotating axis
The glass turntable sits on the axis; the motor underneath it
drives the turntable to rotate.
4) Rotating ring
The glass turntable sits on its wheels; it supports the turntable
and helps it to balance when rotating.
5) Turntable
The food sits on the turntable, its rotation during operation
helps to cook food evenly.
- Place the rotating ring first.
- Fit the turntable onto the rotating axis and make sure that it is
geared in properly.
6) Control panel
See below in details.
Waveguide
cover
8
.PRODUCT INSTRUCTION………………………….............................
⑥
④
③
①
②
⑤⑦
Waveguide cover
1) Door lock
Microwave oven door must be properly closed in order for it to
operate.
2) Window
Allows user to see the cooking status.
3) Rotating axis
The glass turntable sits on the axis; the motor underneath it
drives the turntable to rotate.
4) Rotating ring
The glass turntable sits on its wheels; it supports the turntable
and helps it to balance when rotating.
5) Turntable
The food sits on the turntable, its rotation during operation
helps to cook food evenly.
- Place the rotating ring first.
- Fit the turntable onto the rotating axis and make sure that it is
geared in properly.
6) Control panel
See below in details.
1
2
3
46
57
9
7) Waveguide cover
Located next to the wall of control panel.
Never remove or use the microwave oven without the
waveguide cover. Replace if damaged.
.OPERATION OF CONTROL PANEL…。。。。。。。。。。...。…...........
Power Express
Pre-set/Clock
Defrost
Pause/Cancel Start
Time
Weight
Auto
Cooking
1. BEFORE COOKING
The LED flashes 3 times when plugged in to a power supply.
Then it flashes “:”, prompting you to input the cooking menu
and time.
Power Express
Defrost Pre-set/Clock
Pause/Cancel
Auto
cooking Time
weight
Start

7
4. AUTO REMINDER
When your preset cooking procedure have finished, the LED display will show End and three
beeps sound will be heard to prompt you to take out food. If you do not press Pause/Cancel
button once or open the door, the beep will be sounded at an interval of 3 minutes.
5. INSTANT COOKING
In standby status, press Start button and the oven will start cooking with high power; system
default cooking time is 1 minute. You can increase or decrease cooking time by turning the knob.
NOTE! This instant cooking function applies to one of following situations:
a. Activate instant cooking function within 2 minutes when the oven door is closed.
b. Activate instant cooking function within 2 minutes when the Pause/Cancel is pressed.
c. Activate instant cooking function within 2 minutes when the preset cooking program finishes.
6. CLOCK SETTING
Clock button make it available for you to input current or preset time when “:” flashes onto LED display.
Example: to set 12:30
Steps Display
1After power-up, the colon flashes :
2Press Pre-set/ Clock button once 00:00
3Turn Auto Cooking/ Time. Weight knob to set exact hours. 12:00
4Press Pre-set/Clock button once again. 12:00
5Turn Auto Cooking/ Time. Weight knob to set exact minutes. 12:30
6Press Pre-set/ Clock button once again or wait for 5 seconds, and the numbers will go steadily. 12:30
7. MICROWAVE COOKING
This function is for cooking and heating food. Press Power button, LED will cycle to show
100P—80P—60P — 40P— 20P.
High power 100P 100% microwave power. Applicable for quick and thorough cooking.
Medium/
High power 80P 80% microwave power. Applicable for medium express cooking.
Medium power 60P 60% microwave power. Applicable for steaming food .
Medium/ Low power 40P 40% microwave power. Applicable for defrosting food.
Low power 20P 20% microwave power. Applicable for keeping warm.
CAUTION!
a. The max time which can be set is 60 minutes.
b. Never operate the oven if it is empty.
c. At the maximum microwave power, the oven will automatically lower the power after a certain
time of cooking to lengthen the service life.
d. If you stop to turn the food during operation, press the Start button once and the preset cooking
procedure will continue.
e. If you intend to remove the food before the preset time, you must press Pause/Cancel button
once to clear the preset procedure to avoid unintended operation of next time use.

8
ENG
Example: To cook at P80 for 10 minutes.
Steps Display
1After power-up, the colon flashes. :
2Select the desired microwave power by pressing Power button consecutively. 80P
3Set cooking time by turning Auto Cooking/Time. Weight knob 10:00
4Press Start button to start and LED will count down to show running time.
8. EXPRESS
Press Express button and LED display will cycle to show 0:30, 1:00, 1:30. This function will allow
you to heat a cup of water or beverage conveniently, omitting the steps of setting time. Choose the
proper time depending on the beverage capacity.
Example: To cook with express for 1 minute
Steps Display
1After power-up, the colon flashes. :
2Press Express button consecutively to select desired menu. 1:00
3. Start cooking by pressing Start button .
9. DEFROST
This function is used to defrost food. Press the Defrost button and the LED display will cycle to show
d.1-d.2-d.3.
d.1 For defrosting meat, the weight range from 0.1 to 2.0 kg.
d.2 For defrosting poultry, the weight range from 0.2 to 3.0kg.
d.3 For defrosting seafood, the weight range from 0.1 to 0.9kg.
CAUTION!
a. It is necessary to turn over the food during operation to obtain uniform eect.
b. Defrosting will usually need longer time than cooking the food.
c. If the food can be cut by knife, the defrosting process can be considered completed.
d. Microwave penetrates around 4cm into most food
e. Defrosted food should be consumed as soon as possible, it is not advised to put back to fridge or
freeze again.
Example: To defrost 0.4kg poultry
Steps Display
1After power-up, the colon flashes :
2Press Defrost button to set the food kind. d.2
3Turn Auto Cooking/ Time. Weight knob to set the defrost weight 0.4
4Start cooking by pressing Start
5
During defrosting, beep sounds will be heard two times to prompt you turn over the food.
Open the door and turn over the food. Then close the door. Press Start button again to continue
defrosting
10. AUTO COOKING
• The oven has default cooking menu for simple operation. When the LED flashes colon, turn the
Auto Cooking knob and LED will cycle to show A.1, A.2 …… A.8
• Choose the appropriate menu according to the food type and weight and strictly observe the
directions in below table, otherwise the cooking eect will be largely influenced.

9
Display Kind Method
A.1 Popcorn
Suitable for popping a bag of corn, weighted 85 grams. If the popping speed has been
decreased to 1 time per 1-2 seconds you should press Pause/Cancel button to stop
the popping process.
A.2 Popcorn Same as A.1 except 100g weight
A.3 Pizza Warm a piece of chilled pizza of 0.15kg
A.4 Beverage Heating a cup of 250 ml liquid. The liquid temperature is about 5-10°C. Use a big
mouth cup and do not seal
A.5 Beverage Heating a cup of 500 ml liquid. The liquid temperature is about 5-10°C. Use a big
mouth cup and do not seal
A.6 Potato
Cooking potato strips; cut into 5mm width and height, length. Total weight is about
0.45kg. Place the strips on a large dish and cover the dish with a thin film to prevent
water loss.
A.7 Potato Same as A.6 except the weight of potato strips is about 0.65kg
A.8 Fish
Suitable for steaming a fish of 0.45kg. After washing and scales removed, make a slits
on the skin of fish. Put the fish on a shallow dish of 22-27cm diameter. Sprinkle lightly
with your desired ingredients and cover the dish with a thin film to prevent water loss.
After cooking, let it stand for 2 minutes.
CAUTION!
a. The temperature of food before cooking should be 20-25°C. Higher or lower temperature of the
food before cooking would require an increase or decrease of cooking time.
b. The temperature, weight and shape of food will largely influence the cooking eect. If any deviation
has been found to the factor noted on the above table, you must adjust the cooking time for best result.
11. AUTOMATIC STARTING (DELAYED FUNCTION)
If you do not want the cooking to be started immediately, you can preset the cooking and time.
The preset menu will be automatically started at your set time. The setting will consist of 2 steps:
• Setting the current clock;
• Setting the cooking menu and time.
Example: Now it is 12:30 clock, if you hope that the microwave oven will automatically start
cooking with 100P microwave power for 9 minutes and 30 seconds at 14:20
Steps Display
1After power-up, the colon flashes :
1.1 Press Pre-set/Clock button 00:00
1.2 Set hours by turning Auto Cooking/ Time. Weight knob 12:00
1.3 Press Pre-set/Clock button again to confirm hours 12:00
1.4 Set minutes by turning Auto Cooking/ Time. Weight knob 12:30
1.5 Press Pre-set/Clock button once or waiting for 5 seconds, and the numbers will go steady. 12:30
2Set the cooking menu and time
2.1 Select cooking power by pressing Power button 100P
2.2 Turn Auto Cooking/ Time. Weight knob to set cooking time 9:30
2.3 Press and hold Pre-set/Clock button for 3 seconds to return to current clock.
3Set the time you expect to start. Repeat the steps of 1.2, 1.3, 1.4
4Press Pre-set/Clock button to confirm the delayed menu. Now the program has been activated.
And the menu will be started at 14:20.
5You may check the preset starting time by pressing Pre-set/Clock button.

10
ENG
12. MULTI-SEQUENCE COOKING
To obtain best cooking result, some recipes call for dierent cooking modes and time.
You may program your personalized menu as follow:
Example: You want cook food with 100P microwave for 3 minutes then 20P for 9 minutes.
This is 2 sequence setting.
Steps Display
1100P microwave for 3min
1.1 Press Power button to select power level. 100P
1.2 Turn Auto Cooking/ Time. Weight knob to set cooking time. 3:00
220P for 9min
2.1 Press Power button to select desired menu 20P
2.2 Turn Auto Cooking/ Time. Weight knob to set cooking time. 9:00
3Start cooking by pressing Start
CAUTION!
a) When 100P microwave power is finished, microwave oven will begin next operation automatically.
b) Max 4 sequences can be set per time.
13. CHILD LOCK
Use this feature to lock the control panel when you are cleaning or so that children can not use the
oven unsupervised. All the buttons are rendered inoperable in this mode.
1) Set lock: Hold Pause/Cancel button about 3 seconds.
2) Cancel lock: Hold Pause/Cancel button about 3 seconds.
UTENSILS GUIDELINE
Use only containers that are suitable and safe for microwave cooking. Generally speaking, contai-
ners which are made of heat-resistant ceramic, glass or plastic are suitable for microwave cooking.
Never use metal containers for microwave cooking and/or combination cooking as sparks is likely to
occur. Use below table as reference.
Material Microwave Notes
Heat-resistant ceramic Yes Never use the ceramics that are glazed decorated with a metal rim.
Heat-resistant plastic Yes Can not be used for long time microwave cooking.
Heat-resistant glass Yes
Plastic film Yes It should not be used when cooking meat or chops as the over-
temperature may do damage to the film.
Grill rack No
Metal container No It should not be used in microwave oven. Microwave can not penetrate
through metal.
Lacquer No Poor heat-resistance. Can not be used for cooking in higher
temperatures.
Bamboo wood and paper No Poor heat-resistance. Can not be used for cooking in higher
temperatures.

11
COOKING TIPS
The following factors may aect the cooking result:
FOOD ARRANGEMENT
Place thicker areas towards the outside of your dish/container and the thinner part towards the
centre and spread it evenly. Do not overlap.
COOKING TIME LENGTH
Start cooking with a short time setting, evaluate it after time runs out and extend it according to the
actual need. Over cooking may result in smoke and/or burns.
COOKING FOOD EVENLY
Food such as chicken, hamburger or steak should be turned once during cooking. Depending on the
type of food, if applicable, stir it from outside to centre of dish once or twice during cooking
ALLOW STANDING TIME
After cooking time is out, leave the food in the oven for an adequate length of time, this allows it to
complete its cooking cycle and cooling it down in a gradual manner
WHETHER THE FOOD IS DONE
Color and hardness of food help to determine if it is done, these include:
- Steam coming out from all parts of food, not just the edge
- Joints of poultry can be moved easily
- Pork or poultry shows no signs of blood
- Fish is opaque and can be sliced easily with a fork
BROWNING DISH
When using a browning dish or self-heating container, always place a heat-resistant insulator such as
a porcelain plate under it to prevent damage to the turntable and rotating ring.
MICROWAVE SAFE PLASTIC WRAP
When cooking food with high fat content, do not allow plastic wrap to come into contact with food as
it may melt
MICROWAVE SAFE PLASTIC COOKWARE
Some microwave safe plastic cookware might not be suitable for cooking foods with high fat and/or
sugar content. The preheating time specified in the dish instruction manual must not be exceeded.
MAINTENANCE SERVICE
Please check the following to make sure that microwave oven is working properly.
1. Place one cup of water (approx.150ml) in a glass container in the oven and close the door securely.
Oven lamp should go o if the door is closed properly. Let the oven work for 1 min.
2. Does the oven lamp light?
3. Does the cooling fan work?
4. (Put your hand over the rear ventilation openings.)
5. Does the turntable rotate? (The turntable can rotate both clockwise or counter clockwise.)
6. Is the water inside the oven hot?
If “NO” is the answer to any of the above questions, please check your wall socket and the fuse in your
meter box. If both the wall socket and the fuse are functioning properly, CONTACT YOUR NEAREST
SERVICE CENTER APPROVED.

12
ENG

13
RIGHT OF COMPLAINT
By law the product must be returned to the place of purchase along with the original receipt in the
event of a complaint. The user is liable for any damage to the product that is caused by not using the
product for its intended purpose or by not following this user manual correctly. The right of com-
plaint will not apply in these instances.
INFORMATION ABOUT HAZARDOUS WASTE
Used products should be handled separately from
household waste. They should be taken for recycling in
accordance with local rules for waste management.

14
SE
Mikrovågsugn
Läs bruksanvisningen noggrant och se till att produkten installeras, används och under-
hålls på rätt sätt enligt instruktionerna. Spara bruksanvisningen för senare bruk.
SÄKERHETSFÖRESKRIFTER
• Se till att voltantalet i ditt hem motsvarar spänningen på apparatens
märketikett. Se till att vägguttaget är jordat.
FÖR MINSKAD BRANDRISK I UGNSUTRYMMET
- Tillaga inte maten för länge.
- Avlägsna påsförslutare, papper och plastpåsar innan maten
placeras i ugnen.
- Värm aldrig olja eller frityrfett då oljetemperaturen inte kan
kontrolleras.
- Avlägsna stänk och fett från livsmedel efter användning genom att
torka av vågledarskyddet med först fuktig och sedan torr trasa.
Fettavlagringar kan överhettas och orsaka rökutveckling eller
eventuellt brand.
- I händelse av rökutveckling eller antändning i ugnen, håll ugns-
luckan stängd, stäng av ugnen och koppla från strömsladden genast.
- Var uppmärksam på antändningsrisken när livsmedel värms upp i
behållare av hårdplast eller papper.
FÖR ATT MINSKA RISKEN FÖR EXPLOSION OCH PLÖTSLIG KOKNING
- VARNING! Vätskor och övriga livsmedel får inte värmas i förslutna
behållare, då dessa kan explodera. Nappflaskor med skruvlock och
liknande räknas som förslutna behållare.
- Vätskor ska tillagas i behållare med bred öppning. Låt den färdig-
lagade vätskan svalna innan du tar ut den ur ugnen, för att undvika
eventuella risker på grund av fördröjd plötslig kokning.
Tack för att du valt att
köpa en produkt från Rusta!
Läs igenom hela bruksanvisningen
innan montering och användning!
VARNING!
Om föreskriften inte efterföljs kan en olycka leda till
allvarlig person- eller egendomsskada.

15
l
- Potatis, korv och kastanjer bör skalas eller naggas före tillagning.
Råa eller hårdkokta ägg i skal bör inte värmas i mikrovågsugn då de
kan explodera, även efter avslutad uppvärmning.
- Nappflaskor och barnmatsburkar bör röras eller skakas om och tem-
peraturen kontrolleras före förtäring för att undvika brännskador.
• Om elsladden skadats måste den bytas ut av tillverkaren, utsedd service-
representant eller behörig tekniker för att undvika risken för elstötar.
• Behållare blir mycket varma efter tillagning. Använd handskar för att ta
ut maten, och undvik ångbrännskador genom att rikta ångan från ansikte
och händer.
• Lock och mikrovågsfolie öppnas försiktigt från kanten längst bort.
Popcorn och tillagningspåsar öppnas försiktigt bort från ansiktet.
FÖR ATT FÖRHINDRA ATT DEN ROTERANDE TALLRIKEN GÅR SÖNDER
- Låt den roterande tallriken svalna innan rengöring.
- Placera inte varm mat eller varma föremål på tallriken när den är kall.
- Placera inte frusen mat eller föremål på tallriken när den är het.
• Se till att inga föremål vidrör ugnens innerväggar under tillagningen.
• Använd endast redskap som är godkända för användning i mikrovågsugn.
• Förvara inte livsmedel eller andra föremål i ugnen.
• Kör inte ugnen när den är tom. Detta gör att ugnen skadas.
• På grund av de höga temperaturerna som uppstår bör barn endast
använda ugnen under vuxens överinseende.
• Tillbehör som inte rekommenderats av tillverkaren kan orsaka skada
på person och/eller föremål.
• Använd inte utomhus.
• Spara dessa instruktioner.
• VARNING! Om ugnsluckan eller luckans tätningar skadats eller vid
funktionsfel på ugnen, får ugnen inte användas före reparation av
behörig person.
• VARNING! Det är farligt för personer utan lämplig behörighet att utföra
service eller reparationer där skydd avlägsnas som utsätter användaren
för mikrovågsstrålning.
• Vid rökutveckling, stäng av apparaten eller dra ut sladden och håll
luckan stängd för att förhindra eventuell brand.
• Uppvärmning av drycker med mikrovågor kan resultera i fördröjd
plötslig kokning. Behållaren ska därför hanteras med försiktighet.

16
SE
• Ugnens glaslucka bör inte rengöras med frätande rengöringsmedel
eller vassa metallskrapor, då detta kan leda till repor på ytan och till
att glaset eventuellt splittras.
• Mikrovågsugnen lampa är inte avsedd för andra ändamål.
• Apparaten är inte avsedd att användas i kombination med en extern
timer eller separat fjärrstyrningssystem.
• Apparaten är endast till för hemmabruk.
• Mikrovågsugnen är avsedd för uppvärmning av mat och dryck.
Torkning av mat eller klädesplagg och uppvärmning av värmekuddar,
toor, tvättsvampar, disktrasor och liknande föremål kan leda till
skaderisk, antändning eller brand.
• Denna apparat får användas av barn från åtta år och uppåt, samt av
personer med fysiska eller mentala funktionshinder, eller personer
utan erfarenhet och kunskap, om de använder den under överinseende
av en vuxen eller om de fått sådana instruktioner att de kan använda
den på ett säkert sätt och förstår vilka risker användningen medför.
Se till att barn inte leker med apparaten, och låt inte barn under åtta
år rengöra eller utföra normalt underhåll på apparaten utan en vuxens
överinseende. Förvara apparaten och sladden utom räckhåll för små
barn under åtta år.
• Denna apparat är inte avsedd för personer (inklusive barn) med
fysiska, sensoriska eller mentala funktionshinder, eller bristande
erfarenhet och kunskap, såvida det inte sker under överinseende eller
med lämpliga anvisningar om apparatens användning från den som
ansvarar för dessa personers säkerhet.
• Håll alltid barn under uppsikt så att de inte leker med apparaten.
• Ångtvätt får inte användas i eller på mikrovågsugnen eller något av
dess tillbehör.
• Ugnsluckan och apparatens utsida kan hettas upp när apparaten körs.
• VARNING! Åtkomliga ytor kan hettas upp vid användning. Barn bör
hållas åt sidan.
• Apparaten hettas upp vid användning. Se till att värmeelementen inne
i ugnen inte vidrörs.
• Ytorna blir varma under användning.
• Endast för hemmabruk.

17
INSTALLATION
1. Ta ut allt förpackningsmaterial. Om ugnen är försedd med säkerhetsfilm ska denna avlägsnas
innan användning. Avlägsna allt övrigt förpackningsmaterial. Inspektera apparaten noggrant
för eventuella skador. Om skador skulle upptäckas, meddela återförsäljaren genast eller skicka
produkten till tillverkarens servicecenter.
2. Mikrovågsugnen måste placeras på en torr, icke-korroderande plats, och hållas borta från
värmekällor och fukt, till exempel gasbrännare eller vattentank.
3. För tillräcklig ventilering bör mikrovågsugnen placeras med minst 10 cm avstånd till väggen
bakom, 5 cm till väggen åt sidan, och med minst 20 cm fri höjd ovanför. Mikrovågsugnen bör stå
minst 85 cm ovanför marken.
4. Ugnen ska placeras långt ifrån TV, radio eller antenner. Avståndet bör vara minst 5 m.
5. Apparaten bör placeras så att stickproppen går lätt att komma åt, med god jordning i händelse av
läckage, så att elstötar kan undvikas med hjälp av jordslinga.
6. Luckan måste vara stängd när mikrovågsugnen är igång.
7. Mikrovågsugnen får inte placeras i ett skåp. Mikrovågsugnen är gjord för att användas fristående.
8. På grund av kvarvarande tillverkningsrester och/eller olja i ugnsutrymmet och/eller värme-
elementen uppstår oftast lukt, odör eller t.o.m. lättare rökutveckling de första gångerna mik-
rovågsugnen används. Detta är normalt och upphör efter några gångers användning. Öppna en
dörr eller ett fönster för bättre ventilering.
9. När mikrovågsugnen används för första gången rekommenderas att en kopp med vatten place-
ras på den roterande tallriken. Kör sedan ugnen ett flertal gånger på hög eekt. Se till att koppen
som används är godkänd för användning i mikrovågsugnen.
RENGÖRING
SKÖTSEL AV MIKROVÅGSUGN
• OBS! Ugnen ska rengöras efter varje användning och eventuella matrester måste avlägsnas.
• VARNING! Dra ut elsladden ur vägguttaget innan rengöring. Låt inte apparaten täckas av vatten
eller andra vätskor vid rengöring.
• Om ugnen inte hålls ren kan det leda till att ytan försvagas och negativt påverkar apparatens
livslängd, eller eventuellt leda till farliga situationer.
• Rengör aldrig någon del av apparaten med hårda rengöringsmedel, bensin, slipmedel eller
metallborste.
• Kör aldrig mikrovågsugnen utan vågledarskyddet. Om vågledarskyddet skadas måste det bytas ut.
• Dålig lukt kan uppstå när mikrovågsugnen använts under en längre tid. Lukten kan avlägsnas
med någon av följande 3 metoder:
- Placera några citronskivor i en kopp och värm på hög eekt under 2–3 minuter.
- Placera en kopp rött te i ugnen och värm på hög eekt under 1 minut.
- Lägg lite apelsinskal i ugnen och värm på hög eekt under 1 minut.
RENGÖRINGSTIPS
UTSIDA
• Torka av utsidan med en fuktig, mjuk trasa.
LUCKA
• Torka av luckan och fönstret med fuktig, mjuk trasa. Avlägsna eventuellt spill och stänk från
dörrtätningar och angränsande delar
• Torka av kontrollpanelen med en lätt fuktad, mjuk trasa.

18
SE
INNERVÄGGAR
• Torka av ugnen invändigt med en fuktig, mjuk trasa.
• Torka av eventuellt matstänk från vågledarskyddet.
ROTERANDE TALLRIK/ROTATIONSRING/ROTATIONSAXEL
• Diska med milt tvålvatten. Skölj med rent vatten och låt torka ordentligt.
PRODUKTBESKRIVNING
1. LÅSFÄSTEN – Luckan måste vara helt stängd innan mikrovågsugnen kan köras.
2. FÖNSTER – Låter användaren se tillagningen.
3. ROTATIONSAXEL – Glastallriken sitter på rotationsaxeln, som drivs med en
motor på undersidan.
4. ROTATIONSRING – Glastallriken ligger på ringens hjul, som stödjer och
balanserar tallriken vid rotation.
5. ROTERANDE TALLRIK – Livsmedel placeras på tallriken, vars rotation
hjälper maten att tillagas jämnt.
OBS! Lägg rotationsringen på plats först.
OBS! Montera glastallriken på rotationsaxeln och kontrollera dess placering.
6. KONTROLLPANEL – Se detaljer nedan.
7. VÅGLEDARSKYDD – Sitter på väggen mot kontrollpanelen.
VARNING! – Avlägsna aldrig vågledarskyddet. Mikrovågsugnen får inte
köras utan det. Skyddet ska bytas ut om det skadats.
INSTRUKTIONER FÖR KONTROLLPANELEN
1. FÖRE TILLAGNING
Lampan blinkar 3 gånger när strömmen kopplas in.
När den blinkar “:” kan du ställa in inställningar och tillagningstid.
2. REGLAGE FÖR TID/VIKT/AUTOMATLAGNING
Tillagningstid, vikt eller automatlagning kan justeras medan ugnen körs
genom att vrida på det här reglaget.
3. PAUSE/CANCEL
I inställningsläge: tryck en gång för att avbryta programmeringen och
återgå till utgångsläget.
Under tillagning: tryck en gång för att pausa tillagningen, tryck två gånger för att avbryta
pågående program.
8
.PRODUCT INSTRUCTION………………………….............................
⑥
④
③
①
②
⑤⑦
Waveguide cover
1) Door lock
Microwave oven door must be properly closed in order for it to
operate.
2) Window
Allows user to see the cooking status.
3) Rotating axis
The glass turntable sits on the axis; the motor underneath it
drives the turntable to rotate.
4) Rotating ring
The glass turntable sits on its wheels; it supports the turntable
and helps it to balance when rotating.
5) Turntable
The food sits on the turntable, its rotation during operation
helps to cook food evenly.
- Place the rotating ring first.
- Fit the turntable onto the rotating axis and make sure that it is
geared in properly.
6) Control panel
See below in details.
Vågledar-
skydd
8
.PRODUCT INSTRUCTION………………………….............................
⑥
④
③
①
②
⑤⑦
Waveguide cover
1) Door lock
Microwave oven door must be properly closed in order for it to
operate.
2) Window
Allows user to see the cooking status.
3) Rotating axis
The glass turntable sits on the axis; the motor underneath it
drives the turntable to rotate.
4) Rotating ring
The glass turntable sits on its wheels; it supports the turntable
and helps it to balance when rotating.
5) Turntable
The food sits on the turntable, its rotation during operation
helps to cook food evenly.
- Place the rotating ring first.
- Fit the turntable onto the rotating axis and make sure that it is
geared in properly.
6) Control panel
See below in details.
1
2
3
46
57
9
7) Waveguide cover
Located next to the wall of control panel.
Never remove or use the microwave oven without the
waveguide cover. Replace if damaged.
.OPERATION OF CONTROL PANEL…。。。。。。。。。。...。…...........
Power Express
Pre-set/Clock
Defrost
Pause/Cancel Start
Time
Weight
Auto
Cooking
1. BEFORE COOKING
The LED flashes 3 times when plugged in to a power supply.
Then it flashes “:”, prompting you to input the cooking menu
and time.
Power Express
Defrost Pre-set/Clock
Pause/Cancel
Auto
cooking Time
weight
Start

19
4. AUTOMATISK PÅMINNELSE
När förinställt tillagningsprogram avslutats visar displayen End och tre pip hörs. Du kan nu ta
ut maten. Om du inte trycker på knappen Pause/Cancel en gång eller öppnar luckan, kommer
signalen höras igen med 3 minuters mellanrum.
5. SNABBLAGNING
I vänteläget, tryck på Start en gång för att starta ugnen på hög eekt. Systemet är förinställt på
1 minut. Tillagningstiden kan ökas eller minskas genom att vrida på reglaget.
OBS! Snabblagning fungerar i följande situationer:
a) Inom 2 minuter efter att ugnsluckan stängts.
b) Inom 2 minuter efter att knappen Pause/Cancel tryckts ner.
c) Inom 2 minuter efter att förinställt program avslutats.
6. KLOCKINSTÄLLNING
Med klockknappen kan du ställa in aktuell eller förinställd tid när “:” blinkar på displayen..
Exempel: för att ställa in 12:30
Steg Display
1Blinkande kolon (:) efter uppstart :
2Tryck på knappen Pre-set/Clock en gång 00:00
3Vid på reglaget Auto Cooking/Time/ Weight för att ställa in korrekt timantal. 12:00
4Tryck på knappen Pre-set/Clock en gång till. 12:00
5Vid på reglaget Auto Cooking/Time/ Weight för att ställa in korrekt minutantal. 12:30
6Tryck på knappen Pre-set/Clock en gång till eller vänta i 5 sekunder. Därefter går klockan normalt. 12:30
7. MIKROVÅGSTILLAGNING
Detta är funktionen för tillagning och uppvärmning av mat. Tryck på knappen Power.
Displayen kommer i tur och ordning visa 100P—80P—60P — 40P— 20P.
Hög eekt 100P 100% mikrovågseekt. För snabb och grundlig tillagning.
Medel/ Hög eekt 80P 80% mikrovågseekt. För medelsnabb tillagning.
Medium power 60P 60% mikrovågseekt. Passar för att ånga livsmedel.
Medium/ Low power 40P 40% mikrovågseekt. Passar för att tina livsmedel.
Low power 20P 20% mikrovågseekt. Passar för varmhållning.
OBS!
a) Maximal tidsinställning är 60 minuter.
b) Kör aldrig ugnen tom.
c) Vid maximal eekt sänker ugnen automatiskt eekten efter en stund för att öka apparatens
livslängd.
d) Om du vill vända på maten under lagningen, tryck på Start en gång för att spara förinställningarna.
e. Om du vill ta ut maten innan tiden gått ut, tryck Pause/Cancel en gång för att avbryta förinställ-
ningarna och undvika oavsiktlig felinställning nästa gång.
Exempel: Tillaga på P80 i 10 minuter
Steg Display
1Blinkande kolon (:) efter uppstart. :
2Välj önskad mikrovågseekt genom att trycka på Power flera gånger tills rätt inställning syns. 80P
3Ställ in tillagningstiden genom att vrida på reglaget Auto Cooking/Time/ Weight. 10:00
4Tryck Start för att sätta igång. Kvarvarande tid räknas ned på displayen.

20
SE
8. EXPRESS
När du trycker Express visar displayen i 0:30, 1:00, 1:30 i följd. Med den här funktionen kan du
värma en kopp med vatten eller annan dryck bekvämt utan att behöva ställa in tiden med stegen
ovan. Välj rätt tid efter behållarens kapacitet.
Exempel: 1 minuts expresstillagning
Steg Display
1Blinkande kolon (:) efter uppstart. :
2Tryck på knappen Express flera gånger tills rätt inställning syns. 1:00
3. Starta tillagningen genom att trycka Start.
9. DEFROST
Används för att tina livsmedel. Tryck knappen Defrost och displayen visar i tur och ordning
d.1-d.2-d.3.
d.1 Används för att tina kött från 0,1 till 2,0 kg.
d.2 Används för att tina fågel från 0,2 till 3,0 kg.
d.3 Används för att tina fisk och skaldjur från 0,1 till 0,9 kg.
OBS!
a) Maten måste vändas under tiden för att uppnå jämnt resultat.
b) Upptining tar oftast längre tid än tillagning.
c) Maten är färdigtinad om den går att skära i med kniv.
d) Mikrovågor tränger in cirka 4 cm i de flesta livsmedel
e) Upptinad mat bör förtäras så snart som möjligt, och bör inte läggas tillbaka i kyl eller frys igen.
Exempel: Att tina 0,4 kg kyckling
Steg Display
1Blinkande kolon (:) efter uppstart. :
2Tryck på knappen Defrost för att ställa in typ av livsmedel. d.2
3Vid på reglaget Auto Cooking/Time/ Weight för att ställa in vikt. 0.4
4Starta genom att trycka på Start.
5Medan maten tinas hörs en signal två gånger för att du ska vända på maten. Öppna luckan och
vänd på maten. Stäng sedan luckan igen. Tryck på Start igen för att fortsätta tina.
10. AUTO COOKING
• Ugnen har en standardinställning för enkel manövrering. Vrid reglaget Auto Cooking när kolon
blinkar på displayen. Displayen visar A.1, A.2 ...... A.8
• Välj lämplig inställning enligt livsmedelstyp och vikt. Följ noggrant anvisningarna i tabellen
nedan, annars påverkas tillagningsresultatet.
Display Typ Metod
A.1 Popcorn Passar för en påse popcorn, vikt 85 gram. Tryck på knappen Pause/Cancel när pop-
hastigheten saktat ner till 1 pop per 1-2 sekunder för att avbryta.
A.2 Popcorn Samma som A.1 fast med vikt 100 g
A.3 Pizza Värm en bit kyld pizza, vikt 0,15 kg
A.4 Dryck Värmer en kopp med 250 ml vätska.Vätskan har temperaturen 5-10°C. Använd en kopp
med bred mynning utan lock
A.5 Dryck Värmer en kopp med 500 ml vätska.Vätskan har temperaturen 5-10°C. Använd en kopp
med bred mynning utan lock
Table of contents
Languages:
Other RUSTA Microwave Oven manuals
Popular Microwave Oven manuals by other brands

Electrolux
Electrolux Over the Range Microwave Oven installation instructions

Orima
Orima OR-823 instruction manual

Panasonic
Panasonic Inverter NN-GD469M Cookery book

Fulgor Milano
Fulgor Milano F4OTR30S1 Use & care manual

UNITED
UNITED MWO-9104 instruction manual

VESTEL
VESTEL VFM620MW operating instructions