10
ENG
COMBINATION COOKING MICRO + GRILL
• C-1 = 55% cook at max power, 45% grill function. Suitable for cooking omelettes,
baked potatoes and seafood.
C-2 = 36% cooking at max power, 64% grill function. Suitable for cooking fish, potatoes
and casseroles.
TABLE FOR COMBINATION COOKING
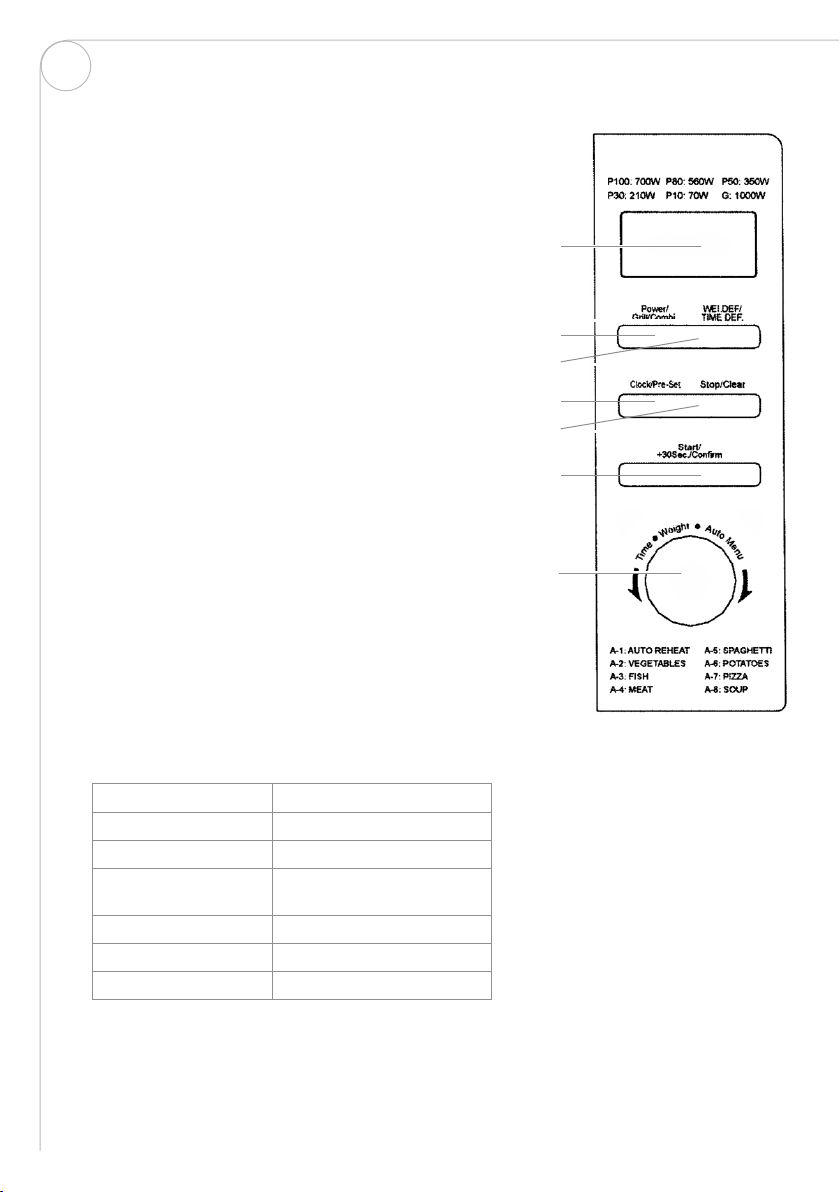
• Press POWER/GRILL/COMBI. The display shows P100.
• Press POWER/GRILL/COMBI or turn the knob until the symbol for combination
cooking C-1 or C-2 is shown on the display.
• Press START/+30SEC./CONFIRM to select C-1 or C-2.
• Turn the knob until the desired time is shown. The time can range from 0:05 to 95:00.
Press START/+30SEC./CONFIRM to select the desired time and simultaneously start
the microwave oven according to the settings.
• Example: You want to cook food with combination C-1 for 20 minutes.
Press POWER/GRILL/COMBI. The display shows P100.
• Press POWER/GRILL/COMBI or turn the knob until the symbol for combination
cooking C-1 is shown on the display.
• Press START/+30SEC./CONFIRM and select C-1.
• Turn the knob until the desired time 20:00 is shown on the display.
(See table for combination cooking. For combination C-1, the cook time will thus be 11
minutes microwave cooking at max power and 9 minutes cooking with grill).
• Press START/+30SEC./CONFIRM to select the desired time and simultaneously start
the microwave oven according to the settings.
Set total time,
minutes
C-1, cook time 55% microwave power
and 45% grill
C-2, cook time 36% microwave power
and 64% grill
1 33 + 27 seconds 22 + 38 seconds
3 1 min 39 sec + 1 min 21 sec 1 min 5 sec + 1 min 55 sec
5 2 min 45 sec + 2 min 15 sec 1 min 48 sec + 3 min 12 sec
10 5 min 30 sec + 4 min 30 sec 3 min 36 sec + 6 min 24 sec
20 11 min + 9 min 7 min 12 sec + 12 min 48 sec
30 16 min 30 sec + 13 min 30 sec 10 min 48 sec + 19 min 12 sec
40 22 min + 18 min 14 min 24 sec + 25 min 36 sec
50 27 min 30 sec + 22 min 30 sec 18 min + 32 min
60 33 min + 27 min 21 min 36 sec + 38 min 24 sec
70 38 min 30 sec + 31 min 30 sec 25 min 12 sec + 44 min 48 sec
80 44 min + 36 min 28 min 48 sec + 51 min 12 sec
95 52 min 15 sec + 42 min 45 sec 34 min 12 sec + 60 min 48 sec


 Operating and installation instructions")