manuals.online logo
Brands
  1. Home
  2. •
  3. Brands
  4. •
  5. Rutenbeck
  6. •
  7. Network Hardware
  8. •
  9. Rutenbeck Line21 User manual

Rutenbeck Line21 User manual

Allgemeines
line21®-Komponenten nutzen vorhandene
analoge Telefonleitungen für folgende
Anwendungen
• zusätzliche Vernetzung von
Datenendgeräten
• Nachrüstung von xDSL- oder Netzwerk-
anwendungen
• Ausweitung von Netzwerk- und xDSL-
Anwendungen.
Installation des PPR 6 in einer
Unterverteilung
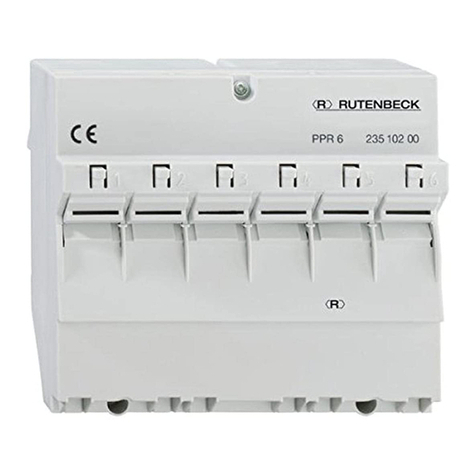
1 Legen Sie das fachgerecht vorbereitete
Kabel in die Klemme ein
und schrauben Sie die
Kabelschelle fest.
2 Legen Sie die Adern ent-
sprechend Bild 5 an den
Anschlussklemmen an.
3 Drücken Sie die Drähte
mit einem LSA-Anlege-
werkzeug in die Klemmen.
4 Nach Aufsetzen und
Befestigen des Deckels
stecken Sie die Patchka-
bel in die RJ45-Buchsen
an der Frontseite und stel-
len Sie die Verbindungen
zu den aktiven Netzwerk-
komponenten her (z. B.
Switch, s. Bild 1).
5 Zum Lösen der Patch-
kabel aus den Buchsen
drücken Sie zunächst auf
den Entriegelungsknopf
oberhalb der entspre-
chenden Buchse und
ziehen dann den Stecker
heraus (s. Bild 2).
Zubehör/Accessory
Switch SRM 5 235 105 01
General
line21®-components use the existing
analog telephone lines for the following
applications:
• Additional networking of data equipment
• Refitting of xDSL or network applications
• Expansion of network- and xDSL-
applications
Installation of PPR 6 in an electrical
distribution box
1 Lay the prepared pro-
fessionally cable in the
terminal of strain relief and
screw the cable clamp up.
2 Apply the cores to the
connecting terminals
according to figure 5.
3 Press the wires in the ter-
minals by using a suitable
tool, e.g. the connection
tool AW2.
4 Plug the patch panel in the
RJ45 jacks on the front
face and connect them
with the active network
components (s. fig. 1).
5 For the disconnection of
the patch panel from the
terminals press the release
knob above of the respec-
tive terminal at first and
then extract the plug from
the terminal (s. fig. 2).
Patchkabel PK0,23 m 235 102 02
Line Port Tester LPT 235 102 09
line21®
Installationsanleitung
Installation instructions
Bild/fig. 1
Bild/fig. 2
Niederworth 1–10
58579 Schalksmühle
Telefon (0 23 55) 82-0
Telefax (0 23 55) 82-105
www.rutenbeck.de
[email protected]
Bei Installationsfragen
Kundenser vice:
+49 - (0)3 69 25 - 9 00 90
kundenservice@rutenbeck.de
2
Installation/Installations
Beschaltung der UAE 8/8 line21®/
Terminal assignement UAE 8/8 line21®
Klemmen-Nr. Adernfarbe* Adernpaar Funktion
terminal color* pair function
1 rot/ 1 line21®
red
2 schwarz/ 1 line21®
black
3 weiß/ 2 line21®
white
6 gelb/ 2 line21®
yellow
4 rot/ - analoge Telefonleitung ankommend**/
unten/bottom red analog telephone line incoming**
5 schwarz/ - analoge Telefonleitung ankommend**/
unten/bottom black analog telephone line incoming**
Beschaltung der UAE/TAE 8/8 line21®/
Terminal assignement UAE/TAE 8/8 line21®
Beschaltung der PPR 6 line21®/
Terminal assignement PPR 6 line21®
Klemmen-Nr. Adernfarbe* Adernpaar Funktion
terminal color* pair function
1 rot/ 1 line21®
red
2 schwarz/ 1 line21®
black
3 weiß/ 2 line21®
white
6 gelb/ 2 line21®
yellow
a rot/ - analoge Telefonleitung ankommend/
unten/bottom red analog telephone line incoming
b schwarz/ - analoge Telefonleitung ankommend/
unten/bottom black analog telephone line incoming
Klemmen-Nr. Adernfarbe* Adernpaar Funktion
terminal color* pair function
1 rot/ 1 line21®
red
2 schwarz/ 1 line21®
black
3 weiß/ 2 line21®
white
6 gelb/ 2 line21®
yellow
6 rot/ - weiterführende Telefoninstallation, bei Bedarf/
unten/bottom red to additional telephone jacks, if required
5 schwarz/ - weiterführende Telefoninstallation, bei Bedarf/
unten/bottom black to additional telephone jacks, if required
* bei I-Y (St) Y/ at I-Y (St)Y
** Alternativ zum Anschluss über Buchse/Alternatively to the connection via outlet
3
Bild/fig. 3
Bild/fig. 4
Bild/fig. 5
3
621
54
Digitale Daten 10/100 MBit/s
(DSL o. ä.)/
Digital data 10/100 MBit/s (DSL
or the like)
Anschlussseite line21®/
connection side line21®
max. 50 m
analoge Telefonleitung ankommend/
analog telephone line incoming
analoge Telefonleitung ankommend alternativ zur Buchse/
analog telephone line incoming alternatively to outlet
a b
3
126
56
Digitale Daten 10/100 MBit/s (DSL o. ä.)/
Digital data 10/100 MBit/s (DSL or the like)
Anschlussseite line21®/
connection side line21®
max. 50 m
Telefon/
telephone
weiterführende Telefoninstallation, bei Bedarf/
to additional telephone jacks, if required
a2 b2
Anschluss-
seite/
connection
side
line21®
analoge Telefonleitung
ankommend/analog
telephone line incoming
Anschlussseite/
connection side
line21®
analoge Telefonleitung
ankommend/analog
telephone line incoming analoge Telefonleitung
ankommend/analog
telephone line incoming
line21®,
max. 50 m
Digitale Daten 10/100
MBit/s (DSL o. ä.)/
Digital data 10/100 MBit/s
(DSL or the like)
Montage
Achtung Arbeiten am 230-V-Netz
dürfen nur von autorisiertem
Elektrofachpersonal ausgeführt
werden!
Lebensgefahr! Durch elektrischen Strom!
Bei allen Montagearbeiten
schalten Sie zunächst die
Netzspannung ab!
Beachten Sie die aktuell gültigen Normen und
Richtlinien, um die allgemeinen Sicherheitsbe-
stimmungen für Fernmeldeanlagen zu erfüllen
und um Störbeeinflussungen zu vermeiden.
Achten Sie bei kombinierten Anlagen auf
den Berührungsschutz des Starkstromteils.
Der Berührungsschutz muss auch dann
gewährleistet sein, wenn Sie die gemein-
same Abdeckung entfernt haben (dies ist bei
Altanlagen nicht immer gegeben).
Achten Sie bei der Errichtung kombinierter
Anlagen auf die Einhaltung der Mindestabstände
von 10 mm zwischen Daten-/Fernmeldeleitun-
gen und Starkstromleitungen.
Die Montage wird wie folgt ausgeführt:
1 Rasten Sie das REG-Patchpanel auf der
Hutschiene ein.
2 Lösen Sie die Schrauben des Geräte-
deckels und nehmen Sie ihn ab.
3 Nach der Installation stecken Sie den
Deckel wieder auf und schrauben Sie ihn
fest.
Hinweis Die Kombination einer line21®-
Strecke mit ISDN-Anwendungen
(S0) ist nicht möglich.
Der Aufbau einer line21®-Strecke
in einem mehradrigen Kabel (> 6
Adern) neben anderen Diensten/
Anwendungen ist problemlos
möglich.
Technische Daten
Temperaturbereich
Betrieb: -5 °C bis 45 °C
Lager: -25 °C bis 70 °C
Leitungstyp: 2 x 2 Adern, twisted
pair oder Sternvierer;
< 0,6 mm
Übertragungsraten
Leitungslänge < 30 m: 100 Mbit/s
Leitungslänge < 50 m: 10 Mbit/s
Schutzart: IP20 gemäß EN 60529
Schutzklasse: II
Mounting
Attention Work on the 230-V-supply
may only be carried out by
authorized electricians.
Danger for life! Disconnect the main vol-
tage at first for all mounting
works.
Pay attention to the actual norms, in order to
fulfil the general safety requirements for tele-
communication systems and to avoid disturbing
interferences.
Pay attention to the shock-proof protection of
the heavy-current part in combined plants. The
shock-proof protection must also be guaran-
teed, when you have removed the common
covering (this is not always given for old instal-
lations).
Take care that the minimum distance of 10 mm
between data-/telecommunication cables and
heavy-current cables are strictly observed during
the erection of combined plants.
The mounting is carried out as follows:
1 Snap the DIN Rail-Patch panel, 6 Port on
the DIN rail.
2 Disconnect the screws from the device’s lid
and remove the lid.
3 After installation put the lid on and screw it
on.
Notice The combination of a line21®-
installation with ISDN-applications
(S-bus) is not possible.
The set-up of a line21®-installation
in a multi-wire cable (> 6 wires)
besides other services/applications
is possible.
Technical Data
Range of temperature
Operation: -5 °C to 45 °C
Storage: -25 °C to 70 °C
Cable type: 2 x 2 wires, twisted pair
or twisted quad,
> 0.6 mm
Data transmission rates
cable length < 30 m: 100 Mbit/s
cable length < 50 m: 10 Mbit/s
Protection class: IP20 acc. to EN 60 529
Class: II
© Wilhelm Rutenbeck GmbH & Co. KG · Technische Änderungen vorbehalten./Subjected to technical changes. · 293 492 · Stand/Status 07.13

Other Rutenbeck Network Hardware manuals

Rutenbeck PPR 6 User manual

Rutenbeck

Rutenbeck PPR 6 User manual

Rutenbeck 23510305 Installation instructions

Rutenbeck

Rutenbeck 23510305 Installation instructions

Popular Network Hardware manuals by other brands

Lantronix EDS3000PS quick start guide

Lantronix

Lantronix EDS3000PS quick start guide

Aetina AN110-XNX-EN70 quick start guide

Aetina

Aetina AN110-XNX-EN70 quick start guide

TxPORT Transport PRISM 3021 manual

TxPORT Transport

TxPORT Transport PRISM 3021 manual

mIoT Captis Multi installation guide

mIoT

mIoT Captis Multi installation guide

Korenix JetBox 8152 user manual

Korenix

Korenix JetBox 8152 user manual

Actidata actiNAS cube RDX user manual

Actidata

Actidata actiNAS cube RDX user manual

AutoPatch AF-10 Installation and setup guide

AutoPatch

AutoPatch AF-10 Installation and setup guide

Cailabs Tilba R instruction manual

Cailabs

Cailabs Tilba R instruction manual

ADTRAN NetVanta 1000 Series Hardware installation guide

ADTRAN

ADTRAN NetVanta 1000 Series Hardware installation guide

Conceptronic EMRICK12B Quick installation guide

Conceptronic

Conceptronic EMRICK12B Quick installation guide

Seyeon FlexWATCH FW3470 user manual

Seyeon

Seyeon FlexWATCH FW3470 user manual

Sierra Wireless AC595 Developer's guide

Sierra Wireless

Sierra Wireless AC595 Developer's guide

Nokia FPS-8 user guide

Nokia

Nokia FPS-8 user guide

CommScope EHD user manual

CommScope

CommScope EHD user manual

ADC PG-FlexPlus PG-CAB001 manual

ADC

ADC PG-FlexPlus PG-CAB001 manual

NEC N8151-50 user guide

NEC

NEC N8151-50 user guide

Moxa Technologies IA3341 Hardware user manual

Moxa Technologies

Moxa Technologies IA3341 Hardware user manual

Alvarion BreezeNET DS.11 Configuration Utility Brochure & specs

Alvarion

Alvarion BreezeNET DS.11 Configuration Utility Brochure & specs

manuals.online logo
manuals.online logoBrands
  • About & Mission
  • Contact us
  • Privacy Policy
  • Terms and Conditions

Copyright 2025 Manuals.Online. All Rights Reserved.