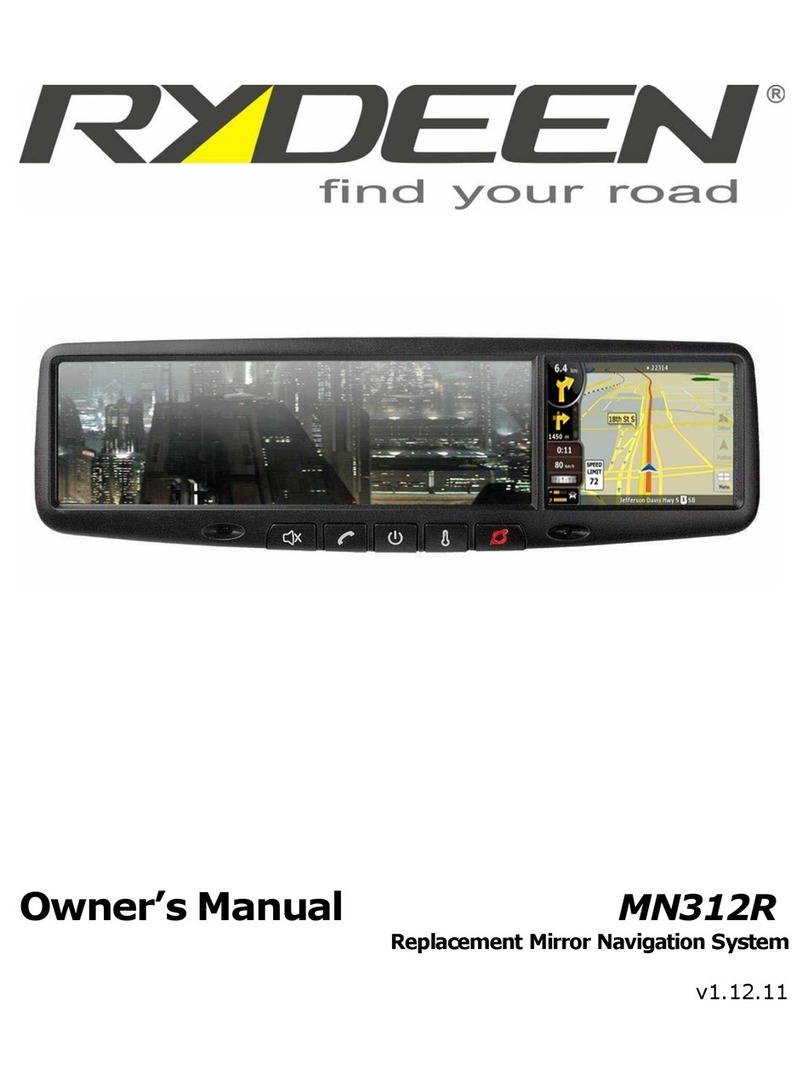
Rydeen MN312S User manual

Owner’s Manual MN312S/MN312D
Mirror Replacement Navigation System
v1.0

Welcome Statement & Warnings
1
[THIS PAGE IS INTENTIONALLY LEFT BLANK]

Welcome Statement & Warnings
2
Contents
1. Welcome Statement & Warnings 4
2. What’s in the Box 6
3. Product Overview 7
4. Installation 10
5. Getting Started (Navigation) 13
Configuration Wizard........................................................................................................................ 13
Main Map.......................................................................................................................................... 14
6. Select Location and Generate Route 16
Go to an Address.............................................................................................................................. 16
Navigate to an Address.................................................................................................................... 20
Points of Interest (POI)..................................................................................................................... 23
QuickNav.......................................................................................................................................... 26
Recent Locations.............................................................................................................................. 26
Favorite Locations (Address Book) .................................................................................................. 27
7. Additional Rydeen GPS Features 29
Map Browsing................................................................................................................................... 29
Map Selection................................................................................................................................... 29
8. Rydeen GPS Configurations 30
Settings Menus................................................................................................................................. 30
Figure 26 –Enter Settings................................................................................................................ 30
Automatic Day & Night Adjustments ................................................................................................ 30
Prompts ............................................................................................................................................ 31
Language Settings............................................................................................................................ 32
Look & Feel Settings ........................................................................................................................ 32
GPS Settings.................................................................................................................................... 33
Units of Measure .............................................................................................................................. 34
Time Settings.................................................................................................................................... 34
Start Demo........................................................................................................................................ 35
About ................................................................................................................................................ 35
Help .................................................................................................................................................. 35
9. Device System Settings 36
Brightness (Backlight) Settings......................................................................................................... 37
Date-Time Settings........................................................................................................................... 37
Language Settings............................................................................................................................ 38
System & Touch Screen Calibration ................................................................................................ 38
Software Launch Path Selection ...................................................................................................... 39
10. Music and Volume Settings 40
11. Handsfree Bluetooth Operation 42
12. Temperatures Display Button Function 46
13. Store Demo Video Playback 47
14. Specifications 48
15. Maintaining Your GPS 49

Welcome Statement & Warnings
3
16. Technical Support Contact Info 49
17. One Year Limited Warranty 49
18. To Obtain Warranty Service 50
19. FCC Compliance Statement 51
20. Copyright 51
21. Disclaimer 51
Index 52

Welcome Statement & Warnings
4
1. Welcome Statement & Warnings
Congratulations and thank you for purchasing the RYDEEN MN312S/MN312D Mirror
Car Navigation Unit. We hope you will enjoy using this exciting product and trust
that it will make your driving experience more comfortable and hassle-free.
The MN312S/MN312D provides an easy-to-use touch screen user interface, clear,
easy-to-understand spoken instructions, and innovative functionality in a stylish
housing that replaces the factory mirror.
Please read this Owner’s Manual carefully. If you have any further questions about
your MN312S/MN312D’s operation, feel free to call RYDEEN, Toll Free at
1-877-777-8811 (within USA only) for product support, or visit our website:
www.rydeenmobile.com.
PRECAUTIONS & WARNINGS
IMPORTANT INFORMATION
PLEASE READ CAREFULLY BEFORE USING THIS PRODUCT
This product is intended to provide accurate turn-by-turn directions that will help
you quickly reach your desired destination. We therefore, recommend that you read
and follow all information and instructions in this Owner’s Manual for the best
performance and satisfaction of your MN312S/MN312D.
Your MN312S/MN312D IS NOT a substitute for personal judgment. The route
suggestions should never supersede any local traffic regulation, personal
judgment or knowledge of safe driving practices. Before making any
maneuvers (for example, a U-turn or a left turn) suggested by the
MN312S/MN312D system, please be sure that such a maneuver can be
completed legally and safely. Do not follow route suggestions that could put
you or your vehicle in a potentially unsafe or illegal circumstance.
You should not depend on MN312S/MN312D to locate emergency services
(such as police, fire stations, hospitals and clinics). The database may not
include all emergency service providers. It is the best to call your local police
department and ask for directions in these situations.
Set the unit volume at a level that will allow you to hear outside traffic and
emergency vehicles.
Avoid placing cell phones or wireless transceiver devices near the GPS
antenna (located in the rear of the unit) as their signals may weaken or
interfere with the GPS satellite signal being received by your
MN312S/MN312D, causing it to perform poorly.
The MN312S/MN312D should not be programmed while driving. The driver
can only program the unit while the vehicle is parked in a safe location.
Otherwise, a passenger may program and operate the unit while the vehicle
is in motion.
SEVERE INJURY RISK -DO NOT mount your MN312S/MN312D on the
surface of, or in the deployment field of your vehicle’s driver and passenger

Welcome Statement & Warnings
5
airbag units.
Position the unit in a location that does not obstruct the driver’s view of the
road, instruments or vehicle controls.
Position the unit so the screen can be viewed with just a quick glance. Glance
at the unit screen or manipulate the in-route touch screen controls ONLY
WHEN VEHICLE IS COMPLETELY STOPPED AND IT IS SAFE to do so.
Be sure the MN312S/MN312D unit is securely attached to the windshield of
your vehicle with the supplied bracket.
DO NOT attempt to modify or disassemble the MN312S/MN312D unit.
Personal injury or damage could result. If a problem occurs, stop using the
system immediately and contact RYDEEN. Changes or modifications to the
MN312S/MN312D will void the warranty and its compliance with FCC rules
thus making it illegal to use.
If you notice any of the following: (unidentified liquid on the unit; smoke
rising out of the unit; unusual odor emanating from the unit) –STOP USING
THE UNIT IMMEDIATELY. Contact the nearest RYDEEN retailer or call
RYDEEN Customer Service for assistance Toll Free @ 1-877-777-8811 (within
USA only).
DO NOT mount your MN312S/MN312D on any non-automotive form of
transportation (motorcycles, bikes, ATV’s, watercraft).
WARNINGS
Avoid dropping your MN312S/MN312D unit or subjecting it to excessive shock
and vibrations as this may cause it to malfunction.
DO NOT use any sharp object to operate your unit’s touch-screen display.
Excessive force could damage the LCD display.
Keep the MN312S/MN312D unit out of reach of small children. Removable
parts (microSD memory card) can be a choking hazard.
The MN312S/MN312D unit IS NOT WATERPROOF. Avoid exposing it to
rain or other forms of excessive moisture. Water damage is not covered
under the warranty.
WARNINGS
•THE FOLLOWING INSTRUCTIONS ARE INTENDED FOR AUTHORIZED
RYDEEN MOBILE INSTALLERS ONLY
•PROFESSIONAL INSTALLATION BY AUTHORIZED RYDEEN RETAILER
REQUIRED TO BE COVERED UNDER WARRANTY

What’s in the Box
6
2. What’s in the Box
Your MN312S/MN312D system comes complete with everything you need to get set
up and get going. Please take a moment to review the contents of your system.
Windshield Mounting Stem is Sold Separately..
(Choose from the following types. Check for updated mount type availability at
www.rydeenmobile.com/GPS%20Car%20Navigation/VehicleSpecificMounts.html )
MN312S/MN312D
Most Toyota, Nissan, Mazda & Ford
Most Honda
Kia & Hyundai
Universal Package
Most VW & Audi

Product Overview
7
3. Product Overview
MN312S / MN312D
FRONT
BACK
1
4
3
5
7
6
2
8
9
10
11
12
13
14
15
11

Product Overview
8
FRONT
Description
1
Mirror
Reflective Area for Rear Viewing
2
Photo Sensor /
Bluetooth Microphone
Opening for Photo Sensor for Auto-dimming
Function (MN312D only) and Microphone for
Bluetooth Function
3
Mute/Volume Button
SHORT PRESS –Mutes Sound
LONG PRESS –Opens Volume / Music Control Main
Screen
4
Bluetooth Button
SHORT PRESS –Answer / Hung Up Bluetooth
Connected Phone
LONG PRESS –Opens Bluetooth Main Menu
5
POWER
MN312S –Power ON/OFF with LONG
PRESS
MN312D –Power ON/OFF with LONG
PRESS. Turns ON/OFF Auto-dimming Function (RED
is OFF) with SHORT PRESS
6
Temperature Button
SHORT PRESS –Displays Temperature at Current
Screen
LONG PRESS –Displays Temperature Main Screen
with Calibration (+/-) buttons
7
Guidepoint Button
SHORT PRESS –Connects with Guidepoint Call
center via Bluetooth connected call phone (dialing
preprogrammed toll-free phone number)
LONG PRESS –Triggers Guidepoint GPS Tracking
System module (sold separately) for Transmitting
GPS Location Alert to the Guidepont Call Center in
Case of Emergency
8
TOUCHSCREEN
3.5 inch touch screen of the GPS and other mirror
functions
9
microSD CARD PORT
Supports up to 8GB microSD card for Map Update
and Music Play
10
RESET Button
(Located at the
Bottom of Unit)
Use a PEN to press the button, to RE-START
the unit (System Re-Boot)
11
Speaker Unit (Back)
2.5W Built-In Speaker

Product Overview
9
*Located Inside the Main Power Cable
NO.
BACK / CABLE
Description
11
SPEAKER
2.5W Built-in Speaker
12
BRACKET CHASSIS
Attaches to Vehicle Specific Bracket Here
13
Connector A
Main Connector
14
Connector B
Second Connector for Audio Connection
15
4 Pin Connector
Connector for Guidepoint GPS Tracking Box
16
BATTERY (YELLOW) *
12V+ Constant power supply
17
GND (BLACK) *
- Chassis Ground
18
ACC (RED) *
12v+ ACC Controlled Power Supply
19
Backup Camera In
Video In for Backup Camera (YELLOW RCA)
20
Audio Out Right Ch (RED)
Connected to Audio Amplifier (Right)
21
Audio Out Left Ch (WHITE)
Connected to Audio Amplifier (Left)

Installation
10
Connector PIN Descriptions:
Connector A
Pin
Color
Description
Terminal
1
Red
Ignition 12v + (ACC)
Bare
2*
Black
Ground
Bare
3
Yellow
12 DC Constant (car battery)
Bare
4
Yellow
Camera In +
RCA
5*
Blue
Guidepoint On-Call
Negative Trigger output (-)
4* pin
connector
6**
White
Temp sensor Send
Bare
7**
Green
Temp sensor Receive
Bare
Connector B
4. Installation
NOTES
•To find your nearest professional Rydeen Authorized
installer, please call Rydeen Mobile Electronics at
1-877-777-8811, so that we can assist you.
•Dropping your MN312S/MN312D unit or subjecting it to excessive
shock and vibrations as this may cause it to malfunction and is not
covered by warranty.
•The MN312S/MN312D units ARE NOT WATERPROOF. Avoid exposing
it to rain or other forms of excessive moisture. Water damage is not
covered under the warranty.
Most vehicles have the mirror mounted directly onto the glass;
therefore improper tools or techniques used in the installation
could result in a damaged or broken windshield. Rydeen is not
responsible for damages to windshield caused by installation
processes.
Pin
Color
Description
Terminal
8
Red
Audio Line Out + Right
RCA Male
9
White
Audio Line Out + Left
RCA Male
10
Black
Audio Line Out Right & Left -
RCA Male
(Ground)
11
N/A
N/A
N/A
12
N/A
N/A
N/A
13
N/A
N/A
N/A
14
N/A
N/A
N/A

Installation
11
1) Remove the existing mirror and unplug a connector if exist. (Note: All
vehicles use different mounting solutions. If necessary, consult your local
automotive dealer or installation professional for specific instructions.)
2) Attach the vehicle-specific mounting stem (sold
separately) to the back of the mirror using the
supplied washers and screws, starting with the holes
nearest the top of mirror housing.
3) Mount the MN312S/MN312D using supplied screw.
Slide or twist it onto the factory mounting base and
carefully tighten the screw until secure.
4) Plug in the cigar lighter power connector to the car power outlet or if
necessary the unit can be hardwired for better appearance.

Installation
12
Temperature Sensor installation locations (Suggested
Installation locations for Optional Temperature Sensor for
optimum sensitivity)
Note
Please refer to Guidepoint installation manual for the Guidepoint
GPS Vehicle Tracking Box installation. Guidepoint GPS Tracking
Box is sold separately and service activation is necessary. Contact
Guidepoint Systems Inc. for more information (Toll-Free
1-877-477-3463).
Note
Cables connected to PIN 6 & 7 are for temperature sensor
connections. Please contact Rydeen Tech Support (Toll-Free
1-877-777-8811) for more details.
Sensor
location for
vehicle’s
cabin
temperature
Sensor location for
outside temperature

Getting Started (Navigation)
13
5. Getting Started (Navigation)
Configuration Wizard
This wizard, which automatically starts at the first time you use RYDEEN GPS,
lets you easily configure the system settings by providing a step-by-step setup
process. You can also configure these system settings by going to the system
options from the Settings menu.
Language Settings - Set text and voice language preferences.
EULA –Confirm the terms and conditions of using the software.
Select “I Agree” and proceed.
Time Zone –Select the time zone according to where you live. Select
Daylight Saving if applicable.
Units of Measure - Set the units of measures of your preference.
Warning - When you start RYDEEN GPS, the Warning screen appears.
Please take a moment to review the information provided before tapping the
Agree button. Select the "Do not display this warning again" checkbox to
skip this message in the future.
Note: Destinator is a software provider for Rydeen Navigation.
Figure 1 –Configuration Wizard

Getting Started (Navigation)
14
Main Map
You can use the icons displayed on this screen to plan and view your route.
1
6
2
7
8
3
9
4
5
10
Figure 2 - Map Screen
Main Map Icons
1, 6
Zoom in or out of the map to view a larger less detailed
area or a smaller area in greater detail
2
Tap the compass to change the map view display as
follows:
2D map view with the forward direction at the top.
3D map view with the forward direction at the top.
2D Nmap view with North at the top.
3
Use the Volume bar to adjust or mute the volume.
4
When you have calculated a route, the
Directions bar displays information
about your next turn. Tap this bar to
hear the voice announcement of next
maneuver.
5
The GPS bar is a toggle button. Tap
this area to display the remaining
travel distance and travel time,
estimated time of arrival, street name
and address number.

Getting Started (Navigation)
15
7
Speed limits are visible only when the Speed Warning
prompt is selected.
When you are exceeding the speed limit, RYDEEN GPS
displays the following icons:
8
These icons display your power source.
9
Tap this icon to set your QuickNav location. When set, you
can tap this button to automatically calculate a route to this
location.
10
Tap this icon to display the Main Menu.
Location Point on MainMap
You can drag the map to a specific point and tap the desired location directly on
the Main Map screen in both 2D and 3D map view. This feature is useful when
you want to navigate to a specific point on the map, rather than by the street
address. When you tap on the map, the pop-up menu appears with the following
options:
Figure 3 - Point on the Map Options
Go There - Navigate to the selected
point on the map.
Save (Add to my Favorites) - Save
a point on the map as a favorite
destination for future use.
Start here - Designate the selected
point as the starting point instead of
your current location.
Tap

Select Location and Generate Route
16
Select City First.
Select or enter a State you
want to go. Then tap OK.
Enter a City then tap OK.
Enter a Street then tap OK.
Enter a Address Number
then tap OK.
6. Select Location and Generate Route
Go to an Address
From the Main Menu, tap the Go! button. Then Where Do You
Want To Go? Screen appears, allowing you to choose from New
Address, POI (Point of Interest), Recent Place or Favorites.
Tap the Address button to enter address information. Then follow
the steps below.
Select from the following address entry options:
City First –City > Street > Address Number
Intersections –City> 1st Street > 2nd Street
Tap to
enter new
address
Select City First. Enter a
City then tap OK.
Enter a Street then tap
OK.
Enter a Address &
Number then tap OK.
If going to a different
State, select Change State
to enter a State you want
to go. Then tap OK.
Figure 4 - Search by POI Name
Figure 5 –Enter Address Screen

Select Location and Generate Route
17
Tap one of the Enter Address Screen Buttons to display the first address
screen.
Figure 6 - Selecting a State
When entering an address, you can use the keyboard to enter the characters. The
characters appear in the Address field. Rydeen GPS automatically searches the
Address list for the first occurrence of the characters entered. After you have
selected a town or city, Rydeen GPS displays the next address field, such as
street and address number.
Instead of specifying a street, you have the option of selecting the Town/City
Center. If you don't know the address number, you can select the Street Midpoint.
Tap the OK button to move through the sequence of address screens.
Go to Another Country
From the Enter address screen, you can tap Change State to select a State of
another country that you can travel to by vehicle.
This feature is available only when you have the following maps installed:
Map of the country where you are currently located.
Map of the country where you want to travel.
The map of the major roads for that continent that connect one map to
another (for example, the major roads in USA & Canada)
For example, if you are in New York and you want to travel to Toronto, select the
State of Canada (for this case Ontario) and designate Toronto City Center as your
destination. Rydeen GPS automatically displays the map of USA when traveling
on local roads in USA, a map of major roads in USA, when traveling on a USA
major road. The map of Canada automatically displays when traveling on roads in
Canada.

Select Location and Generate Route
18
Keyboard Command Keys
The following buttons are available to enhance your search process.
Select from list
Figure 7 - Search and Keyboard Buttons
1
Lets you move back a character that you have entered.
2
Lets you scroll up or down the list of town/city or street names.
3
Lets you extend the address list by hiding the keyboard.
4
Lets you change the keyboard for address number input.
Note: Rydeen GPS automatically switches to the address number input
keyboard after you enter street numbers and tap OK. To switch back
to the alphabetical address input screen, simply tap the ABC key.
1
2
3
4

Select Location and Generate Route
19
Figure 8 –Route Selection Confirmation Screen
Options
Tap the one of Option button to:
To save an Entry - Tap Save to add an address to your list of favorite
locations. For more information about favorites, see Favorite Locations on
page 28.
Set an Address as the Starting Point - Tap the Starting Point button to
designate the selected address as the route origin.
Preview Route (Demo Route) –Run simulated route to selected address.
Tap to see the entire route on the map.
Selecting a Destination and Options
The following screen appears when a destination address input is complete and
ready to navigate.
Go - When you tap the Go button, Rydeen GPS calculates the route
to your selected destination.
When you tap this button, Rydeen GPS returns to the previous
screen.
This manual suits for next models
1
Table of contents
Other Rydeen Car Navigation System manuals
Popular Car Navigation System manuals by other brands

Audiovox
Audiovox NAV 102 - NAVIGATION SOFTWARE datasheet

Crutchfield
Crutchfield 000NAVIG installation guide

Panasonic
Panasonic Strada CN-GP50N Quick reference guide

Chevrolet
Chevrolet 2004 Tahoe manual

Toyota
Toyota TNS 300 installation instructions

Blaupunkt
Blaupunkt TravelPilot RNS 149 operating instructions