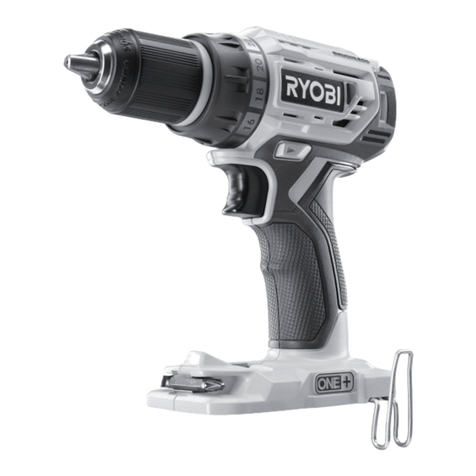
Ryobi EID11002RV User manual

EID11002RV
GB IMPACT DRILL USER’S MANUAL 1
FR PERCEUSE À PERCUSSION MANUEL D’UTILISATION 4
DE SCHLAGBOHRMASCHINE BEDIENUNGSANLEITUNG 7
ES TALADRO DE PERCUSION MANUAL DE UTILIZACIÓN 10
IT TRAPANO A PERCUSSIONE MANUALE D’USO 13
NL KLOPBOOR GEBRUIKERSHANDLEIDING 16
PT BERBEQUIM DE PERCUSSÃO MANUAL DE UTILIZAÇÃO 19
DK SLAGBOREMASKINE BRUGERVEJLEDNING 22
SE SLAGBORRMASKIN INSTRUKTIONSBOK 25
FI ISKUPORAKONE KÄYTTÄJÄN KÄSIKIRJA 28
NO SLAGBOREMASKIN BRUKSANVISNING 31
RU êìäéÇéÑëíÇé èé ùäëèãìÄíÄñàà 34
PL WIERTARKA UDAROWA INSTRUKCJA OBSŁUGI 37
CZ PŘÍKLEPOVÁ VRTAČKA NÁVOD K OBSLUZE 40
HU ÜTVEFÚRÓ HASZNÁLATI ÚTMUTATÓ 43
RO MASINA DE GAURIT ROTOPERCUTOARE MANUAL DE UTILIZARE 46
LV TRIECIENURBIS LIETOTĀJA ROKASGRĀMATA 49
LT SMŪGINIS GRĄŽTAS NAUDOJIMO VADOVAS 52
EE LÖÖKTRELL KASUTAJAJUHEND 55
HR BEÆI»NA BU©ILICA-ZAVRTA» KORISNI»KI PRIRU»NIK 58
SI UDARNI VRTALNIK UPORABNIŠKI PRIROČNIK 61
SK PRÍKLEPOVÉ VŔTANIE NÁVOD NA POUŽITIE 64
GR O X 67
TR DARBEL MATKAP KULLANiM KILAVUZU 70
GB ORIGINAL INSTRUCTIONS FR TRADUCTION DES INSTRUCTIONS ORIGINALES DE ÜBERSETZUNG DER ORIGINALANLEITUNG ES TRADUCCIÓN DE
LAS INSTRUCCIONES ORIGINALES IT TRADUZIONE DELLE ISTRUZIONI ORIGINALI NL VERTALING VAN DE ORIGINELE INSTRUCTIES PT TRADUÇÃO DAS
INSTRUÇÕES ORIGINAIS DK OVERSÆTTELSE AF DE ORIGINALE INSTRUKTIONER SE ÖVERSÄTTNING AV DE URSPRUNGLIGA INSTRUKTIONERNA FI
ALKUPERÄISTEN OHJEIDEN SUOMENNOS NO OVERSETTELSE AV DE ORIGINALE INSTRUKSJONENE RU
PL TUMACZENIE INSTRUKCJI ORYGINALNEJ CZ PŘEKLAD ORIGINÁLNÍCH POKYNŮ HU AZ EREDETI ÚTMUTATÓ FORDÍTÁSA RO TRADUCEREA
INSTRUCIUNILOR ORIGINALE LV TULKOTS NO ORIĢINĀLĀS INSTRUKCIJAS LT ORIGINALIŲ INSTRUKCIJŲ VERTIMAS EE ORIGINAALJUHENDI TÕLGE
HR PRIJEVOD ORIGINALNIH UPUTA SI PREVOD ORIGINALNIH NAVODIL SK PREKLAD POKYNOV VORIGINÁLI GR
TR ORIJINAL TALIMATLARIN TERCÜMESI
EID11002RV_24lgs manual_v2B.indd A1EID11002RV_24lgs manual_v2B.indd A1 1/16/10 9:41:11 AM1/16/10 9:41:11 AM

7
8
11
1
5
2
10
6
3
16
17
18
5
18
1
4
2
19
Fig. 2Fig. 1
EID11002RV_24lgs manual_v2B.indd A2EID11002RV_24lgs manual_v2B.indd A2 1/16/10 9:41:13 AM1/16/10 9:41:13 AM

4
6
15 14
16
6
7
19
17
9
3
12
13
Fig. 5
Fig. 4Fig. 3
Fig. 6
Fig. 7 Fig. 8
EID11002RV_24lgs manual_v2B.indd A3EID11002RV_24lgs manual_v2B.indd A3 1/16/10 9:41:16 AM1/16/10 9:41:16 AM

Important!
It is essential that you read the instructions in this manual before operating this machine.
Attention !
Il est indispensable que vous lisiez les instructions contenues dans ce manuel avant la mise en service
de l’appareil.
Achtung!
Bitte lesen Sie unbedingt vor Inbetriebnahme die Hinweise dieser Bedienungsanleitung.
¡Atención!
Es imprescindible que lea las instrucciones de este manual antes de la puesta en servicio.
Attenzione!
Prima di procedere alla messa in funzione, è indispensabile leggere attentamente le istruzioni contenute
nel manuale.
Let op !
Het is van essentieel belang dat u de instructies in deze gebruiksaanwijzing leest vooraleer u dit toestel
in gebruik neemt.
Atenção!
É indispensável que leia as instruções deste manual antes de utilizar a máquina.
OBS!
Denne brugsanvisning skal læses igennem inden ibrugtagning.
Observera!
Det är nödvändigt att läsa instruktionerna i denna bruksanvisning innan användning.
Huomio!
On ehdottoman välttämätöntä lukea tässä käyttöohjeessa annetut ohjeet ennen käyttöönottoa.
Advarsel!
Det er meget viktig at du leser denne brukerveiledningen før du tar maskinen i bruk.
ÇÌËχÌËe!
.
Uwaga!
Przed przystpieniem do uytkowania tego urzdzenia, naley koniecznie zapozna si z zaleceniami
zawartymi w niniejszym podrczniku.
Dležité upozornní!
Nepoužívejte tento pístroj díve, než si petete pokyny uvedené v tomto návodu.
Figyelem!
Feltétlenül fontos, hogy a jelen használati útmutatóban foglalt elírásokat az üzembe helyezés eltt
elolvassa!
Atenie!
Este esenial s citii instruciunile din acest manual înainte de operarea acestui aparat.
Uzmanību! Svarīgi, lai jūs pirms mašīnas darbināšanas izlasītu instrukcijas šajā rokasgrāmatā.
Dėmesio! Prieš praddami eksploatuoti š prietais, svarbu, kad perskaitytumte šiose instrukcijose pateiktus
nurodymus.
Tähtis! Enne trelli kasutama hakkamist tuleb käesolevas juhendis esitatud juhised kindlasti läbi lugeda.
Upozorenje! Neophodno je da proitate ove upute prije uporabe ovog ureaja.
Pomembno!
Pred uporabo tega stroja, obvezno preberite navodila iz tega prironika.
Dôležité! Pre prácou s týmto zariadením je dôležité, by ste si prečítali pokyny v tomto návode.
!
!"#$#% &'()*#* #+ ),)#()*+ #- %&$/0 ,#0 !" 1 #$ 23)$ )*
4*#%,"/.
Dikkat!
Cihazn çaltrlmasndan önce bu klavuzda bulunan talimatlar okumanz zorunludur.
Subject to technical modifications / Sous réserve de modifications techniques /Technische Änderungen vorbehalten /
Sujeto a modificaciones técnicas / Con riserva di eventuali modifiche tecniche /Technische wijzigingen voorbehouden /
Com reserva de modificações técnicas / Med forbehold for tekniske ændringer / Med förbehåll för tekniska ändringar /
Tekniset muutokset varataan / Med forbehold om tekniske endringer / åÓ„ÛÚ ·˚Ú¸ ‚ÌeÒeÌ˚ ÚeıÌ˘eÒÍËe ËÁÏeÌeÌËfl /
Z zastrzeeniem modyfikacji technicznych / Zmny technických údaj vyhrazeny / A mszaki módosítás jogát fenntartjuk /
Sub rezerva modificarilor tehnice / Paturam tiesības mainīt tehniskos raksturlielumus / Pasiliekant teisę daryti techninius pakeitimus /
Tehnilised muudatused võimalikud /Podloæno tehniËkim promjenama /Tehnine spremembe dopušene/
Technické zmeny vyhradené / 5!6 #$ *!7849$ #*:10 #"%!%!%;)*- / Teknik deiiklik hakk sakldr
EID11002RV_24lgs manual_v2B.indd A4EID11002RV_24lgs manual_v2B.indd A4 1/16/10 9:41:18 AM1/16/10 9:41:18 AM

1
English
GB
FR DE ES IT NL PT DK SE FI NO RU PL CZ HU RO LV LT EE HR SI SK GR TR
SPECIAL RULES
QWear ear protectors with impact drills. Exposure to
noise can cause hearing loss.
QUse auxiliary handles supplied with the tool. Loss
of control can cause personal injury.
QHold power tool by insulated gripping surfaces,
when performing an operation where the cutting
accessory may contact hidden wiring or its own
cord. Cutting accessory contacting a "live" wire may
make exposed metal parts of the power tool "live" and
could give the operator an electric shock.
SPECIFICATIONS
EID11002RV
Voltage 230 V 50 Hz
Chuck capacity 13 mm (1/2”)
Drilling capacity
in wood 50 mm
in steel 13 mm
in masonry 20 mm
Input 1100 W
No load speed 0-1,200 / 0-3,200 min-1
Blows per minute 0-19,000 / 0-51,000 min-1
Weight 3.38 kg
DESCRIPTION
1. Trigger Switch
2. Forward / Reverse Selector
3. Keyless Chuck
4. Variable Speed Selector
5. Lock-on Button
6. Drill Mode Shift Knob
7. Depth Gauge
8. Auxiliary Handle
9. Bit (Not included)
10. Air Vents
11. Livetool Indicator™
12. To Tighten Chuck
13. To Loosen Chuck
14. To Tighten Handle
15. To Loosen Handle
16. Bit Storge
17. Spindle Lock
18. Bubble Level
19. Gear Setting Switch
STANDARD ACCESSORIES
Auxiliary handle and Depth Gauge.
OPERATION
APPLICATIONS
(Use only for the purposes listed below.)
QDrilling wood, materials and resin boards.
QDrilling concrete (impact drilling only).
QDrilling metal: steel, brass, aluminum sheets, stainless
steel & pipe.
SWITCH
See Figure 1 & 3.
QThis tool can be started and stopped by squeezing
and releasing the trigger switch (1).
QThe speed can be adjusted in either gear by
controlling the force applied to the trigger.
QThe maximum speed of the drill may be set at different
speeds by adjusting the variable speed selector (4).
QFor continuous operation, press the lock-on button (5)
while squeezing the trigger. Squeeze the trigger again
to release the lock.
CHANGING THE ROTATION DIRECTION
See Figure 2.
QTo change the direction of rotation, stop the tool and
push the forward / reverse selector (2).
QWhen the forward selector is pushed in, the bit rotates
clockwise when viewed from the handle end of the tool.
QWhen the reverse selector is pushed in, the bit rotates
counterclockwise.
MOUNTING AND REMOVING THE BIT
See Figure 4.
QInsert the drill bit (9) into the chuck as far as the plain
part of its shank will go.
QTighten the chuck securely by rotating the chuck head
in a clockwise direction (12).
QThe bit can be removed by rotating the chuck in a
counterclockwise direction (13).
CHANGING BETWEEN DRILLING AND IMPACT
DRILLING MODE
See Figure 5.
The drilling mode shift knob (6) for changing between
the drilling mode and impact drilling mode is positioned
on the top of the tool.
DRILLING MODE: Shift the knob to the " " and
showing " " symbol for drilling.
EID11002RV_24lgs manual_v2B.indd Sec1:1EID11002RV_24lgs manual_v2B.indd Sec1:1 1/16/10 9:41:18 AM1/16/10 9:41:18 AM

2
English
GB
FR DE ES IT NL PT DK SE FI NO RU PL CZ HU RO LV LT EE HR SI SK GR TR
OPERATION
IMPACT DRILLING MODE: Shift the knob to the " "
and showing " " symbol for impact drilling.
OPERATING
NEVER COVER THE AIR VENTS (10) SINCE THEY
MUST ALWAYS BE OPEN FOR PROPER MOTOR
COOLING.
DRILLING IN WOOD
To prevent ugly splits around the drill hole on the reverse
side of the workpiece, put a piece of scrap timber under
the work piece.
DRILLING IN METAL
Metals such as steel, brass, aluminum sheets, stainless
steel, and pipe may also be drilled. Mark the point to be
drilled with a nail or punch.
Do not use impact drilling mode on these materials.
DRILLING IN CONCRETE
Stone and masonry are generally drilled in the impact
drilling mode.
When drilling in delicate materials such as wall tiles,
it is essential to start with ordinary drilling and, once the
tile is pierced, to continue with impact drilling.
In deep bore holes the drill bit should be pulled out
occasionally in order to remove the debris from the
drill and hole.
AUXILIARY HANDLE AND DEPTH GAUGE
See Figure 6.
Auxiliary handle
The auxiliary handle (8) can be rotated 360º.
Loosen the handle grip by turning in direction (15),
and tighten it at an easy to use position by turning
the grip in direction (14).
Depth gauge
Holes of a fixed depth can be accurately bored by using
the depth gauge (7).
The depth of the hole will be the distance from the end
of the bit to the end of the depth gauge.
By turning the handle grip in direction (14), the depth
gauge can be released and the depth adjusted. After
adjusting the depth, fix the depth gauge again by turning
the handle grip in direction (15).
BIT STORAGE
See Figure 7.
The auxiliary handle also contains a compartment to
store drill bits. To access this compartment unscrew
the end cap below the grey trim on the handle in an
anticlockwise direction.
SPINDLE LOCK
See Figure 8.
For easy changing of the drill bit this drill is equipped with
an automatic spindle lock (17) which holds the spindle
stationary when loosening and tightening the chuck.
CHANGING THE ROTATION SPEED
See Figure 6.
The rotation speed can only be changed when the tool is
at a standstill.
The gear setting switch (19) is on the left side of the
housing.
QWhen the switch is in position “1” the tool is in the low
gear.
QWhen the switch is in position “2” the tool is in the
high gear.
BUBBLE LEVEL
See Figure 1.
A bubble vial is located on the top of the motor housing
to help keep the drill bit level during use. This ensures
maximum accuracy in drilling.
LIVETOOL INDICATOR™
This tool features a Livetool Indicator™ (11) which
illuminates as soon as the tool is connected to the power
supply. This warns the user that the tool is connected and
will operate when the switch is pressed.
MAINTENANCE
After use, check the tool to make sure that it is in good
condition. It is recommended that you take this tool to
a RYOBI Authorized Service Center for a thorough
cleaning and lubrication at least once a year.
DO NOT MAKE ANY ADJUSTMENTS WHILE
THE MOTOR IS IN MOTION. ALWAYS DISCONNECT
THE POWER CORD FROM THE POWER SUPPLY
BEFORE CHANGING REMOVABLE OR CONSUMABLE
PARTS (BLADE, BIT, ETC.), LUBRICATING OR
WORKING ON THE UNIT.
EID11002RV_24lgs manual_v2B.indd Sec1:2EID11002RV_24lgs manual_v2B.indd Sec1:2 1/16/10 9:41:18 AM1/16/10 9:41:18 AM
3
English
GB
FR DE ES IT NL PT DK SE FI NO RU PL CZ HU RO LV LT EE HR SI SK GR TR
MAINTENANCE
WARNING
To ensure safety and reliability, all repairs should
be performed by an AUTHORIZED SERVICE
CENTER or other QUALIFIED SERVICE
ORGANIZATION.
SAVE THESE INSTRUCTIONS FOR FUTURE
REFERENCE.
ENVIRONMENTAL PROTECTION
Recycle raw materials instead of disposing as
waste. The machine, accessories
and packaging should be sorted for
environmental-friendly recycling.
SYMBOL
Safety Alert
V Volts
Hz Hertz
Alternating Current
W Watts
no No load Speed
min-1 Revolutions or reciprocations per minute
CE Conformity
Double Insulation
Please read the instructions carefully before
starting the machine.
Recycle raw materials instead of disposing as
waste. The machine, accessories and
packaging should be sorted for environmental-
friendly recycling
EID11002RV_24lgs manual_v2B.indd Sec1:3EID11002RV_24lgs manual_v2B.indd Sec1:3 1/16/10 9:41:18 AM1/16/10 9:41:18 AM
Table of contents
Other Ryobi Drill manuals

Ryobi
Ryobi P205G User manual

Ryobi
Ryobi R18DD2-220S User manual

Ryobi
Ryobi P200 User manual

Ryobi
Ryobi P210 User manual

Ryobi
Ryobi DP120 User manual

Ryobi
Ryobi R18DD4 User manual

Ryobi
Ryobi D40 User manual

Ryobi
Ryobi P241 User manual

Ryobi
Ryobi CTH1202K2 Quick setup guide

Ryobi
Ryobi EID1102RB Operation manual