Safa Media IRS-810L User manual

Missi2000 building 101, 725, Suseo-Dong,
Gangnam-Gu, Seoul, Korea
TEL: 02-3413-2020(Rep)
FAX: 02-3413-2029
E-Mail:[email protected]
User's Manual
IC RECORDER
IRS-810L / IRS-1610L
Thank you for your purchasing a Sound MAP.
Please read this User Guide before you use your Sound MAP.
SF69-00139A
SAFA MEDIA Co., Ltd.

2
Table of Contents
1
Special features
Special features.................................................... 1
Cautions and Warnings........................................ 4
Names of each part.............................................. 5
Check the components......................................... 5
LCD Indicator and Symbols................................. 6
Replacing Batteries............................................... 7
Getting Started ..................................................... 9
Recording.............................................................. 10
Voice Recording.................................................... 11
-Recording with the Built-in microphone........... 11
-Recording with the external microphone.......... 11
Recording with line-in.......................................... 12
-Recording from external appliances
(Audio, PC)........................................................... 12
-Recording the general telephone
conversation ........................................................ 12
Playback ................................................................ 13
-Normal Playback ................................................. 13
-Low-speed Playback............................................ 13
-High-speed Search.............................................. 13
-Playback on other Indexes.................................. 14
-Repetition Playback............................................. 14
Menu...................................................................... 15
-Mic Recording Sensitivity ................................. 15
-VOR Function....................................................... 15
-Beep Setting ........................................................ 16
-Recording Time Setting...................................... 16
-Index Introduction .............................................. 16
Delete Function..................................................... 17
-To delete a particular index................................ 17
-To Delete a File.................................................... 17
Saving into the external appliance ..................... 18
-To save into the external audio (such as
cassette recorder)............................................... 18
-To save into a PC................................................. 18
Specification ......................................................... 20
Troubleshooting................................................... 20
1. Convenient and easy to carry slim-line design.
2. Telephone conversation recording
3. Auto power-off
4. Search & Play (INTRO SCAN)
5. Various repetitions
6. 396 recordings capacity
7. Record mode index separation
8. Earphone monitoring during line-in recording
9. VOR (Voice Operation Recording)
10.Backlight
11.Low speed play
12.Fast saving to PC via USB
Preparation
How to Use
References

4
Cautions and Warnings
3
1. Do not attempt to open, repair, or modify your Sound MAP.
2. Do not use this product where the use of electronic devices is
prohibited (such as in aircraft, etc.).
3. Do not put this product or any of its accessories in your mouth.
4. Do not immerse this product in water or spill liquids on it.
1. Do not expose your Sound MAP or its accessories to any
shocks. This may cause it to malfunction.
2. Should the product become deformed or malfunction due to
exposure to smoke or heat, remove the batteries from the
main unit immediately and disconnect any external cables.
3. Do not apply excessive force to the LCD screen. It may cause
damage to the LCD or cause it to malfunction.
4. Do not expose the product to direct sunlight or any source of
heat for a prolonged period.
5. Remove the batteries if you do not intend to use this product
for any prolonged period of time.
6. Do not pull the accessory wires (earphone, earmic, or audio
cables) with excessive force.
The design and the specifications of the Sound MAP are subject
to change without prior notice.
Preparation
Special features......................................... 1
Cautions and Warnings............................ 4
Names of each part................................... 5
Check the components............................. 5
LCD Indicator and Symbols...................... 6
Replacing Batteries................................... 7 Warnings
Cautions

6
LCD Indicator and Symbols
5
Names of each part
FILE/REPEAT
File change and repeat playback
LCD screen
Battery indicator
Index Display (01~99)
Play time, recording time indicator, menu change
Long-play recording
mode indicator
Low-sensitivity recording
mode indicator
Repeat one index Mode
Section Repeat (A <--> B)
Playback state indicator
File repeat playback
mode indicator
4 files displayed
Description of Screen Display
Speaker
STOP/DELETE
Stop recording, index delete,
selected file delete, and all files
delete
Audio cable connector
REC/PAUSE
Recording and pause
NEXT
Fast forwarding, index change,
and menu change
Volume Control
The LED will lit about 5 seconds every time
any key is pressed so that you can
conveniently use your Sound MAP in the
dark.
BACK
(Fast rewinding, index change, and
menu change)
Built-in Microphone
Earphone jack
Recording/Playback
Indicator LED
Red = Recording, Green = Playback
Liquid Crystal Display
PLAY/PAUSE/REMAIN
(Low-speed) playback and pause,
remaining recording capacity check,
INDEX (recording number),
time check, menu selection, index
introduction functions
MENU/HOLD
Recording sensitivity, VOR, beep,
recording time Index introduction
(scan) and hold set/release
SOUND MAP (main unit) Adaptor for telephone
conversation recording Audio Cable USB cable User’s manualMono earphone External
Microphone CD-ROMBattery Cable for telephone
conversation recording
Check the components
USB cable connector

7
Replacing Batteries
8
How to Use
Getting Started.............................................................. 9
Recording ...................................................................... 10
Voice Recording ........................................................... 11
- Recording with the Built-in microphone.................. 11
- Recording with the external microphone. ............... 11
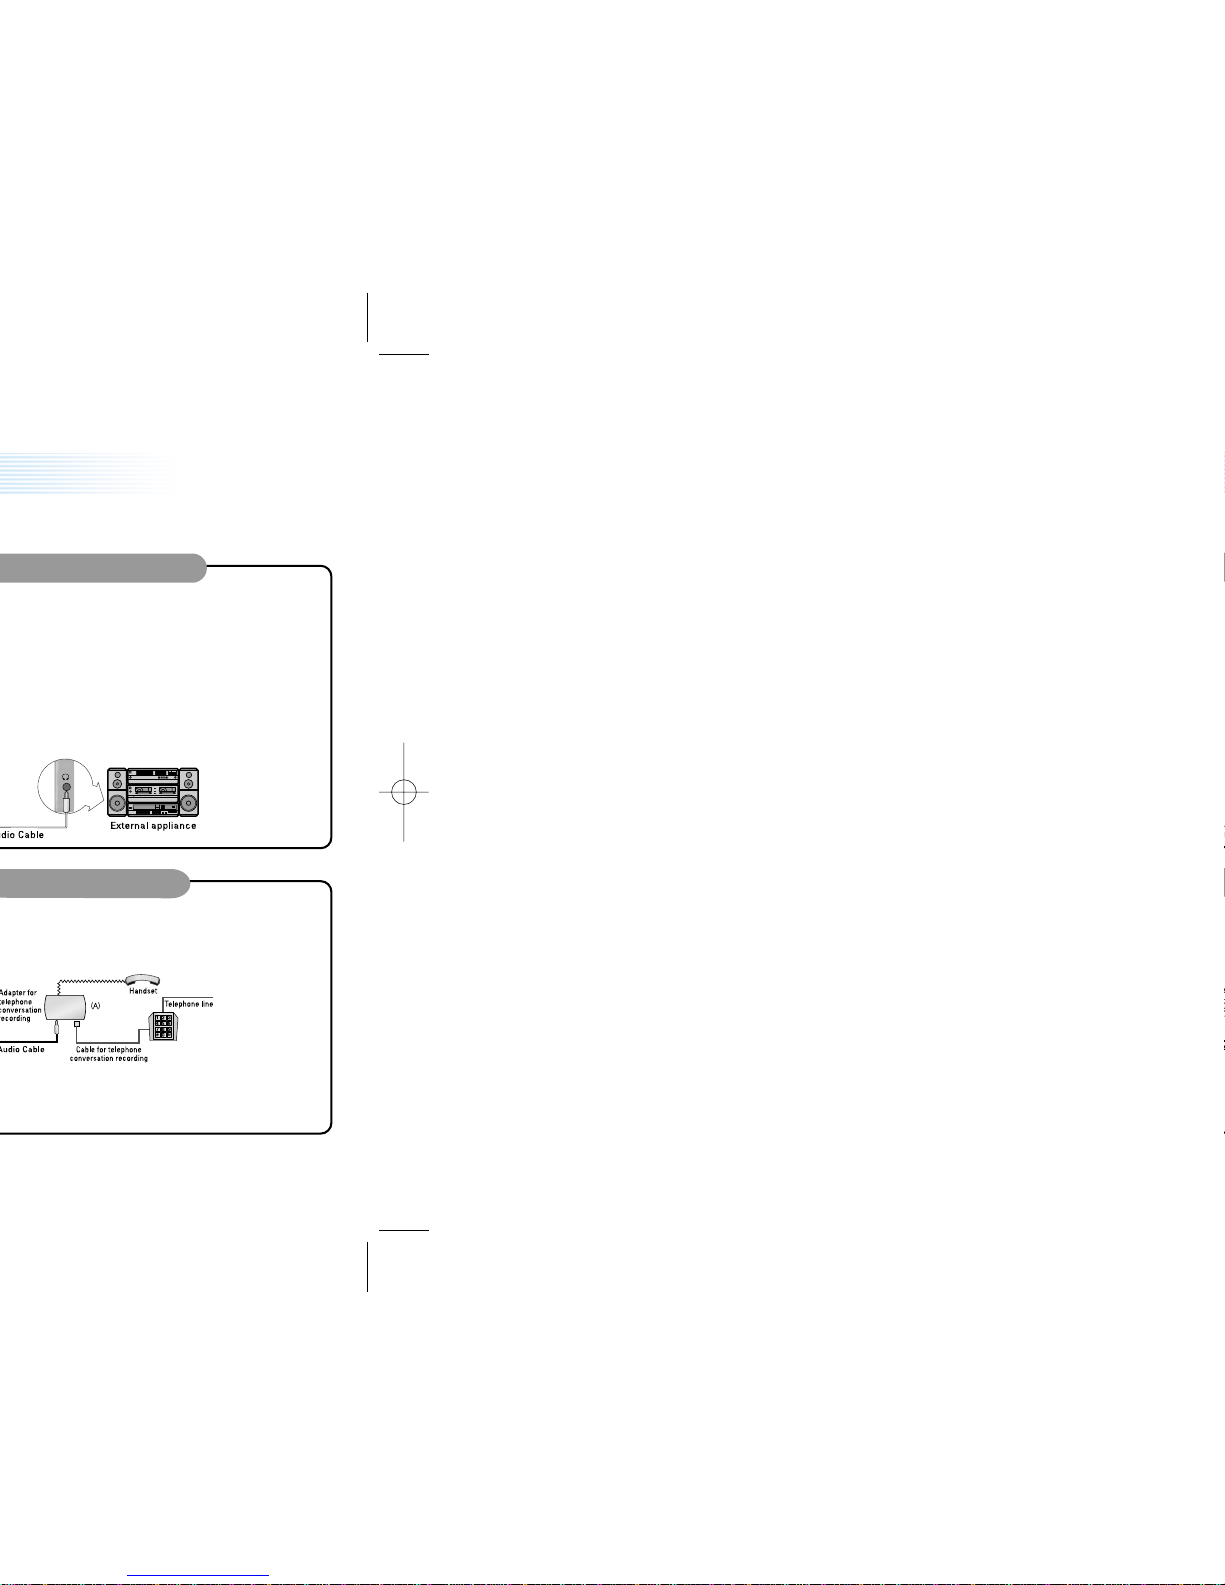
Recording with line-in.................................................. 12
- Recording from external appliances (Audio, PC).... 12
- Recording the general telephone conversation ...... 12
Playback......................................................................... 13
- Normal Playback........................................................ 13
- Low-speed Playback .................................................. 13
- High-speed Search..................................................... 13
- Playback on other Indexes ........................................ 14
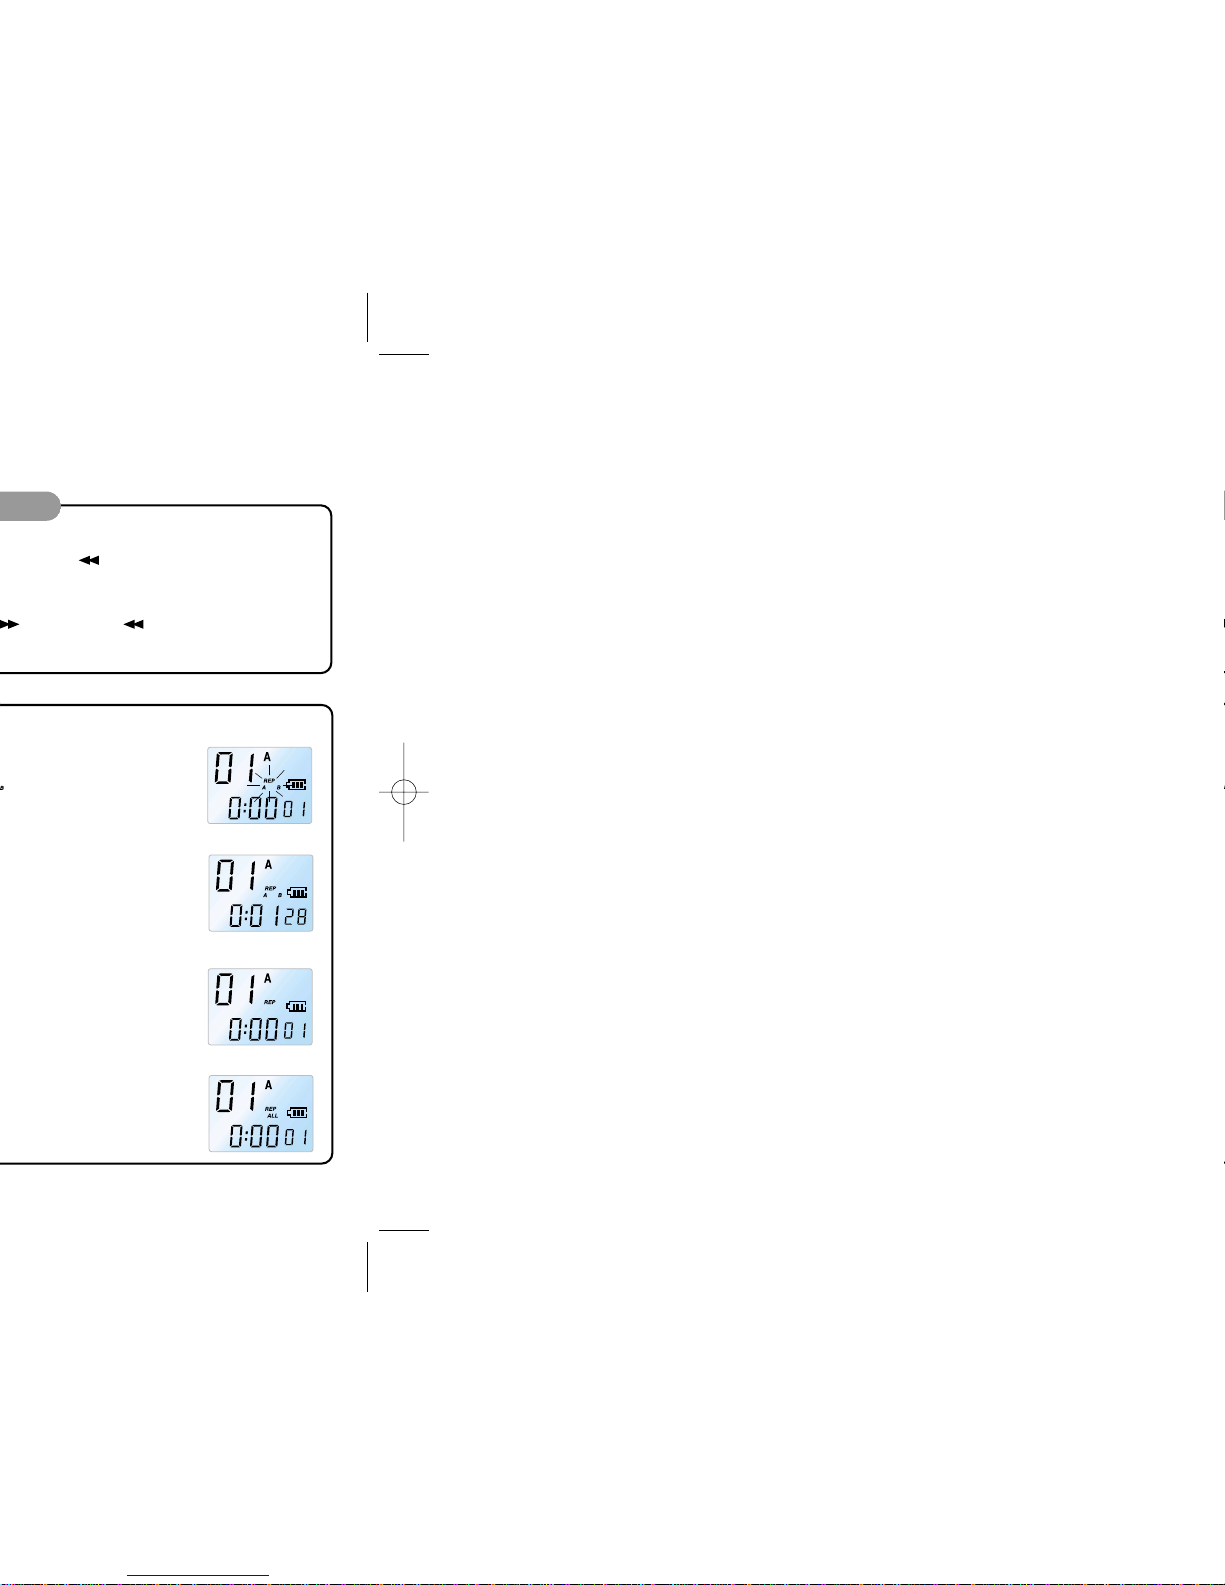
- Repetition Playback ................................................... 14
Menu.............................................................................. 15
- Mic Recording Sensitivity ....................................... 15
- VOR Function ............................................................. 15
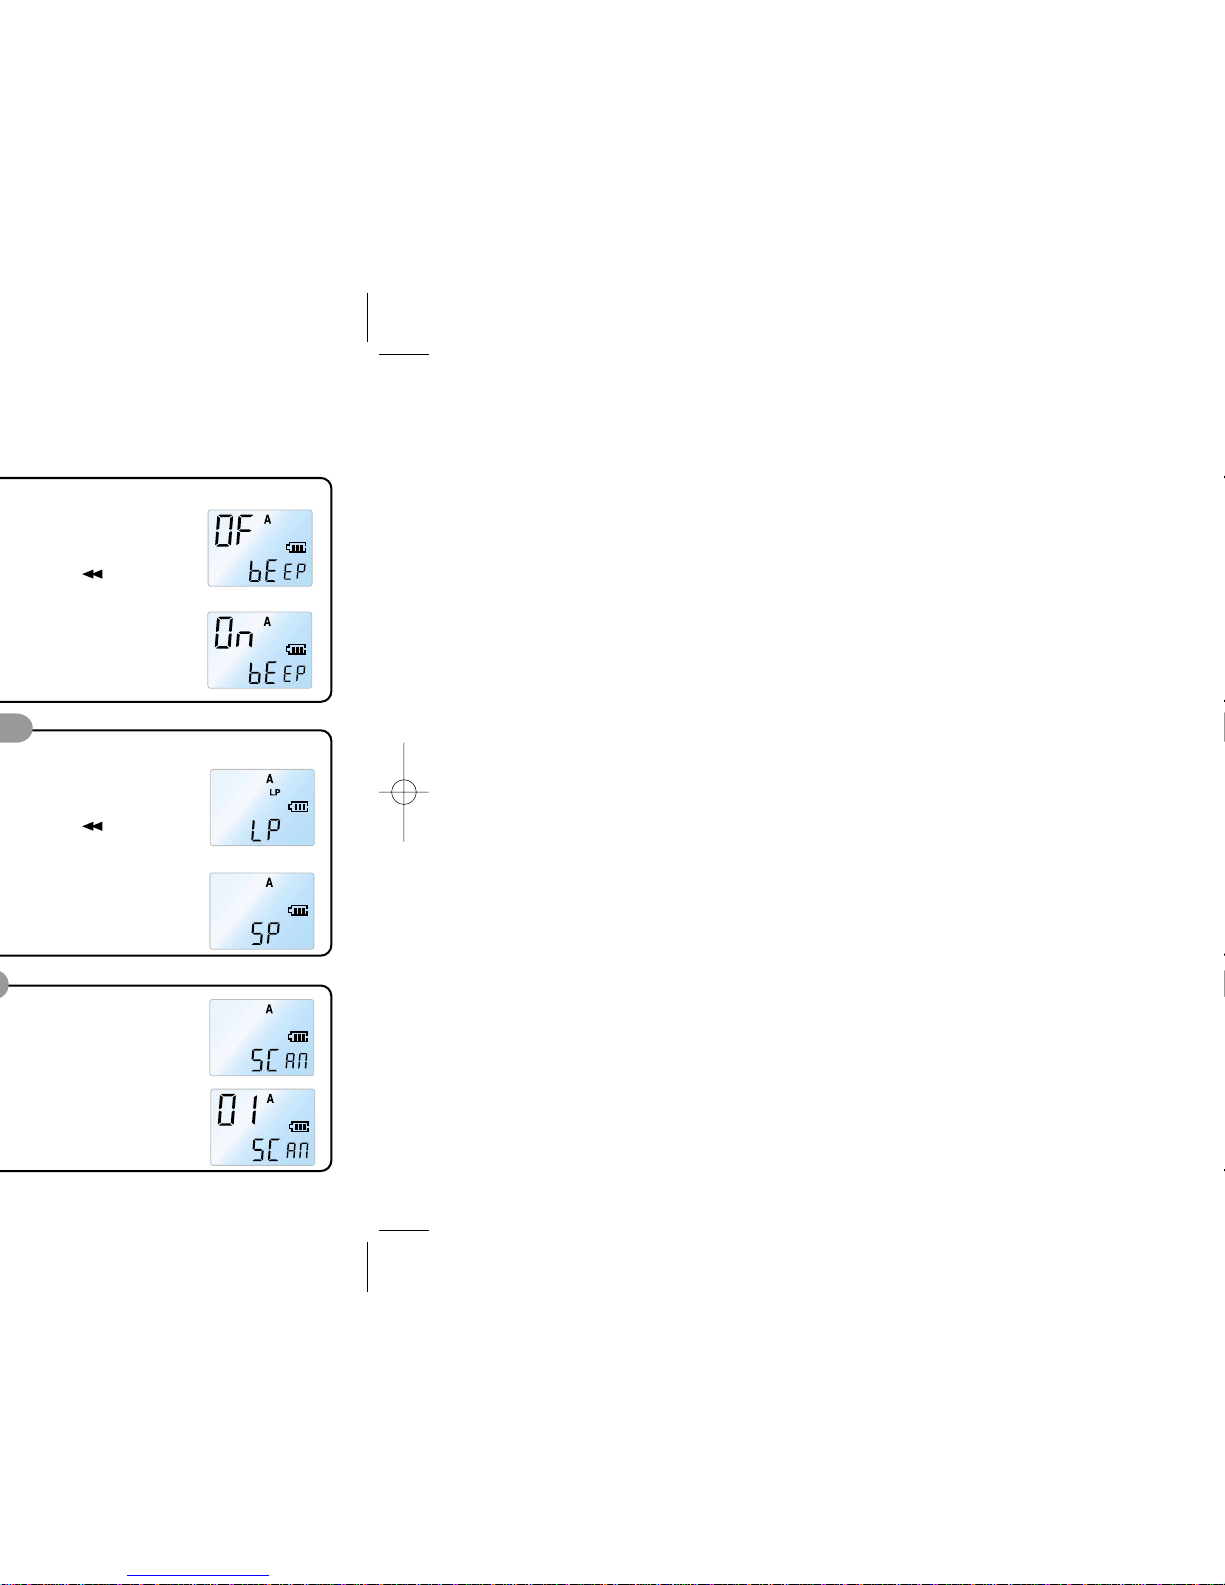
- Beep Setting............................................................... 16
- Recording Time Setting............................................. 16
- Index Introduction ..................................................... 16
Delete Function............................................................. 17
- To delete a particular index ...................................... 17
- To Delete a File........................................................... 17
Saving into the external appliance.............................. 18
- To save into the external audio (such as
cassette recorder)...................................................... 18
- To save into a PC ....................................................... 18
1Be sure that the power is OFF. 2Open the battery cover.
Recording and playback
standby mode
3Insert the batteries.
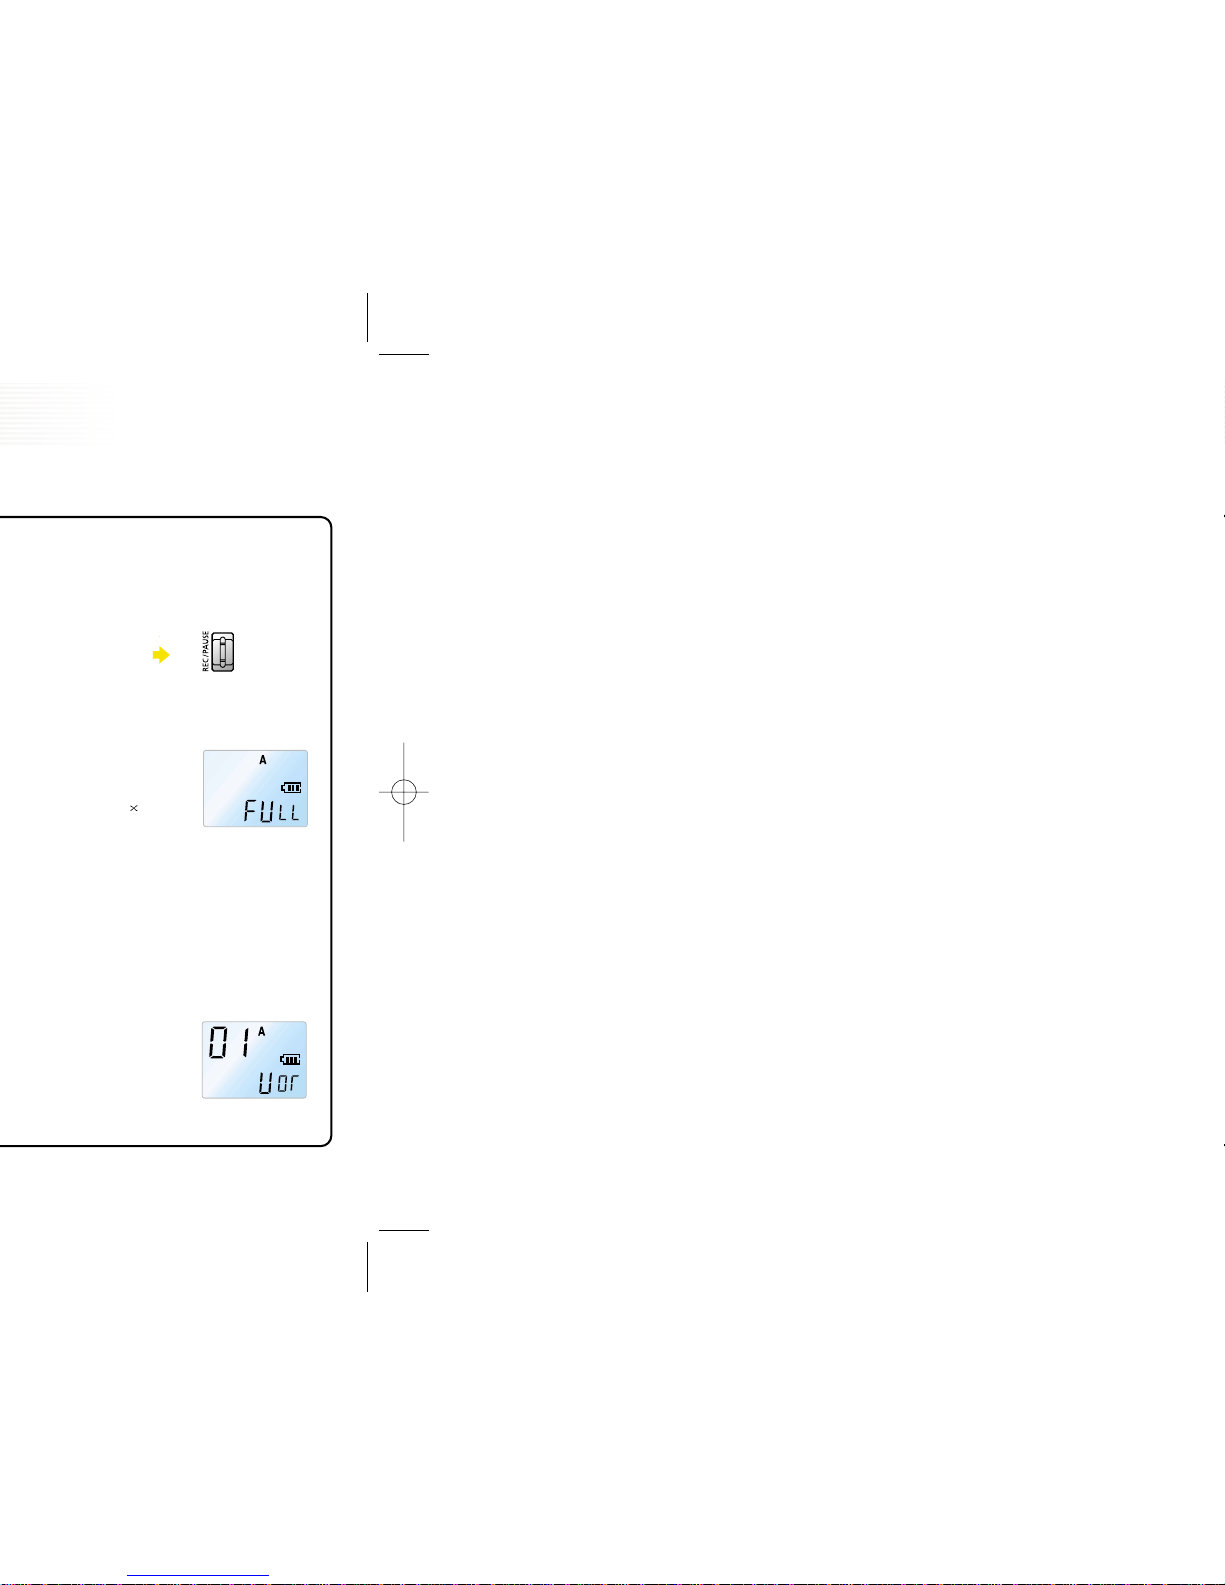
Battery indicator
Full Almost deadApproximately half used Batteries dead
Battery life
Battery Recording capacity Playback capacity
Approximately 8 hours Approximately 7 hours
Alkaline (LR03)
1. Check the polarity of the batteries (Size "AAA") and close the cover.
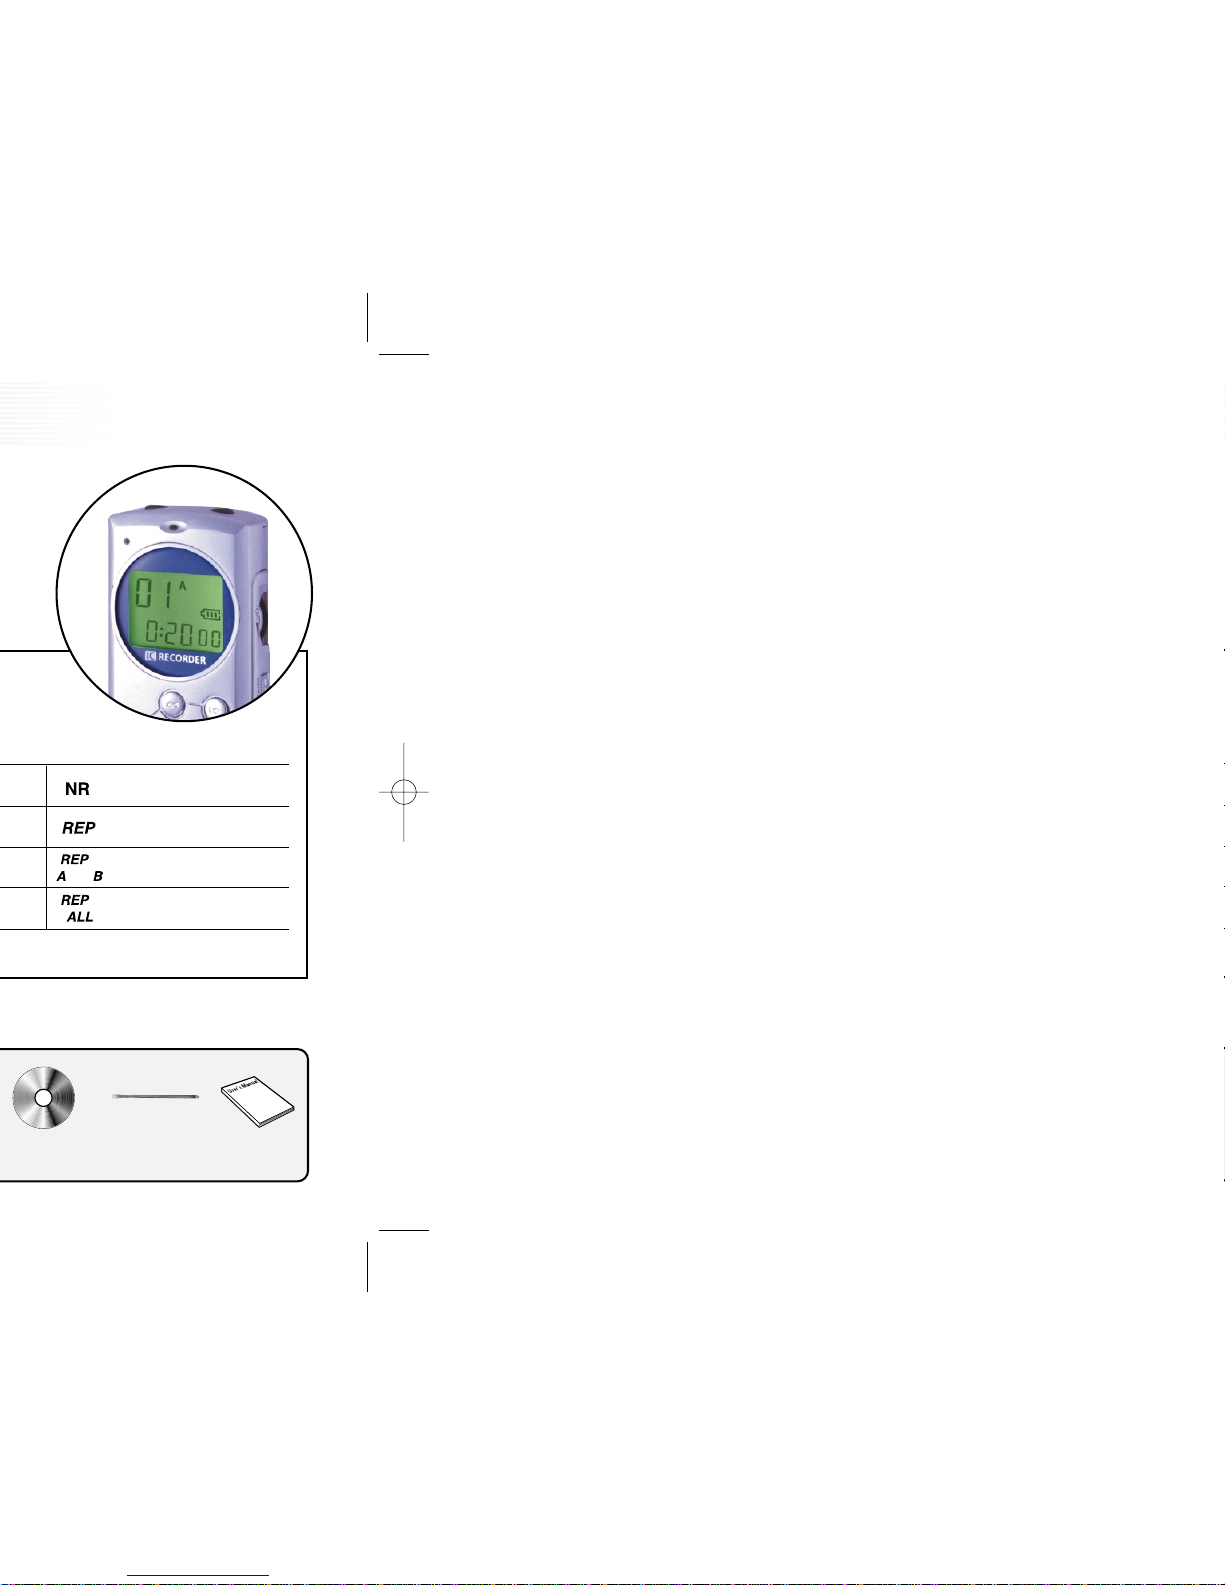
2. When you have inserted the batteries, the LCD will display all indicators
(Figure 1) and will switch to recording and playback standby mode (Figure 2).
3. The power will be automatically shut off if no function is activated for 1 minute.
4. Press PLAY/PAUSE/REMAIN or REC/PAUSE button to switch the power on. Your
Sound MAP will be in the standby mode for recording or playback. (Figure 2)
From now on, we will refer to the mode in Figure 2 as "Standby
mode" (waiting for recording or playback to be activated).
Do not replace the batteries while the
power is on. It may cause the product
malfunction.
Warnings
2
Static discharge or poor contact due to an external impact during battery replacement may
cause the product to malfunction. Remove the batteries and insert them into the battery
compartment again if this happens.
Remove the batteries from the main unit if you do not intend to use this product for a
prolonged period of time.(Leaking batteries may cause the damage to the product)
1
(Figure 1)
(Figure 2)
Replace the batteries if mode 3 and mode 4 are displayed one after another.
Replace with new batteries
(The product may malfunction if
the batteries are not replaced)

Check that the product is in standby mode.
Press the FILE/ REPEAT button to select the file you want. The file type will be scrolled (A, B, C, and D)
every time you press the button. If you do not select a file, you will record in the current file.
If the index of the current file reaches 99, the recording will continue from the at the end last index of the
next file.
Press the PLAY/PAUSE/REMAIN button to display the remaining recording
capacity.
Press the NEXT button ( ) to increase the size of the INDEX while
you are recording (Index separation function).
The maximum index number for each file is 99 (Up to 396 files: 99 4 ).
If the recording time is longer than the available capacity or when the index
reaches 396, 'FULL' is displayed and you cannot continue recording. (Figure 5)
When this happens, delete some recordings or move them to an external appliance (audio or
PC) to continue recording.
Do not remove the batteries during recording. This may cause the product to malfunction. If you intend to
record for a prolonged period of time, first replace the batteries while the unit is in standby mode or power
off mode.
Do not touch or move the product while you are recording via the built-in Microphone. This may cause
unnecessary noise on your recording.
The recording will automatically be paused when the level of sound
resource decreases while VOR is on. (Figure 6)
- The sound may be discontinued for a short period while VOR mode is
activated.
- When you use the VOR function in low/sensitive mode, only loud sounds
will be recorded.
- Deactivate the VOR function when recording important conversations.
10
Recording
9
Getting Started
Please note the followings before you start recording.
(Figure 5)
(Figure 6)
1
Switching Sound MAP On
Press the PLAY/PAUSE/REMAIN button to switch on the product.
The product will switch to standby mode.
Alternatively, you can press the REC/PAUSE button.
When you replace the batteries, the LCD displays all indicators and your
Sound MAP goes into recording and playback standby state (Figure 2).
Switching Sound MAP Off
The power will be automatically shut off if you do not do activate any
functions for 1 minute (i.e. if you don't use your Sound MAP for one minute).
2
Lock the button(hold)
1. Press and hold MENU/HOLD button (for about 2 seconds) in the
standby state to set the lock state (HOLD ON). (Figure 3)
If you press any other button while the unit is in HOLD ON mode, the
LCD displays 'ON HOLD' and pressing the button will not result in any
response from the machine.
2. Press and hold MENU/HOLD button (for about 2 seconds) in the lock
state to release lock state. (Figure 4)
The LCD will display 'OFF HOLD' indicating that the lock mode has
been released.
While the unit is in HOLD ON mode, this mode will be de-activated if
the power is turned off and on again.
(Figure 4)
(Figure 3)
(Figure 2)
File Types
Select one of A, B, C, or D.

12
Recording the general telephone conversation
1. Connect the audio cable in the Sound MAP Audio Cable Connector(LINE). Connect the adapter
and the telephone with the cable for telephone conversation recording. Then, connect the
handset cable of the telephone to the adapter.
2. Follow the same procedure as with the built-in microphone (See page 11).
It may be necessary to change the direction of installation of the adaptor (marked by (A)) depending
on your particular model of telephone.
2
Recording from external appliances (Audio, PC)
Set the recording speed (SP and LP), file, and VOR function before you start recording (see pages 15 and 16).
Sound can be distorted during playback if the volume control is set too high during recording.
1. Sound can be distorted during recording if the volume control of the external appliance is
set too high.
2. Connect one end of the audio cable to the Audio Cable Connector(LINE) of your Sound MAP
and the other end to the external appliance (Audio or PC).
3. Plug in the earphone to listen to the sound input from the external appliance.
4. The sound from the earphone may change slightly when recording starts. However, this will
not have any effect on the actual recording.
5. Follow the same procedure as with the built-in microphone (See page 11).
1
Recording with line-in
11
Recording with the Built-in microphone
Set recording sensitivity, file, VOR function and speed (SP or LP) before you start recording (see Pages 15 and 16).
1 Direct the product's built-in microphone towards the source of the sound.
2. Press the REC/PAUSE button to start recording. The red LED will illuminate (Figure 7 and 8).
3. Press REC/PAUSE button to stop the recording for a short moment. The red LED will flash.
(Figure 9)
4. Press REC/PAUSE button again to continue the recording. The red LED will light again.
5. Press the STOP/DEL button during recording or during standby mode to stop recording.
1
1. Connect the external microphone supplied with your Sound MAP to the Audio Cable
Connector(LINE).
2. Follow the same procedure as with the built-in microphone.
2
Voice Recording
(Figure 7) (Figure 8) (Figure 9)
Recording with the external microphone

13
Playback
14
Playback on other Indexes
4
1) To move by one index
Press the NEXT button ( ) or BACK button ( ) briefly during playback or pause state.
The index will jump to the next or previous index for playback.
2) To move by several indexes
Press and hold the NEXT button ( ) or BACK button ( ) during stop state to move to
other index fast.
Release the button to start playback from the index displayed.
Index Repetition
Section Repetition
1. Press and hold the FILE/REPEAT button during playback.
2. The ( ) indicator will appear and the current index will be repeated 10 times
(Figure 13).
3. Press STOP/DELETE to stop playback.
File Repetition
1. Press and hold the FILE/REPEAT button during playback.
2. When the ( ) appears on the LCD (Figure 13) press and hold the FILE/REPEAT
button again.
3. The ( ) appears on the LCD and the whole indices of the current file will be
repeated for 10 times. (Figure 14)
4. Press STOP/DELETE during file repetition to stop playback.
Repetition Playback
1. Press FILE/REPEAT button where you want to start the section repetition.
The starting point is set and the ( ) indicator flashes (Figure 11).
2. While ( ) is flashing, press FILE/REPEAT button again where you want to stop
repetition.
The ( ) indicator illuminates continuously; the selected section will be
repeated 10 times (Figure 12).
3. Press STOP/DELETE during repetition to stop playback.
5
(Figure 11)
(Figure 12)
(Figure 13)
(Figure 14)
Normal Playback
1. Press the FILE/REPEAT button to select the file (A, B, C, or D) you want.
If you do not select a file, the last file you recorded will be played.
2. Press the PLAY/PAUSE/REMAIN button to start playback. The green
LED will illuminate and the recorded time will be displayed.(Figure 10)
3. Press the PLAY/PAUSE/REMAIN button again to pause the machine.
4. Press PLAY/PAUSE/REMAIN button again during pause to resume the
playback.
5. Press the STOP/DELETE button during playback or pause mode to stop
playback.
High-speed Search
1. Press and hold (for at least 0.5 seconds) the NEXT button( ) or BACK button ( ) during
playback.
The playback stops and the time on the LCD increases or decreases rapidly.
2. Release the button when you want to start playback.
3. The search will stop when the time reaches the end of the current index if you press and hold
the NEXT button( ).
4. The search will stop when the time reaches the beginning of the current index if you press and
hold the BACK button ( ).
1
Low-speed Playback
1. Press the REPEAT/FILE button to select the file (A, B, C, or D) you want.
If you do not select any file, the file that you have recorded or played the last time will be
played.
2. Press and hold PLAY/PAUSE/REMAIN button to start low-speed playback. The green LED will
light and the recorded time will be displayed.
3. Press PLAY/PAUSE/REMAIN button briefly again during the low-speed playback to pause.
4. In pause mode, press the PLAY/PAUSE/REMAIN button:
1) long time to resume the low-speed playback.
2) briefly, to start normal playback.
5. Press the STOP/DELETE button during playback or pause mode to stop playback.
2
3
Press and hold PLAY/PAUSE/REMAIN button during normal playback to display time of the current index (recorded
time: REMAIN).
(Figure 10)

15
Menu
16
Recording Time Setting
1. Press the MENU/HOLD button four times during
Record/Playback/Stop state (Figure 22).
2. Press the NEXT button ( ) or BACK button ( ).
3. The mode toggles between long play (LP) and standard play (SP)
(Figures 21 and 22).
4. To select the current mode, press the PLAY/PAUSE/REMAIN or
STOP/DELETE button or STOP/DELETE button.
5. The previous operation (playback, or stop) will continue in the
changed mode.
The factory default is standard recording mode.
4
Index Introduction
1. Press the MENU/HOLD button five times during
Playback/Stop state.
2. Press the PLAY/PAUSE/REMAIN button to play
every index for 3 seconds from the first index of the
current file.
6
Beep Setting
1. Press MENU/HOLD button for three times in Record/Playback/Stop
state. (Figure 20)
2. Press the NEXT button ( ) or BACK button ( ).
3. The mode toggles between BEEP OFF (OFF BEEP) and BEEP ON
(ON BEEP) (See Figures 19 and 20).
4. Press the PLAY/PAUSE/REMAIN or STOP/DELETE button to select
the current mode.
5. The previous operation (recording, playback, or stop) will continue
in the changed mode.
The factory default is BEEP ON mode.
3
(Figure 19)
(Figure 20)
(Figure 21)
(Figure 23)
(Figure 24)
(Figure 22)
Mic Recording Sensitivity
1. Press MENU/HOLD button once during Record/Playback/Stop state.
(Figure 16)
2. Press the NEXT button ( ) or BACK button ( ).
3. The mode will toggle between low sensitivity mode (LO SENSE) and
high sensitivity mode (HI SENSE) (Figure 15 and 16).
4. Press the PLAY/PAUSE/REMAIN or STOP/DELETE button to select
the current mode.
5. The previous operation (recording, playback, or stop) will be
resumed with the changed mode.
The factory default is high-sensitive mode.
1
VOR Function
1. Press the MENU/HOLD button twice during Record/Playback/Stop
state (Figure 18).
2. Press the NEXT button ( ) or BACK button ( ).
3. The mode toggles between VOR ON (ON VOR) and VOR OFF (OF
VOR) (See Figures 17 and 18).
4. Press the PLAY/PAUSE/REMAIN or STOP/DELETE button to select
the current mode.
5. The previous operation (recording, playback, or stop) will continue
in the changed mode.
The factory default is VOR OFF mode.
2
Hi SENSE : In a silent circumstance (recommended)
LO SENSE : In a noisy circumstance. Put the mic close to the source of the sound.
Notes
(Figure 15)
(Figure 16)
(Figure 17)
(Figure 18)

18
Saving into the external appliance
17
Delete Function
To save into the external audio (such as cassette recorder).
1. Connect one end of the audio cable to the earphone jack of your Sound MAP and the other
end to the Mic input jack or AUX jack of the external audio appliance.
2. Press the record button on the external audio appliance and the play button on your Sound
MAP simultaneously to start recording.
1
To save into a PC
1. Connect one end of the audio cable to the LINE jack of your Sound MAP and the other end to
the LINE-IN jack of the PC sound card.
2. See the separate guide for sound card settings and saving method.
1. Use the USB cable to connect the USB ports of your Sound MAP and the PC.
2. See the separate guide for program installation details and saving method.
2
You need to purchase another cable if the provided audio cable does not fit the input jack of the external
audio.
Using a PC Sound Card
Using a USB port
To delete a particular index
1. Press STOP/DEL button briefly during playback or stop state.
The index number appears and DEL flashes while your Sound MAP
still plays the music in delete standby state.
2. Press the NEXT button ( ) or BACK button ( ) to move to the
index that you want to delete (Figure 25).
3. Press and hold the STOP/DEL button (for approximately 3 seconds) to
delete the current index.
The number of indices after the deleted index will now be decreased
by 1 automatically (Figure 26).
If you do not want to delete the index, press STOP/DELETE or any
other button briefly.
To Delete a File
1. Press and hold DEL button (for about 3 seconds) during stop state.
The current file appears and DEL flashes. (Figure 27)
2. Press the FILE/REPEAT to move to the file you want to delete.
When you move to a file you want to delete, the file will be set to
be deleted (Figure 28).
3. Press and hold STOP/DEL button (for about 3 seconds) again to delete
all the indexes in the selected file. Your Sound MAP will stop playing
at this file.
4. If you do not want to delete the file, press STOP/DEL or any other
button briefly.
2
1
Figure 26
(Figure 27)
(Figure 28)
(Figure 29)
(Figure 30)
(Figure 31)
Figure 25
1. Press and hold the DEL button (for approximately 3 seconds) during
stop mode.
The current file appears and DEL flashes (Figure 27).
2. Press the FILE/REPEAT to display all four files. "DEL" and "ALL" will
appear one after another.
3. Press and hold STOP/DEL button again to delete all the indexes in all
the files. Your Sound MAP will stop playing at file A.
4. If you do not want to delete the files, press the STOP/DEL button
briefly or press any other button(Figure 30)
To delete a particular file
To delete all files (Memory Format Mode)

20
Specifications
Item IRS-1610L IRS-810L
Maximum Recording Time
33mm 110mm 19mm
40g / 64g (battery included)
LRO3 (AAA, UM-4) 2 batteries
Recording: 8 hours, Playback: 7 hours
FLASH MEMORY
Total 396 (99 per a file x 4)
80 mW
Built-in and omni-directional capacitor microphone
23mm diameter
SP: 531 minutes (8 hours 51 minutes) SP: 265 minutes (4 hours 25 minutes)
LP: 988 minutes (16 hours 28 minutes) LP: 493 minutes (8 hours 13 minutes)
Dimensions
Weight
Power
Battery Life
Recording Media
Maximum Number of Recordings
Effective Maximum Output
Microphone
Speaker
Symptom Check Corrective action
LCD is blank.
I cannot record
anything.
I cannot playback.
I cannot hear anything
from the speaker.
I cannot hear anything
from the earphone.
The batteries are dead.
The battery polarity is wrong. Replacethe batterieswith newones
Insertthe batterieswith rightpolarity.
Release the lock mode.
Replace the batteries with new ones
Delete any unnecessary recordings.
Release the lock mode.
Replace the batteries with new ones
Check the recording number.
Adjust the volume control.
Pull out the earphone.
Adjust the volume control.
Fully plug in the earphone.
Adjust the volume control.
Sound MAP is locked (HOLD ON mode).
The batteries are dead.
Recording number or recording space is full.
Sound MAP is locked (HOLD ON mode).
The batteries are dead.
Nothing is recorded yet.
The volume control is on lowest position.
Earphone is plugged in.
The volume control is on lowest position.
Earphone is not fully plugged in.
The volume control is on lowest position.
19
References
Specifications .............................................................. 20
Troubleshooting.......................................................... 20
Troubleshooting

21
MEMO
Warranty
1. This product has passed through thorough quality management and testing.
2. Any malfunction during normal use will be repaired free within the warrantee
period.
3. Some service charge may apply for the services in Charged Service Guide
even in the warrantee period.
4. This Warranty is valid only in the country of purchase.
5. Please fill the warrantee form and keep it at the safe place.
6. Please contact your local dealer when any problem occurs to this product.
1. Malfunction due to user's negligence.
2. Malfunction due to unauthorized modification or repair
3. Malfunction due to natural hazards (such as fire, seawater, flood, or war).
4. When the warrantee period is expired.
Charged Service Guide
Product Name SOUND MAP
Model Name
Date of Purchase yr mon day Warranty Period 1 year
Location Paid Amount
$
Tel
Name
Address
Tel
Customer
SAFA MEDIA Co., Ltd.
Smart Audio & Future Audiopia
This manual suits for next models
1
Table of contents
Other Safa Media Voice Recorder manuals