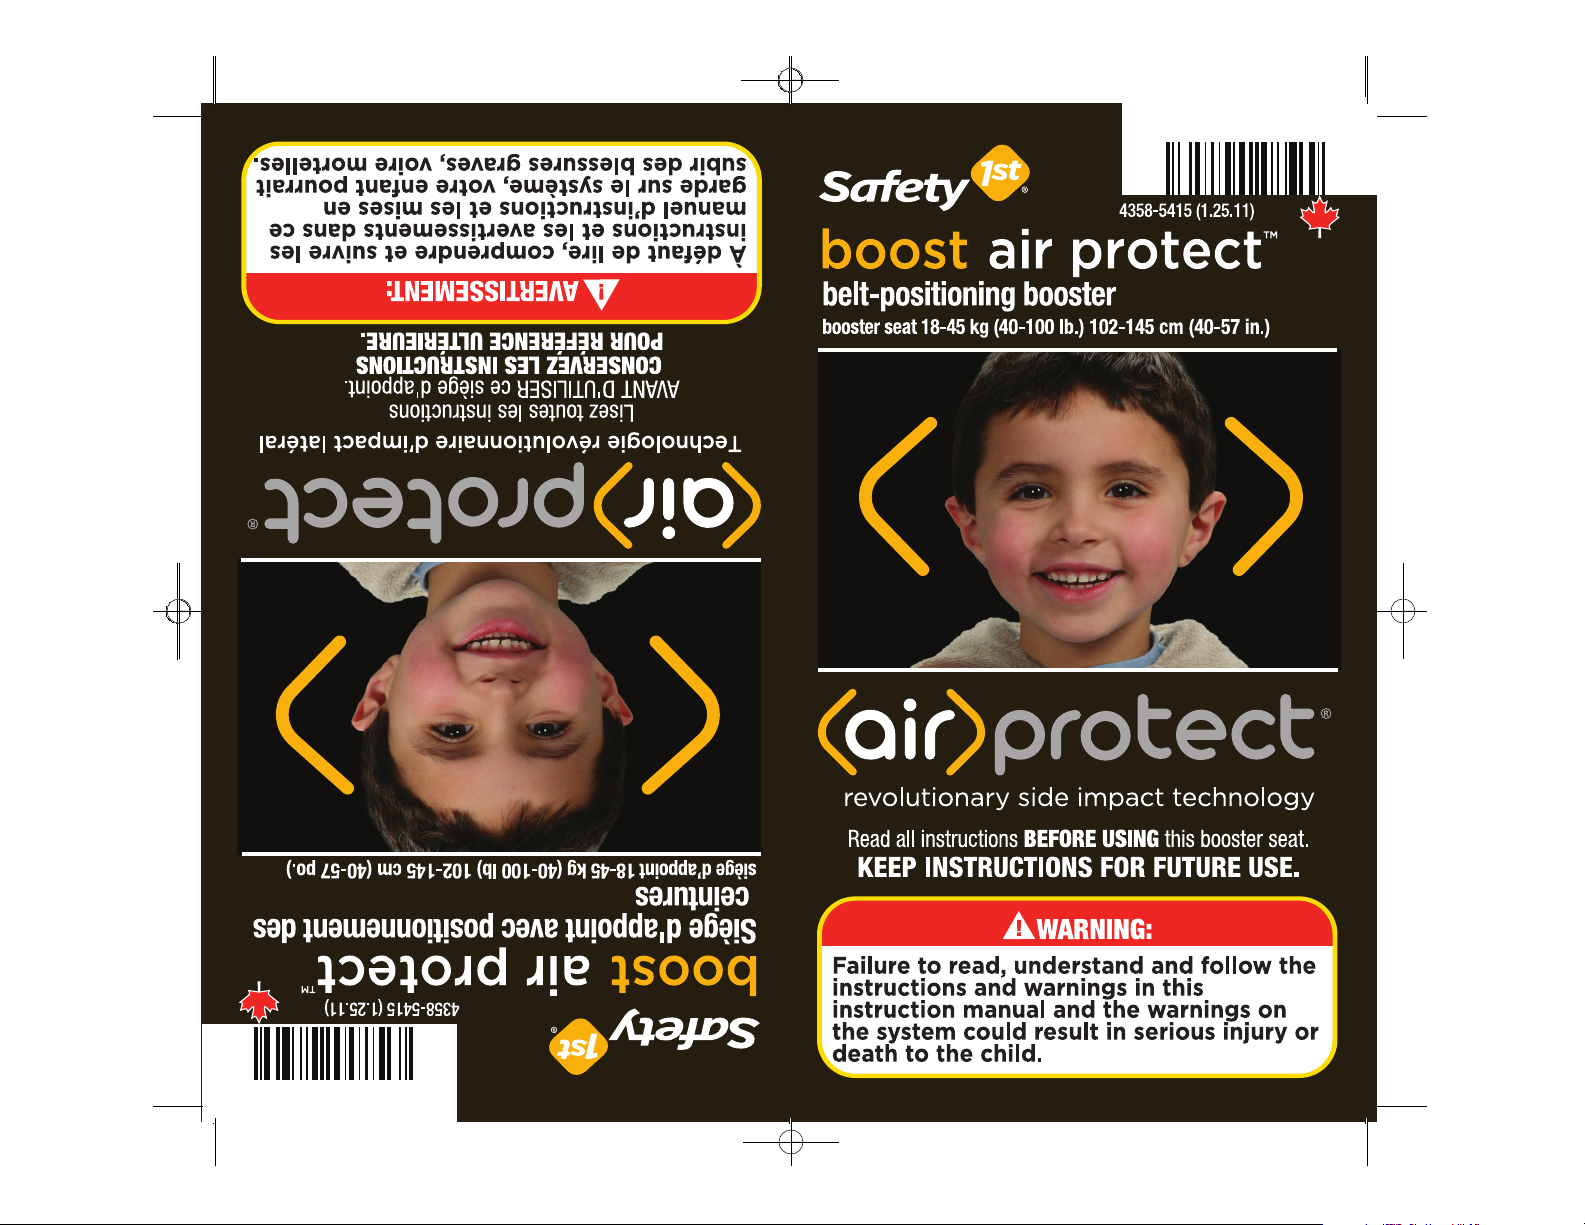
Safety 1st air protect User manual

4358-5415 Can BoostAir Eng 1/27/11 9:05 AM Page 1

1 in 4 car crashes involving children are side
impact collisions. They are by far the deadliest
type of collision for children, accounting for 1
in 3 child fatalities;* nearly all of which are
caused by head trauma. These are frightening
facts, but Safety 1st has been by your side for
25 years providing innovative products to help
protect your child from becoming a statistic. It
is in this tradition that we proudly announce
Air Protect® side impact technology.
Safety 1st engineers designed Air Protect®
using next generation testing methods that
simulate the most violent types of side impact
crashes, those with vehicle intrusion. Using
this advanced methodology, Air Protect® was
engineered to defend your child in two vital
ways. During a crash, the system immediately
shields your child’s head from the impact. In a
second layer of defense, Air Protect® allows
air to escape from the headrest: channeling
crash energy away from your child, creating
more ride down time. It is this double layer of
protection that makes Air Protect®
technology unique.
At Safety 1st we are proud of our history, but
are always looking towards the future and
developing innovative products. Products
like Air Protect® that help shield your child
from the most violent real world threats.
Safety 1st Air Protect®: Real Safety for Real
Life.
* Based on US statistics.
®
©2011 Dorel Juvenile Group, Inc. All rights reserved
4358-5415 Can BoostAir Eng 1/27/11 9:05 AM Page 3

2
1
B. Safety Information . . . . . . . . . . . . . . .Pages 7-9
B-1 Vehicle Seating Position
B-2 Installation in Vehicle
B-3 Booster Seat Use
B-4 Transport Canada Regulations
B-5 Storing Your Booster Seat
A. Before You Begin . . . . . . . . . . . . . . . . .Pages 3-6
C. Basic Use . . . . . . . . . . . . . . . . . . . . . . .Pages 10-18
C-1 Choose Position for Your Child
C-2 Preparing Booster Seat for Use
C-3 Adjusting the Headrest Height
C-4 Reclining the Backrest
C-5 Removing Headrest/Backrest
C-6 Cup Holder
C-7 Removing Pad for Cleaning
A-1 Thank You...
A-2 DJG Consumer Relations Contact Information
A-3 Registration and Safety Notices
A-4 Understanding Your Booster Seat
F-1 Preparing to Install Highback Belt-Positioning Booster
F-2 Installing Highback Booster Using the Lap
and Shoulder Belt
F-3 Preparing to Install Backless Belt-Positioning Booster
F-4 Installing Backless Booster Using the Lap
and Shoulder Belt
F. Belt-Positioning Booster Use . . . . Pages 22-27
D. General Vehicle Installation . . . . .Pages 19-21
D-1 Understanding Your Vehicle
D-2 Vehicle Seating Position
D-3 Knowing Your Vehicle Belts
Important Information . . . . . . . . . . . .Pages 28-32
Warranty
Replacement Parts Order Form
E. Aircraft Installation . . . . . . . . . . . . . . . . . .Page 21
E-1 Booster Aircraft Information
4358-5415 Can BoostAir Eng 1/27/11 9:05 AM Page 5

A. Before You Begin
Thank you for choosing this car seat, referred to throughout
this manual as a booster seat. Dorel Juvenile Group, (DJG) is
committed to creating convenient, comfortable, and
dependable products for children.
No one can predict if use of a restraint system will prevent
injury or death in a particular crash. However, combined with
careful driving, proper use of a restraint system can lower a
child’s risk of injury or death in most crashes.
Your child’s safety is worth the time it will take to read,
understand and follow the instructions and warnings.
After reading if you still have questions or concerns with the
restraint system please contact our Consumer Relations
Department.
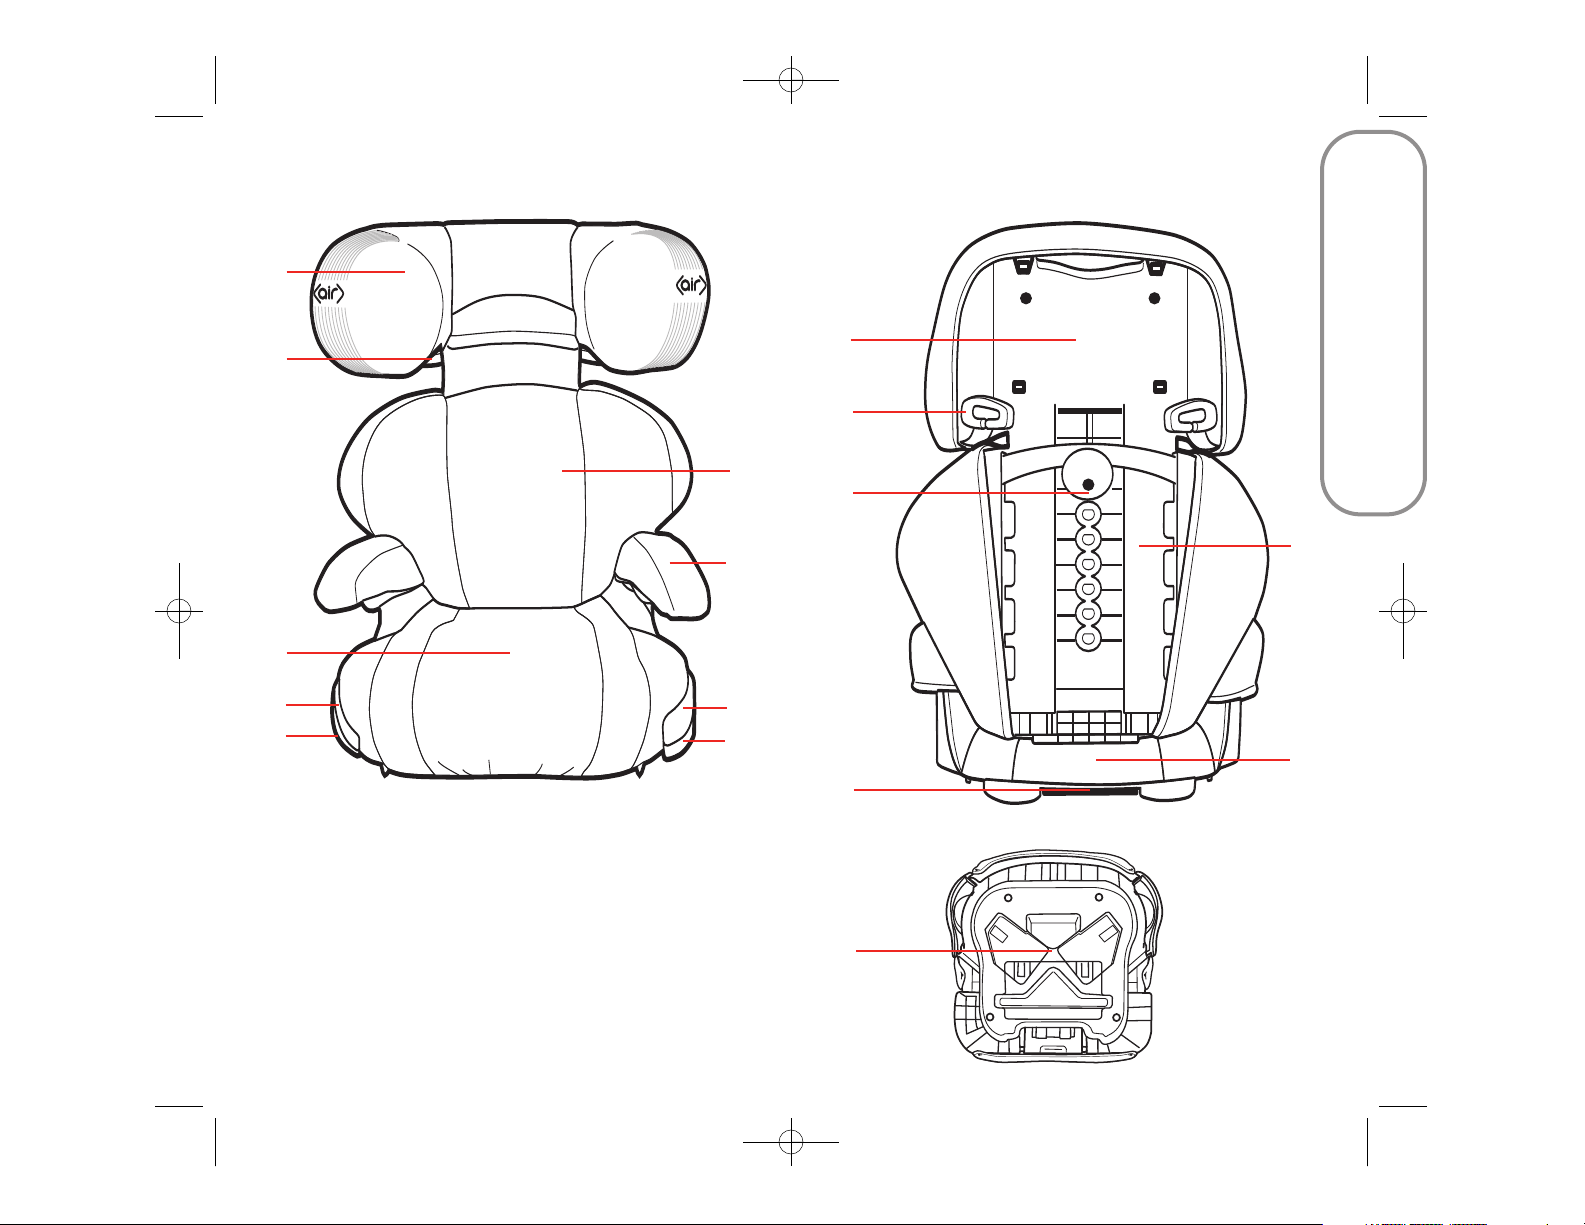
On the bottom of the seat base there is an expiry date for
use of this restraint system. Do not use this seat after the
expiry date.
Dorel Juvenile Group, Inc.
Website: www.djgusa.com
Fax: 1-800-207-8182
Mailing Address: Dorel Juvenile Group, Inc.
P.O. Box 2609
Columbus, IN 47202-2609
Telephone: 1-800-544-1108
7 A.M. to 6 P.M. EST M-TH
7 A.M. to 4:30 P.M. EST FRI
A-1 Thank You...
A-2 Dorel Juvenile Group Consumer
Relations Contact Information
Although booster seats are tested, evaluated and certified by
the manufacturer and tested by Transport Canada, it is
possible that a safety-related problem may be found. If there
is ever a safety issue with your restraint system, we use
registration information to reach owners.
If you don’t have the card or if your
address changes, you will find the
model number and manufactured date
on the label located on side of seat
base. There are three additional ways
to register your information:
A-3 Registration and Safety Notices
Model
Number
Manufacture
Date
For information on safety-related problems, you can also call
Transport Canada’s Road Safety Dept. at: 1-800-333-0371.
Online: www.djgusa.com/registration/carseat/can
Telephone: 1-800-544-1108
Mail: Send your name, address and your booster
seat model number and manufactured date
to:
Dorel Distribution Canada
873 Hodge, St-Laurent, QC H4N 2B1
Attn: Consumer Relations
Please do not send in your registration card if you have
registered your booster seat online.
34
4358-5415 Can BoostAir Eng 1/27/11 9:05 AM Page 7

H.
C.
A.
B.
E.
A.
B.
D.
E.
C.
F.
G.
G.
F.
A. Before You Begin
5
A. Headrest
B. Shoulder Belt
Positioning Guide
C. Removable Backrest
D. Armrest
(pad on select models)
E. Seat Base
F. Cup Holder
G. Cup Holder Insert
(on select models)
H. Headrest Adjustment
Lock
I. Backrest Release Tab
J. Instruction Manual
Storage
A-4 Understanding Your Booster Seat
Front View
Back View
6
Seat Base Bottom View
J.
I.
4358-5415 Can BoostAir Eng 1/27/11 9:05 AM Page 9

78
B-3 Booster Seat Use
Do not use a booster seat that has been in a
crash or a collision. The system must be
replaced.
Do not use a booster seat if you do not know
the history of the restraint.
Never take your child out of the booster seat
or attend to the child’s needs while the vehicle
is moving.
Never leave child unattended in the booster
seat.
To avoid the child being seriously burned,
always check for hot seat and buckles before
using this booster seat.
Do not use a booster seat with missing or
damaged parts.
DJG does not recommend the use of
accessories or add-ons that have not been
certified with this booster seat at original
purchase date.
Never allow any child to play with this
booster seat. It is not a toy.
Do not remove the warning labels.
This booster seat has been certified for use in
passenger vehicles only. Do not use in a boat,
motorcycle, aircraft or in a cargo van or bus
where there are no seat belts.
Read all instructions and warning labels for
additional warnings.
B-1 Vehicle Seating Position
Always check vehicle owner’s manual for
booster seat use with front or side air bags.
For vehicles with no rear seats, check the
vehicle owner’s manual for location and
installation of a booster seat.
B. Safety Information
Failure to read, understand and follow the
instructions and warnings in this instruction
manual and the warnings on the system could
result in serious injury or death to the child.
B-2 Installation in Vehicle
When unoccupied, the booster seat must be
secured to the vehicle with the vehicle’s seat
belt only.
In a crash or sudden stop, an unsecured
booster seat could injure the driver or other
occupants in the vehicle.
In very few vehicles, the booster seat cannot
be properly installed because of the type of seat
belt system and/or air bag system. Always read
and follow the vehicle owner’s manual
instructions for booster seat use.
Do not use the booster seat with a lap belt
only.
4358-5415 Can BoostAir Eng 1/27/11 9:05 AM Page 11

910
Transport Canada Road Safety Directorate regulates children’s
restraint systems under the Motor Vehicle Restraint Systems
Safety Regulations (RSSR). The regulations require the
manufacturer and/or importer to certify the booster seat to the
applicable safety standards and place specified warnings and
information on the labels fastened to each booster seat and in
this instruction manual.
B-4 Transport Canada Regulations C-1 Choose Position for Your Child
Your child’s height, weight and age determine how your booster
seat should be used and placed in the vehicle.
18-45 kg (40-100 lb)
102-1
45
cm (40-57 in.)
and Over 1 Year Old
Highback Belt-
positioning booster
seat using vehicle
lap/shoulder belt
combination
Child and booster seat are
placed in the back seat,
facing the front of the
vehicle.
C. Basic Use
18-45 kg (40-100 lb)
102-1
45
cm (40-57 in.)
and Over 1 Year Old
Backless Belt-
positioning booster
seat using vehicle
lap/shoulder belt
combination
Child and booster seat are
placed in the back seat,
facing the front of the
vehicle.
To protect your booster seat, store in the house, not in the
garage or attic. The hot and cold temperatures can harm the
plastic if stored for a long period of time.
B-5 Storing Your Booster Seat
Verify your child’s weight and height (do not
guess) before using this booster seat.
4358-5415 Can BoostAir Eng 1/27/11 9:05 AM Page 13

11
C-2 Preparing Booster Seat For Use
To use the booster seat with backrest/headrest, follow
all of the instructions below to attach the seat back.
12
C. Basic Use
Expose the Backrest
Hole
Hold the rectangular shaped
flap on the rear of the seat
base pad down to expose
the backrest hole.
1.
Attach Backrest to Seat
Base
With the backrest laying flat
(horizontal), insert the hook
on the backrest into the
large opening on the back
of the seat base. Make
sure the seat base pad does
not get caught between the
moving parts. The backrest
may not connect properly if
the pad is in the way
2.
Rotate Backrest Up
Rotate backrest all the way
up into the locked position.
In the locked position, the
backrest will remain
upright.
Tuck backrest hole flap
under the backrest pad.
3.
To Raise or Lower
Headrest
Grasp the side of the
backrest with one hand
while pulling out on the
headrest adjustment lock
with the other.
Raise or lower headrest to
selected position. Release
the headrest adjustment
lock into 1 of the 8
headrest heights. Check
to make sure the headrest is locked by push/pull headrest
up and down. Headrest will move slightly when it is locked.
C-3 Adjusting the Headrest Height
Headrest has 8
Headrest Positions
1.
3.
Check Headrest
Height
Align the midpoint of the
child’s ears with the
midpoint of the headrest.
Adjust headrest if needed.
2.
4358-5415 Can BoostAir Eng 1/27/11 9:05 AM Page 15

C. Basic Use
13 14
C-4 Reclining the Backrest
Backrest has 2 Positions
Backrest has an upright and
semi-reclined position. The
semi-reclined position is to
be used only to install the
booster seat flush against
the vehicle seat back, if
needed.
1.
To Recline Backrest
Push firmly on the backrest
release tab and rotate top
of seat back about 2.5 cm
(1 in.) The backrest is now
in semi-recline mode.
2.
C-5 Removing Headrest/Backrest
Lay Backrest Flat
To remove backrest/
headrest from seat base,
backrest needs to be in the
most upright position.
Press firmly on backrest
release tab (1) and rotate
seat back until it lays flat
(2).
1.
Remove Backrest
Lift backrest hook out of
hole in seat base. Store
backrest for future use.
Lay flap over hole where
backrest connects to the
base.
2.
1
2
4358-5415 Can BoostAir Eng 1/27/11 9:05 AM Page 17

15 16
C. Basic Use
C-6 Cup Holder
Cup Holders
Cup holders are located in
the base of the booster
seat.
1.
Pull out cup holder to use.
Push the cup holders in
when not needed.
a.
Cup Holder Insert
(on select models)
The cup holder may have a
removable liner for cleaning.
To remove, pull up on the
corner of the rubber insert
and remove. The insert is
top rack dishwasher safe or
hand wash with mild soap
and water. When dry,
replace the insert.
2.
C-7 Removing Seat Pad for Cleaning
Lay Backrest Flat
To remove backrest/
headrest from seat base,
backrest needs to be in the
most upright position.
Press firmly on backrest
release tab (1) and rotate
seat back until it lays flat
(2).
1.
Remove Backrest
Lift backrest hook out of
backrest hole in seat
base.
2.
1
2
Remove Armrest Pads
(on select models)
Undo the fastening strips
on the back of the
armrest and remove the
armrest pads.
3.
continued on next page.
4358-5415 Can BoostAir Eng 1/27/11 9:05 AM Page 19

17 18
C. Basic Use
Remove Pad from Seat
Base
On the bottom of the base
are pad attachment tabs.
Release the pad from the
tabs. Remove pad
4.
Remove Pad from
Backrest
From the side, pull pad off
of backrest.
5.
Remove Pad from
Headrest
From the back, release the
elastic from the back of the
headrest.
Pull pad off of headrest.
NOTE: DO NOT REMOVE
the plastic air protect® air
bladder system from the
headrest.
6.
Cleaning Pad
Hand wash pad with warm sudsy water, rinse clean and air
dry. Do not use bleach or use other harsh cleaners. Do not
dry clean or machine wash.
NOTE: Do not wash the pad while still on the booster seat.
Spot clean only if it is not removed.
Install Pad
Replace pad by reversing order. Starting with the headrest, slip
pad over the headrest and air protect system® and attach the
elastic straps. Slide backrest pad onto backrest. Make sure
bottom of headrest pad is behind the backrest pad. Lay the
base pad on the base and hook the pad onto the pad
attachment tabs and then slip on the armrest covers.
Do not use this restraint system without the
seat pad. Failure to do this can result in
serious injury.
4358-5415 Can BoostAir Eng 1/27/11 9:05 AM Page 21

Your vehicle’s features may be considerably different than
those pictured here. Consult your vehicle owner’s manual to
help identify your vehicle’s specific features and locations.
D-1 Understanding Your Vehicle
Seat Bight
Vehicle Seat Belts
Consult your vehicle owner’s
manual for vehicle belt use.
D-2 Vehicle Seating Position
Use the restraint system only on vehicle seats
that face forward. Do not use on seats that face
the sides or rear of the vehicle. For vehicles
with an air bag, but without a back seat, refer
to your vehicle owner’s manual.
In very few vehicles, the restraint system cannot
be properly installed because of the type of seat
belt system or air bag system. Always read and
follow the vehicle owner’s manual instructions for
restraint system use.
Safety Tip:
Children are safer when
properly restrained in
rear seating positions
than in the front seating
positions.
According to accident statistics, children in
rear seating positions are statistically safer,
whether you have air bags, advanced air
bags, or no air bags at all.
To help protect your vehicle seat’s upholstery from damage,
use a single layered towel underneath and behind booster
seat.
To avoid your child being seriously burned, take the
following precautions:
1. Park in the shade or where sun does not directly hit the
booster seat.
2. Cover the booster seat with a sheet or blanket when not in
use.
3. Check for hot booster seat and buckles before placing
child in booster seat.
D-3 Knowing Your Vehicle Belts
Review your vehicle’s owner manual for vehicle seat belt use
with booster seats. This is your best source for information
concerning your vehicle.
Not all vehicle belts will work with this booster seat. This
booster seat must be tightly locked in place at all times
during travel. You must determine if your vehicles belts are
compatible with this booster seat.
19 20
D. General Vehicle Installation
continued on next page.
4358-5415 Can BoostAir Eng 1/27/11 9:05 AM Page 23

Vehicle Belts
• Automatic/Passive Vehicle Seat Belts
You MUST have a vehicle lap and shoulder belt to install any
booster seat.
• Vehicle Belts in center of the door
or side panel
You must move the booster seat to
another seating location. Consult your
vehicle owner’s manual.
• Vehicle Belts that are in front of
the seat bight
You may need to move the booster seat
to another seating location. Consult your
vehicle owner’s manual.
F-1 Preparing to Install Highback
Belt-Positioning Booster Seat
Lap/Shoulder Belt
Use only the vehicle’s lap and shoulder belt
system when restraining the child in this
booster seat.
Do not use this booster seat if the
midpoint of your child’s ears are
above the top of the booster seat’s
headrest.
Do not use this booster seat if
the midpoint of your child's
ears is above the top of the
vehicle seat back or vehicle’s
headrest.
Do Not Use a UAS with this
booster seat.
Failure to follow these warnings can result in
serious injury or death.
21 22
F. Highback Booster Use
This booster seat is NOT
certified for use in aircraft
because aircraft seats do
not have shoulder belts.
E-1 Booster Aircraft Information
18-45 kg (40-100 lb) 102-1
45
cm (40-57 in.)
Belt-positioning booster seat using only vehicle
lap/shoulder belt.
4358-5415 Can BoostAir Eng 1/27/11 9:05 AM Page 25

Secure the shoulder belt
through the shoulder belt
positioning guide on the
headrest. The shoulder
belt should lay snugly
across the center of the
child’s shoulders and
across the chest (not on
the face or neck). Pull up on the shoulder belt to tighten and
to remove all of the slack out of the lap belt.
Check periodically to ensure your child has not moved out of
position and loosened the vehicle belt.
Buckle Lap and
Shoulder Belt
Lap belt should cross the
child’s thighs (not on the
stomach). The lap belt
should be under both
armrests and the shoulder
belt should be under the
armrest closest to the
buckle as shown.
F-2 Installing Highback Booster
Seat Using the Lap and
Shoulder Belts
Place Booster Seat in
Vehicle Forward-Facing
in the Back Seat
Place booster seat in the
back seat, flush against the
back of the vehicle seat.
1.
Place Child in Seat
Place the child’s bottom and
back flat against the booster
seat. This will allow the
vehicle belt to be properly
tightened.
2.
4.
5.
Do Not Use the vehicle lap belt
only when using this booster
seat.
The shoulder belt must always
be adjusted snugly across the
child’s chest.
NEVER place the shoulder belt
behind the child’s back or under the child’s
arms.
Failure to follow these warnings can result in
serious injury or death to your child.
23 24
F. Installing Highback Booster
Check Headrest Position
The midpoint of the child’s
ears should be at the
midpoint of the headrest.
See section C-3 to adjust
the headrest.
3.
4358-5415 Can BoostAir Eng 1/27/11 9:05 AM Page 27

F-4 Installing Backless Booster
Seat Using the Lap and
Shoulder Belts
Place Booster Seat in
Vehicle Forward-
Facing in the Back
Seat
Place booster seat in the
back seat, flush against
the back of the vehicle
seat.
1.
Buckle Lap and
Shoulder Belt
Lap belt should cross the
child’s thighs (not on the
stomach). The lap belt should
be under both armrests and
the shoulder belt should be
under the armrest closest to
the buckle as shown.
Place Child in Seat
Place the child’s bottom
flat against the booster
seat. The child’s upper
and lower back should be
flat against the vehicle
seat back. This will allow
the vehicle belt to be
properly tightened.
2.
3.
25 26
F. Installing Backless Booster
F-3 Preparing to Install Backless
Belt-Positioning Booster Seat
Lap/Shoulder Belt
18-45 kg (40-100 lb) 102-1
45
cm (40-57 in.)
Belt-positioning booster seat using only vehicle
lap/shoulder belt.
Use only the vehicle’s lap and shoulder belt
system when restraining the child in this
booster seat.
Do not use this backless
booster seat if the midpoint of
your child's ears is above the
top of the vehicle seat back or
vehicle headrest.
Do Not Use a UAS with this
booster seat.
Failure to follow these warnings can result in
serious injury or death.
continued on next page.
4358-5415 Can BoostAir Eng 1/27/11 9:05 AM Page 29

27 28
The shoulder belt should lay
snugly across the center of
the child’s shoulders and
across the chest (not on the
face or neck). Pull up on the
shoulder belt to tighten and
to remove all of the slack
out of the lap belt.
Check periodically to ensure
your child has not moved out
of position and loosened the
vehicle belt.
4.
Do Not Use the vehicle lap belt
only when using this booster
seat.
The shoulder belt must always
be adjusted snugly across the
child’s chest.
NEVER place the shoulder belt
behind the child’s back or under the child’s
arms.
Failure to follow these warnings can result in
serious injury or death to your child.
Warranty
Dorel Juvenile Group, Inc. (DJG) warrants this product to the original retail
purchaser as follows:
This product is warranted against defective materials or workmanship for
one year from the date of original purchase. An original receipt is
required to validate your warranty. DJG will, at its option, provide
replacement parts or replace this product. DJG reserves the right to
substitute if the part or model has been discontinued.
To make a claim under this warranty you may contact us at
www.djgusa.com, fax us at 1-800-207-8182 24 hours a day, write to
DJG, Consumer Relations Department, P O Box 2609, Columbus, IN
47202-2609, or call 1-800-544-1108 from 7:00 a.m. to 6:00 p.m. EST
Monday through Thursday and from 7:00 a.m. to 4:30 p.m. on Friday.
Proof of purchase is required and shipping charges are the
responsibility of the consumer.
Warranty Limitations: This warranty does not include damages which
arise from misuse or abuse of this product.
Limitation of Damages: The warranty and remedies as set forth are
exclusive and in lieu of all others, oral or written, express or implied. In
no event will DJG or the dealer selling this product be liable to you for
any damages, including incidental or consequential damages, arising out
of the use or inability to use this product.
PLEASE REGISTER ON LINE AT
WWW.DJGUSA.COM/REGISTRATION/CARSEAT/CAN
OR
COMPLETE AND MAIL THE PRE-PAID OWNER REGISTRATION CARD
WITHIN (30) DAYS OF PURCHASE TO EXPEDITE
WARRANTY
CLAIMS AND TO VERIFY THE ORIGINAL DATE OF PURCHASE.
Please do not send in your registration card if you have
registered your restraint system online.
4358-5415 Can BoostAir Eng 1/27/11 9:05 AM Page 31

29 30
Replacement Parts Order Form
We MUST have this information to process your order:
Model Number (5 digits & 4 letters): ____________________
Manufacture Date (yyyy/mm/dd): ______________________
For replacement parts, complete this form below. We must have
your model number and manufacture date codes on the form to
ensure proper replacement parts. They can be found on the stickers
on the side of the seat base. Payment in U.S. dollars must
accompany your order. Choose parts needed from the list supplied.
Mail form and payment to;
Dorel Juvenile Group. Inc.
2525 State Street
Columbus, IN 47201-7494
Fax to: 1-800-207-8182
Website: www.djgusa.com
Please make money order payable to Dorel Juvenile Group, Inc. See
next page for Visa or MasterCard payment. We do not accept
personal checks or Discover Card. For orders outside of Canada and
the U.S. we accept Visa or MasterCard only.
Ship to (please print)________________________________
Name____________________________________________
Address __________________________________________
City______________________________________________
Province _____________________________________
Postal code_______________ Country _____________
Telephone (area code)_______________________________
E-mail address______________________________________
4358-5415 Can BoostAir Eng 1/27/11 9:05 AM Page 33

Replacement Parts List
NOTE: If requested color is not available, similar color will be
substituted. Prices are subject to change.
Part Cost Quantity Total Cost
Pad Set . . . . . . . . . .$24.99 X ______= $ ______________
Instructions . . . . . . . . .$0.00 X ______= $ ______________
Merchandise Total $ ________________
Shipping and handling: $ ________________
Sales Tax $________________
Residents of Quebec, add 5% GST and 8.5% QST.
Residents of New Brunswick, Newfoundland, Ontario and Nova Scotia, add
13% HST.
Residents of British Columbia add 12% HST.
All other provinces, add 5% GST.
Grand Total $ ________________
No shipping and handling on instructions for quantities under 6. Add $.50 for each
instruction over 6, then add applicable shipping and handling
Up to $25.00 . . . . . . . . . . . .$5.95
$25.01 to $50.00 . . . . . . . .$6.95
$50.01 to $75.00 . . . . . . . .$8.95
$75.01 to $100.00 . . . . . . .$9.95
$100.01 to $150.00 . . . . . .$10.95
$150.01 to $200.00 . . . . . .$11.95
$200.01 and up . . . . . . . . .$13.95
Outside Continental USA $10.00
Fill Out For Credit Card
Visa Mastercard
Card Exp. Date: ________________________________
Cardholder’s Name: ____________________________
Card Number: ________________________________
Signature ____________________________________
31 32
4358-5415 Can BoostAir Eng 1/27/11 9:05 AM Page 35
Table of contents
Other Safety 1st Extender manuals
Popular Extender manuals by other brands

Icron
Icron USB 2.0 Ranger 2304 user guide

Radial Engineering
Radial Engineering McBoost user guide

Wilson Electronics
Wilson Electronics Tri-Band 4G-C installation guide

PureTools
PureTools PT-IPAV-E2-RX user manual

Rose electronics
Rose electronics VideoSplitter CAT5 Installation and operation manual

Green-Box Technology
Green-Box Technology ET-HC0101-T user manual